Have you noticed a decrease in your smart vacuum cleaner’s suction power? Is it leaving behind dirt and debris instead of cleaning it up? If so, the culprit may be clogged filters. Cleaning your smart vacuum cleaner’s filters is crucial for maintaining its optimal performance and preventing damage to the machine. But how often should you clean them, and what’s the best way to do it? In this article, we’ll answer those questions and provide step-by-step instructions on how to clean your smart vacuum cleaner’s filters. So, let’s get started!
Table of Contents
Why is Cleaning Your Smart Vacuum Cleaner’s Filters Important?
Cleaning your smart vacuum cleaner’s filters is an essential step in maintaining its overall efficiency and longevity. Dirty and clogged filters can significantly affect your vacuum’s performance, leading to the accumulation of dirt and dust in your home.
One of the primary reasons for keeping your smart vacuum cleaner’s filters clean is to ensure that the air quality in your home remains healthy. Over time, the filters can quickly accumulate dust and other allergens, leading to compromised air quality. This can be especially risky for individuals with respiratory issues such as asthma or allergies. Regular cleaning of the filters is necessary to ensure that the air in your home is free of airborne threats.
Cleaning your smart vacuum cleaner’s filters is vital for ensuring optimal performance. As the filters become clogged with dirt and dust, the suction power of the vacuum decreases. This means that the vacuum cleaner will not effectively pick up dirt and debris from your floor. With a clean filter, your smart vacuum cleaner will have optimal suction power, ensuring that your home is thoroughly cleaned with every use.
Clogged and dirty filters can cause your smart vacuum cleaner to overheat, leading to potential damage. Overheating puts extra pressure on the motor and internal components, which can lead to breakdowns or costly repairs. By maintaining clean filters, you reduce the risk of overheating and extend the life of your smart vacuum cleaner.
Cleaning your smart vacuum cleaner’s filters is an essential step in ensuring that it operates efficiently and effectively. Neglecting to clean them can compromise the quality of your home’s air, decrease your vacuum’s suction power, and cause potential damage to your appliance. With regular cleaning and filter replacement, you can ensure that your smart vacuum cleaner remains in tip-top condition. Be sure to follow the manufacturer’s guidelines and use appropriate filter replacements as needed. For more information on smart vacuum cleaner filters, check out our Smart Vacuum Cleaner Filters guide.
Improves Air Quality in Your Home
Taking care of your smart vacuum cleaner’s filters can significantly improve the air quality in your home. This is because the filters help to capture dust, dirt, and other pollutants that are present in your home’s air. If the filters are not cleaned or replaced on a regular basis, they can become clogged and lose their effectiveness. This means that the air quality in your home may suffer, which can be particularly problematic for those who suffer from allergies or respiratory issues.
Regularly cleaning and maintaining your smart vacuum cleaner’s filters can help to ensure that your air quality remains high, allowing you and your family to breathe in clean air. This is especially important if you have pets, as pet hair and dander can contribute to poor air quality if not properly filtered out. Additionally, if you live in an area with high levels of pollution or allergens, keeping your filters clean and functional can help to remove these particles from your home’s air.
Taking care of your smart vacuum cleaner’s filters is an essential part of maintaining a healthy and comfortable home environment. By regularly cleaning and replacing your filters as needed, you can improve your air quality and ensure that your smart vacuum cleaner is working at its best.
For more information on smart vacuum filter cleaning and replacement, check out our smart vacuum filter replacement guide for tips and tricks on how to keep your filters in great shape.
Ensures Optimal Performance
Keeping your smart vacuum cleaner’s filters clean is essential to ensure optimal performance of the device. Over time, debris and dirt accumulate in the filters, clogging them up, which can reduce the suction power of your smart vacuum. This can lead to incomplete cleaning, and the device may not be able to pick up all the debris, pet hair or dirt as it used to when the filters were clean.
If your smart vacuum cleaner is not able to clean as efficiently after a certain period of time, perhaps it’s because the filters have to be cleaned or replaced. Ignoring the clogged filters will cause the vacuum to work harder than needed, which can cause the motor to overheat, shortening its lifespan. Clean or replace filters will maintain the suction power of your smart vacuum and improve your cleaning experience.
Regular cleaning of filters improves the quality of air inside your home. The filters trap dust, debris, and dirt that would otherwise flow back to the air. By having clean filters, you ensure that the air you breathe is clean and free from allergens, pet hair, and other debris that can cause breathing problems or allergic reactions.
It is important to clean the filters of your smart vacuum cleaner regularly as part of your cleaning routine. A dirty filter will make it harder for the smart vacuum cleaner to do its job properly, so you must ensure that you clean or replace them according to the manufacturer’s instructions. To know when it’s time to replace your smart vacuum cleaner’s filters, refer to the product manual or see the maintenance suggestions on our website in smart vacuum filter replacement frequency article.
If you want your smart vacuum cleaner to perform at its best, you have to clean or replace its filters regularly. Doing so will improve the suction power of your device, improve air quality, and prevent damage to your vacuum cleaner motor. To learn more about smart vacuum cleaner filters, visit smart vacuum filter tips or clean and maintain filters in a smart vacuum to understand the different types of filters, which filter is washable or disposable, and how to take care of them.
Prevents Damage to Your Smart Vacuum Cleaner
One of the most important reasons to clean your smart vacuum cleaner’s filters regularly is that it can prevent damage to your device. When filters become clogged, it forces the vacuum to work harder to pick up debris. Not only does this reduce the overall performance of your smart vacuum, but it can also cause overheating and other internal damage.
Many smart vacuum cleaners have sensors that will detect when the filters are dirty or clogged, and some may even shut off to prevent further damage. However, relying solely on these sensors to determine when to clean your filters can be risky. If the sensors fail, it can lead to permanent damage to the motor or other internal parts of your smart vacuum.
To avoid these problems, it’s important to regularly clean the filters on your smart vacuum. By keeping them clean and free of debris, you’ll ensure that the vacuum is working efficiently and effectively. This will not only extend the life of your vacuum, but it will also save you money in expensive repairs or replacement costs.
Additionally, it’s important to use the correct type of filters for your smart vacuum. Using the wrong type of filter can also cause damage to your device. Be sure to refer to the user manual or do your research to make sure you’re using the proper filter for your specific model.
If you’re unsure about whether your filters need to be cleaned or replaced, it’s always better to err on the side of caution and clean them more frequently. Alternatively, you can invest in an upgraded filter that may require less frequent cleaning or replacement. Understanding the type of filter your smart vacuum uses and how often it needs to be cleaned or replaced will save you time, money, and potential damage to your device in the long run.
Taking care of your smart vacuum’s filters is crucial in preventing damage and extending the life of your vacuum. By regularly cleaning and maintaining your filters, you’ll ensure optimal performance and air quality in your home. Don’t make common mistakes when replacing the filters, and if you need help, consider a smart vacuum filter replacement service.
When Should You Clean Your Smart Vacuum Cleaner’s Filters?
It is important to clean your smart vacuum cleaner’s filters regularly to ensure that it continues to function correctly. Dirty filters can hinder the performance of the vacuum cleaner and even cause permanent damage to the motor.
But, how do you know when it’s time to clean your filters? The answer is that it depends on several factors such as how often you use your smart vacuum cleaner, how dirty your floors are, and the specific type of filters your smart vacuum cleaner uses.
As a general rule of thumb, it is recommended to clean the filters of your smart vacuum cleaner once a month. If you have pets that shed a lot of hair, live in a particularly dusty area, or have a bigger living space, you might need to clean the filters more frequently.
Another indicator that it’s time to clean your smart vacuum cleaner’s filters is a noticeable decrease in suction power. If you notice that your vacuum cleaner is not picking up as much debris as it used to, it’s time to clean the filters.
If you’re unsure when to clean your filters or how to clean them, refer to your smart vacuum cleaner’s user manual for specific instructions. The user manual will also tell you where the filters are located and how to remove them safely.
By keeping your filters clean, you not only ensure that your smart vacuum cleaner operates at optimal performance, but you can also prevent any long-term damage to the motor. For more information on smart vacuum filter replacement, common mistakes while replacing filters on a smart vacuum, understanding washable vs disposable filters or smart vacuum filter upgrade, check out the relevant articles on our website.
How to Clean Your Smart Vacuum Cleaner’s Filters?
Keeping the filters of your smart vacuum cleaner clean is crucial if you want it to perform at its best. When the filters of your smart vacuum cleaner get clogged, it can lead to reduced suction power, overheating, and even damage to the motor.
Before you begin cleaning the filters of your smart vacuum cleaner, it is essential to refer to the user manual for instructions. The manual will provide you with detailed steps on how to remove and clean the filters.
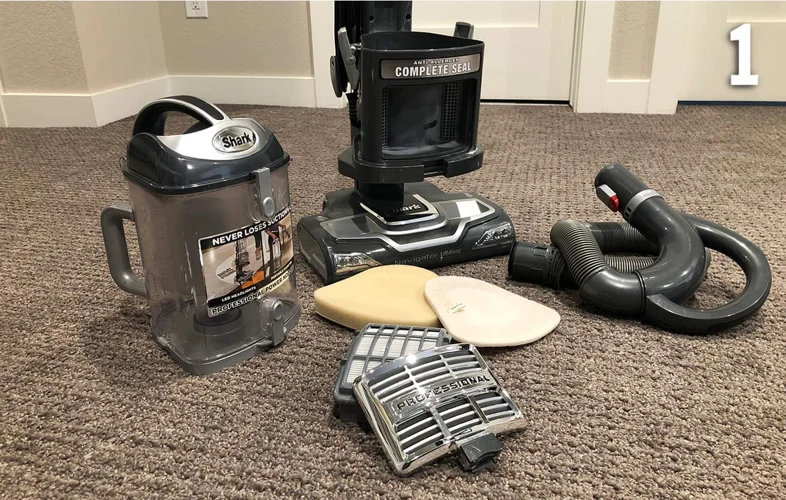
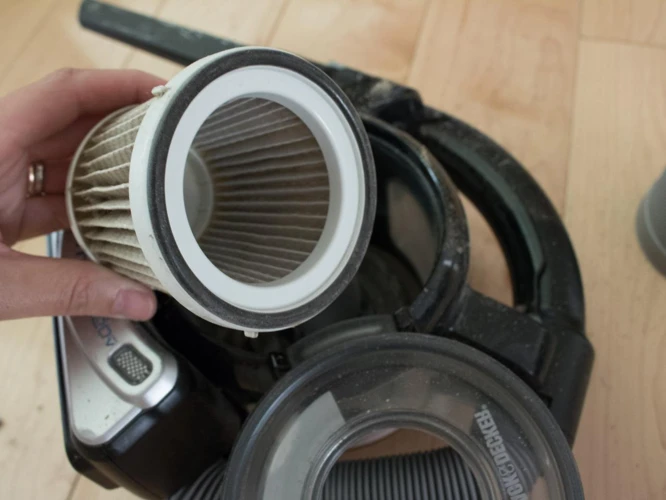
Locate the filters in your smart vacuum cleaner and remove them from the device. Most smart vacuum cleaners have one pre-motor filter and one post-motor filter.
Use your fingers, a brush, or a soft cloth to remove debris, hair, and dust from the filters. Be gentle and do not use too much force as it may damage the filter.
Rinse the filters under running water if the filters are washable. Otherwise, replace the disposable filter. If your manufacturer recommends using soap or cleaning solution, follow their instructions.
After washing the filters, dry them completely. Give them enough time to dry and do not reinstall the filters until they are fully dry. You can place them near a fan or in a warm place to speed up the drying process.
Once the filters are completely dry, reinstall them in your smart vacuum cleaner. Make sure they are inserted correctly and securely.
Make sure to clean the filters of your smart vacuum cleaner regularly to ensure maximum performance. How often you need to clean the filters will depend on how much you use your vacuum cleaner and how much dirt and debris it picks up. For disposable filters, it’s easy to know when it’s time for a replacement. However, for washable filters, you can follow the manufacturer’s recommendation on how often to clean them.
In some cases, upgrading the filters on your smart vacuum cleaner can lead to better performance. We discuss the benefits of upgrading your smart vacuum cleaner filters in our article on Smart Vacuum Filter Upgrade.
By following the steps outlined in this article and keeping your smart vacuum cleaner’s filters clean regularly, you can ensure your smart vacuum cleaner works efficiently for many years to come.
Step 1: Check the User Manual
Before starting the cleaning process, the first and most important step is to check the smart vacuum cleaner’s user manual. The user manual will have all the information needed for proper cleaning instructions, as different vacuum cleaners might have different filter cleaning procedures. The user manual will indicate where the filters are located in the vacuum cleaner, which might not be apparent at first glance.
It’s essential to follow the manufacturer’s instructions for cleaning the filters properly because doing so will ensure the longevity of the vacuum cleaner and its filters. Failure to follow the instructions could lead to damage to the filters or the vacuum cleaner, which could result in costly repairs or replacements.
Some manufacturers might recommend cleaning the filters with a specific cleaning solution or using a specific method. Make sure to take note of these instructions and follow them precisely if they are present in the user manual.
Additionally, some smart vacuum cleaners might have features that allow the user to monitor filter health and clogs via a mobile app. Checking the app might provide more information on when filters need cleaning or replacing.
Checking the user manual is a crucial step in cleaning the filters of a smart vacuum cleaner. By doing so, the proper cleaning procedure will be followed, ensuring the longevity of both the vacuum cleaner and its filters. For more information about filter replacements, refer to our article on smart vacuum filter replacement.
Step 2: Remove the Filters
To properly clean your smart vacuum cleaner’s filters, you need to first remove them from the device. This step may vary depending on the model and brand, so it’s important to check your user manual for specific instructions.
Generally, though, removing the filters requires a bit of gentle force. First, power off the vacuum cleaner and unplug it from the wall to ensure your safety. Next, locate the filters by checking the user manual or by inspecting the device.
Most filters are located at the bottom or back of the device. Once you’ve located the filters, you may need to twist or push a button to release them from the vacuum cleaner. Be sure to do this gently to avoid damaging the filters or the device itself.
It’s a good idea to have a clean surface nearby where you can place the filters once you’ve removed them. This ensures that they don’t become dirty or contaminated before you’ve had a chance to clean them properly.
Removing the filters may seem like a small and simple step, but it’s a crucial part of ensuring that your smart vacuum cleaner runs efficiently and effectively. Don’t skip this step and be sure to double check your user manual to make sure you’re doing it correctly for your specific model.
Step 3: Remove Debris from the Filters
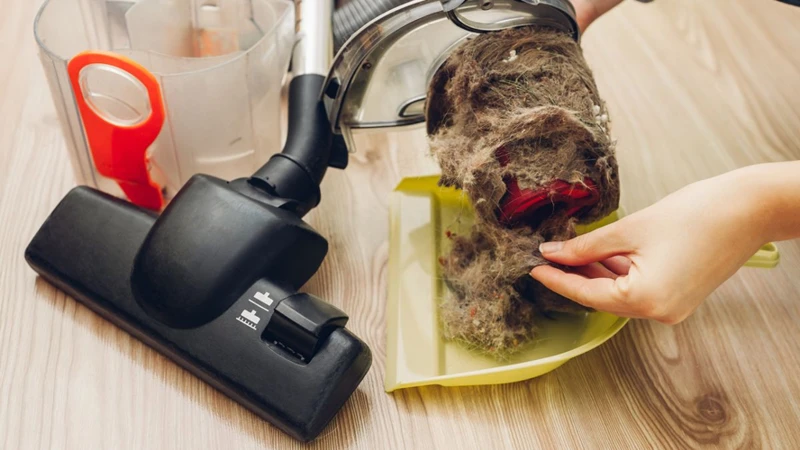
Now that you’ve removed the filters, it’s time to get rid of any debris that may be trapped in them. This step is crucial because it ensures that your smart vacuum cleaner functions effectively and continues to pick up dirt and dust from your floors.
To remove debris from the filters, use a soft-bristled brush or your hands, depending on how dirty the filters are. If the filters have accumulated a significant amount of debris, use a brush to gently remove it. Make sure to do this outside your home to avoid spreading the dirt inside your home.
For smaller debris like pet hair or small particles, you can use a pair of tweezers or your hands to remove them. Be careful not to damage the filter material while removing debris.
It’s important to be thorough during this step as any remaining debris will affect the performance of your smart vacuum cleaner. So, take your time and remove all the debris carefully.
Remember that if you don’t clean your filters regularly or properly, you risk damaging your smart vacuum cleaner’s motor, which could lead to costly repairs.
Once you’ve successfully removed all the debris, you can move on to the next step and wash the filters.
Step 4: Wash the Filters
Once you have removed debris from the filters, the next step is to wash them properly. Depending on the type of filter, there are different methods to clean them.
HEPA Filters: HEPA filters are made of a fine mesh material that should never be washed with water. Instead, use a small brush or a vacuum attachment to gently clean the dust and debris that collected on the outside of the filter.
Pre-Motor and Post-Motor Filters can be washed with soap and water. Begin by running them under cold water, then use a mild detergent or soap to wash the filters. Make sure to get into all the crevices and corners to ensure you remove any trapped dust or debris.
Be sure to rinse the filters well with plain water to remove any soap residue. Then, let the filters sit in a dry place or use a clean towel to gently dry them off. Make sure that the filters are completely dry before reinstalling them back into your smart vacuum cleaner.
Do not use a dryer or any other heat source to dry the filters quickly. Doing so may cause the filters to shrink, deform or melt which will impact their ability to filter dust and debris properly.
Washing the filters may seem like a tedious process, but it is essential to ensure that your smart vacuum cleaner is functioning as it should. With proper cleaning and maintenance, you can enjoy optimal performance and prolong the lifespan of your vacuum cleaner.
Step 5: Dry the Filters Completely
After washing the filters thoroughly, it’s crucial to dry them completely before putting them back in their place. If you don’t dry the filters properly, it can cause build-up of mold and bacteria over time, which can further reduce the efficiency of the vacuum cleaner.
To dry the filters, first shake off any excess water. Then, you can use a clean paper towel to gently pat them and soak out any remaining water droplets. However, make sure not to rub the filters vigorously as it can cause damage to the filter material.
Next, you can either let the filters air dry for a few hours or use a fan to speed up the drying process. Placing the filters in direct sunlight may seem like a good idea, but it can damage the filter material and reduce its effectiveness in the long run. It’s better to dry them in a shaded area.
Ensure that the filters are completely dry before putting them back into the vacuum cleaner. Inserting damp filters can cause damage to the vacuum cleaner’s motor and lead to reduced suction power.
Drying the filters is a crucial step in maintaining your smart vacuum cleaner, and neglecting this step can lead to problems down the line. So take your time and make sure the filters are dry before putting them back in place.
Step 6: Reinstall the Filters
After washing and air-drying the filters completely, it is time to reinstall them back into the smart vacuum cleaner. Be sure to check the user manual for specific instructions on how to correctly position and secure each filter.
Most filters will usually have some kind of marking or label indicating the correct orientation, so be mindful of the arrows or labels on the filter as you perform this step. You should also make sure that each filter snaps back into place securely.
Once all the filters are installed correctly, run a quick test run of the vacuum cleaner to make sure everything is working as expected.
A properly installed filter will help maintain the air quality in your home while also ensuring that your vacuum cleaner operates at optimal performance levels. If you’re still experiencing issues with your vacuum cleaner after cleaning and reinstalling the filters, refer to the user manual or contact the manufacturer’s customer support team for further assistance.
How Often Should You Replace Your Smart Vacuum Cleaner’s Filters?
Maintaining and replacing your smart vacuum cleaner’s filters is crucial for ensuring optimal performance and avoiding damage to your machine. But how do you know when it’s time to replace these filters?
HEPA Filters: HEPA filters are designed to last longer than other types of filters, usually up to two years with proper maintenance. However, it’s important to check the filter every six months for signs of wear and tear, such as holes or tears. If you notice that the filter is damaged or the vacuum is no longer picking up dust and debris effectively, it’s time for a replacement.
Pre-Motor and Post-Motor Filters: Pre-motor and post-motor filters are responsible for catching smaller particles such as pet hair, dirt, and dust. These filters are less durable and need to be replaced more frequently, depending on usage.
For households with pets or allergies, it’s important to change these filters every three months. For regular households, it is recommended to change these filters every six months.
If you notice a decrease in suction or an increase in noise coming from your vacuum, it’s a sign that the filters need to be replaced. Also, if you notice a decrease in the air quality of your home, this can be a warning that your filters need to be changed.
Regular maintenance and replacement of your smart vacuum cleaner’s filters is necessary for ensuring efficient performance and prolonging the lifespan of your machine. Be sure to follow the manufacturer’s recommendations for replacement and check the filters regularly for signs of wear and tear.
HEPA Filters
HEPA filters are an essential component of smart vacuum cleaners. These filters are designed to trap even the smallest particles, such as dust mites, pet dander, and pollen, ensuring that the air that is emitted back into your home is clean and allergen-free. HEPA filters are made up of multiple layers of fine mesh that captures up to 99.97% of particles that are 0.3 microns in size or larger.
It’s important to note that HEPA filters should not be cleaned with water or washed. Doing this could damage the filter and reduce its effectiveness. Instead, vacuum users should simply remove the filter and gently tap it against a hard surface to dislodge any dust or debris that has been trapped in the mesh.
When it comes to replacing HEPA filters, it largely depends on usage. A general rule of thumb is to replace the filter every six months to a year, depending on how often the vacuum is used and the air quality of your home. It’s important to keep an eye out for signs that the filter needs to be replaced, such as reduced suction or the presence of dust or debris in the air after vacuuming.
Keeping your HEPA filter clean and replacing it as needed is crucial for maintaining optimal air quality in your home and ensuring that your smart vacuum cleaner performs at its best.
Pre-Motor and Post-Motor Filters
The pre-motor and post-motor filters are an essential component of your smart vacuum cleaner’s filtration system. The pre-motor filter captures all the large particles, such as pet hair, dust, and debris before they enter the motor, while the post-motor filter captures the fine dust and allergens that the vacuum cleaner picks up.
Pre-Motor Filter
The pre-motor filter prevents any particles from entering the motor, thereby protecting it from damage. If this filter becomes clogged, it can cause the motor to overheat, and the vacuum cleaner will not function optimally. It is important to regularly clean this filter.
Post-Motor Filter
The post-motor filter is responsible for filtering the air that is expelled from the vacuum cleaner. This filter captures any fine dust and allergens, ensuring that the air quality in your home is optimal. Over time, the post-motor filter can become clogged with dirt, and this can affect the performance of your vacuum cleaner.
It is important to note that not all smart vacuum cleaners have a post-motor filter. If your vacuum cleaner has one, then it is important to clean it regularly. If you do not clean the filters properly or replace them as necessary, it can cause the vacuum cleaner’s suction power to decrease, reducing its efficiency, and affecting its overall performance.
Maintaining your pre-motor and post-motor filters is essential for the optimal performance of your smart vacuum cleaner. You must clean the filters on a regular basis to ensure that they function properly and your vacuum cleaner lasts longer. Remember to follow the manufacturer’s instructions when cleaning or replacing these filters, and consult the user manual for guidance.
Conclusion
In conclusion, taking care of your smart vacuum cleaner’s filters is crucial for maintaining its performance and ensuring a healthy environment for you and your family. Remember to check the user manual for specific instructions on how to clean your filters and how often you should replace them.
By cleaning your filters regularly, you can improve the air quality in your home by capturing dust, dirt, and allergens that can trigger allergies and asthma. Additionally, it also ensures optimal performance by allowing your vacuum to suck up all the dirt and debris in your home. Neglecting to clean your filters can result in reduced suction power and even damage to your vacuum’s motor.
When it comes to how often you should replace your filters, there’s no one-size-fits-all answer. It depends on the type of filter and how frequently you use your vacuum. For HEPA filters, it’s recommended to replace them every six months to a year, while pre-motor and post-motor filters can be replaced every three to six months.
Overall, maintaining your smart vacuum cleaner’s filters should be a part of your regular cleaning routine. It’s a small step that can have significant benefits for your home’s air quality and your vacuum’s longevity. So, don’t forget to check and clean your filters regularly to ensure that your smart vacuum cleaner works at its best.
Frequently Asked Questions
1. How often should I clean my smart vacuum cleaner’s filters?
You should clean your smart vacuum cleaner’s filters at least once a month, or more frequently if you have pets or allergies.
2. Can I wash my smart vacuum cleaner’s filters with soap and water?
Yes, you can wash your smart vacuum cleaner’s filters with soap and water, but be sure to rinse them thoroughly and allow them to dry completely before reinstalling them.
3. What happens if I don’t clean my smart vacuum cleaner’s filters?
If you don’t clean your smart vacuum cleaner’s filters regularly, the suction power of the vacuum cleaner will decrease, and it may start to malfunction or overheat.
4. Can I clean my smart vacuum cleaner’s filters with compressed air?
Yes, you can use compressed air to clean your smart vacuum cleaner’s filters, but be careful not to damage the filters with the force of the air. Always hold the can of compressed air at a safe distance from the filters.
5. How do I know if my smart vacuum cleaner’s filters are clogged?
You can tell if your smart vacuum cleaner’s filters are clogged if the suction power of the vacuum cleaner is reduced or if you notice an unpleasant odor coming from the machine. You may also see dirt or debris trapped in the filters.
6. Can I reuse disposable filters for my smart vacuum cleaner?
No, disposable filters for smart vacuum cleaners are designed for one-time use only. Reusing them can cause damage to your vacuum cleaner’s motor or decrease its performance significantly.
7. Should I replace all the different types of filters on the same schedule?
No, each type of filter in your smart vacuum cleaner needs to be cleaned and replaced on a different schedule. Check your user manual for specific instructions.
8. Is it safe to clean my smart vacuum cleaner’s filters in the dishwasher?
No, it is not recommended to clean smart vacuum cleaner’s filters in the dishwasher as the high temperatures and harsh detergents can damage them. Always follow the manufacturer’s instructions for cleaning the filters.
9. Can I use my smart vacuum cleaner without the filters?
No, it is not safe to use your smart vacuum cleaner without the filters. The filters are designed to protect the motor and ensure optimal performance. Using the vacuum cleaner without the filters can lead to damage or failure of the machine.
10. Can I clean my smart vacuum cleaner’s filters in cold water?
Yes, you can clean your smart vacuum cleaner’s filters in cold water, but using warm water may make it easier to remove dirt and debris from the filters.