Maintaining and Replacing Filters in Your Smart Vacuum Cleaner
Warning: A non-numeric value encountered in /var/www/html/wp-content/themes/generatepress/inc/structure/post-meta.php on line 165
by Dwight Gibson
Vacuum cleaners have come a long way from the bulky, manual machines that our grandparents used to lug around the house. With the advent of smart vacuum cleaners, keeping your home spick and span has become even easier. These machines are equipped with modern filters that trap dirt, dust, and allergens, providing a healthier and cleaner living environment for you and your family. However, these filters need to be replaced regularly to ensure optimum performance of your smart vacuum cleaner. In this article, we will explore the essential do’s and don’ts of replacing filters in your smart vacuum cleaner to ensure its longevity and maximum efficiency. So, grab your dust mask and let’s get started!
Table of Contents
Why Is it Important to Replace Filters?
Have you ever wondered why you need to replace the filters in your smart vacuum cleaner? While it may seem like a hassle, regularly replacing your filters is essential to maintaining the performance and longevity of your device. Not only do filters improve cleaning efficiency, but they also contribute to better indoor air quality by trapping harmful particles such as dust, pollen, and pet dander. In this section, we’ll take a closer look at why smart vacuum cleaner filters are so important, and how neglecting them can lead to bigger problems in the long run. For more information on smart vacuum cleaner filters, visit our smart vacuum cleaner filters page.
Improved Cleaning Efficiency
Replacing filters in your smart vacuum cleaner is an important maintenance task that can significantly improve its cleaning efficiency. The filter is responsible for trapping dust, dirt, and other debris that your vacuum cleaner picks up from your surfaces. A clogged or dirty filter will hinder the airflow resulting in reduced suction power and decreased cleaning efficiency.
Regular replacement of filters in your smart vacuum cleaner will ensure:
Benefits of Replacement
Description
Improved Suction Power
An unclogged filter will allow for better airflow, increasing the suction power of your smart vacuum cleaner.
Enhanced Cleaning Performance
A clean filter will ensure that your smart vacuum cleaner picks up smaller particles like dust and pollen, enhancing its cleaning performance.
Better Air Quality
Replacing your filter can improve your indoor air quality by reducing the amount of dust and allergens released back into the air as the vacuum cleaner blows out air. This is especially important if anyone in your home suffers from allergies or asthma.
Prolonged Lifespan of Your Vacuum
A dirty filter will cause your smart vacuum cleaner to work harder to pick up dirt and debris, increasing wear and tear on the motor and other parts. Regular filter replacement can help extend the lifespan of your vacuum cleaner.
To ensure that your smart vacuum cleaner is running at optimal efficiency, it is important to replace its filters regularly. The frequency of filter replacement depends on the model of the vacuum cleaner and how often you use it. Most manufacturers provide guidelines on the recommended filter replacement frequency in the user manual. Make sure to follow these recommendations to get the best performance from your smart vacuum cleaner.
Regularly replacing the filters in your smart vacuum cleaner not only improves its efficiency, but also has a positive impact on the quality of the air inside your home. Better indoor air quality means a healthier living space for you and your family. The filters in your smart vacuum cleaner help to capture fine dust particles, dirt and pet hair which can cause allergies and respiratory issues. Without regular filter replacement, these particles can accumulate in the air resulting in poor indoor air quality. If you have pets at home, the dander from their fur can be a cause for concern. Regular filter replacements help to keep the air clean and smelling fresh.
Replacing filters at regular intervals (check your smart vacuum filter replacement frequency guide here) is important to ensure that the filters are functioning efficiently. As a general rule, filters should be replaced every three to six months. However, if you have pets at home, you might need to replace them more frequently. This simple step can have a significant impact on the indoor air quality of your home.
To maintain better indoor air quality, it is important to understand how to clean and maintain filters in addition to replacing them regularly. You should also consider the difference between washable and disposable filters, and which option is best for your needs (learn more here). By following these tips and practices, you can improve your indoor air quality and maintain a healthy living environment for you and your family.
So, it is essential to replace filters in your smart vacuum cleaner for better indoor air quality, allowing you to live comfortably and breathe easily. Don’t make the common mistakes when replacing filters, like using damaged filters, which can cause clogs, reducing suction power, and shortening the device’s lifespan. Also, do not forget to reset the filter indicator when you replace filters which will reduce the likelihood of early or unnecessary replacement (more info on common mistakes here). You may also consider upgrading your filter to a high-performance one (click here to learn more), if you are looking to improve your vacuum’s performance and air quality.
Longer Lifespan of Your Smart Vacuum Cleaner
Replacing filters in your smart vacuum cleaner ensures a longer lifespan of your appliance. Regular filter replacement prevents the accumulation of harmful particles in the internal components of the vacuum cleaner which can lead to malfunction or even permanent damage.
To better understand how regular filter replacements can protect your smart vacuum cleaner, take a look at the table below:
Problem
Consequence
Dirty filters
Reduces suction and vacuuming power
Clogged filters
Increase strain on motor, cause overheating, and shorten the lifespan of your smart vacuum cleaner
Broken filters
Allows dust and debris to get into the motor, causing permanent damage and requiring expensive repairs or replacement
Failing to replace filters on time can lead to reduced performance, motor overheating, and permanent damage. This can result in a costly expense for repairs and potential replacement.
To avoid these consequences, make sure to follow the manufacturer’s recommendations for filter replacement and use genuine replacement filters. Additionally, keep the filter compartment clean and handle the filters with clean hands to ensure they stay in good condition.
Replacing filters in your smart vacuum cleaner can extend its lifespan and maintain its optimal performance. Be sure to check out our guide to smart vacuum filter replacement for more information on ensuring your vacuum operates at its best.
Do’s of Replacing Filters in Your Smart Vacuum Cleaner
When it comes to replacing filters in your smart vacuum cleaner, there are certain things that you should do to ensure that the process is carried out efficiently and effectively. These tips can help you extend the lifespan of your smart vacuum cleaner while improving the quality of indoor air at the same time. So, let’s take a look at some of the essential do’s of replacing filters in your smart vacuum cleaner. By following these recommendations, you’ll be able to experience the full benefits of your device and keep your home free from dirt and debris.
Do Follow the Manufacturer’s Recommendations
It is crucial to follow the manufacturer’s recommendations when replacing filters in your smart vacuum cleaner. Every vacuum cleaner brand provides specific guidelines for how often to replace the filters and which replacement filters to use. Failure to follow these recommendations can lead to reduced cleaning efficiency, decreased lifespan of your smart vacuum cleaner, and even increased health risks due to the lack of proper air filtration.
To make it easier for you to understand what to do when replacing filters, we’ve compiled a table below to highlight the manufacturer’s recommendations:
Recommendation
Description
Replace Filters Regularly
Filters should be replaced as often as recommended by the manufacturer to ensure optimal cleaning performance and air filtration.
Use Genuine Replacement Filters
Always use replacement filters provided by the manufacturer to maintain the quality and effectiveness of the filters.
Handle Filters with Clean Hands
Dirty hands can transfer dust and debris to the filters, reducing their effectiveness. Always wash your hands before handling filters.
Clean the Filter Compartment
Before replacing the filters, make sure to clean the filter compartment to remove any dust or debris that may have accumulated.
By following these recommendations, you can ensure that your smart vacuum cleaner operates at maximum efficiency and provides the best possible air filtration for you and your family. Additionally, following the manufacturer’s recommendations will help prolong the lifespan of your smart vacuum cleaner and reduce the risk of costly repairs or replacements in the future.
Remember, always check the user manual or manufacturer’s website for specific recommendations on filter replacement for your particular model of smart vacuum cleaner.
Do Replace Filters Regularly
Making sure that you replace your smart vacuum cleaner’s filters regularly is essential if you want to maintain its cleaning efficiency and prolong its lifespan. While manufacturers may suggest specific timelines for replacing filters, it’s important to be aware of signs that indicate when it is time to change them. The frequency of filter replacements also depends on usage patterns and the type of filters being used. Here are some factors to consider when deciding how often to replace filters:
Usage Patterns
Frequency of Filter Replacement
Light Use
Every 3-6 months
Moderate Use
Every 2-3 months
Heavy Use
Every 1-2 months
If you have pets, suffer from allergies or live in a dusty environment, you may need to change filters more frequently. As a general rule of thumb, it’s better to replace filters sooner rather than later to avoid putting unnecessary strain on your vacuum cleaner, which can lead to a shorter lifespan.
Regularly replacing filters will also help maintain indoor air quality, as it prevents the filters from becoming clogged with dust and debris, which can cause a variety of health issues. By having clean filters, you’ll be able to breathe in clean air while the smart vacuum cleaner does its job. And of course, higher cleaning efficiency will be achieved, meaning a cleaner house in less time.
Make sure you are aware of the manufacturer’s recommendations and the factors that influence the frequency of filter replacements. By being proactive and regularly replacing filters, you’ll enjoy better indoor air quality, efficient cleaning, and a longer lifespan for your smart vacuum cleaner.
Do Use Genuine Replacement Filters
One of the most critical “Do’s” of replacing filters in your smart vacuum cleaner is to use genuine replacement filters. Using authentic filters ensures that your device can maintain optimal cleaning efficiency and maximum lifespan. It can be tempting to purchase cheaper filters of lower quality, but this can negatively impact performance and even harm the vacuum cleaner.
To ensure that you are purchasing genuine filters, you should only buy from reputable suppliers. These include the manufacturer’s official website, authorized dealers, and well-known retailers. When you purchase from these sources, you can be confident that you are getting the right filters for your vacuum cleaner.
Using genuine replacement filters is important for several reasons. First, they are designed to fit your device precisely. This ensures a good seal, preventing dust and debris from entering areas where it should not. Second, OEM filters are made from high-quality materials that can trap even the smallest particles, such as pollen, pet dander, and dust mites. This means that your smart vacuum cleaner can more effectively clean your floors and improve the air quality of your home.
Using non-genuine filters can result in sub-optimal performance and shorter lifespan. Cheaper, low-quality filters may not capture small particles, forcing you to vacuum more frequently to get the job done. This can put more stress on your vacuum cleaner’s motor, leading to a shorter lifespan. Non-genuine filters may also have flaws in design, like having fibers that can be sucked into the motor, resulting in significant damage.
One more thing to remember when using genuine replacement filters is to store the old filters in a safe place. You can use them as a reference in case you need to buy new ones. Additionally, when you recycle old filters, make sure to read your manufacturer’s instructions on how to dispose of them properly.
So, if you’re looking to replace the filters in your smart vacuum cleaner, don’t skimp on quality. Buy genuine replacement filters, and you’ll be rewarded with improved performance, cleaner floors, and healthier indoor air.
To sum up, always use genuine replacement filters to ensure that your vacuum cleaner runs effectively and lasts longer. Remember to purchase from trusted sources and follow the manufacturer’s guidelines when replacing the filters. By doing so, you can guarantee that you will enjoy the benefits of a clean and healthy home environment.
Do Handle Filters with Clean Hands
It is crucial to handle the filters of your smart vacuum cleaner with clean hands to prevent unwanted dirt and debris from clogging the filters. When you touch the filters with dirty hands, it can cause the filters to lose their filtering power, which can reduce the overall cleaning efficiency of your vacuum cleaner.
To protect the performance of your vacuum cleaner, always make sure your hands are clean before handling the filter. This may seem like a simple precaution, but it can make a significant difference in the life of your smart vacuum cleaner.
Here are some dos and don’ts when handling the filters of your smart vacuum cleaner:
Do
Don’t
Wash your hands before handling the filter.
Touch the filter with dirty or greasy hands.
Handle the filter gently to prevent any damage.
Use too much force or pressure when handling the filter.
Store replacement filters in a clean, dry place.
Store filters in a dusty or dirty area.
Use gloves if needed to protect the filter from any unwanted substances.
Handle the filter without any protection if you are working with chemicals or other hazardous substances.
By following these guidelines, you can ensure that your smart vacuum cleaner continues to perform at its best. Remember, a small action like washing your hands can make a big difference in the performance and lifespan of your vacuum cleaner.
Do Clean the Filter Compartment
Keeping the filter compartment clean is essential to maintain the efficiency of your smart vacuum cleaner. A dirty filter compartment can lead to clogging, which may result in decreased suction power and ultimately, a less effective cleaning process. Here are some tips on how to clean the filter compartment:
Step 1: Turn off the Power
Before cleaning the filter compartment, make sure to turn off the power of your vacuum cleaner. This is important to avoid any injuries and ensure that the cleaning process is safe.
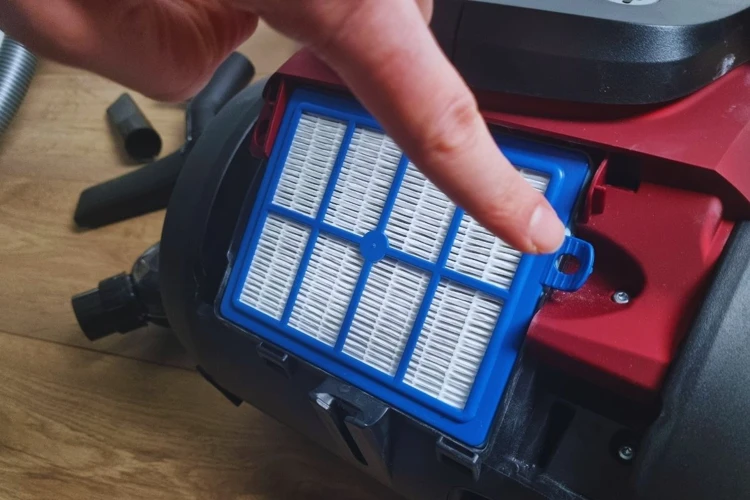
Step 2: Remove the Filter
Remove the filter from the compartment carefully. If the filter is washable, refer to the manufacturer’s recommendations on how to properly clean it. If it’s not washable, dispose of it and replace it with a new one.
Step 3: Clean the Compartment
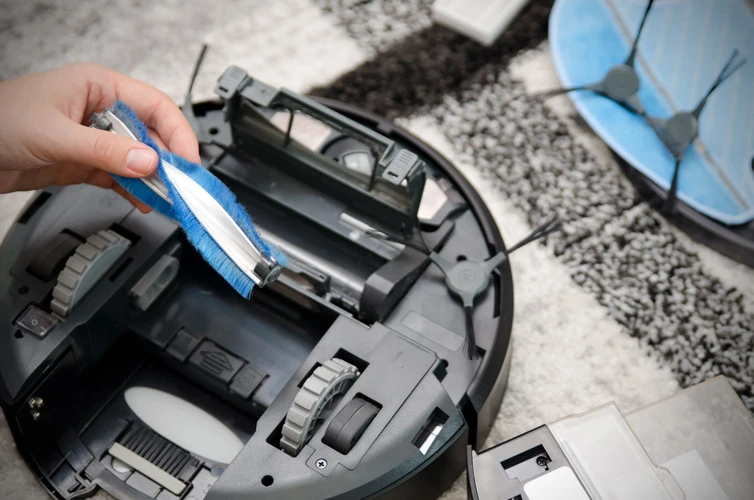
Using a clean, dry cloth, wipe the filter compartment to remove any dust, debris, or dirt that may have accumulated in it. Make sure to wipe the compartment thoroughly, paying attention to corners and hard-to-reach areas. You may also use a small brush to remove any stubborn dirt.
Step 4: Reinsert the Filter
Once the filter compartment is clean, reinsert the cleaned or new filter back into the compartment. Make sure it is properly aligned and securely attached.
Step 5: Reset the Filter Indicator
If your smart vacuum cleaner has a filter indicator, make sure to reset it after replacing the filter. This will help you keep track of when you need to replace the filter again.
Regularly cleaning the filter compartment and replacing the filter as needed will not only improve the cleaning efficiency of your smart vacuum cleaner but also extend its lifespan. Make sure to follow these steps to keep your vacuum cleaner operating optimally.
Do Clean the Filter Compartment
✔ Turn off the power
✔ Remove the filter
✔ Clean the compartment with a dry cloth or small brush
✔ Reinsert the cleaned or new filter
✔ Reset the filter indicator
Don’ts of Replacing Filters in Your Smart Vacuum Cleaner
As much as there are things that you should do when replacing filters in your smart vacuum cleaner, there are also things you should avoid. While some of these may seem obvious, they can easily slip your mind in the heat of the moment. By paying attention to these don’ts, you’ll ensure that your vacuum cleaner operates smoothly and delivers the best possible results. Here are some of the most critical don’ts of replacing filters in your smart vacuum cleaner.
Don’t Use Damaged or Dirty Filters
It’s important to never use damaged or dirty filters when replacing the filter in your smart vacuum cleaner. Using a damaged or dirty filter can greatly reduce the efficiency of your vacuum cleaner and also cause damage to the internal components. Here are a few reasons why:
The impact on efficiency:
Dirty or clogged filters restrict airflow and reduce suction power, which can leave some dirt and debris behind.
Dirty filters cause the vacuum’s motor to work harder, which can cause it to overheat or even wear out faster than it should.
If the filter is damaged, it might let debris through, which can cause damage to the inside of the vacuum cleaner.
The impact on maintenance costs:
Using damaged or dirty filters can also lead to other parts of the vacuum cleaner getting dirty or damaged. This could mean that other components would need to be replaced sooner than they would otherwise.
This means that using dirty or damaged filters can increase the overall maintenance costs of your vacuum cleaner.
How to avoid using dirty or damaged filters?
Regularly inspect your filters before replacing them. Check for signs of damage or excessive dirt and debris.
Filters should be replaced more frequently if you have pets or if you use your vacuum cleaner more often than recommended by the manufacturer.
Always use replacement filters that have been recommended by the manufacturer, and never try to use filters that are not designed to fit your specific model of vacuum cleaner.
Keep a supply of replacement filters on hand so that you can change them out as needed.
By following these do’s and don’ts of replacing filters in your smart vacuum cleaner, you can ensure that your vacuum cleaner works efficiently and effectively for as long as possible.
Don’t Forget to Turn the Power Off
When replacing the filters in your smart vacuum cleaner, one of the most important things to remember is to always turn the power off. This may seem like common sense, but it is a step that many people overlook, and it can lead to serious accidents and injuries.
Why is it important to turn off the power?
Turning off the power to your smart vacuum cleaner before replacing the filters ensures that the machine is completely safe to work on. Many vacuum cleaners have a powerful motor that can cause the brushes and other moving parts to continue to move even after the vacuum is turned off. This can be dangerous if the filters are being replaced at the time.
What could happen if you forget to turn off the power?
If you forget to turn off the power before removing the filters, you may accidentally touch the moving parts and get injured. You could also damage the filters, the filter compartment, or other parts of the vacuum cleaner. Additionally, if the vacuum cleaner is still powered on when you replace the filters, the dust and debris in the filters may be expelled into the air, causing indoor air pollution and health hazards.
To avoid these risks, always turn off the power to your smart vacuum cleaner before replacing the filters. Use the power switch or unplug the vacuum cleaner from the electrical outlet. Wait a few minutes to ensure that the motor has completely stopped moving before proceeding with the filter replacement.
Here are some tips to remember when turning off the power to your smart vacuum cleaner:
Do
Don’t
Use the power switch to turn off the vacuum cleaner.
Assume that the vacuum cleaner is off just because the motor has stopped running.
Unplug the vacuum cleaner from the electrical outlet if you are not sure how to turn off the power.
Rely on memory to remember whether the vacuum cleaner is on or off.
Wait a few minutes to make sure that the motor has completely stopped moving.
Assume that it is safe to open the filter compartment as soon as the motor has stopped.
By following these do’s and don’ts, you can ensure that you always turn off the power to your smart vacuum cleaner before replacing the filters, and do so in a safe and effective manner.
Don’t Replace Filters While They’re Wet
Replacing filters while they’re still wet may seem like a quick and efficient solution, but it’s actually one of the biggest mistakes you could make when it comes to maintaining your smart vacuum cleaner. It’s crucial to make sure that your filters are completely dry before replacing them as using damp filters can be damaging to your vacuum cleaner’s performance. Here are some reasons why you should never replace filters while they’re still wet:
Reduced suction power: Wet filters have a harder time trapping dirt and dust particles, leading to reduced suction power. This means that your smart vacuum cleaner won’t be able to clean floors and carpets as effectively as it should.
Risk of mold growth: Using wet filters can create the ideal breeding ground for mold and bacteria, which can lead to foul odors and even health hazards. It’s essential to make sure that all filters are completely dry before installing them to prevent moisture buildup and mold growth.
Potential damage to your vacuum cleaner: Wet filters can clog up your vacuum cleaner, leading to motor damage and other significant problems. Replacing filters while they’re still wet can void your warranty and result in costly repairs or even replacement of your vacuum cleaner altogether.
Always check the filters and make sure they’re completely dry before installing them. You can air-dry them or use a soft cloth to absorb any remaining moisture. Don’t compromise the performance and lifespan of your smart vacuum cleaner by replacing filters while they’re still wet.
Don’t Overuse Filters Beyond Their Recommended Lifespan
One of the most common mistakes people make when it comes to replacing filters in their smart vacuum cleaner is overusing them beyond their recommended lifespan. While it’s tempting to stretch the lifespan of the filter, doing so can have significant negative effects on both the filter’s performance and the lifespan of your vacuum cleaner. Here are some reasons why you shouldn’t overuse filters beyond their recommended lifespan:
Reduced cleaning performance: Overused filters become clogged with dirt, dust, and debris, making it harder for the vacuum to suck up dirt and debris. This reduces cleaning efficiency and can result in a less clean home.
Reduced suction power: Overused filters can also reduce the suction power of your vacuum, making it less powerful and effective in picking up debris from your floors.
Increased wear and tear: Overusing filters beyond their recommended lifespan can cause your vacuum cleaner to work harder to pick up debris. This can lead to increased wear and tear on the vacuum’s motor, resulting in the need for costly repairs or even a replacement.
Poor air quality: Overused filters can also reduce the indoor air quality of your home. They can become breeding grounds for bacteria and mold, which can affect your family’s health and well-being.
Less efficient cleaning: When a filter in your smart vacuum cleaner is overused, it means that the vacuum cleaner is not functioning at its best. This can result in the vacuum not picking up debris fully, making it difficult to clean rugs, carpets, and other surfaces effectively. Proper maintenance ensures a better clean, a healthier living environment and fewer issues in the long run.
To avoid these problems, it’s best to adhere to the recommended lifespan of your smart vacuum cleaner’s filter. Most manufacturers recommend changing the filter once every three to six months, depending on your usage of your vacuum cleaner. Not only will this keep your vacuum cleaner performing at its best, but it will also ensure that your home stays clean and healthy.
Don’t Forget to Reset the Filter Indicator
One important point to keep in mind when replacing filters in your smart vacuum cleaner is to not forget to reset the filter indicator. This feature is designed to alert you when it’s time to replace the filter, ensuring maximum cleaning efficiency and lifespan of your vacuum.
When you replace the filter, make sure to reset the indicator so that it accurately reflects the new filter’s lifespan. Failure to do so can result in reduced cleaning efficiency and a shorter lifespan for your vacuum.
To reset the filter indicator, consult your user manual for specific instructions on how to do so. In general, the process will involve locating the indicator on the vacuum and pressing and holding a certain button or combination of buttons for a set amount of time.
It’s important to note that if you don’t reset the filter indicator, your vacuum may continue to operate as if the old filter is still in place, despite having a new one installed. This can make it difficult to tell when it’s time to replace the filter again, leading to decreased cleaning efficiency and even potential damage to the vacuum over time.
Don’t forget to reset the filter indicator when replacing filters in your smart vacuum cleaner in order to ensure optimal cleaning efficiency and extend the lifespan of your vacuum. Consult your user manual for specific instructions on how to do so, and always use genuine replacement filters to ensure the best performance.
Do:
Don’t:
Follow manufacturer’s recommendations
Use damaged or dirty filters
Replace filters regularly
Forget to turn the power off
Use genuine replacement filters
Replace filters while they’re wet
Handle filters with clean hands
Overuse filters beyond their recommended lifespan
Clean the filter compartment
Forget to reset the filter indicator
Conclusion
In conclusion, replacing the filters in your smart vacuum cleaner is an essential maintenance task that you should not overlook. It ensures that your cleaning appliance functions at its best and prolongs its lifespan. By following the do’s and don’ts outlined in this article, you can make sure that you are replacing filters correctly.
Remember to always follow the manufacturer’s guidelines for replacing filters, replace them regularly, and use genuine replacement filters. Take care to handle the filters with clean hands and clean the filter compartment to avoid any problems.
On the other hand, don’t use damaged or dirty filters, forget to turn the power off, or replace filters while they’re wet. Overusing filters beyond their recommended lifespan can also cause problems. Additionally, remember to reset the filter indicator to ensure that it accurately displays when it’s time to change the filter.
By following these simple do’s and don’ts, you’ll be sure to get the most out of your smart vacuum cleaner and keep your indoor air quality clean and healthy. So, keep these tips in mind and enjoy a cleaner and more efficient home with a well-maintained smart vacuum cleaner!
Frequently Asked Questions
1. How often should I replace the filter in my smart vacuum cleaner?
It is recommended to replace the filter every 3-6 months, depending on usage and manufacturer’s instructions.
2. Can I wash and reuse the filter in my smart vacuum cleaner?
It depends on the type of filter. Some filters are washable and reusable, while others are disposable and should not be reused.
3. What happens if I don’t replace the filter in my smart vacuum cleaner?
The effectiveness and efficiency of the vacuum cleaner will reduce, and it may start to emit dust and allergens back into the air, compromising indoor air quality.
4. How do I know when it’s time to replace the filter in my smart vacuum cleaner?
Most smart vacuum cleaners come with a filter indicator that will notify you when it’s time to replace the filter. Additionally, if you notice a decrease in the suction power or if the vacuum emits an unusual odor, it’s time to change the filter.
5. Can I use generic filters in my smart vacuum cleaner?
While generic filters may be cheaper, it is recommended to use genuine replacement filters to ensure optimum performance and longevity of your smart vacuum cleaner.
6. Can I clean the filter compartment before replacing the filter?
Yes, it is recommended to clean the filter compartment before replacing the filter to ensure proper ventilation and to prevent the build-up of dust, debris, and allergens.
7. Will replacing the filter improve indoor air quality?
Yes, replacing the filter in your smart vacuum cleaner will help improve indoor air quality by trapping dust, dirt, and other allergens, preventing them from circulating back into the air.
8. Can I replace the filter in my smart vacuum cleaner while it’s still turned on?
No, it is strongly advised to turn the power off and unplug the vacuum cleaner before replacing the filter to avoid potential hazards.
9. What should I do if the filter compartment is stuck or difficult to open?
Refer to the instruction manual for tips on how to safely and effectively remove the filter compartment. If the compartment remains stuck, contact customer service for assistance.
10. Will replacing the filter prolong the lifespan of my smart vacuum cleaner?
Yes, replacing the filter on a regular basis will help prolong the lifespan of your smart vacuum cleaner by reducing wear and tear on the vacuum’s motor, as well as improving the overall performance and longevity of the appliance.