You want to ensure that your smart vacuum cleaner is working at its best, and replacing the filters is an important step in doing so. However, with all the different types of filters and complicated installation processes out there, it’s easy to make mistakes when trying to replace them. With that in mind, let’s take a closer look at some of the common mistakes people make when replacing filters and how you can avoid them. Trust us, you’ll be surprised at how easy it is to get these simple tasks right with a bit of guidance.
Mistake #1: Not Replacing Filters Often Enough
It’s no secret that smart vacuum cleaners are a convenient and time-saving addition to any household. Not only do they clean your floors on their own, but they also require minimal effort to maintain. However, one crucial aspect that many people tend to overlook is the importance of regularly replacing the filters in their smart vacuums. Failure to do so can lead to a plethora of problems, including reduced suction power and air quality. In this article, we will outline the most common mistake of not replacing filters often enough, why it matters, and how you can avoid making the same mistake.
Explanation of the Mistake
One common mistake to avoid when replacing filters in your smart vacuum cleaner is not replacing filters often enough. Over time, filters become clogged with dirt, dust, and debris, and they can no longer effectively filter the air passing through the vacuum. This can result in decreased suction power and poor cleaning performance.
Some people make the mistake of forgetting to check and replace their smart vacuum cleaner filters regularly. They may assume that the filter is still working fine, even though they’ve been using their vacuum for several months or even years.
Another mistake is assuming that the filter only needs to be replaced when it is visibly dirty or clogged. However, this is not always the case. Some filters can become clogged even when they don’t look dirty, so it’s important to follow the manufacturer’s recommendations for filter replacement intervals.
Failing to replace filters often enough can also result in the motor of the vacuum cleaner having to work harder, which can lead to more wear and tear on the machine. This can ultimately cause the vacuum to break down sooner than it would otherwise.
To avoid this mistake, make sure to check your owner’s manual or the manufacturer’s website for guidelines on how often you should replace your smart vacuum filters. Many manufacturers recommend replacing filters every 3-6 months, depending on usage.
It’s also a good idea to set reminders for yourself to check and replace the filters regularly. This can be as simple as setting a reminder on your phone or writing it on your calendar.
By staying on top of filter replacement, you can ensure that your smart vacuum cleaner is always working at its best, with maximum suction power and cleaning performance.
How to Avoid it
To avoid the first mistake of not replacing filters often enough, set a reminder for yourself to check and replace the filter on a regular basis. You can set a reminder on your phone or mark the replacement dates on your calendar. Also, make sure to buy extra filters when purchasing your smart vacuum to have them on hand when needed.
Using the correct type of filter is crucial in order to avoid the second mistake. Check your smart vacuum cleaner’s user manual or the manufacturer’s website to make sure you purchase the correct type of filter for your model. You may also want to consider upgrading your filter to a washable or HEPA filter for better performance.
To avoid not cleaning the filter before replacing it, make sure to read the manufacturer’s instructions on how to properly clean and maintain your filter. Some filters are washable while others are not, this is particularly important to consider. Make it a regular practice to clean and maintain the filter according to the manufacturer’s instructions.
Properly installing the new filter is key to avoiding the fourth mistake. Follow the manufacturer’s instructions and make sure the filter is inserted correctly and securely in the vacuum. An improperly installed filter may not work effectively, and may also cause damage to your vacuum.
Lastly, to avoid not resetting the filter replacement indicator, make sure to follow the manual to reset the indicator after replacing the filter. This will ensure that the replacement indicator will accurately reflect when it is time to replace the filter again.
Make sure to keep these tips in mind when replacing filters for your smart vacuum cleaner, to ensure its effectiveness and longevity. For more information on smart vacuum filter replacement and maintenance, check out our smart vacuum filter tips or our smart vacuum filter replacement guide.
Mistake #2: Using the Wrong Type of Filter
Have you ever wondered why your smart vacuum cleaner isn’t performing up to your expectations even after replacing the filters? One common mistake that most people make is using the wrong type of filter. While it may seem like a trivial issue, using the wrong filter can lead to poor suction and cause damage to your device. In this section, we’ll discuss this mistake in detail and provide you with some tips on how you can avoid it.
Explanation of the Mistake
When it comes to replacing the filters in your smart vacuum cleaner, there are several mistakes to avoid. Let’s dive into the details of each mistake and why it’s important to avoid them.
| Common Mistake | Explanation of the Mistake |
|---|---|
| Not Replacing Filters Often Enough | Over time, vacuum filters become clogged with dirt and debris, reducing their efficiency and potentially damaging your vacuum cleaner. If you don’t replace your filters often enough, your vacuum’s suction power will decrease, leaving dust, dirt, and pet hair all over your floors. This is especially important if you have pets or allergies, as dirty filters can circulate allergens and irritants that can affect your respiratory health. |
| Using the Wrong Type of Filter | Each vacuum cleaner requires a specific type of filter to operate correctly, and using the wrong type of filter can lead to several issues. For example, if you use a washable filter in a vacuum cleaner that only accepts disposable filters, you may clog up the filter and damage your vacuum. Similarly, if you use a filter that is too small or too large for your vacuum, you may compromise its suction power and reduce its efficiency. It’s essential to understand the difference between washable and disposable filters before making a purchase. |
| Not Cleaning the Filter Before Replacing It | If you don’t clean your vacuum filter before replacing it, you risk damaging your vacuum cleaner and reducing its efficiency. A dirty filter can clog up and damage your vacuum, leading to costly repairs or even a replacement. It’s essential to clean your filter regularly, following the manufacturer’s instructions, before replacing it with a new one to ensure your vacuum’s longevity and efficiency. |
| Not Installing the New Filter Correctly | If you install your new filter incorrectly, you may compromise your vacuum’s suction power and even damage it. Poorly installed filters can cause leaks and clogs in your vacuum cleaner, reducing its ability to clean your floors effectively. It’s crucial to follow the manufacturer’s instructions and be careful when installing your new filter to ensure it fits securely and operates correctly. |
| Not Resetting the Filter Replacement Indicator | Most smart vacuum cleaners have a filter replacement indicator that alerts you when it’s time to replace your filter. If you replace your filter but forget to reset the indicator, you won’t receive an accurate notification the next time you need to replace it. This can lead to reduced efficiency and damage to your vacuum in the long run. Be sure to reset the filter replacement indicator every time you replace your filter to ensure you receive accurate notifications. |
Properly cleaning and maintaining your smart vacuum’s filters is essential to keep your floors clean and prevent damage to your vacuum cleaner. If you’re interested in learning more about how to clean and maintain your filters, check out our related article on cleaning and maintaining your smart vacuum filters. If you’ve noticed that your filters are clogged and need an upgrade, read our article on smart vacuum filter upgrades to find the best filter for your vacuum cleaner.
How to Avoid it
One of the most common mistakes people make when replacing filters in their smart vacuum cleaner is not doing it often enough. To avoid this mistake, it is important to have a regular filter replacement schedule. Here are some tips to help you avoid this mistake:
| Tip | Description |
|---|---|
| 1. | Refer to the manufacturer’s instructions to determine how often the filter should be replaced. This may vary depending on the frequency of use and the type of filter being used. |
| 2. | Set a reminder or schedule a recurring event on your calendar to remind you to check and/or replace your filter. |
| 3. | Pay attention to how well your vacuum is performing. If it seems to be losing suction, it may be time to replace the filter. |
Another common mistake is using the wrong type of filter. This can lead to reduced performance, and even damage to the vacuum. Here are some tips to help you avoid this mistake:
| Tip | Description |
|---|---|
| 1. | Refer to the manufacturer’s instructions to determine the correct type of filter to use. |
| 2. | Understand the difference between washable and disposable filters. Refer to our article on Understanding Washable vs. Disposable Filters for more information. |
| 3. | If you are unsure which filter to use, consult with a knowledgeable sales representative or contact the manufacturer for guidance. |
Not cleaning the filter before replacing it is another mistake that people commonly make. This can cause dirt and debris to build up, reducing the performance of the vacuum. Here are some tips to help you avoid this mistake:
| Tip | Description |
|---|---|
| 1. | Refer to the manufacturer’s instructions for guidance on how to clean the filter before replacing it. |
| 2. | If your filter is washable, be sure to clean it thoroughly and allow it to dry completely before reinstalling it. |
| 3. | If your filter is disposable, be sure to dispose of it properly and safely. Do not attempt to clean or reuse disposable filters. |
Not installing the new filter correctly can cause it to function improperly, leading to reduced performance or damage to the vacuum. Here are some tips to help you avoid this mistake:
| Tip | Description |
|---|---|
| 1. | Refer to the manufacturer’s instructions for guidance on how to install the new filter correctly. |
| 2. | Make sure the filter is aligned properly and securely fastened in place before operating the vacuum. |
| 3. | If you are unsure how to install the filter correctly, consult with a knowledgeable sales representative or contact the manufacturer for guidance. |
Finally, not resetting the filter replacement indicator can cause confusion and make it difficult to keep track of when filter replacements are due. Here are some tips to help you avoid this mistake:
| Tip | Description |
|---|---|
| 1. | Refer to the manufacturer’s instructions for guidance on how to reset the filter replacement indicator. |
| 2. | Make sure to reset the indicator after replacing the filter to ensure that it accurately reflects when the next replacement is due. |
| 3. | If you are unsure how to reset the filter replacement indicator, consult with a knowledgeable sales representative or contact the manufacturer for guidance. |
Mistake #3: Not Cleaning the Filter Before Replacing It
As you set out to replace the filter in your smart vacuum cleaner, you might think that all you need to do is simply swap out the old filter for a new one. However, this common assumption can lead to a major mistake that results in reduced vacuum performance and even damage to your device. One of the most critical steps in the replacement process is cleaning the filter before installing the new one. Failure to do so can lead to decreased suction power, clogs, and other issues that can impact the effectiveness of your vacuum. To learn more about how clogged filters can affect your smart vacuum, check out our article on what to do when your smart vacuum filters get clogged.
Explanation of the Mistake
When it comes to replacing the filters in your smart vacuum cleaner, there are a number of common mistakes that people make. Here are some explanations of the mistakes, along with tips on how to avoid them.
| Mistake | Explanation |
| Not replacing filters often enough | Over time, the filters in your smart vacuum cleaner can become clogged with dust, dirt, and other debris. If you don’t change the filters regularly, it can cause your vacuum cleaner to lose suction power and become less effective at cleaning your floors. |
| Using the wrong type of filter | There are different types of filters available for smart vacuum cleaners, including HEPA filters, foam filters, and paper filters. If you use the wrong type of filter, it may not be able to filter out the specific particles that you want to remove from your floors. This can lead to poor air quality in your home and potential health hazards. |
| Not cleaning the filter before replacing it | If you replace a dirty filter with a new one without cleaning it first, you’re essentially reducing the lifespan of the new filter. Over time, the dust and debris that has accumulated on the old filter can transfer to the new one, causing it to clog up faster and decreasing its filtering efficiency. |
| Not installing the new filter correctly | Incorrect installation of a new filter can cause air leaks, which can lead to less efficient cleaning and poor suction power. It can also lead to more wear and tear on the vacuum cleaner and its parts, which can result in costly repairs. |
| Not resetting the filter replacement indicator | Many smart vacuum cleaners have filter replacement indicators, which let you know when it’s time to change the filter. However, if you don’t reset the indicator after replacing the filter, it will continue to display the old filter’s usage data. This can lead to unnecessary filter replacements and higher costs. |
Avoiding these mistakes can help you get the most out of your smart vacuum cleaner, ensure it’s working at peak performance, and save you time, money, and hassle in the long run.
How to Avoid it
To avoid the common mistakes when replacing filters in your smart vacuum cleaner, here are some helpful tips:
- Set a filter replacement schedule: To avoid mistake #1 of not replacing filters often enough, it’s important to set a schedule for filter replacements. Check the owner’s manual or the manufacturer’s website to see their recommended replacement schedule based on usage.
- Find the right filter: Before replacing the filter, make sure you’re using the correct one. There are different types of filters for different models, so double-check before making a purchase to avoid mistake #2.
- Clean the filter: Before replacing the filter, clean it thoroughly using the manufacturer’s recommended method to avoid mistake #3 of not cleaning the filter before replacing it. This will ensure optimal performance from your vacuum cleaner.
- Follow installation instructions: Read the installation instructions provided with your new filter carefully to avoid mistake #4 of not installing the filter correctly. Make sure you understand the installation process before you start.
- Reset the filter replacement indicator: After replacing the filter, it’s important to reset the filter replacement indicator. This will ensure that the vacuum cleaner keeps track of when the next filter replacement is due, avoiding mistake #5. Check the owner’s manual for instructions on how to reset the filter replacement indicator.
By following these simple tips, you can ensure that you avoid common mistakes when replacing filters in your smart vacuum cleaner. Regular maintenance, correct installation, and following the manufacturer’s recommendations will keep your smart vacuum cleaner functioning optimally, ensuring longevity and efficiency.
Mistake #4: Not Installing the New Filter Correctly
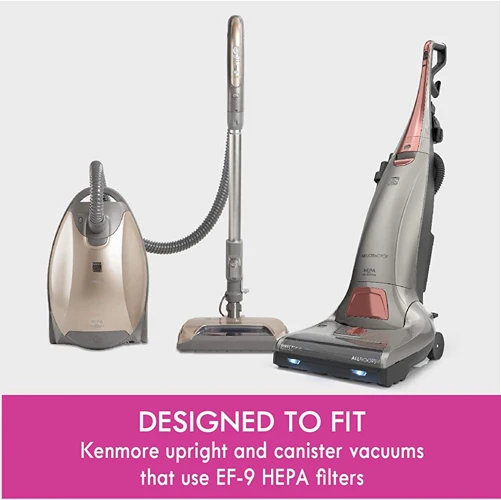
When it comes to replacing the filter in your smart vacuum cleaner, there’s more to it than just swapping out the old one for a new one. One mistake that often gets made is not installing the new filter correctly. This can lead to poor suction, decreased performance, and even damage to your vacuum over time. It’s important to take the time to properly install the new filter, ensuring that it’s positioned correctly and secured in place. Let’s take a closer look at this common mistake and how to avoid it.
Explanation of the Mistake
One of the most common mistakes to avoid when replacing filters in your smart vacuum cleaner is not replacing them often enough. This can lead to a number of issues that can affect the performance and lifespan of your vacuum cleaner.
Here are some of the problems that can arise:
- Poor suction power: When the filter is clogged with dirt and debris, it can restrict the airflow and cause poor suction power, making your smart vacuum cleaner less effective at picking up dirt and debris.
- Overheating: When the filter is clogged, it can prevent air from flowing through the vacuum cleaner, causing the motor to overheat and potentially cause damage to the machine.
- Shorter lifespan: If the filter is not replaced often enough, it can put more strain on the motor and other components, which can lead to a shorter lifespan for your smart vacuum cleaner.
So, it’s important to replace your vacuum cleaner’s filters on a regular basis to avoid these issues and keep your machine running at optimal performance.
How to Avoid it
Mistake #1: Not Replacing Filters Often Enough
Explanation of the Mistake:
One of the most common mistakes people make when it comes to their smart vacuum cleaner is not replacing the filters often enough. Over time, the filters of your vacuum cleaner get choked with dust, dirt, and other debris, which can hinder the performance of the vacuum cleaner. Besides, if the filters are not replaced regularly, your vacuum cleaner may also start emitting a foul odor, which can make the air inside your home unhealthy to breathe.
How to Avoid it:
You can avoid this mistake by making a point to regularly check and replace the filters in your smart vacuum cleaner. Here are a few tips that can help you:
1. Set a Reminder: You can set a reminder on your calendar or phone to alert you when it’s time to replace the filters. Better yet, invest in a vacuum cleaner that comes with a filter replacement indicator, which will notify you when it’s time to replace the filters.
2. Keep Replacement Filters on Hand: It’s a good idea to keep a set of replacement filters on hand so that when it’s time to replace them, you’ll have them ready to go.
3. Follow the Manufacturer’s Instructions: Every vacuum cleaner is different so make sure you follow the manufacturer’s instructions on how often you should replace the filters.
4. Vacuum Regularly: Vacuum your home regularly to help reduce the amount of dirt and dust that collects in your vacuum cleaner’s filters, and make sure to empty the dustbin after each use.
By regularly replacing your vacuum cleaner filters, you’ll not only improve the performance of your vacuum cleaner but also improve the air quality in your home.
Remember, prevention is always better than cure, and replacing the filters often is far easier and cost-effective than repairing or even replacing the vacuum cleaner itself.
Mistake #5: Not Resetting the Filter Replacement Indicator
One of the essential features of a smart vacuum cleaner is its ability to indicate when it’s time to replace the filter. However, it’s crucial to not only replace the filter but also reset the filter replacement indicator after doing so. Many people often overlook this step, which can lead to issues with the vacuum’s performance in the long run. In this section, we will discuss why resetting the filter replacement indicator is crucial and how to do it correctly.
Explanation of the Mistake
When it comes to replacing filters in your smart vacuum cleaner, it’s important to avoid common mistakes that can lead to decreased efficiency and even damage to your device. Let’s take a look at some of the most common mistakes people make when replacing filters, and why they should be avoided.
| Mistake: | Not Replacing Filters Often Enough |
| Explanation: | Over time, filters can become clogged with dirt, dust, and other debris, which can decrease the suction power of your smart vacuum cleaner. Not replacing the filters often enough can cause your device to work harder than necessary, leading to premature wear and tear and a shorter lifespan for your vacuum. |
| Example: | John has been using his smart vacuum cleaner for over a year and has never replaced the filter. He has noticed that the device doesn’t seem to be picking up as much dirt as it used to, and it’s now making strange noises. When he finally checks the filter, he sees that it’s completely clogged with dirt and dust, which is causing the diminished suction power and added strain on the device’s motor. |
It’s important to regularly check the filter on your smart vacuum cleaner and replace it as often as recommended by the manufacturer. This will ensure that your device is working at maximum efficiency and prolong its lifespan.
How to Avoid it
When it comes to avoiding common mistakes in replacing filters in your smart vacuum cleaner, it’s important to take a few simple steps to ensure that you get the most out of your device. Here’s what you can do to avoid each mistake:
- Not Replacing Filters Often Enough: To avoid this mistake, it’s important to regularly check your device’s filter status and replace them as needed. Schedule a routine maintenance routine for your smart vacuum, and set reminders to check your filter status often to ensure you don’t forget. This will help you extend the life of your vacuum and ensure it works optimally for longer.
- Using the Wrong Type of Filter: To avoid using the wrong type of filter, always check the manufacturer’s recommendations and make sure you’re using the right filter for your specific device. This will help you avoid any compatibility issues that could negatively impact your vacuum’s performance, and ensure that you’re able to get the best results possible.
- Not Cleaning the Filter Before Replacing It: To avoid this mistake, be sure to clean your filter before you replace it. This will remove any build-up that may be present and help to ensure that your new filter is able to work effectively from the start. Dispose of the old filter according to the manufacturer’s recommendations, and make sure to wash or clean the compartment where the filter was housed.
- Not Installing the New Filter Correctly: To ensure that the new filter is installed correctly, read the manufacturer’s instructions carefully and follow them to the letter. Double-check to ensure that the filter is installed correctly and securely, and make sure all the components are in their correct positions before replacing any covers or panels.
- Not Resetting the Filter Replacement Indicator: To avoid this mistake, take note of the instructions for resetting the filter replacement indicator. Many smart vacuums come with an indicator light or similar feature that notifies you when it’s time to replace your filter, and resetting this indicator will help you accurately track when it’s time for the next replacement.
By taking the time to avoid these simple mistakes, you can ensure that your smart vacuum cleaner is able to perform its best, clean your home effectively, and help you keep your living space looking its best. So be sure to follow these simple steps and enjoy the benefits of a smart, reliable vacuum that can help you keep your home looking its best for years to come.
Conclusion
In conclusion, it is essential to replace the filters in smart vacuum cleaners regularly to ensure optimal performance and longevity of the machine. Neglecting this maintenance can lead to a variety of issues, including reduced suction power, decreased air quality, and even damage to the vacuum cleaner itself.
To avoid these common mistakes when replacing filters, it is crucial to establish a routine maintenance schedule and stick to it. This means replacing filters as often as recommended by the manufacturer, using the correct type of filter for your vacuum cleaner, and cleaning the filter before installation to remove any dust or debris.
Additionally, taking the time to install new filters correctly and resetting any filter replacement indicators will minimize the likelihood of encountering problems down the line.
By taking these simple steps, you can ensure that your smart vacuum cleaner delivers superior performance and remains in good condition for years to come. Remember, a little bit of preventative maintenance now can save you time, money, and headaches in the future. So, always prioritize the proper care and maintenance of your smart vacuum cleaner to reap the full benefits of this cutting-edge technology.
Frequently Asked Questions
1. How often should I replace the filter in my smart vacuum cleaner?
It depends on the manufacturer’s instructions, but most smart vacuum cleaners require you to replace the filter every 2-3 months.
2. Why is it important to use the right type of filter for my smart vacuum cleaner?
Using the wrong type of filter can reduce your vacuum’s suction power and cause it to work harder, ultimately resulting in a shorter lifespan for your vacuum cleaner.
3. How do I know which type of filter to use for my smart vacuum cleaner?
You can find this information in your vacuum cleaner’s user manual or on the manufacturer’s website. If you are still unsure, contact the manufacturer for assistance.
4. Can I clean and reuse my old filters?
It depends on the manufacturer’s instructions. Some filters are designed to be cleaned and reused, while others are disposable and should be replaced with a new one.
5. What should I use to clean my filter before replacing it?
You can often use a soft brush to gently remove dust and debris from the filter, or rinse it with water if instructed to do so by the manufacturer.
6. Will using a dirty filter damage my smart vacuum cleaner?
Yes, a dirty filter can cause your vacuum’s motor to work harder and wear out more quickly, resulting in reduced suction power and a shorter lifespan for your vacuum cleaner.
7. What should I do if my vacuum cleaner’s filter replacement indicator light comes on?
Replace the filter as soon as possible, following the manufacturer’s instructions for your specific model.
8. Can I use third-party filters with my smart vacuum cleaner?
It depends on the manufacturer’s instructions. Some will void your warranty if you do not use their branded filters, while others are more flexible. Check the user manual or contact the manufacturer for guidance.
9. How do I reset the filter replacement indicator on my smart vacuum cleaner?
Refer to the user manual for your specific model. In general, you may need to press and hold a specific button or combination of buttons to reset the indicator light.
10. What other maintenance tasks should I perform on my smart vacuum cleaner?
Regularly emptying the dustbin and cleaning the brushes are important maintenance tasks that should be performed, according to the manufacturer’s instructions. Some models may also require periodic maintenance such as replacing batteries or cleaning sensors.


