Are you tired of your smart vacuum cleaner losing suction power and not picking up all the dirt and dust around your home? The solution may be as simple as cleaning and maintaining the filters. Filters, such as pre-filters, HEPA filters, and dustbin filters, play a crucial role in ensuring that the suction power of your smart vacuum cleaner is at its peak performance. But it’s not just about cleaning up dirt and dust – maintain the filters and you’ll also prevent bacteria growth and prolong the lifespan of your smart vacuum cleaner. In this article, we’ll provide you with step-by-step tips and tricks for cleaning and maintaining your smart vacuum cleaner’s filters, so that you can keep your home clean and your smart vacuum cleaner working efficiently.
Why should you clean and maintain your smart vacuum cleaner’s filters?
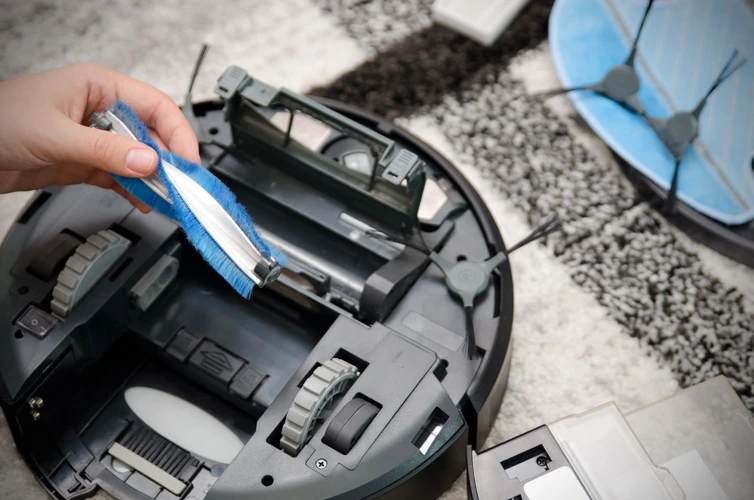
Maintaining your smart vacuum cleaner’s filters is crucial for ensuring that it works effectively and lasts a long time. In this section, we’ll explore the reasons why you should make cleaning and maintenance of your vacuum’s filters a top priority. From preventing bacteria growth to increasing suction power and prolonging the lifespan of your smart vacuum cleaner, the benefits of regularly cleaning and maintaining filters cannot be overstated. Not only will it keep your home cleaner, but it will also save you from costly repairs or needing to replace your vacuum altogether. So, let’s dive into the various reasons why taking care of your smart vacuum cleaner filters is important.
1. Prevent Bacteria Growth
Regularly cleaning and maintaining your smart vacuum cleaner’s filters is crucial for preventing the growth of bacteria. Over time, dust and debris accumulate in the filters, providing a breeding ground for harmful bacteria. If left unchecked, these bacteria can spread throughout your home, potentially causing health hazards for you and your family.
What are the risks of bacterial growth in a dirty filter?
- Bacterial growth can lead to unpleasant odors emanating from your smart vacuum cleaner.
- Bacteria can cause respiratory issues such as allergies, asthma, and other illnesses.
- Bacteria can also affect the efficiency of your smart vacuum cleaner, reducing suction power and increasing the risk of breakdowns.
To prevent these risks, it’s important to clean your smart vacuum cleaner’s filters regularly. Depending on your model, your vacuum cleaner may have several types of filters, including a pre-filter, a HEPA filter, and a dustbin filter.
How does cleaning filters prevent bacterial growth?
By cleaning these filters, you remove the dust and debris that bacteria need to thrive, thus preventing their growth. For the pre-filter and dustbin filter, cleaning involves removing them from the vacuum cleaner, rinsing them under running water, and letting them air dry completely. For HEPA filters, cleaning involves tapping them gently to remove the dust and debris, and wiping them with a damp cloth.
How often should you clean your smart vacuum cleaner’s filters?
- The pre-filter and dustbin filter should be cleaned after every use, or once a week at a minimum.
- The HEPA filter should be cleaned every two to three months, depending on usage.
By following these cleaning schedules, you can ensure that your smart vacuum cleaner’s filters remain free of dust and debris, preventing bacteria growth and ensuring a healthy and efficient cleaning process.
Remember, if your filters become excessively clogged or damaged, replacement may be necessary. Check out our smart vacuum filter replacement guide to learn more about when to replace your filters, common mistakes to avoid, and upgrade options for your smart vacuum cleaner’s filters.
2. Increase Suction Power
Regularly cleaning and maintaining your smart vacuum cleaner’s filters can significantly increase its suction power. When the filters become clogged with dust, dirt, and debris, the air flow is restricted, making it harder for the vacuum cleaner to pick up dirt and dust from the floors and other surfaces. This puts a strain on the machine’s motor and can cause it to overheat, reducing its performance and lifespan in the long run.
To avoid this problem, make sure to follow the recommended frequency for cleaning and replacing the filters in your smart vacuum cleaner. This will prevent dirt and debris from building up and clogging the filters, which will ensure optimal suction power.
Here are some tips to help you maintain the suction power of your smart vacuum cleaner:
- Clean or replace the pre-filter regularly to prevent large particles of dust and debris from clogging the HEPA filter.
- Make sure to clean the HEPA filter frequently, ideally once a month, to ensure that it is working at its best. This is especially important if you or someone in your household suffers from allergies or asthma, as the HEPA filter traps dust mites, pollen, and other allergens.
- Empty and clean the dustbin filter frequently to ensure that it is not full or clogged. If the dustbin filter is clogged, the vacuum cleaner will lose suction power and performance will suffer.
Keep in mind that while cleaning the filters regularly can help to maintain suction power, there are other factors that can affect the performance of your smart vacuum cleaner. These include the condition of the brushes, the type of flooring in your home, and the age and overall condition of the vacuum cleaner itself.
If you notice a significant decrease in suction power despite regular cleaning and maintenance of the filters, it may be time to consider replacing the filters or upgrading to a newer model. For more information on filter replacement and maintenance, check out our smart vacuum filter replacement guide or our tips for dealing with clogged filters.
3. Prolong the Lifespan of your Smart Vacuum Cleaner
Cleaning and maintaining the filters of your smart vacuum cleaner can do wonders for the longevity of the device. Regularly cleaning the filters can prevent undue strain on the motor, which can lead to a longer lifespan. Not only that, but it can also prevent the need for costly repairs, as well as the need for replacement filters in the long run.
It is incredibly important to clean and maintain your smart vacuum cleaner’s filters as part of your overall cleaning routine. In addition to removing dirt, dust, and other debris from your floors, a well-maintained smart vacuum cleaner can provide effective and efficient cleaning for years to come.
Proper maintenance of the filters can help prevent clogging and other issues that can impede suction power, as well as keep your device in good working order. Additionally, over time, filters can become clogged with dirt, dust, and hair, which can cause the motor to work harder to perform the same task. This can lead to reduced suction power and overall performance, as well as increase the likelihood of overheating and other issues. By cleaning and maintaining the filters, you can help prolong the life of your smart vacuum cleaner, reduce the need for expensive repairs, and ensure that it continues to perform its job effectively.
So, always remember to keep your filters clean and well-maintained as part of your regular cleaning routine. Refer to the manufacturer’s guidelines for the recommended frequency of filter replacement and proper maintenance practices. Additionally, make sure you understand the difference between washable and disposable filters, as well as common mistakes to avoid when replacing filters. With a little bit of effort, you can keep your smart vacuum cleaner in top condition and make the most of your investment.
Types of Filters in a Smart Vacuum Cleaner
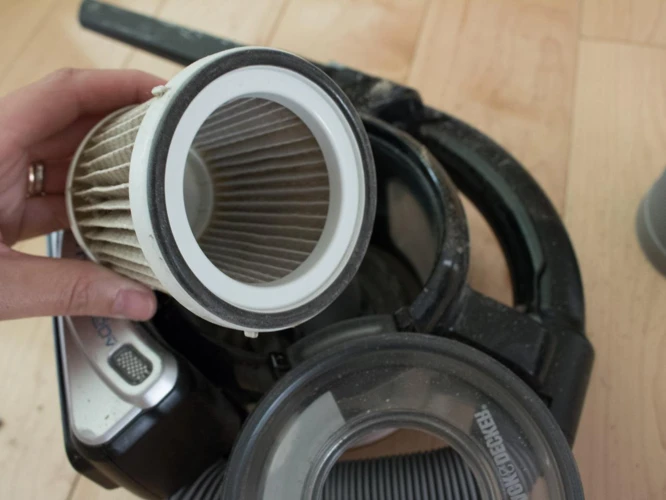
When it comes to cleaning with a smart vacuum cleaner, filters play a significant role in the process. They help in capturing small dust and debris particles to improve the air quality of your home. There are different types of filters in a smart vacuum cleaner, and each one works differently to clean and maintain the appliance. Understanding the types of filters in a smart vacuum cleaner can help you upgrade accordingly or replace them if necessary. Let’s take a look at the different types of filters in a smart vacuum cleaner, and how they function in the cleaning process. For more filter tips and tricks, check out our smart vacuum filter tips, or learn how to upgrade your filter with our smart vacuum filter upgrade.
1. Pre-Filter
The pre-filter in a smart vacuum cleaner is the first line of defense against larger debris such as dirt, hair, and dust. It works by capturing these larger particles before they enter the main filter. Keeping the pre-filter clean is essential for the efficient operation of your smart vacuum cleaner as it prevents clogging and promotes maximum suction power.
Frequency of Cleaning: The frequency of cleaning the pre-filter depends on the usage of the vacuum cleaner. If you use it frequently in a house with pets, you may need to clean the pre-filter more often than someone who uses the vacuum cleaner less frequently in a home without pets. Generally, it is recommended to clean the pre-filter once a week.
How to Clean: Cleaning the pre-filter is a quick and straightforward process:
| Step | Instructions |
|---|---|
| Step 1 | Remove the pre-filter from the vacuum cleaner |
| Step 2 | Tap the pre-filter gently to remove any loose dirt and dust |
| Step 3 | Rinse the pre-filter under running water to remove any remaining debris |
| Step 4 | Gently squeeze the pre-filter to remove excess water |
| Step 5 | Let the pre-filter dry completely before reattaching it to the vacuum cleaner |
Cleaning Tips: To ensure that you clean the pre-filter thoroughly, follow these tips:
– Use lukewarm water when rinsing the pre-filter. Avoid using hot water as this may damage the filter.
– Do not use soap or detergent when cleaning the pre-filter. These may clog the filter and reduce its efficiency.
– Do not wring or twist the pre-filter when drying it. This may damage the filter and compromise its performance.
– If the pre-filter is heavily soiled, you may need to replace it. Refer to the manufacturer’s instructions on how to replace the pre-filter.
By following these simple steps and tips, you can keep your smart vacuum cleaner’s pre-filter clean and in good condition, ensuring that it functions efficiently and effectively.
2. HEPA Filter
The HEPA filter is an essential component in a smart vacuum cleaner. The acronym HEPA stands for High-Efficiency Particulate Air, and as the name suggests, it captures the tiniest particles of dust and allergens from your floors and carpets, leaving your home healthy and clean. Here are some tips on how to clean and maintain your HEPA filter:
- Step 1: Check the Manual
- Step 2: Remove the Filter
- Step 3: Clean the Filter
- Step 4: Inspect the Filter
- Step 5: Reinstall the Filter
Before you begin cleaning your HEPA filter, it’s essential to carefully read the manufacturer’s instructions that came with your smart vacuum cleaner. The manual will provide the right cleaning procedure for the specific model of your vacuum cleaner. It will also outline the recommended frequency to service, clean, or replace the HEPA filter.
The HEPA filter is usually located in a removable compartment in your smart vacuum cleaner’s body. To access it, you need to open the cover and remove the filter. After you have taken out the filter, tap it gently to remove loose dirt or debris.
To clean the HEPA filter, use a soft brush or a clean, dry cloth to remove stubborn debris or dirt. Avoid using water or any cleaning solution as it can damage the filter’s delicate fibers. Some models come with washable HEPA filters, and if yours is one of them, you can rinse it under running water and let it air dry for at least 24 hours before reinstalling it.
After cleaning the HEPA filter, inspect it for any signs of damage or wear and tear. If the filter is torn or has holes, it’s best to replace it with a new one to prevent the release of harmful allergens and particles into the air.
Once the filter is clean and dry, slide it back into its compartment and click it into place. Make sure you follow the manufacturer’s instructions on how to reinstall the HEPA filter correctly.
Regular cleaning of the HEPA filter is crucial as it not only helps to keep indoor air quality at its optimum level but also extends the filter’s lifespan. If you have a household with pets or are prone to allergies, it’s best to clean your HEPA filter at least every two months.
3. Dustbin Filter
The dustbin filter is responsible for capturing the finest dust particles and debris that get sucked into the vacuum cleaner. Keeping the dustbin filter clean is essential to ensure the efficient functioning of the smart vacuum cleaner. Here are some tips for cleaning and maintaining the dustbin filter:
- Step 1: Turn off the smart vacuum cleaner and unplug it from the socket. This is an essential safety step that should never be overlooked.
- Step 2: Find the dustbin and open the lid to access the dustbin filter.
- Step 3: Gently remove the dustbin filter from its compartment inside the dustbin.
- Step 4: Tap the dustbin filter gently to remove any loose dirt particles that may have stuck to it.
- Step 5: Use a soft-bristled brush or a dry cloth to carefully wipe the dustbin filter. Ensure that you do not damage the filter in the process.
- Step 6: Rinse the dustbin filter with water under a tap. Ensure that you do not use hot water or any cleaning detergent.
- Step 7: Shake off the excess water and leave the dustbin filter to air-dry completely.
- Step 8: Once the dustbin filter is dry, fix it back into the dustbin compartment, close the lid, and ensure that it clicks into place.
Remember that the dustbin filter should be cleaned after every use of the smart vacuum cleaner. This is because the filter quickly clogs with dirt and dust, which affects the suction power of the vacuum cleaner.
By cleaning and maintaining the dustbin filter, you will ensure that your smart vacuum cleaner operates at peak performance. You will also prolong the lifespan of your smart vacuum cleaner, which will save you money in the long run.
Frequency of Cleaning Filters
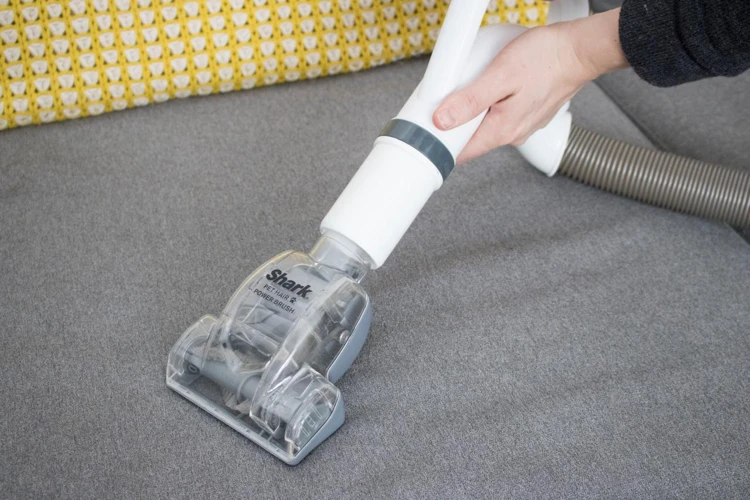
Have you ever wondered how often you should clean the filters of your smart vacuum cleaner? Routine maintenance of your vacuum cleaner’s filters plays a crucial role in ensuring its optimal performance. Neglecting to clean the filters of your vacuum cleaner could lead to a whole host of problems, including compromised indoor air quality and decreased suction power. Read on to discover the recommended frequency at which you should clean and replace the various filters in your smart vacuum cleaner.
1. Pre-Filter
The pre-filter is the first line of defense for your smart vacuum cleaner’s filtration system. Its primary purpose is to capture the larger particles like hair, dust, and debris to prevent them from clogging the more delicate HEPA filter. Cleaning the pre-filter is essential to ensure optimal suction power and prevent damage to the HEPA filter.
To clean the pre-filter, follow these steps:
- Step 1: Turn off the vacuum cleaner and unplug it from the power source to avoid any accidents.
- Step 2: Locate the pre-filter. It is usually found near the dustbin or behind the brush roll depending on the design of the vacuum cleaner.
- Step 3: Remove the pre-filter carefully. You may need to refer to your vacuum cleaner’s manual for instructions on how to do this properly.
- Step 4: Tap the pre-filter gently to remove any loose dust or debris. You can also use a soft-bristled brush or a vacuum cleaner attachment to remove the dirt thoroughly.
- Step 5: Rinse the pre-filter under running water. Make sure to use cold water and avoid using any soap or detergent as they may cause damage to the filter.
- Step 6: Allow the pre-filter to air-dry completely before reattaching it to the vacuum cleaner. Avoid using heat or direct sunlight to dry the filter as it may cause deformity or shrinkage.
Cleaning the pre-filter should be done at least once a month or more frequently if you have pets or if you vacuum more often. A dirty pre-filter can reduce suction power and cause the vacuum cleaner to work harder, resulting in increased power consumption and a shorter lifespan for your machine.
2. HEPA Filter
The HEPA filter is one of the most important components of your smart vacuum cleaner. It is responsible for capturing tiny particles like dust, pet hair, and allergens, ensuring the air in your home is clean and healthy. The table below outlines the steps to clean and maintain your HEPA filter:
| Step | Action |
|---|---|
| Step 1 | Remove the HEPA filter from your smart vacuum cleaner |
| Step 2 | Tap the filter gently to remove loose dirt and dust |
| Step 3 | Use a soft-bristled brush to remove any remaining dirt and debris |
| Step 4 | Rinse the filter with warm water |
| Step 5 | Gently shake the filter to remove excess water |
| Step 6 | Allow the filter to air dry completely before reinstalling |
It is important to clean your HEPA filter regularly, as dirt and debris can build up over time, reducing its efficiency and causing your smart vacuum cleaner to lose suction power. In most cases, you should clean your HEPA filter every 2-3 months, or as recommended by the manufacturer.
If your HEPA filter is damaged or extremely dirty, it may need to be replaced. Most smart vacuum cleaners have replaceable filters that you can purchase, but be sure to check your owner’s manual or contact the manufacturer for specific instructions.
Remember, proper maintenance of your smart vacuum cleaner’s HEPA filter is essential for maintaining a clean and healthy environment in your home. By following these simple steps, you can ensure that your smart vacuum cleaner is operating at peak performance, providing you with years of reliable service.
3. Dustbin Filter
The dustbin filter is another essential component of your smart vacuum cleaner. It serves the important function of trapping fine particles of dust, dirt and debris that your smart vacuum has collected during the cleaning process. Over time, neglecting this filter can cause it to clog, resulting in a significant reduction in suction power, which can affect the cleaning performance of your smart vacuum cleaner.
To clean the dustbin filter, follow these simple steps:
- Step 1: Turn off the smart vacuum cleaner and unplug it from the power source.
- Step 2: Locate the dustbin on your smart vacuum cleaner and remove it from the unit.
- Step 3: Empty the contents of the dustbin into a trash can, removing any large debris that may have accumulated.
- Step 4: Rinse the dustbin with clean water to remove any remaining dirt and dust particles.
- Step 5: Locate the dustbin filter, usually located on the top portion of the dustbin, and remove it from the unit.
- Step 6: Rinse the dustbin filter with clean water to remove any dirt and dust particles.
- Step 7: Allow the dustbin and filter to air dry completely before reinstalling it back into the vacuum cleaner.
It’s important to clean the dustbin filter after every use, especially if you have pets or a large household. Neglecting this component can cause it to clog, which will greatly reduce the suction power of your smart vacuum cleaner. If you find that the dustbin filter is too dirty to be effectively cleaned, it may be time to replace it with a new one. Replacing the dustbin filter is a fairly simple process and can often be done in a matter of minutes.
How to Clean and Maintain Filters
Cleaning and maintaining filters is an essential task to keep your smart vacuum cleaner in top condition. This ensures that your vacuum cleaner can function at its best, providing a thorough cleaning performance every time. Neglecting to clean and maintain your filters can lead to poor suction power and potential bacteria growth inside your vacuum cleaner. It’s important to know the proper steps to clean and maintain your smart vacuum cleaner’s filters. In this section, we will discuss the different types of filters found in smart vacuum cleaners and provide a step-by-step guide on how to clean and maintain them. So, let’s get started with ensuring your smart vacuum cleaner is always in its best shape!
1. Pre-Filter
The pre-filter is the first line of defense in your smart vacuum cleaner against larger particles of dust, dirt, and debris. It is designed to capture larger particles so that they do not get into the HEPA filter or the dustbin filter. Cleaning the pre-filter regularly is crucial to maintain the suction power of your vacuum cleaner. Follow these simple steps to clean and maintain the pre-filter:
- Step 1: Turn off the Vacuum Cleaner
- Step 2: Remove the Pre-Filter
- Step 3: Shake or Brush the Pre-Filter
- Step 4: Wash the Pre-Filter
- Step 5: Dry the Pre-Filter
Before cleaning the pre-filter, make sure to turn off your smart vacuum cleaner and unplug it from the power source.
Locate the pre-filter in your vacuum cleaner. It is usually located at the top of the dustbin, and you can remove it by pressing a button or pulling it out.
Gently shake off any loose dust or debris from the pre-filter. You can also use a soft-bristled brush to remove any stubborn dirt or dust particles.
After shaking off the dust, wash the pre-filter under running water. Use a mild soap or detergent and gently rub the filter to remove any remaining dirt or debris.
Once you have washed the pre-filter, gently squeeze out the excess water and leave it to air dry for at least 24 hours. Make sure the filter is completely dry before installing it back into your vacuum cleaner.
To keep your smart vacuum cleaner’s pre-filter working effectively and ensure the longevity of the product, you should clean the pre-filter at least once every month or more frequently if you use your vacuum cleaner on a daily basis or have pets. By cleaning the pre-filter regularly, you can prolong the lifespan of your smart vacuum cleaner and ensure that it is always sucking up dirt and debris as efficiently as possible.
2. HEPA Filter
The HEPA filter is a crucial component of a smart vacuum cleaner. It is responsible for filtering out fine particles such as dust, pollen, and pet dander from the air. Since these pollutants can cause allergies and other respiratory problems, it is essential to keep the HEPA filter clean and well-maintained.
Here are some tips for cleaning and maintaining the HEPA filter:
- Step 1: Check the manufacturer’s instructions to determine if the filter is washable or if it needs to be replaced. If it is washable, gently tap it to remove any loose debris before washing it.
- Step 2: Wash the HEPA filter under running water while being careful not to damage it. Use a soft bristle brush to clean any stubborn dirt or debris but avoid using any soap or cleaning solutions as they may damage the filter’s efficiency.
- Step 3: After washing, let the HEPA filter air dry completely before putting it back into the smart vacuum cleaner. It is essential to let it dry completely to prevent any residual moisture from encouraging mold or bacteria growth.
- Step 4: To prolong the lifespan of the HEPA filter, it is best to replace it periodically depending on the usage and manufacturer’s recommendations. A clogged or damaged HEPA filter can decrease the suction power of the smart vacuum cleaner and reduce its efficiency.
Proper maintenance of the HEPA filter will not only result in better air quality but will also ensure the maximum suction power of the smart vacuum cleaner. So, make sure to clean the filter regularly and replace it when necessary.
3. Dustbin Filter
The Dustbin Filter is an essential part of your smart vacuum cleaner as it traps small particles and debris that are not caught by the pre-filter and HEPA filter. Dustbin filters are usually made of foam or mesh and located near the dustbin.
To maintain your dustbin filter, you should follow these steps:
- Step 1: First, unplug your smart vacuum cleaner and remove the dustbin from the unit.
- Step 2: Next, check the dustbin filter for any visible debris or trapped dirt. Gently tap the filter to remove excess dust and dirt.
- Step 3: Rinse the dustbin filter with water until it is clean. Avoid using soap or harsh cleaning solutions as they may damage the filter.
- Step 4: Gently squeeze the filter to remove excess water, but not too hard as this may damage the filter.
- Step 5: Allow the filter to air dry completely before placing it back into the dustbin. Make sure the filter is dry before you re-install it to avoid moisture buildup and to prevent mold growth.
It is important to clean your dustbin filter at least once every two weeks or more often if you have pets who shed a lot. Neglecting to clean the dustbin filter regularly will reduce the suction power of your smart vacuum cleaner and may even cause it to malfunction.
Regularly cleaning and replacing your dustbin filter is necessary for maintaining the performance of your smart vacuum cleaner. A clogged filter will reduce the suction power of your vacuum cleaner and make it less effective in cleaning your floors. By following these simple steps, you can ensure that your dustbin filter is clean and in good condition, thus prolonging the lifespan of your smart vacuum cleaner.
4. Cleaning Tips
When it comes to cleaning and maintaining your smart vacuum cleaner’s filters, there are certain tips that can come in handy. Below are some cleaning tips that can help you keep your filters in good condition:
- Vacuum the Filters: Before beginning to clean the filters, give them a quick vacuum to remove any loose dirt and debris that may have accumulated on the surface. This makes the cleaning process easier.
- Wash the Filters: Most smart vacuum cleaner filters are washable, and regular washing can prevent clogging and improve suction. To wash the filters, remove them from the vacuum cleaner and clean them with water. Be gentle while washing to avoid damaging the filter.
- Let the Filters Dry: After washing the filters, do not put them back into the vacuum cleaner until they are completely dry. This prevents mold growth and keeps the vacuum cleaner functioning properly.
- Use a Soft Brush or Cloth: To clean the filter’s surface, use a soft brush or cloth to gently remove any dirt or debris. Be careful not to rub too hard or use any harsh chemicals as that can damage the filter.
- Don’t Overclean: While it is important to clean the filters frequently, overcleaning can be harmful. Overcleaning can damage the filter and reduce its efficacy, so follow the recommended cleaning frequency for your specific filter type.
- Check for Wear and Tear: During the cleaning process, examine the filters for any signs of wear and tear, such as holes or tears. If you notice any damage, replace the filter immediately to avoid any further damage to the vacuum cleaner.
By following these cleaning tips, you can keep your smart vacuum cleaner’s filters in pristine condition, and ensure that it functions optimally.
5. Replacing Filters
As much as cleaning and maintaining your smart vacuum cleaner’s filters can help prolong its lifespan, there eventually comes a time when the filters need to be replaced altogether. This is because no matter how effective the cleaning process is, the filters wear out over time and lose their ability to trap dust and other pollutants.
How often should you replace the filters? The frequency of filter replacements varies depending on the type of filter and how frequently you use your smart vacuum cleaner. Refer to the manufacturer’s instructions to determine the recommended replacement interval. However, a general rule of thumb is to replace the filters every six months to ensure optimal performance.
How to replace the filters? The process of replacing the filters might vary slightly depending on the brand and model of your smart vacuum cleaner. Refer to the manufacturer’s instructions for specific guidance. However, the following steps provide a general guideline:
1. Turn off the smart vacuum cleaner and unplug it from its power source.
2. Locate the filter compartment and remove the old filter(s) from the compartment.
3. Replace the old filter(s) with a new one(s) of the same type and size.
4. Ensure that the filter(s) is securely in place and that there are no gaps or spaces around it.
5. Close the filter compartment and ensure that it is properly secured.
6. Plug in the smart vacuum cleaner and turn it on to check that everything is working properly.
How to choose replacement filters? When it comes to choosing replacement filters, it is always best to choose filters that are recommended by the manufacturer. These filters are designed to fit your vacuum cleaner perfectly and are made of the same quality materials as the original filters.
Benefits of using high-quality replacement filters Using high-quality replacement filters can help maintain and even enhance the performance of your smart vacuum cleaner. High-quality filters, especially HEPA filters, have finer pores, which allow them to trap smaller particles and pollutants. This, in turn, reduces the risk of respiratory problems caused by poor air quality.
Replacing the filters of your smart vacuum cleaner is an important maintenance task that should be carried out regularly. It is also important to choose high-quality replacement filters to ensure optimal performance and air quality in your home.
Conclusion
In conclusion, maintaining and cleaning the filters of your smart vacuum cleaner is an essential aspect of ensuring its optimal functionality and longevity. By cleaning the filters regularly, you can prevent bacteria growth, increase suction power, and prolong the lifespan of your device.
Remember that smart vacuum cleaners come with different types of filters, including pre-filters, HEPA filters, and dustbin filters. Each of these filters requires different cleaning frequencies and methods.
It is essential to adhere to the recommended cleaning frequencies to avoid clogging the filters, which can affect the suction power and performance of your vacuum cleaner.
When cleaning the filters, remember to remove the accumulated debris and dirt using the appropriate cleaning method, whether by rinsing or tapping the filter. Additionally, replacing the filters regularly is necessary when they are worn out or damaged.
Overall, cleaning and maintaining the filters of your smart vacuum cleaner is an effortless task that can significantly contribute to keeping your home clean and healthy. With these tips and tricks, you can efficiently clean and maintain your vacuum cleaner filters, ensuring that it operates at maximum efficiency for years to come.
Frequently Asked Questions
1. How often should I clean my smart vacuum cleaner’s filters?
It is recommended to clean the filters of your smart vacuum cleaner once a month.
2. What happens if I don’t clean my smart vacuum cleaner’s filters?
If you don’t clean your smart vacuum cleaner’s filters, the suction power of the vacuum cleaner will decrease and it might lead to premature failure of the device.
3. How do I know when my smart vacuum cleaner’s filters need to be cleaned?
You can check the filters of your smart vacuum cleaner for signs of dust and debris buildup. If they appear dirty or clogged, it is time to clean them.
4. Can I wash my smart vacuum cleaner’s filters?
Yes, you can wash some filters such as pre-filters and dustbin filters. However, HEPA filters usually cannot be washed and require replacement.
5. How long do smart vacuum cleaner’s filters typically last?
The lifespan of smart vacuum cleaner’s filters depends on the usage and the type of filter. Pre-filters and dustbin filters usually last for 6 to 12 months. HEPA filters typically last for 1 to 2 years.
6. Can I use a vacuum cleaner to clean the filters of my smart vacuum cleaner?
Yes, you can use a regular vacuum cleaner to clean the filters of your smart vacuum cleaner. Use a soft brush attachment to gently remove dust and debris.
7. Can I reuse the same filter after cleaning?
Yes, you can reuse the same filter after cleaning, as long as it is not damaged or worn out.
8. Where can I buy replacement filters for my smart vacuum cleaner?
You can buy replacement filters for your smart vacuum cleaner from the manufacturer’s website or from a reputable online retailer.
9. Can I clean my smart vacuum cleaner’s filters with soap and water?
Yes, you can clean some filters with soap and water, but be sure to follow the manufacturer’s instructions and let the filters dry completely before using them again.
10. Is it necessary to replace all filters at the same time?
No, it is not necessary to replace all the filters at the same time, unless they all show signs of wear or damage. You can replace filters as needed, depending on their condition.

