Are you tired of spending hours cleaning your floors every week? Well, you’re in luck because multi-floor robot vacuum cleaners are here to make your life easier! With their advanced technology, these devices can easily navigate through your home, cleaning every nook and cranny without you having to lift a finger. However, with so many models available, it can be daunting to figure out how to set up and use your robot vacuum cleaner for optimal performance. But don’t worry, we’ve got you covered. In this article, we’ll take you through the step-by-step process of setting up and using your multi-floor robot vacuum cleaner on different surfaces, troubleshooting common issues, and optimizing its performance. So sit back, relax, and let’s get started!
Table of Contents
Setting Up Your Multi-Floor Robot Vacuum Cleaner
When it comes to keeping your home clean, nothing beats a good vacuum cleaner. However, vacuuming can be a laborious and time-consuming task, especially if you have multiple floors to cover. This is where a multi-floor robot vacuum cleaner comes in handy. With its advanced features and adaptability, it can save you both time and effort. But how do you set up your multi-floor robot vacuum cleaner for optimal performance? In this section, we will walk you through the essential steps to get your robot vacuum cleaner up and running. Whether you recently invested in one or looking to learn more about their benefits, we’ve got you covered. Let’s dive into the details! To choose the best multi-floor robot vacuum for your home, check out our article “Top 10 Best Multi-Floor Robot Vacuum Cleaners for Your Home in 2021”.
1. Charge Your Robot Vacuum Cleaner
Charge Your Robot Vacuum Cleaner:
Before starting to use your multi-floor robot vacuum cleaner, it needs to be charged fully. Check your robot vacuum cleaner’s user manual to know about the charging requirements and significant aspects to keep in mind. Generally, the charging process takes almost three to five hours, depending on the model and the level of the battery.
Follow these simple steps to charge the multi-floor robot vacuum cleaner:
Locate the charging dock provided with the robot vacuum cleaner.
It would be ideal to place the charging dock against the wall of a room where you want your cleaning sessions to start and end.
Ensure that the charging dock is placed in an open space, and there are no obstacles around it.
Connect the charging dock to a power source properly.
Place your robot vacuum cleaner on the charging dock so that the metal charging plates at the base of the robot vacuum cleaner must contact the charging dock’s metal pins.
Now, your robot vacuum cleaner will begin charging, and a light on the charging dock will indicate whether the robot vacuum cleaner is charging or completely charged.
A fully charged multi-floor robot vacuum cleaner can work continuously for almost 90-120 minutes for a single level before seeking recharging.
Remember, if you want to get the most of your robot vacuum cleaner’s capabilities, you should choose the best one that serves your specific needs. Check out our list of top features and benefits of multi-floor robot vacuums to find which one suits you better. Plus, regular maintenance and care would keep your robot vacuum cleaner in good shape and continue to function flawlessly for years to come.
2. Download and Install the Robot Vacuum Cleaner App
Once you have received your multi-floor robot vacuum cleaner, the next step is to download and install the accompanying app. This app is essential for controlling and monitoring the robot vacuum cleaner’s performance.
Here is a step-by-step guide to download and install the robot vacuum cleaner app:
Step
Action
1
Go to your device’s app store (App Store for iOS devices or Google Play Store for Android devices).
2
Search for the name of your robot vacuum cleaner brand (e.g., iRobot, Neato, Shark, etc.) in the search bar.
3
Select the appropriate app from the search results.
4
Click “Download” or “Install.”
5
The app will automatically download and install on your device.
6
Open the app once it is installed, and follow the instructions to connect your robot vacuum cleaner to the app.
It’s important to note that not all robot vacuum cleaners require an app for operation, but most high-end models do. With the app, you can control the robot vacuum cleaner’s cleaning cycles, set schedules, and even create maps of your home for the robot to navigate. The app allows you to access important features remotely and monitor the cleaning process even when you’re not at home.
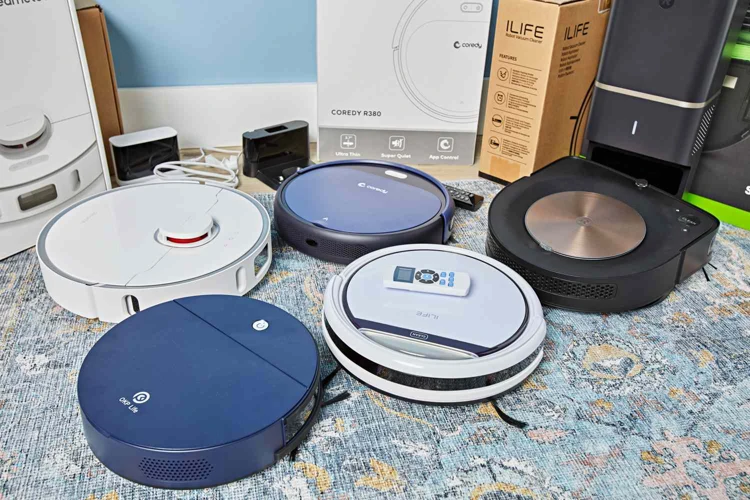
If you haven’t purchased a multi-floor robot vacuum cleaner yet, you may want to check out some of the popular options on the market. Choosing the right model will depend on your needs and budget. Keep in mind that a multi-floor robot vacuum cleaner is equipped to handle various surfaces and comes with additional features for optimal performance on different floors.
After downloading the app, the next step is to connect your robot vacuum cleaner to Wi-Fi. Check out the next section to learn how to do this. If you’re upgrading from a single-floor robot vacuum cleaner, you may want to read about multi-floor robot vacuum adaptation for more information on how to use this type of vacuum.
3. Connect Your Robot Vacuum Cleaner to Wi-Fi
One of the most significant features of a multi-floor robot vacuum cleaner is its ability to connect to Wi-Fi. By doing so, you can remotely control your vacuum cleaner and even monitor its performance with just a few taps on your smartphone. Here are the steps to connect your robot vacuum cleaner to Wi-Fi:
Step 1: Ensure that your Wi-Fi network is up and running. Data connectivity is essential to connect your robot vacuum cleaner to the internet.
Step 2: Locate the Wi-Fi button on your robot vacuum cleaner. The button is typically located on the top, bottom or side of the vacuum, depending on the brand or model.
Step 3: Press and hold the Wi-Fi button until you hear a beep or see the Wi-Fi light blink. The vacuum will enter into Wi-Fi pairing mode.
Step 4: On your smartphone or tablet, search for available Wi-Fi networks and connect to the one that corresponds to your robot vacuum cleaner’s brand or model. For example, if you have an iRobot vacuum cleaner, connect to the Wi-Fi network named “iRobot”.
Step 5: Once connected to the robot vacuum cleaner’s Wi-Fi network launch the robot vacuum cleaner app that you installed earlier.
Step 6: The app will prompt you to enter your Wi-Fi password to connect to your home network. Once you input the password, the robot vacuum cleaner will save the network and connect to it automatically every time it cleans.
We hope these steps help you connect your robot vacuum cleaner to Wi-Fi without any problems. Once it’s connected, you can not only control it remotely but also get software updates, customise your cleaning preferences, set up cleaning schedules, and much more.
4. Map Your Home with Your Robot Vacuum Cleaner
One of the most important steps to ensuring optimal performance of your multi-floor robot vacuum cleaner is mapping your home. This step is essential for the robot to navigate seamlessly through your home, avoiding obstacles and cleaning each room efficiently. Here are the steps to follow when mapping your home with the robot vacuum cleaner:
Clear the Space: Before you start mapping, make sure the floors are clear of clutter and any potential obstacles. This will help your robot vacuum cleaner work more efficiently and achieve the best possible results.
Start the Cleaning: Turn on your robot vacuum cleaner and let it run while you observe its movements.
Monitor the Robot: Keep an eye on the robot as it moves around the room, taking note of any obstacles it encounters or areas it struggles to reach.
Use the App: Most robot vacuum cleaners come with a companion app that allows you to manually guide the robot and mark out specific areas of your home. Use the app to create virtual boundaries or no-go zones for the robot to avoid.
Repeat the Process: After mapping out one room, move on to the next, repeating the process until you’re happy with the map of your home. Be patient, as mapping can take some time, but the results will be worth it in the long run.
Save the Map: Once you’ve completed the mapping process, save the map to your robot vacuum cleaner’s memory. This will allow the robot to navigate your home more efficiently and clean with greater accuracy.
Mapping your home with your multi-floor robot vacuum cleaner may take some time and effort, but the results will pay off in the end. By following these steps, you can ensure that your robot vacuum cleaner works to its maximum potential, efficiently navigating and cleaning each room of your home.
5. Set Cleaning Schedules and Create Virtual Walls
One of the best features of a multi-floor robot vacuum cleaner is the ability to set cleaning schedules for each floor of your home. This means you can have your robot vacuum cleaner clean automatically at specific times, so you don’t have to worry about scheduling cleaning sessions every day.
To set up cleaning schedules, you need to use the robot vacuum cleaner app. Once you have downloaded and installed the app (as explained in step 2), you can easily create a cleaning schedule. Here is how:
Action
Instructions
Select the Schedule Option
Open the app and select the “Schedule” option.
Select the Floor
Choose the floor you want to create a schedule for.
Set the Cleaning Time
Select the time you want the cleaning to start. You can choose any time of day.
Choose the Cleaning Mode
You can choose the cleaning mode you want for each scheduled cleaning session. This could be spot cleaning or full cleaning.
Save the Schedule
Once you’ve completed all these steps, save the schedule, and your robot vacuum cleaner will automatically clean at the scheduled time.
Another fantastic feature of a multi-floor robot vacuum cleaner is the ability to create virtual walls. Virtual walls are sensors that you can place around your home that indicate to your robot vacuum cleaner where it can’t go. This is particularly useful in homes with pets, children or valuable items that could get damaged.
To create virtual walls, you’ll first need to select the “Virtual Walls” option in the robot vacuum cleaner app. Then, you can place the virtual walls physically around your home.
Here are the steps to follow:
Action
Instructions
Select the Virtual Walls Option
Open the robot vacuum cleaner app and select “Virtual Walls.”
Choose the Floor
Choose the floor where you want to place virtual walls.
Place the Virtual Walls
Physically position the virtual walls around your home where you don’t want the robot vacuum cleaner to go.
Save the Changes
Once you’ve positioned the virtual walls, save the changes, and your robot vacuum cleaner will be programmed to avoid those areas.
By setting cleaning schedules and creating virtual walls, you can maximize the performance of your multi-floor robot vacuum cleaner and ensure that your home is clean and tidy at all times.
6. Set Up a Charging Station
Setting up a charging station for your multi-floor robot vacuum cleaner is essential to ensure it can effectively clean all levels of your home without interruption. Here’s how you can set up the charging station for optimal performance:
Step 1: Choose the Right Location
The first step is to choose a suitable location for the charging station. It should be easily accessible for your robot vacuum cleaner and away from any hazards or obstacles. A convenient spot to set up the charging station is along the wall, close to a power outlet.
Step 2: Gather the Components
The second step is to gather all the components you will need. This includes the charging dock, power cord, and power adapter. Ensure all components are compatible with your robot vacuum cleaner model.
Step 3: Connect the Charging Dock to Power
The third step is to connect the charging dock to power using the power cord and adapter. Plug the power adapter into the nearest electrical outlet, then connect the charging dock’s power cord to the adapter. Your robot vacuum cleaner should only be charged with its original charger to prevent any damage.
Step 4: Place the Charging Dock in Position
The fourth step is to place the charging dock in a suitable location. Align the charging dock against the wall and ensure it is stable. It’s important to make sure the charging dock is on a level surface and is not wobbling.
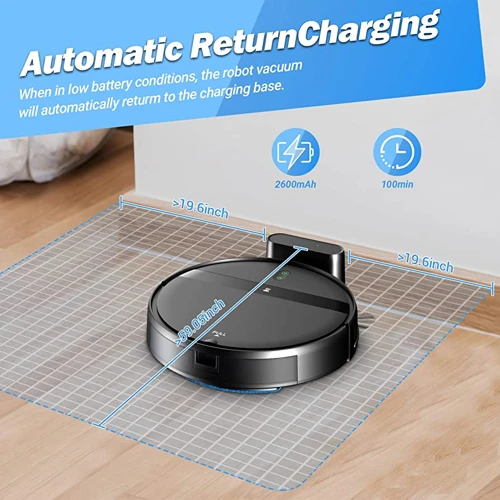
Step 5: Turn On the Charging Dock
The fifth and final step is to turn on the charging dock. This will make the charging dock ready to charge your robot vacuum cleaner. Once your robot vacuum cleaner is running low on battery, it will automatically return to the charging dock to recharge.
To ensure optimal performance of your multi-floor robot vacuum cleaner, make sure to keep the charging dock in the same location at all times. This will allow your robot vacuum cleaner to easily locate the dock and recharge whenever necessary, keeping your floors free of dust, dirt, and debris.
Step
Description
1
Choose the Right Location
2
Gather the Components
3
Connect the Charging Dock to Power
4
Place the Charging Dock in Position
5
Turn On the Charging Dock
Using Your Multi-Floor Robot Vacuum Cleaner on Different Surfaces
You may be wondering how your multi-floor robot vacuum cleaner can effectively clean different surfaces in your home. With various flooring options like hardwood, tile, low-pile carpets, high-pile carpets, and even uneven surfaces and thresholds, it can be perplexing to determine the best settings for optimal performance. Fear not, with a few simple adjustments, your robot vacuum cleaner can tackle any surface with ease. Let’s explore the steps for using your multi-floor robot vacuum cleaner on different surfaces.
1. Hardwood and Tile Floors
When it comes to using your multi-floor robot vacuum cleaner on hardwood and tile floors, there are a few things to keep in mind to ensure optimal performance. Here are some tips and tricks to help you get the most out of your robot vacuum cleaner on these surfaces:
Tip
Explanation
Clear the Floor
Before running your robot vacuum cleaner on hardwood or tile floors, make sure the floor is clear of any loose items such as small toys, pieces of paper or other debris. These items can get stuck in the robot vacuum cleaner and impact its ability to clean efficiently.
Check for High-Pitched Noise
If you notice a high-pitched noise coming from the robot vacuum cleaner while cleaning hardwood or tile floors, it could be a sign that the cleaning brush is too close to the floor. Use the vacuum’s settings to raise the brush and improve the cleaning performance.
Use Rubber Wheels
Hardwood and tile floors can be slippery, so it’s important to use a robot vacuum cleaner with rubber wheels. Rubber wheels provide more traction and prevent the vacuum from slipping or skidding while in operation.
Set the Vacuum to “Quiet” Mode
If you have hardwood or tile floors in a bedroom or other quiet space, set your robot vacuum cleaner to “quiet” mode to minimize noise. This mode will reduce the amount of noise the vacuum makes while operating without impacting its cleaning ability.
Pay Attention to the Edges
Robot vacuum cleaners may sometimes overlook corners and other hard-to-reach areas when cleaning hardwood or tile floors. Pay attention to these edges and manually clean them yourself to ensure a thorough clean.
By following these tips and tricks, you can ensure that your multi-floor robot vacuum cleaner will operate efficiently on hardwood and tile floors, making your cleaning routine a breeze.
2. Low-Pile Carpets and Rugs
Using Your Multi-Floor Robot Vacuum Cleaner on Low-Pile Carpets and Rugs
Low-pile carpets and rugs are easier to vacuum than high-pile ones because they have shorter fibers. However, they still require proper cleaning to keep them looking their best.
Here are some tips for using your multi-floor robot vacuum cleaner on low-pile carpets and rugs:
Tips
Explanation
Adjust the Brush Roll
Most robot vacuum cleaners have a brush roll that can be adjusted to different heights. For low-pile carpets and rugs, make sure that the brush roll is at the lowest height settings to avoid damaging the fibers.
Clean Regularly
Low-pile carpets and rugs still accumulate dirt and dust over time. Make sure to clean your carpets and rugs regularly to prevent excessive buildup. Set up a cleaning schedule on your robot vacuum cleaner app to ensure that your carpets and rugs are cleaned frequently enough.
Remove Obstacles
Like hardwood and tile floors, low-pile carpets and rugs can also have small obstacles that can get in the way of your robot vacuum cleaner. Make sure to remove any small objects or items from the floor before cleaning to avoid damaging the robot vacuum cleaner or the carpet/rug fibers.
Use Spot Clean Function
If you have any stubborn stains on your carpet or rug, use the spot clean function on your robot vacuum cleaner. This will allow the robot vacuum cleaner to focus on a specific area using a more intense suction power to get rid of the stain.
Keep in mind that low-pile carpets and rugs may still require periodic deep cleaning. While your robot vacuum cleaner can help maintain the cleanliness of your carpets and rugs, it is still important to schedule professional deep cleaning once or twice a year.
3. High-Pile Carpets and Thick Rugs
When it comes to high-pile carpets and thick rugs, your multi-floor robot vacuum cleaner may require a bit of extra attention to ensure optimal cleaning performance. Here are some tips to keep in mind:
Use the Right Cleaning Mode: Your robot vacuum cleaner likely has a specific cleaning mode for high-pile carpets, which adjusts the suction power to better navigate the thick fibers. Make sure to activate this mode before cleaning your carpets to ensure a thorough clean.
Check for Tangles: High-pile carpets and thick rugs can be prone to tangling with your robot vacuum cleaner’s brushes, which can impede its cleaning performance. Regularly check for tangles and clear them out as necessary for optimal performance.
Create Virtual Walls: If you have areas of your high-pile carpets or thick rugs that you’d like your robot vacuum cleaner to avoid, create virtual walls to keep it on the right path. This can help prevent it from getting stuck or damaging the fibers of your carpet or rug.
Be Patient: High-pile carpets and thick rugs can require more passes from your robot vacuum cleaner to achieve a deep clean. Don’t be afraid to run it multiple times if necessary, or to manually clean any remaining debris with a spot cleaner for a pristine finish.
By following these simple tips, you can help ensure that your multi-floor robot vacuum cleaner is able to tackle even the thickest, most high-pile carpets and rugs in your home with ease.
4. Uneven Surfaces and Thresholds
When it comes to cleaning uneven surfaces and thresholds with your multi-floor robot vacuum cleaner, there are a few things to keep in mind to ensure optimal performance. Uneven surfaces and thresholds can often trip up robot vacuums, causing them to get stuck or not clean properly. However, with a few tips and tricks, you can easily navigate these obstacles.
Here’s a table summarizing some of the key considerations when cleaning uneven surfaces and thresholds:
Considerations when cleaning uneven surfaces and thresholds:
Solutions:
Height differences between surfaces
Adjust the robot vacuum cleaner’s suction power to accommodate the height difference. Some robot vacuums also have adjustable wheels that can help with navigating height differences.
Narrow thresholds or gaps
Use virtual walls to create no-go zones around narrow thresholds or gaps. Alternatively, you can use magnetic strips to create physical boundaries that the robot vacuum will not cross.
Thresholds that are higher than the robot vacuum’s clearance
Use a ramp or a piece of wood to create a gradual slope that the robot vacuum can climb up. Alternatively, you can manually carry the robot vacuum over the threshold.
Keep in mind that every robot vacuum cleaner is different, and some may handle uneven surfaces and thresholds better than others. It’s important to reference your specific robot vacuum cleaner’s manual for additional guidance. With these tips and tricks, you can confidently clean all surfaces and thresholds with ease.
5. Avoiding Obstacles and Cleaning Tight Spaces
5. Avoiding Obstacles and Cleaning Tight Spaces
Your multi-floor robot vacuum cleaner is equipped with sensors that can help it avoid obstacles during cleaning. However, it is important to ensure that the cleaning path is clear to avoid any damage to the vacuum cleaner or other objects on the floor. Here are some tips to help your robot vacuum cleaner avoid obstacles and clean tight spaces.
Remove any large objects from the floor, such as shoes or toys, before starting the vacuum. This will allow the vacuum to navigate around the room without getting stuck.
If you have tight spaces such as narrow hallways or under furniture, make sure you create enough clearance for the vacuum cleaner to pass through. Remove any potential obstacles such as cords or cables that could get caught in the vacuum.
Use virtual walls to create no-go zones around fragile objects or areas that you don’t want the robot vacuum cleaner to clean. These can be set up through the app and will prevent the vacuum cleaner from entering certain areas.
Clean under furniture before starting the vacuum to remove any dust, debris or pet hair that could clog the vacuum’s brushes or filters. This will also help the vacuum move freely under the furniture.
If your robot vacuum cleaner is getting stuck in tight spaces, you can use a boundary marker to guide it around these areas. The boundary marker can be placed along the edge of the area you want to avoid, and the vacuum will redirect its path without getting stuck.
By following these tips, you can help your multi-floor robot vacuum cleaner smoothly navigate around your home, avoid obstacles, and clean tight spaces with ease.
Troubleshooting Your Multi-Floor Robot Vacuum Cleaner
Sometimes, even the most advanced technology can encounter a problem or two. When it comes to your multi-floor robot vacuum cleaner, it is also possible that unexpected issues may arise. Don’t despair, as there are some common troubleshooting steps that you can take to help get your robot cleaner back on track. Let’s explore some of these steps below and find out what you can do in case of unexpected problems.
1. Robot Vacuum Cleaner Not Charging
If your robot vacuum cleaner is not charging, this can be a frustrating problem to encounter, but there are a few things you can try to troubleshoot the issue:
Check the power source: First, make sure the charging station is plugged in and receiving power. If the outlet or power source is faulty, this may be preventing the robot vacuum cleaner from charging properly.
Ensure proper placement: The robot vacuum cleaner may not be properly positioned on the charging station. Make sure it is properly aligned and in the center of the charging dock to ensure optimal charging capability.
Check the charging contacts: The charging contacts on both the robot vacuum cleaner and the charging dock should be clean and free of any debris or dust. If they become dirty, they can prevent the robot vacuum cleaner from making proper connection and charging.
Reset the robot vacuum cleaner: Try resetting the robot vacuum cleaner by pressing and holding the power button for about 10-15 seconds. After this, place the cleaner back on the charging dock to see if it begins charging.
Replace the battery: If the above steps do not fix the issue, it may be time to replace the robot vacuum cleaner’s battery. Contact the manufacturer or consult the user manual for specific instructions on how to do so.
By following these troubleshooting tips, you can identify and fix the issue of your robot vacuum cleaner not charging, allowing it to continue cleaning your floors effortlessly. Remember to always read the user manual for specific instructions on your model of robot vacuum cleaner.
2. Robot Vacuum Cleaner Not Connecting to Wi-Fi
Problem: Your multi-floor robot vacuum cleaner is not connecting to Wi-Fi, preventing you from accessing its full functionality through the app.
Possible causes and solutions:
Cause
Solution
The robot vacuum cleaner is too far from the Wi-Fi router
Move the robot vacuum cleaner closer to the router to establish a stable connection. Alternatively, invest in a Wi-Fi extender to expand the signal range.
The Wi-Fi network name (SSID) or password has changed
Re-enter the correct network name (SSID) and password on the robot vacuum cleaner app. Make sure you spell everything correctly and use the correct capitalization.
The Wi-Fi network is experiencing connectivity issues or server downtime
Check if other devices can connect to the Wi-Fi network. If the issue persists, try restarting the router, waiting for a few minutes, and reconnecting the robot vacuum cleaner to the Wi-Fi. If it still doesn’t work, contact your internet service provider or technical support for assistance.
The robot vacuum cleaner’s firmware is outdated or buggy
Check for firmware updates in the robot vacuum cleaner app or on the manufacturer’s website. Install any available updates and try reconnecting to the Wi-Fi network. If this doesn’t work, try resetting the robot vacuum cleaner to its default settings and start the Wi-Fi connection process from scratch.
The robot vacuum cleaner’s Wi-Fi module is damaged
If none of the above solutions work, the Wi-Fi module in your robot vacuum cleaner may be faulty. Contact the manufacturer’s customer support for repair or replacement options.
Remember, a stable Wi-Fi connection is essential for your multi-floor robot vacuum cleaner to operate at optimal performance. If you are still experiencing connectivity issues, do not hesitate to seek technical support or professional assistance.
3. Robot Vacuum Cleaner Not Cleaning Properly
The effectiveness of your multi-floor robot vacuum cleaner largely depends on its ability to clean properly. However, there are a number of factors that can contribute to a robot vacuum cleaner not cleaning as it should. Here are some common issues and possible solutions to ensure optimal performance:
Issue
Possible Solution
Dull Brushes
Over time, the brushes on your robot vacuum cleaner can become dull and less effective at picking up dirt and debris. To fix this, simply replace the brushes with new ones.
Clogged Filters
The filters on your robot vacuum cleaner can become clogged with dust and debris, which can hinder its suction power. Clean or replace the filters regularly to ensure proper airflow.
Low Battery
If your robot vacuum cleaner is not cleaning properly, it may be due to a low battery. Check that the battery is fully charged and replace it if necessary.
Incorrect Cleaning Modes
Make sure that your robot vacuum cleaner is set to the correct cleaning mode for the surface it is cleaning. For example, if it’s cleaning a carpet, make sure it’s in “carpet cleaning” mode.
Dirty Sensors
The sensors on your robot vacuum cleaner can become dirty, which can interfere with its navigation and ability to detect obstacles. Clean the sensors regularly with a microfiber cloth.
Obstruction Sensors Blocked
The robot vacuum cleaner may not be cleaning properly due to the obstruction sensors being blocked. Move any objects that are in the way and ensure that there is enough clearance around the vacuum to allow it to move freely.
Software Issues
If your robot vacuum cleaner is not cleaning properly, it may indicate a software issue. Try resetting the device and updating the software to see if this resolves the problem.
By addressing these common issues, you can troubleshoot your robot vacuum cleaner and ensure that it is cleaning properly. Regular maintenance and cleaning will help keep your robot vacuum cleaner in top condition and performing optimally on all surfaces.
4. Robot Vacuum Cleaner Getting Stuck or Falling
Problem: Your robot vacuum cleaner is getting stuck or falling while cleaning, which can interrupt its cleaning cycle.
Possible Solutions:
Clear the floor of any obstacles: Before starting the cleaning cycle, be sure to remove any potential obstacles such as pet toys, shoes, or cords that may cause the robot vacuum cleaner to get stuck or fall.
Adjust the cleaning schedule: If the robot vacuum cleaner keeps getting stuck in certain areas of the house, try adjusting the cleaning schedule to avoid those areas or clean them at a different time of day.
Use virtual walls: If there are areas of the house that are particularly difficult for the robot vacuum cleaner to navigate, use virtual walls to create no-go zones and prevent the cleaner from entering them.
Check the cliff sensors: If the robot vacuum cleaner keeps falling off ledges or stairs, it may be because the cliff sensors are dirty or malfunctioning. Check and clean the sensors to help prevent this issue.
Check the wheels: If the robot vacuum cleaner keeps getting stuck on uneven surfaces or thresholds, it may be because the wheels are worn or damaged. Check and replace the wheels as needed.
Tips to Optimize Your Multi-Floor Robot Vacuum Cleaner’s Performance
As you begin to use your multi-floor robot vacuum cleaner, you may notice areas where its performance could be improved. Fortunately, there are several tips and tricks that can help you optimize its cleaning abilities and ensure that it functions at its best. By implementing the following strategies for maximizing your robot vacuum cleaner’s effectiveness, you can enhance its performance and enjoy a cleaner, more seamless cleaning experience.
1. Regularly Maintain the Robot Vacuum Cleaner
Proper maintenance of your multi-floor robot vacuum cleaner is important to ensure its optimal performance and longevity. Here are some tips for keeping your robot vacuum cleaner in top condition.
Tip
Description
Clean the Brushes and Filters
Over time, brushes and filters in your robot vacuum cleaner can accumulate dirt, hair, and other debris. Regularly clean them to enhance suction power and prevent clogs.
Empty the Dustbin
A full dustbin can result in insufficient suction and decreased cleaning efficiency. Empty the dustbin after every vacuuming session.
Inspect the Wheels and Sensors
Check the wheels and sensors for any dirt or debris accumulation as it can affect the robot cleaner’s navigation ability. Clean them regularly to ensure smooth movement and proper navigation.
Replace the Rechargeable Battery
The rechargeable battery is an important component of the robot vacuum cleaner. Replace the battery periodically to ensure the robot cleaner can operate for maximum time for effective cleaning.
By maintaining your robot vacuum cleaner regularly, you can make sure it works efficiently and effectively every time.
2. Clear Any Clutter or Debris on the Floor
It is essential to clear any clutter or debris on the floor before using your multi-floor robot vacuum cleaner. This ensures that the robot cleaner performs optimally and is not impeded by any obstacles.
Why Do You Need to Clear Clutter and Debris?
Clutter and debris can obstruct the robot vacuum cleaner’s path and cause it to get stuck or miss certain spots on the floor. It may also damage the machine’s components and reduce its longevity. It’s essential to clear the floor of all obstacles before using the robot vacuum cleaner to improve its performance.
How to Clear Clutter and Debris?
To clear the clutter and debris, you can follow the steps below:
Step
Instructions
1.
Start by picking up any large objects, such as toys or shoes, and placing them in a designated spot.
2.
Remove any small objects that may be on the floor, such as papers or crumbs, by either picking them up manually or using a broom and dustpan.
3.
Clear any cords or cables that may be on the floor by tying them together or running them along the walls.
4.
Push any furniture, such as chairs or tables, out of the way to create a clear path for the robot vacuum cleaner.
How Often to Clear Clutter and Debris?
It’s a good idea to clear the clutter and debris on the floor before using the robot vacuum cleaner every time. This ensures that the machine runs smoothly and is not impeded by any obstacles that may affect its performance.
Clearing any clutter and debris on the floor is crucial to optimize the performance of your multi-floor robot vacuum cleaner. By doing so, you can ensure that the machine runs smoothly and effectively cleans your floors.
3. Create No-Go Zones with Virtual Walls
One of the great features of multi-floor robot vacuum cleaners is the ability to create no-go zones using virtual walls. These virtual walls act as a barrier for the robot vacuum cleaner, preventing it from entering certain areas that you do not want to be cleaned. For instance, if you have a pet bed or a fragile piece of furniture, you can use virtual walls to ensure that the robot vacuum cleaner avoids these areas.
To create a virtual wall, you will need to use the robot vacuum cleaner app on your smartphone. The process is straightforward and involves creating a boundary line on a virtual map of your home. The robot vacuum cleaner will then recognize this boundary line and avoid crossing it during cleaning tasks.
One thing to keep in mind when creating virtual walls is that they may not work perfectly on all robot vacuum cleaners. Some vacuum cleaners may have difficulty recognizing the virtual wall, which means they may accidentally cross over it. If this happens, you may need to experiment with different virtual wall configurations until you find one that works effectively.
Here are some tips for creating effective virtual walls:
Tip
Description
Use Straight Lines
When creating virtual walls, it’s best to use straight lines that are easy for the robot vacuum cleaner to recognize. Avoid creating zigzag or curvy lines, as these can confuse the vacuum cleaner’s sensors.
Place Virtual Walls Near Doors
If you want to block off entire rooms, it’s best to place virtual walls near doors or other entryways. This will prevent the robot vacuum cleaner from entering the room and ensure that it only cleans the areas you want it to.
Experiment With Placement
If you find that the robot vacuum cleaner is still entering areas that you want it to avoid, try experimenting with different virtual wall configurations. Move the walls closer to the area you want to block off, or create multiple walls to create a more effective barrier.
Creating no-go zones with virtual walls is a simple and effective way to customize the cleaning experience of your multi-floor robot vacuum cleaner. By using virtual walls, you can ensure that the vacuum cleaner only cleans the areas you want it to, which can save time and prevent any potential accidents or damage.
4. Set Cleaning Schedules for Each Floor
To truly optimize the performance of your multi-floor robot vacuum cleaner, it’s important to set cleaning schedules for each floor in your home. This ensures that your robot vacuum cleaner will consistently maintain a clean environment without you having to constantly intervene.
Here’s how to set cleaning schedules for each floor:
First, open the robot vacuum cleaner app on your smartphone or tablet.
Select the floor you want to set the schedule for and click on the “Schedule” option.
Choose the days and times you would like the robot vacuum cleaner to automatically clean that specific floor.
Be sure to adjust the cleaning settings, including suction power and cleaning mode, to best fit the surface types on that floor.
Repeat this process for each floor in your home.
By setting up schedules for each floor, you can ensure that your robot vacuum cleaner will work efficiently and effectively without any additional input from you. Additionally, by adjusting the cleaning settings for each floor, you can tailor the cleaning experience to best fit the needs of each surface type.
However, it’s important to periodically monitor your robot vacuum cleaner to ensure that it’s cleaning properly and not getting stuck or falling. Check out the troubleshooting section of this article for guidance on how to fix any issues that may arise.
Conclusion
After following the steps outlined in this article, you should have a better understanding of how to set up and use your multi-floor robot vacuum cleaner for optimal performance. By properly charging your robot vacuum cleaner, downloading and installing the app, mapping your home, and setting up cleaning schedules and virtual walls, you can save yourself time and hassle by having a clean home without the manual labor.
It is important to note that different surfaces require different settings on your robot vacuum cleaner. By adjusting the settings for hardwood and tile floors, low-pile carpets and rugs, high-pile carpets and thick rugs, uneven surfaces and thresholds, and avoiding obstacles, you can ensure that every surface in your home is properly cleaned.
If you experience any issues with your robot vacuum cleaner, there are troubleshooting steps you can take to fix the problem. By addressing problems with charging, connectivity, proper cleaning, and getting stuck or falling, you can get your robot vacuum cleaner back up and running smoothly.
To optimize your robot vacuum cleaner’s performance, it is important to regularly maintain it by cleaning out the dustbin and replacing the filter. Additionally, clearing any clutter or debris on the floor, creating no-go zones with virtual walls, and setting cleaning schedules for each floor can help maximize the effectiveness of your robot vacuum cleaner.
In conclusion, with the right setup and usage, a multi-floor robot vacuum cleaner can be an incredibly efficient and effective tool for keeping your home clean. Take the time to properly set it up and maintain it, and you may find yourself wondering how you ever managed without it.
Frequently Asked Questions
1. Can I use the robot vacuum cleaner on multiple floors?
Yes, a multi-floor robot vacuum cleaner is designed to clean different floors in your home.
2. Will the robot vacuum cleaner scratch my hardwood floors?
No, most robot vacuum cleaners are designed with soft brushes and sensors to avoid scratching the floors.
3. Can I use the robot vacuum cleaner on thick carpets?
Yes, most robot vacuum cleaners are capable of cleaning thick carpets and rugs.
4. How often should I clean and maintain the robot vacuum cleaner?
It is recommended to clean and maintain the robot vacuum cleaner after every use.
5. Can the robot vacuum cleaner clean tight spaces and corners?
Yes, most robot vacuum cleaners are designed to clean tight spaces and corners using side brushes and sensors.
6. Can the robot vacuum cleaner detect and avoid obstacles?
Yes, most robot vacuum cleaners are equipped with sensors to detect and avoid obstacles such as furniture and walls.
7. Do I need to be at home while the robot vacuum cleaner is cleaning?
No, you can set cleaning schedules and monitor the robot vacuum cleaner from your smartphone app while away.
8. Can I use the robot vacuum cleaner to clean specific areas only?
Yes, you can use the virtual wall feature to create no-go zones and prevent the robot vacuum cleaner from cleaning specific areas.
9. How does the robot vacuum cleaner map my home?
The robot vacuum cleaner uses sensors and mapping technology to create a floor plan of your home which is stored in the app.
10. What should I do if the robot vacuum cleaner is not cleaning properly?
Check for any obstructions on the brushes or sensors and ensure that the floor is clear of any clutter or debris. If the issue persists, refer to the troubleshooting section in the user manual or contact customer support.