Have you ever experienced trouble while emptying your smart vacuum cleaner’s dustbin? It can be frustrating to invest in a high-quality vacuum, only to encounter issues with its essential components. When your dustbin isn’t emptied correctly, it can lead to potential cleaning performance issues, a shorter lifespan for your vacuum, and even concerns for your fresh breathing air. In this article, we’ll explore the importance of emptying a dustbin, the common problems that can arise, and how to troubleshoot these issues for seamless cleaning. So let’s dig in and solve these perplexing problems!
Why Emptying a Dustbin is Important
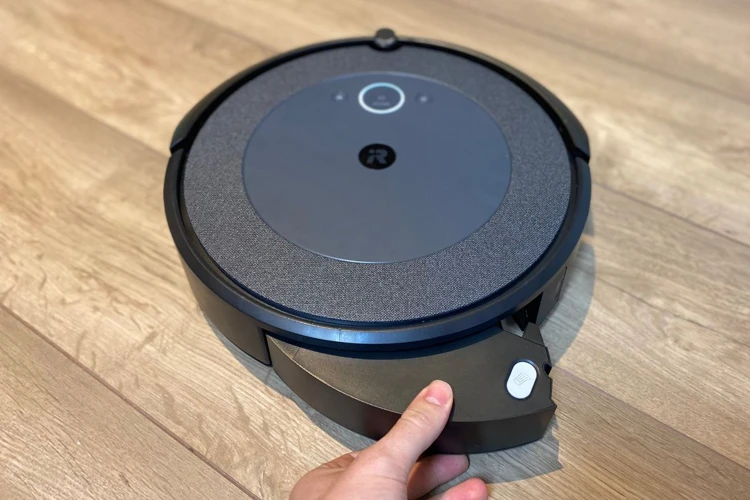
Have you ever wondered why it’s so important to regularly empty your smart vacuum cleaner’s dustbin? Emptying your smart vacuum cleaner’s dustbin after every use is essential to keep your vacuum cleaner properly functioning and ensure that your home remains clean and healthy. If you neglect to regularly empty your smart vacuum cleaner’s dustbin, you could cause a range of problems that not only affect the vacuum’s performance but also reduce its overall lifespan. In this article, we’ll explore the various reasons why emptying your smart vacuum cleaner’s dustbin is critical and how to troubleshoot any issues that arise. If you want to know more about how to empty your smart vacuum cleaner’s dustbin, check out our guide on Smart Vacuum Dustbin Guide.
Reduces the Life of Vacuum Cleaner
Emptying the dustbin of your smart vacuum cleaner on a regular basis is essential for maintaining its longevity. Failing to do so can lead to a number of problems that affect the cleaning ability of the vacuum, posing a risk of damage to the device itself. This is due to the fact that dust and debris tend to accumulate in the dustbin and filters over time, which not only affects the suction power but also puts a strain on the motor. Here are some reasons why neglecting to empty the dustbin can shorten the lifespan of your smart vacuum cleaner:
- Reduced suction power: When the dustbin becomes full or clogged, it can lead to a significant reduction in suction power, meaning that your smart vacuum cleaner will not be able to pick up debris effectively. This can put unnecessary pressure on the motor, ultimately resulting in a shorter lifespan for the device.
- Damaged motor: When there is too much dust and debris in the dustbin, it can start to clog the filters, which can cause the motor to overheat and fail, resulting in a costly repair or replacement.
- Increased maintenance costs: A dirty and clogged dustbin can lead to more frequent maintenance and cleaning of the filters and brushes, which can add up to increased expenses in the long run.
To ensure the longevity of your smart vacuum cleaner, it’s important to make sure that you are emptying the dustbin regularly and taking care of the filters and brushes as needed. Check the manufacturer’s guidelines for more information on how often you should clean the dustbin and filters, as well as any other dos and don’ts for your specific model. Additionally, consider reading our article on smart vacuum dos and don’ts to learn more about how to properly maintain your device.
Prevents Cleaning Performance Issues
Ensuring that you empty your smart vacuum cleaner’s dustbin regularly helps to prevent cleaning performance issues. Over time, if the dustbin becomes full and is not emptied, the cleaning performance of your device will begin to suffer. This is because the suction power decreases when the dustbin is full, which means that your device will have to work harder to pick up dirt and dust.
Regularly emptying the dustbin of your smart vacuum cleaner is essential to maintain efficient cleaning performance. This will ensure that your device is not overloaded with dirt and debris, thereby helping it to maintain optimal suction power. Additionally, emptying the dustbin regularly will prevent clogging that may affect the device’s ability to clean your floors effectively.
It is important to note that the frequency of emptying the dustbin depends on the amount of dirt and debris that accumulates on your floors. If you have pets or a large family, you may need to empty the dustbin more frequently. In the same vein, you may empty the dustbin less frequently if you have a smaller home or fewer people in your household.
To ensure that you maintain optimal cleaning performance, ensure that you follow your smart vacuum cleaner manufacturer’s guidelines for emptying the dustbin. Additionally, it is recommended that you clean your device regularly to maintain optimal performance. You can do this by following some of the smart vacuum cleaner dustbin cleaning hacks that are designed to keep your device in tip-top condition.
Remember, a well-maintained dustbin ensures that your smart vacuum cleaner continues to clean effectively, and keeps your home healthy and dust-free.
Keeps the Air Fresh and Healthy
Ensuring that your smart vacuum cleaner’s dustbin is emptied regularly is not only important for the longevity of your vacuum cleaner and its cleaning performance, but also for keeping the air fresh and healthy in your living space. Dirt and debris that accumulate in the dustbin can release allergens and bacteria into the air, creating an unhealthy breathing environment for you and your family.
To prevent this from happening, it’s important to empty the dustbin frequently and clean it thoroughly. Here are some tips to keep in mind:
- Empty the dustbin after every cleaning session: don’t wait for the dustbin to reach its maximum capacity before emptying it. Doing so can make it difficult to clean and can also cause overflow, creating a mess that needs to be cleaned up.
- Clean the dustbin: after emptying it, take the time to clean the dustbin properly. Make sure to remove any remaining debris or dirt particles that may have accumulated in the corners or crevices of the dustbin.
- Replace filters: Make sure to replace the filters in the dustbin regularly, according to the manufacturer’s instructions. Dirty filters can cause the vacuum cleaner to lose suction power and decrease cleaning performance.
By following these simple tips, you can ensure that your smart vacuum cleaner’s dustbin is always clean and functioning effectively. Not only will this help your vacuum cleaner last longer and perform better, but it will also help to keep the air in your home fresh and healthy, making it a more comfortable place to live. For more tips and tricks to help maintain your smart vacuum cleaner, check out our article on Smart Vacuum Cleaner Dustbin Tips.
Understanding Common Dustbin Emptying Problems
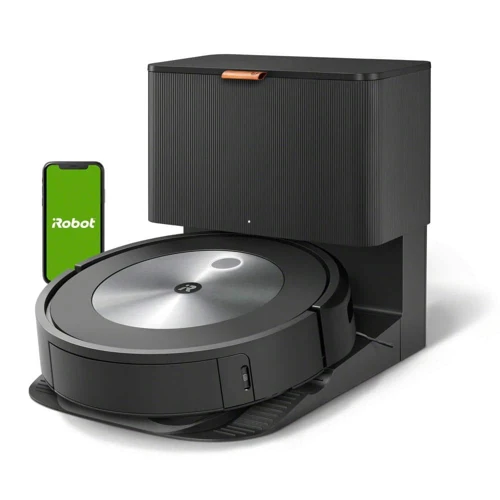
Emptying the dustbin of your smart vacuum cleaner should be a simple task, but there are common problems that can arise even when you follow the manufacturer’s instructions. These problems can be frustrating and prevent your smart vacuum cleaner from working at its optimal capacity. Understanding these issues is important to help you troubleshoot any problems that may arise. In this section, we will explore some of the most common dustbin emptying problems that smart vacuum cleaner owners face. We will also provide expert tips on how to fix them. By the end of this section, you will be equipped with the knowledge to ensure your smart vacuum cleaner continues to operate smoothly.
Dust and Debris Overflowing
Dust and debris overflowing from the dustbin is one of the most common problems that users face when using a smart vacuum cleaner. This may occur for several reasons, including overfilling of the dustbin or improper maintenance of the dustbin.
Overfilling of Dustbin: Many users tend to overfill the dustbin, and this can lead to dust and debris overflowing from the bin. It is essential to empty the dustbin before it gets filled beyond its capacity. Smart vacuum cleaners come with sensors that indicate when the dustbin is full. Still, it is better not to wait for the sensor to activate and empty the dustbin at regular intervals.
Improper Maintenance: Regular maintenance of the dustbin is essential to avoid overflowing. If the dustbin is not maintained correctly, dust and debris get stuck, and the bin’s capacity decreases. This can result in overflow, and small particles of dust can spill into your floors, causing more mess.
Here is a table that shows some common reasons for dustbin overflow and the solutions to troubleshoot them:
| Issue | Solution |
|---|---|
| Dustbin is overfilled | Empty the dustbin more frequently and do not wait for the sensor to activate |
| Dustbin is not installed properly | Check if the dustbin is installed firmly and correctly |
| Blockage in the dustbin | Clean the dustbin thoroughly, remove any debris or dirt, and ensure there is no blockage inside the dustbin |
| Damaged dustbin | If the dustbin is damaged, replace it with a new one |
It is essential to troubleshoot these issues immediately to ensure proper functioning of the smart vacuum. Dust and debris overflowing from the dustbin can cause problems in cleaning and reduce the life of the vacuum cleaner.
Pro tip: Always remember to read the manual instructions before using your smart vacuum cleaner or emptying the dustbin. If you face difficulties with the dustbin overflowing, clean and maintain the dustbin regularly to avoid any problems.
Difficult to Remove Debris from Dustbin
When it comes to emptying the dustbin on your smart vacuum cleaner, you may sometimes find it difficult to remove debris from it. This can be frustrating, and if left unaddressed, can lead to reduced cleaning performance and possibly even damage to your vacuum. Here are some possible reasons why you’re facing this issue, as well as some troubleshooting steps to help you resolve it:
Possible Reasons:
- The debris is too compacted in the bin.
- The dustbin’s opening is too small to allow easy removal of debris.
- The dustbin is overcrowded with debris.
Troubleshooting Steps:
- First and foremost, make sure to turn off your smart vacuum and unplug it from the power source before attempting to remove debris from the dustbin.
- If the debris is compacted in the bin, try using a long-handled brush or spatula to gently loosen it up. Alternatively, you may try shaking the dustbin gently to dislodge the debris.
- If the opening of the dustbin is too small, try using a smaller tool such as a crevice tool to extract the debris. You may also try pressing gently on the debris to compress it, making it easier to remove.
- If the dustbin is overcrowded with debris, empty it more frequently to prevent this from happening. Make sure to also remove any large debris that may be blocking the dustbin’s opening.
- Lastly, consider upgrading to a smart vacuum with a larger dustbin opening or a more powerful suction, which can help prevent debris from getting stuck in the dustbin in the first place. You can learn more about the benefits of smart vacuums with larger dustbins in our article Smart vs. Traditional Vacuum: Benefits of a Larger Dustbin.
By following these troubleshooting steps, you can easily overcome the issue of difficult debris removal from the dustbin of your smart vacuum cleaner. Additionally, don’t forget to regularly check and maintain your vacuum’s dustbin, as well as replace its filters as necessary. You can learn more about maintaining a full smart vacuum dustbin in our article What to Do When Your Smart Vacuum’s Dustbin Is Full?.
Dust Stuck in Dustbin’s Filters
One common problem that users face when emptying their smart vacuum cleaner’s dustbin is finding dust and debris stuck in the filters. This issue can be frustrating since it affects the cleaning performance of the vacuum cleaner. Here are some steps to troubleshoot and resolve this issue:
- Turn off and unplug the vacuum cleaner: It’s important to ensure that the device is off and unplugged before proceeding with any troubleshooting method.
- Remove the filters: Take out the filters and assess the amount of dust and debris stuck in them. In some cases, you may need to tap them gently against a hard surface to loosen the dirt accumulated in them.
- Clean the filters: Wash the filters thoroughly with water and mild detergent. If they are washable, rinse them until the water runs clear. Ensure that you dry them completely before reinserting them back into the dustbin.
- Replace the filters: Sometimes, cleaning the filters may not remove all the dust and debris stuck in them. In such cases, it’s recommended to replace the filters with new ones. Ensure that you purchase the right filters from the manufacturer to maintain the performance of the vacuum cleaner.
- Inspect the dustbin: While the filters are removed, check the dustbin for any debris or dirt buildup. If you notice any blockages, use a brush or a cloth to remove them. Ensure that the dustbin is completely clean before inserting the filters back into it.
- Regular maintenance: To prevent this issue from recurring, it’s important to perform regular maintenance on your smart vacuum cleaner. Empty the dustbin frequently, clean the filters, and inspect the device for any blockages. This will help prolong the life of your vacuum cleaner and maintain its performance.
By following these troubleshooting steps, you can ensure that your smart vacuum cleaner’s filters are clean and free from any debris, which will improve its cleaning performance. It’s essential to maintain the device properly to keep it functioning as intended and prevent any further issues.
Dustbin not Fitting Perfectly
One of the most common problems that users face when emptying their smart vacuum cleaner’s dustbin is that it may not fit perfectly. This can happen due to various reasons, such as damage to the dustbin or incorrect installation. When the dustbin does not fit perfectly, it can lead to increased air leakage and reduced suction power, resulting in poor cleaning performance. Here are some troubleshooting steps that you can take to fix this issue:
- Inspect the dustbin for any damage or cracks. If you find any, you may need to replace the dustbin. Contact the manufacturer for help and guidance on the replacement process.
- Make sure that the dustbin is properly aligned and fitted onto the vacuum cleaner’s body. Check for any obstructions or debris that may be hindering the proper installation of the dustbin.
- Check if there is any dirt or debris accumulated at the edges of the dustbin or the vacuum cleaner’s body that may be preventing the dustbin from fitting properly. Clean the edges thoroughly to ensure a snug fit.
- Replace the dustbin unit altogether. If none of the above steps work, it may be a good idea to replace the entire dustbin unit. Again, contact the manufacturer for support and guidance on the replacement process.
By taking these troubleshooting steps, you can ensure that your smart vacuum cleaner’s dustbin fits perfectly and prevents any air leakage or suction issues.
Troubleshooting Dustbin Emptying Issues
It can be frustrating when you encounter issues while emptying your smart vacuum cleaner’s dustbin. However, don’t lose hope just yet, as there are ways to troubleshoot common problems. In this section, we will explore various solutions and tips to help you overcome dustbin emptying issues with ease. Whether it’s overflowing dust and debris or a dustbin that won’t fit properly, we’ve got you covered with actionable steps to help you maintain your vacuum cleaner’s optimal performance. So, let’s dive in and tackle those pesky dustbin problems!
Clean and Maintain the Dustbin
One of the most important things to do to prevent dustbin emptying problems is cleaning and maintaining the dustbin regularly. This will not only improve your vacuum cleaner’s performance but also prolong its lifespan.
To clean your dustbin, follow these simple steps:
- 1. Turn off and unplug your vacuum cleaner: Before starting any cleaning process, make sure that your vacuum cleaner is turned off and unplugged to avoid any risks of injury.
- 2. Remove the dustbin: Once the vacuum is safely unplugged, remove the dustbin. It is usually located at the back or bottom of the vacuum cleaner.
- 3. Disassemble the dustbin: Disassemble the different parts of the dustbin, such as the lid, bin, and filters, depending on your vacuum model.
- 4. Clean the dustbin: Use a soft-bristled brush or a microfiber cloth to wipe off dust and debris from each part of the dustbin properly. You may also rinse it with water if the manufacturer allows for it, but make sure to let it dry thoroughly before reassembling it.
- 5. Clean the filters: Remove the filters from the dustbin and clean them with water, if allowed by the manufacturer. Do not forget to let them dry before putting them back in the dustbin
- 6. Reassemble the dustbin: Once everything is clean and dry, reassemble the dustbin parts back into the vacuum cleaner, making sure that everything is fitted correctly.
By following these simple cleaning steps, you can prevent common dustbin emptying problems from occurring, and your vacuum cleaner will operate at its best capacity.
Check and Replace Filters
Filters play a crucial role in the proper functioning of a smart vacuum cleaner’s dustbin. Over time, these filters can become clogged with dust and other debris, causing suction power issues and reducing the overall cleaning performance of the device. It is essential to check and replace filters at regular intervals.
Here are some steps that you can follow to check and replace filters:
- Step 1: Refer to the manual of your vacuum cleaner and identify the type and location of filters.
- Step 2: Turn off and unplug the vacuum cleaner before you start checking the filters.
- Step 3: Remove the dustbin from the vacuum cleaner and locate the filters.
- Step 4: Carefully remove filters from their holder and inspect them for any sign of damage or excessive dirt.
- Step 5: If the filters are dirty, clean them according to the manufacturer’s instructions. For more extensive cleaning, you might need to run the filters under running water or use a brush to remove dust particles. Make sure that the filters are completely dry and free of water before reinstalling them.
- Step 6: If the filters are damaged or excessively dirty, it might be time to replace them. Check the manual for replacement filters and purchase them from a reputable dealer.
- Step 7: Once you have cleaned or replaced the filters, reinstall them in the vacuum cleaner and secure them in place.
- Step 8: After you complete the process, turn on the vacuum cleaner and check if the suction power has improved. If the issue persists, consult the manufacturer for additional help.
By following these simple steps and regularly checking and replacing filters, you can ensure optimal performance of your smart vacuum cleaner’s dustbin. Don’t hesitate to invest in a quality filter as it can significantly improve the health and hygiene of your living spaces.
Empty Dustbin More Frequently
When troubleshooting common problems with your smart vacuum cleaner’s dustbin, one important step is to empty the dustbin more frequently. This can help prevent dust and debris from overflowing and causing cleaning performance issues. Here are some reasons why emptying your dustbin more frequently is important:
| Benefits of Emptying Dustbin More Frequently |
|---|
| Improved Cleaning Performance: When the dustbin is full, the vacuum cleaner may not pick up all the dirt and debris, leading to poor cleaning performance. By emptying the dustbin more frequently, you can ensure that your vacuum cleaner is always working at optimal level. |
| Reduces Wear and Tear: When the dustbin is full, the vacuum cleaner has to work harder, which can cause increased wear and tear on the machine. By emptying the dustbin more frequently, you can reduce the strain on your vacuum cleaner, which can help prolong its lifespan. |
| Prevents Dust and Debris Buildup: When the dustbin is full, dust and debris can build up in the vacuum cleaner’s brushes and filters, which can cause clogs and other performance issues. By emptying the dustbin more frequently, you can prevent this buildup and keep your vacuum cleaner working properly. |
Emptying your dustbin more frequently is a simple but effective way to prevent common problems with your smart vacuum cleaner’s dustbin. By doing so, you can ensure that your vacuum cleaner is working properly and keeping your home clean and healthy.
Ensure Proper Installation of Dustbin
Proper installation of the dustbin is crucial for ensuring efficient cleaning and effective dustbin emptying. Misaligning or not locking the dustbin in place can lead to dust and debris overflowing, performance issues, and damage to the vacuum cleaner. Here are some steps to ensure the proper installation of the dustbin:
| Step | Action |
|---|---|
| Step 1 | Turn off the vacuum cleaner and unplug it from the power source. |
| Step 2 | Remove the dustbin by pressing the release button or lever. |
| Step 3 | Clean the dustbin thoroughly by washing it with mild soap and water. Rinse and allow it to dry completely before reinstalling it. |
| Step 4 | Make sure the dustbin is aligned properly with the vacuum cleaner’s body. Check that there are no obstructions or debris that may prevent it from being installed correctly. |
| Step 5 | Insert the dustbin into the vacuum cleaner’s body and press down until it snaps into place. |
| Step 6 | Check that the dustbin is securely locked by gently tugging on it. It should not move or come loose. |
| Step 7 | Plug the vacuum cleaner back in and turn it on. Test the dustbin to ensure it is working properly by running the vacuum cleaner over a small area and checking for any issues. |
Following these steps will ensure the proper installation of the dustbin and prevent any issues with dustbin emptying or vacuum cleaner performance. It is important to perform routine maintenance and cleaning to ensure the longevity and efficiency of your smart vacuum cleaner.
Contact Manufacturer for Help
Sometimes, despite all your troubleshooting efforts, you may still face issues with your dustbin that you can’t rectify. This is where reaching out to the manufacturer for help can come in handy. Contacting the manufacturer is especially recommended if you’re facing difficulties with a new vacuum cleaner, as it may still be under warranty.
The manufacturer can provide technical assistance and even replace faulty parts or the entire vacuum cleaner if necessary. However, before reaching out to the manufacturer, make sure you have attempted all the troubleshooting steps discussed in this article. Be ready to provide specific details about the issue you’re facing, such as the model number, when you purchased the vacuum cleaner, and any error messages if applicable, as it will help the manufacturer’s customer support team diagnose and solve the problem more efficiently.
So, how can you contact the manufacturer for help? Most manufacturers provide multiple channels for customer support, including email, phone, and live chat. You can find this information on the manufacturer’s website, packaging, or documentation that came with the vacuum cleaner. In some cases, the manufacturer may also offer online resources such as user manuals, FAQs, and forums where you can find answers to common issues.
If you have tried troubleshooting on your own and the dustbin is still causing problems, don’t hesitate to reach out to the manufacturer for assistance. They are there to help, and resolving your issue is their top priority.
| Manufacturer | Contact Information |
|---|---|
| SharkNinja | Phone: 1-877-581-7375 Email: [email protected] Live Chat available on website |
| iRobot | Phone: 1-877-855-8593 Email: [email protected] Live Chat available on website |
| Dyson | Phone: 1-866-693-9766 Email: [email protected] Live Chat available on website Online resources available on website |
Remember, emptying the dustbin in your smart vacuum cleaner may seem like a simple task, but it can become frustrating if done improperly or not frequently enough. Keeping the dustbin clean, emptying it often, and maintaining the filters can help prevent issues with smart vacuum cleaners. However, if the problems persist, reaching out to the manufacturer for help is always a viable option.
Conclusion
In conclusion, emptying the dustbin of your smart vacuum cleaner is a crucial task that needs to be performed regularly. Neglecting this important task can lead to reduced appliance life, poor cleaning performance, and unhealthy air quality.
Therefore, it is recommended to make yourself aware of the common dustbin emptying problems such as dust and debris overflowing, difficult to remove debris, dust stuck in filters, and dustbin not fitting perfectly. If you face any of these issues, you can troubleshoot them by cleaning and maintaining the dustbin, checking and replacing filters, emptying the dustbin more frequently, ensuring proper installation of the dustbin, and seeking help from the manufacturer if required.
By taking these simple steps, you can keep your smart vacuum cleaner running smoothly and efficiently for a long time to come. Remember to always prioritize the cleanliness and maintenance of your appliance to ensure optimal performance and a healthy home environment. So, keep these tips in mind and enjoy hassle-free cleaning with your smart vacuum cleaner.
Frequently Asked Questions
1. How often should I empty my smart vacuum cleaner’s dustbin?
It is recommended to empty the dustbin after each cleaning session to prevent overflow and ensure efficient performance.
2. Can I wash the dustbin in water?
It depends on the manufacturer’s instructions. Some dustbins can be washed with water and mild soap, while others may require dry cleaning or wiping with a damp cloth.
3. What should I do if debris is stuck inside the dustbin?
Try using a cleaning tool such as a small brush or toothbrush to dislodge the debris. If the debris is stubborn, you may need to remove the dustbin and manually remove it.
4. How often should I replace the dustbin filters?
Refer to the manufacturer’s instructions for specific guidelines. Generally, it is recommended to replace the filters every 3-6 months, depending on usage.
5. Can I use compressed air to clean the dustbin filters?
It is not recommended to use compressed air as it may damage the filters. Instead, try tapping the filters gently to dislodge any debris, and then wash or replace as needed.
6. What should I do if the dustbin doesn’t fit properly?
Make sure that the dustbin is correctly aligned and locked in place. Sometimes debris or other obstructions may prevent the dustbin from fitting properly. In this case, clean the area thoroughly before reattaching the dustbin.
7. How do I clean the dustbin’s sensors?
Refer to the manufacturer’s instructions for specific guidelines. In general, you can use a small brush or cotton swab to gently clean the sensors.
8. What should I do if the vacuum cleaner doesn’t turn on after emptying the dustbin?
Check that the dustbin is properly installed and that all the components are securely in place. If the problem persists, try resetting the vacuum cleaner or contacting the manufacturer for assistance.
9. Can I empty the dustbin outdoors?
It is not recommended to empty the dustbin outdoors as it may release dust and allergens into the air. Instead, empty the dustbin over a trash can indoors.
10. How do I dispose of the debris collected in the dustbin?
Refer to the manufacturer’s instructions for the proper method of disposing of the debris. In general, it is recommended to seal the debris in a bag and dispose of it in a trash can.

