The Importance of Regularly Emptying Your Smart Vacuum Cleaner’s Dustbin
Warning: A non-numeric value encountered in /var/www/html/wp-content/themes/generatepress/inc/structure/post-meta.php on line 165
by Dwight Gibson
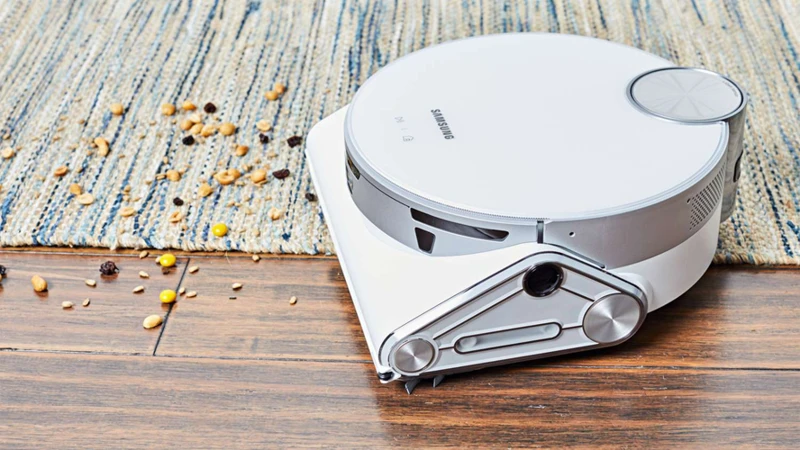
Walking into your home after a long day of work to a pile of dust, crumbs, and pet hair scattered across your floors can leave you with a feeling of dismay. That’s where your smart vacuum cleaner comes in – it navigates around your furniture on its own, making it one of the most convenient inventions of the 21st century. But, did you know that failing to empty its dustbin regularly can cause clogs and diminish its suction power? In this article, we’ll explore why it’s important to empty your smart vacuum cleaner’s dustbin and provide you with a step-by-step guide on how to do it properly to extend the life of your device. So, let’s dive in!
Table of Contents
Why is Emptying Your Smart Vacuum Cleaner’s Dustbin Important?
Do you own a smart vacuum cleaner? If so, have you ever wondered why it’s crucial to regularly empty its dustbin? While it might seem like a small task, neglecting to do so can have numerous negative consequences. In this section, we’ll discuss the importance of emptying your smart vacuum cleaner’s dustbin regularly. Trust us; you don’t want to miss out on this information! Want to learn more about smart vacuum cleaner maintenance? Check out our smart vacuum cleaner dustbin tips for more helpful advice.
It Keeps Your Home Clean
Keeping your home clean is essential for a healthy and comfortable living space. One of the ways to achieve this is by regularly emptying your smart vacuum cleaner’s dustbin. Dust, dirt, and debris can accumulate in the dustbin with continued use, reducing the vacuum’s effectiveness and leaving dirt and dust on your floors. By regularly cleaning out the dustbin on your smart vacuum cleaner, you can ensure that the device picks up dirt and debris during subsequent cleaning cycles.
When the dustbin is full, the vacuum cleaner may begin to leave dust and dirt behind, defeating its purpose completely. This can also trigger allergies and respiratory problems, especially if you have pets or live in a dusty environment. It is essential to empty the dustbin regularly to avoid the buildup of dirt and allergens in your home.
Not only will a clean dustbin make your cleaning cycles more effective, but it will also contribute to the overall cleanliness of your home. Routine dustbin cleaning can help prevent the spread of germs and bacteria, ensuring that your home remains safe for yourself and your family.
To learn more about how to properly care for your smart vacuum cleaner’s dustbin, check out our smart vacuum dustbin guide, which will provide you with more information on dos and don’ts, cleaning hacks, and troubleshooting tips.
It Prevents Clogs and Maintains Suction Power
Keeping your smart vacuum cleaner’s dustbin empty is crucial not only for maintaining a clean home but also for preventing clogs and maintaining strong suction power. When the dustbin is full, it can lead to blockages in the vacuum’s system, which can drastically reduce its suction power. This can make it difficult for your vacuum cleaner to pick up dirt and debris properly.
Clogs can also cause damage to your vacuum cleaner. When the vacuum’s system is clogged, the motor has to work harder to create suction, which can result in overheating and damage to the vacuum’s parts. In some cases, clogs can even cause permanent damage that is not repairable. It’s essential to prevent clogs by emptying the dustbin regularly.
Another benefit of emptying your smart vacuum cleaner’s dustbin regularly is it helps you save money on maintenance costs. When the suction power of your vacuum is weak, it means that the motor is working harder to clean your home. This increased workload can cause your vacuum’s parts to wear out faster, leading to a shorter lifespan. By emptying the dustbin regularly, you can ensure that your vacuum cleaner is working efficiently, which will ultimately extend its lifespan.
To maintain the suction power of your smart vacuum cleaner, ensure that the dustbin is emptied when it’s 2/3 full. This will prevent clogs and keep the suction power strong.
Keeping your smart vacuum cleaner’s dustbin empty is crucial for preventing clogs, maintaining strong suction power, and saving money on maintenance costs. By following simple tips like emptying the dustbin regularly and replacing filters, you can ensure that your vacuum cleaner is working efficiently for years to come. For more information on smart vacuum cleaner dos and don’ts, troubleshooting tips, cleaning hacks, and benefits of smart vacuums’ dustbin, check out our related articles here, here, here, here, here, and here.
It Extends the Life of Your Vacuum Cleaner
A smart vacuum cleaner is not a cheap investment, and you want it to last as long as possible. Regularly emptying the dustbin can help extend the life of your vacuum cleaner in several ways.
Firstly, an overfilled dustbin can cause strain on your vacuum’s motor, which can lead to it burning out or breaking down over time. By emptying the dustbin after each use, you’ll avoid this issue and prevent costly repairs or replacements.
Secondly, not emptying the dustbin can also cause damage to the vacuum’s filter. When the filter is full, the vacuum cleaner has to work harder to maintain suction power, which can contribute to wear and tear. Additionally, a dirty filter can prevent the vacuum from effectively removing particles from your floors, and can lead to reduced suction power over time. By emptying the dustbin and cleaning the filter regularly, you’ll avoid this issue and keep your vacuum working efficiently.
Finally, keeping your dustbin empty can prevent debris from getting trapped inside the vacuum’s brush roll or other components. When debris builds up, it can cause the brush roll to stop working, which can prevent the vacuum from cleaning your floors effectively. In extreme cases, the buildup can even damage the brush roll or other internal components, leading to more costly repairs. By emptying the dustbin regularly, you can avoid this issue and keep your vacuum cleaner in top condition.
In conclusion, emptying your smart vacuum cleaner’s dustbin regularly can help extend the life of your vacuum cleaner and save you money in the long run. By following the steps outlined in this article, you can keep your vacuum cleaner working efficiently for years to come.
| Benefits of Emptying the Dustbin Regularly |
|——————————————|
|1. Prevents strain on vacuum’s motor |
|2. Avoids damage to vacuum’s filter |
|3. Keeps debris from getting trapped |
How Often Should You Empty Your Smart Vacuum Cleaner’s Dustbin?
Many people wonder how often they should empty their smart vacuum cleaner’s dustbin. The truth is that there is no one-size-fits-all answer to this question. The frequency with which you should empty your vacuum cleaner’s dustbin depends on several factors, including how often you use your vacuum cleaner, the size of your home, and the number of people and pets in your household.
Use Frequency: If you use your smart vacuum cleaner frequently, you may need to empty the dustbin more often. For example, if you have a robot vacuum cleaner that runs daily, you will need to empty its dustbin more often than if you only run your vacuum cleaner once a week.
Household Size: The number of people and pets in your household can also affect how often you should empty your smart vacuum cleaner’s dustbin. The more people and pets, the more dirt and debris your vacuum cleaner will pick up, which means you will need to empty the dustbin more often.
Home Size: The size of your home is another factor to consider. If you have a small apartment or house, you may be able to go longer between emptying the dustbin. However, if you have a large house with multiple rooms and levels, you may need to empty the dustbin more frequently.
As a general rule, it is recommended that you empty your smart vacuum cleaner’s dustbin after every use. This will help prevent clogs and ensure that you are getting the most suction power possible from your vacuum cleaner. Additionally, emptying the dustbin frequently will help prevent odors from developing and keep your home smelling fresh.
It’s important to note that some smart vacuum cleaners come with a full dustbin indicator, which will let you know when it’s time to empty the dustbin. However, even if your vacuum cleaner doesn’t have this feature, you can still use the factors mentioned above to determine how often you should empty the dustbin.
In the end, it’s better to err on the side of caution and empty the dustbin more frequently than less frequently. This will help ensure that your smart vacuum cleaner is working efficiently and effectively every time you use it.
How to Properly Empty Your Smart Vacuum Cleaner’s Dustbin
So, you’ve learned about the importance of emptying your smart vacuum cleaner’s dustbin regularly. Now, it’s time to take the next steps and properly empty the bin to keep your vacuum cleaner working efficiently. Don’t worry if you’re unsure about how to do this – in this section, we’ll provide you with a step-by-step guide to ensure that you empty your vacuum cleaner’s dustbin correctly. Follow along with these easy steps to make sure you’re doing it right.
Step 1: Turn Off the Vacuum Cleaner
Before beginning the process of emptying your smart vacuum cleaner’s dustbin, it is crucial to ensure your safety by turning off the vacuum cleaner. This is a crucial step that must be strictly followed to avoid any potential hazards. The vacuum cleaner’s power button must be pressed and held for a few seconds to turn it off.
Remember: always unplug the vacuum cleaner from the electrical socket before you start cleaning the dustbin, the filter, or any other part of the vacuum. This is an essential safety measure that will prevent electric shocks and other accidents.
Take a moment to pause and make sure the vacuum has completely stopped working before proceeding to the next step. When you’re sure that the vacuum cleaner is safely turned off, you’re ready to proceed with the next steps to empty the dustbin.
Here are a few things you may consider after turning off the vacuum cleaner:
Take a deep breath and relax.
Check that the surface is dry and free from any slips, trips or falls hazards.
Make sure you have a clear workspace to empty and clean the vacuum
By following this step-by-step guide, you will be able to effectively empty your smart vacuum cleaner’s dustbin and improve its performance, thereby keeping your home cleaner and safer.
Step 2: Remove the Dustbin
When it comes to emptying your smart vacuum cleaner dustbin, it’s important to follow the proper steps to avoid any mess or damage to your appliance. Here is a detailed guide on how to safely remove the dustbin from your vacuum cleaner:
Step
Action
Step 1
Before removing the dustbin, make sure the vacuum cleaner is turned off and unplugged to avoid any potential accidents.
Step 2
Locate the dustbin on your vacuum cleaner. Depending on the model, the dustbin may be located at the side or bottom of your appliance. Follow the instructions in your user manual to locate the dustbin properly.
Step 3
Once you locate the dustbin, release the latch or button to detach it from the vacuum cleaner. Make sure to grip the dustbin firmly to avoid any accidental spills or damages.
Step 4
Once you have successfully removed the dustbin, take it to the trash and empty its contents. Some dustbins may have a release button or lever to help you dispose of the dirt and debris easily.
Step 5
After emptying the dustbin, use a cleaning tool or a damp cloth to wipe down the inside of the dustbin to remove any remaining dust or debris.
By properly removing the dustbin from your smart vacuum cleaner, you can avoid accidental spills or damages to your appliance. This step is crucial in ensuring that your vacuum cleaner will continue to work optimally and effectively in cleaning your home.
Step 3: Empty the Dustbin in the Trash
Once you have removed the dustbin from your smart vacuum cleaner in step 2 of the process, it is time to empty its contents into the trash. Follow these simple steps to perform this task effectively:
Step 3:
Empty the Dustbin in the Trash
Task:
Dispose of the dust and debris collected in the dustbin
Equipment/Tools Needed:
A trash can or bin
Instructions:
Carry the dustbin to the trash can or bin.
Hold the dustbin over the trash can or bin.
Use the release button or tab to open the bottom of the dustbin.
Gently shake the dustbin to release the contents into the trash can or bin.
If necessary, use a soft-bristled brush or your hand to remove any remaining debris from the dustbin.
It is important to empty the dustbin regularly to avoid it from overfilling and causing any clogging of the vacuum’s suction power. Remember to dispose of the dust and debris into a sealed trash bag and dispose of it properly.
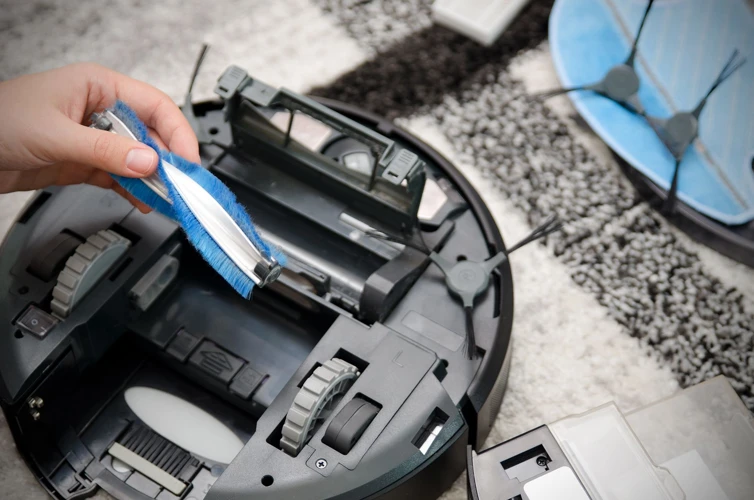
Step 4: Clean the Dustbin and Filter
After emptying the dustbin of your smart vacuum cleaner, it’s important to give it a good cleaning to maintain its efficiency. Here are the steps to properly clean the dustbin and filter:
Step 1: Disassemble the Dustbin and Filter
Remove the filter from the dustbin carefully. Make sure to look for any residue or debris that needs cleaning.
Step 2: Brush off any Large Debris
Using a soft brush, gently brush off any large debris from the dustbin and filter. This will help to remove any stubborn dirt that the vacuum may have missed. Make sure to do this over a trash can to avoid making a mess.
Step 3: Clean the Filter
The filter needs to be cleaned regularly since it traps many fine allergens and dust particles. Depending on the type of filter your vacuum cleaner uses, there are a few ways to clean it. Some filters can be washed with warm water and mild detergent, while others can be tapped gently to release any dirt. Follow the manufacturer’s instructions on how to properly clean the filter to avoid any damages.
Step 4: Wash the Dustbin
Wash the dustbin using warm water and mild detergent. Use a soft sponge to avoid any scratches. Rinse the bin and let it air dry before you reassemble it. Make sure the dustbin is completely dry before you put it back to the vacuum cleaner.
Cleaning your vacuum cleaner’s parts will not only keep it working efficiently but can also improve the air quality in your home. Make sure you clean the dustbin and filter regularly to keep your smart vacuum cleaner running optimally.
Step 5: Reattach the Dustbin
After cleaning the dustbin and filter, it’s time to reattach the dustbin to the vacuum cleaner. This is an important step that should not be overlooked to ensure your smart vacuum cleaner operates effectively.
Step 5: Reattach the Dustbin
Before reattaching the dustbin, make sure it is completely dry. Any moisture left in the dustbin could damage the motor or cause mold to grow. Once the dustbin is dry, follow the steps below to reattach it to your smart vacuum cleaner:
Step
Action
1
Align the dustbin correctly with the vacuum cleaner body.
2
Push the dustbin firmly into place until you hear a click sound. The click sound indicates that the dustbin is securely attached.
3
Double check that the dustbin is properly latched and will not fall off during operation.
4
Turn on your smart vacuum cleaner and make sure it is working properly after reattaching the dustbin.
By following these simple steps, you can ensure that your vacuum cleaner is ready to operate and will continue to clean your home efficiently. Proper maintenance and regular cleaning of your smart vacuum cleaner will help to extend its lifespan and save you money in the long run.
Tips to Keep Your Smart Vacuum Cleaner Working Efficiently
Taking good care of your smart vacuum cleaner is key to ensuring it continues to work efficiently for years to come. While regularly emptying the dustbin is important, there are additional measures you can take to keep your vacuum in tip-top shape. By following these simple tips and tricks, you can ensure your smart vacuum cleaner maintains its suction power and continues to keep your home spick and span.
Empty the Dustbin after Every Use
Regularly emptying the dustbin of your smart vacuum cleaner is crucial for maintaining its efficiency and longevity. To keep your vacuum cleaner in top-notch condition, make sure to empty the dustbin after every use. Here are some tips on why this is important:
Prevents waste buildup: Each time you use your smart vacuum, it picks up dirt, debris, and other small particles that get collected in the dustbin. If you don’t empty the dustbin after each use, these particles can build up and eventually reduce the suction power of your vacuum cleaner.
Keeps your home clean and healthy: A full dustbin not only reduces your vacuum cleaner’s performance but also sends small particles back into your home’s air. This can cause allergy issues and respiratory problems for you and your family, especially if anyone has a sensitive immune system or asthma.
Prevents clogging: A full dustbin can cause clogging in the pathways of your vacuum cleaner, which will then reduce the suction power of your device. Hence, emptying the dustbin after every use will reduce the chances of clogs, thereby keeping your vacuum cleaner functioning optimally.
Keeps your device running efficiently: After your vacuum cleaner has picked up dirt and debris, it’s best to empty the dustbin to ensure that your device’s filter does not get clogged. A clean filter ensures that your vacuum cleaner runs smoothly and efficiently, keeping your home dust and allergen-free.
To ensure proper operation of your smart vacuum cleaner, make sure that you empty the dustbin thoroughly after every use, following the steps mentioned above. With proper maintenance, you can ensure a cleaner and healthier living space and an extended lifespan for your smart vacuum cleaner.
Replace Your Filters on a Regular Basis
One important step in keeping your smart vacuum cleaner working efficiently is to replace the filters on a regular basis. Over time, the filters can become clogged with dust and debris, which can make it harder for the vacuum to suck up dirt and other debris from your floors. To avoid this issue, it’s important to replace your vacuum filters regularly.
Why is it important to replace your vacuum filters?
When your vacuum filters become clogged, they can reduce the suction power of your vacuum cleaner. This means that it will take longer to clean your floors and you may need to run the vacuum multiple times to get the job done. Clogged filters can cause dust and allergens to circulate back into the air, leading to poor indoor air quality.
How often should you replace your vacuum filters?
The frequency with which you need to replace your vacuum filters will depend on the model of your vacuum cleaner and how often you use it. Some manufacturers recommend replacing the filters every two to three months, while others may suggest a shorter or longer interval. Check your vacuum’s user manual or consult the manufacturer’s website to find out the recommended replacement schedule for your specific model.
How to replace your vacuum filters:
Replacing your vacuum filters is usually a simple process that can be done in just a few steps. Here’s what you need to do:
Refer to your vacuum’s user manual or the manufacturer’s website for guidance on how to remove and replace the filters.
Find the location of the filters in your vacuum cleaner. In many models, the filters are located near the dustbin or on the side of the vacuum.
Remove the old filters and discard them in the trash. Be sure to seal them in a plastic bag to prevent the dust and debris from escaping.
Insert the new filters into the vacuum, being careful to align them properly. Some filters may need to be snapped into place or secured with clips.
Restart your vacuum and enjoy the improved suction power and air quality!
By following these steps to replace your vacuum filters regularly, you can help keep your smart vacuum cleaner working efficiently and keep your home clean and healthy.
Remove Tangles from the Brush Roll Regularly
A smart vacuum cleaner’s brush roll, also known as the cleaning head, is responsible for picking up dirt and debris from your floors. Over time, the brush roll can become tangled with hair, string, and other objects, causing it to stop working efficiently. This can lead to a decrease in suction power and an increase in wear and tear on the vacuum cleaner’s motor. To prevent this from happening, it’s important to remove tangles from the brush roll regularly.
Why You Should Remove Tangles from the Brush Roll Regularly
Removing tangles from the brush roll is important for several reasons:
It Keeps Your Vacuum Cleaner Working Efficiently: A brush roll that is tangled with hair and other debris cannot pick up dirt and debris effectively. By removing tangles from the brush roll, you can ensure that your vacuum cleaner is working at its best.
It Extends the Life of Your Vacuum Cleaner: When the brush roll is tangled, it puts extra strain on the vacuum cleaner’s motor, which can cause it to wear out more quickly. By removing tangles from the brush roll, you can help extend the life of your vacuum cleaner.
It Helps Prevent Clogs: Tangles in the brush roll can also lead to clogs in the vacuum cleaner’s hoses and filters. By removing tangles from the brush roll, you can help prevent clogs from forming.
How to Remove Tangles from the Brush Roll
Removing tangles from the brush roll is a simple process that can be done in just a few steps:
Step 1:
Turn off the vacuum cleaner and unplug it from the wall.
Step 2:
Flip the vacuum cleaner over so that you can access the brush roll. Most smart vacuum cleaners have a button or latch that allows you to easily remove the brush roll.
Step 3:
Cut away any hair or string that is tangled around the brush roll. Be careful not to damage the bristles on the brush roll.
Step 4:
Use scissors or a seam ripper to carefully cut away any hair or string that is wrapped around the brush roll. Be sure to cut away the tangle in small sections to avoid damaging the bristles.
Step 5:
Once you have removed all of the tangles, replace the brush roll and secure it in place.
How Often Should You Remove Tangles from the Brush Roll?
The frequency with which you should remove tangles from the brush roll depends on several factors, including how often you use your vacuum cleaner and the length of the hair of any pets in your home. As a general rule, it’s a good idea to check the brush roll for tangles every 2-3 uses. If you have pets with long hair, you may need to remove tangles more often.
By following these simple steps and routinely removing tangles from the brush roll of your smart vacuum cleaner, you can help ensure that your vacuum cleaner is working efficiently and effectively to keep your home clean.
Clean the Sensors and Wheels Frequently
When it comes to keeping your smart vacuum cleaner working efficiently, cleaning the sensors and wheels is an important step that shouldn’t be overlooked. Over time, these components can become clogged or dirty, which can affect the vacuum’s performance. Here are some tips on how to clean them properly:
Clean the sensors: The sensors on your smart vacuum cleaner are designed to help it navigate around your home without getting stuck or running into things. However, if these sensors become dirty or dusty, they may not work properly. To clean them, use a microfiber cloth or a soft-bristled brush to gently wipe away any dirt or debris. Make sure to be careful when cleaning the sensors, as they can be delicate.
Clean the wheels: The wheels on your smart vacuum cleaner are responsible for helping it move around your home. Over time, these wheels can become clogged with dirt, hair, and other debris, which can cause them to work less efficiently. To clean them, use a pair of scissors or a small brush to remove any tangled hair or debris. You can also use a damp cloth to wipe away any dirt or grime that may have accumulated on the wheels.
Check for damage: While you’re cleaning the sensors and wheels, it’s also a good idea to check for any signs of damage. Look for cracks, chips, or other signs of wear and tear. If you notice any damage, it’s best to have your smart vacuum cleaner serviced by a professional.
By taking the time to clean the sensors and wheels on your smart vacuum cleaner on a regular basis, you can help ensure that it continues to work efficiently and effectively. This can also help extend the life of your vacuum, saving you money in the long run. So, make sure to add this step to your regular vacuum cleaning routine!
Conclusion
In conclusion, it is essential to empty your smart vacuum cleaner’s dustbin regularly to maintain its cleaning efficiency and prolong its lifespan. Neglecting to do so can result in clogs, reduced suction power, and a less clean living environment.
Remember, emptying the dustbin after each use and cleaning the filters frequently will keep your vacuum running efficiently. Don’t forget to remove any tangles from the brush roll and clean the sensors and wheels to prevent any damage. These simple steps are necessary to get the most out of your smart vacuum cleaner and extend its functionality.
Moreover, technological advancements in the world of vacuum cleaners have made it easier for people to automate their cleaning routines. But it is not always wise to rely solely on technology; regular maintenance is still essential for optimal performance.
In conclusion, cleaning your smart vacuum cleaner’s dustbin is just one of many steps necessary to maintain a clean and hygienic living environment. Don’t forget to keep these steps in mind to keep your smart vacuum cleaner working efficiently and effectively, saving you time and money in the long run.
Frequently Asked Questions
1. Can I empty my smart vacuum cleaner dustbin in any trash can?
It is best to empty your dustbin in a regular trash can, away from areas where you prepare or consume food.
2. What happens if I don’t empty my smart vacuum cleaner’s dustbin regularly?
If you don’t empty your dustbin regularly, it can lead to clogs, decreased suction power, and damage to your vacuum cleaner.
3. How often should I replace the filters in my smart vacuum cleaner?
It is recommended to replace the filters in your smart vacuum cleaner every 2-3 months or as recommended by the manufacturer.
4. Can I wash the filter of my smart vacuum cleaner?
It depends on the type of filter in your vacuum cleaner. Some filters can be washed, while others need to be replaced. Refer to your manufacturer’s instructions to determine if your filter is washable.
5. What should I do if my smart vacuum cleaner is not picking up debris efficiently?
You should check the dustbin and filter, and remove any clogs or debris. Also, check for tangles in the brush roll and clean the sensors and wheels.
6. Can I use my smart vacuum cleaner on all types of flooring?
Most smart vacuum cleaners can be used on various types of flooring, including carpet, hardwood, and tile. However, always refer to your manufacturer’s instructions to ensure your specific vacuum cleaner is suitable for your flooring.
7. How long does it take to empty the dustbin of a smart vacuum cleaner?
Emptying the dustbin of a smart vacuum cleaner usually takes less than 1 minute.
8. How do I know if the dustbin of my smart vacuum cleaner is full?
Most smart vacuum cleaners have a sensor that indicates when the dustbin is full. Additionally, you may notice a decrease in suction power or an increase in noise level.
9. Do smart vacuum cleaners have different dustbin capacities?
Yes, smart vacuum cleaners have different dustbin capacities. Refer to your manufacturer’s instructions to determine the capacity of your vacuum cleaner dustbin.
10. Can I use my smart vacuum cleaner without its dustbin?
No, you should never attempt to use your smart vacuum cleaner without its dustbin. The dustbin is vital in collecting dirt and debris, and the vacuum cleaner will not function correctly without it.