Warning: A non-numeric value encountered in /var/www/html/wp-content/themes/generatepress/inc/structure/post-meta.php on line 165
by Dwight Gibson
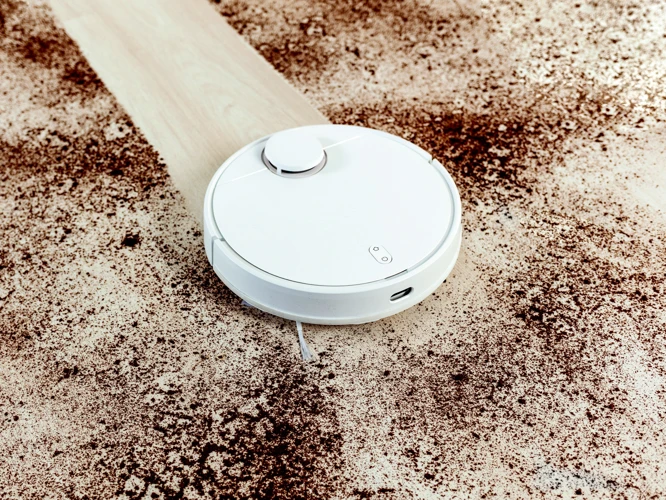
Maintaining the cleanliness of your home can sometimes be an arduous chore, but with the emergence of smart technology, mundane tasks like vacuuming can be done efficiently and conveniently. However, just like any ordinary vacuum cleaner, smart vacuums require periodic emptying to function effectively. If you’re new to using a smart vacuum cleaner or if you’re unsure of the proper way to empty its dustbin, don’t fret. We’ve got you covered with this step-by-step guide, which will make the process a breeze. Follow along as we guide you through the necessary steps to empty your smart vacuum cleaner’s dustbin and keep your home free of dust, dirt, and debris.
Table of Contents
Step 1: Turn off the Vacuum Cleaner
As exciting as it may be to get started with emptying your smart vacuum cleaner’s dustbin, it’s crucial to ensure that the vacuum cleaner is turned off first to prevent any potential accidents. To avoid any electric shock or damage, make sure to follow these simple steps to turn off your smart vacuum cleaner before emptying its dustbin. By doing so, you’ll not only guarantee your safety but also enhance the performance and longevity of your vacuum cleaner. For more tips on smart vacuum cleaner maintenance, check out our Smart Vacuum Dos and Don’ts guide.
Unplug the Vacuum Cleaner
Before beginning the process of emptying your smart vacuum cleaner’s dustbin, you must first unplug the vacuum cleaner to ensure your safety. This step is crucial as it can prevent accidents from happening while you are handling the appliance. Unplugging the vacuum cleaner ensures that it won’t accidentally turn on while you are emptying the dustbin.
To do this, simply locate the power cord connected to the vacuum cleaner and unplug it from the wall socket. Make sure that the cord is not tangled or in a position where it might trip you. Ensure that the vacuum cleaner is turned completely off to avoid electric shock when unplugging it. This will also help to conserve energy and add to the longevity of the appliance.
It’s important to note that you should never attempt to unplug the vacuum cleaner by pulling on the cord directly as this can result in electrical or mechanical damage. Instead, hold onto the plug itself and pull it out of the socket.
Once you’ve unplugged your smart vacuum cleaner, you can move on to the next step in the process of emptying the dustbin. Don’t forget to check the dustbin regularly to ensure that it doesn’t become too full. If the dustbin is full, your vacuum cleaner may not perform at its best. For more tips and troubleshooting solutions related to smart vacuum cleaner dustbins, check out our article dedicated to dustbin troubleshooting.
Press the Power Button
Once you’ve unplugged the smart vacuum cleaner, the next step is to turn it off completely. Find the power button, which is typically located near the top of the device, and press it firmly. This will ensure that the vacuum cleaner is completely powered off and won’t accidentally turn on while you’re emptying the dustbin.
It’s important to note that if you try to remove the dustbin without turning off the vacuum first, you run the risk of injuring yourself. The vacuum’s motor can still be running, which can result in accidents, so be sure to follow this step carefully.
If you’re not sure where the power button is located, consult your vacuum cleaner’s user manual for guidance. It’s always a good idea to familiarize yourself with the different parts of the vacuum before using it, so you can avoid any mishaps.
By turning off the power, you can safely move on to the next step in the process, which is locating the dustbin and removing it. For tips and tricks on how to properly clean and maintain your smart vacuum cleaner’s dustbin, check out our Smart Vacuum Dustbin Cleaning Hacks article.
Step 2: Locate the Dustbin & Remove It
As your smart vacuum cleaner goes about its work, it collects dust and debris that gets deposited into its dustbin. Over time, this dustbin can fill up and reduce the effectiveness of your smart vacuum cleaner. In this step of the guide, we will show you how to locate the dustbin on your smart vacuum cleaner and remove it properly so that you can empty it out and keep your cleaner working at its best. If you’re experiencing reduced suction or your smart vacuum cleaner is indicating that its dustbin is full, it’s a good time to empty it out. Following these steps will prevent messes and help maintain your vacuum’s longevity. So let’s get started!
Once you are ready to empty the smart vacuum cleaner’s dustbin, your next task is to find the dustbin release button. This vital button is usually located on the side or back of the vacuum cleaner. It’s important to refer to your vacuum’s manual to locate the specific release button.
Not all models have the same location, and finding the right button can save you from damaging your equipment. It might be frustrating to locate this button, especially if you’re new to using a smart vacuum cleaner, but once you have it, removing the dustbin becomes a breeze.
Here is a helpful table with some common dustbin release button locations for various smart vacuum cleaner brands:
Brand
Location of Dustbin Release Button
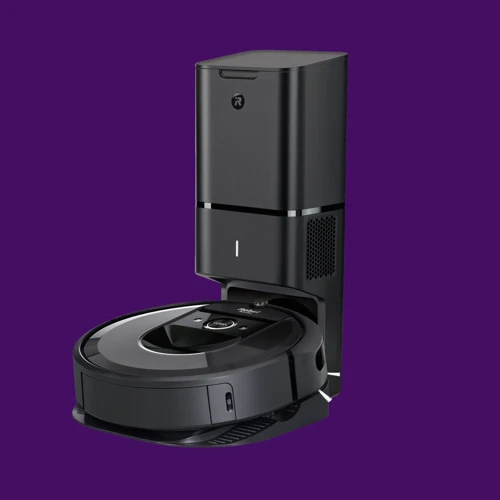
iRobot Roomba
On top of the robot’s body, near the handle or at the back
Eufy Robovac
On the back of the vacuum cleaner
Shark Ion Robot
On the back of the vacuum cleaner, near the handle
Xiaomi Mi Robot
On the top of the robot, near the “Clean” button
Remember, finding the dustbin release button is crucial for safe dustbin removal and to prevent any damage to your smart vacuum cleaner. Once you have located the button, remove the dustbin following the manufacturer’s instructions, which usually involves pressing the release button while pulling the dustbin out.
If you feel that the dustbin is still relatively empty, visit our guide on how to tell when your smart vacuum cleaner’s dustbin is full. Keeping an eye on the dustbin and emptying it regularly will help to maintain the efficiency of your smart vacuum cleaner.
Take Out the Dustbin
When it comes to emptying the dustbin of your smart vacuum cleaner, the process is not too different from that of a traditional vacuum cleaner. However, certain steps are unique to smart vacuums.
Step 2: Locate and Remove the Dustbin
First, locate the dustbin release button on your smart vacuum cleaner. This is usually located on the side or top of the device. Press the button and carefully remove the dustbin from the device. Be careful not to spill the collected dirt and debris.
To ensure proper cleaning of the dustbin, it’s best to take it out and clean it away from any surfaces that may get dirty. This also allows you to get to any hard to reach areas of the dustbin.
If you need more guidance on emptying a smart vacuum cleaner’s dustbin, check out this step-by-step guide. You can also learn more about the benefits of smart vacuums and cleaning their dustbins in this informative article about smart vs traditional vacuums.
Step 3: Open the Dustbin
As you proceed with your smart vacuum cleaner’s dustbin emptying, the next step is to open the dustbin. This is where all the collected dirt and debris are carefully kept. To avoid damaging the device or spilling the contents, you need to take it slow and steady. By following these simple steps, you can open the dustbin smoothly without any complications. Once you have opened the dustbin, you’ll be ready to begin removing the dirt inside. Make sure to read our guide for cleaning your smart vacuum cleaner’s dustbin for more tips on how to keep your vacuum cleaner functioning efficiently.
Find the Dustbin Opening Latch or Button
When it comes to emptying your smart vacuum cleaner’s dustbin, the next step after removing it is to open the dustbin. You need to find the dustbin opening latch or button, which is usually located on the back of the dustbin or at the top of the vacuum cleaner. Refer to your vacuum cleaner’s manual if you’re not sure where to find it.
Once you’ve located the dustbin opening latch or button, it’s time to open the dustbin. This is where you need to be careful not to spill the dirt. Use one hand to hold the dustbin steady while using the other hand to open the latch or press the button.
It’s important to note that different models of smart vacuum cleaners may have different types of latches or buttons for opening the dustbin. Below is a table that summarizes some of the most common types of dustbin openings and how to operate them.
Type of Dustbin Opening
How to Operate
Push Button
Press the button to release the latch and open the dustbin
Slide Latch
Slide the latch to the side to release it and open the dustbin
Press and Pull Latch
Press the latch down while pulling it towards you to release it and open the dustbin
Twist Off Cap
Twist the cap off in a counterclockwise motion to remove it and open the dustbin
No matter what type of dustbin opening your smart vacuum cleaner has, make sure to operate it gently and carefully to avoid spilling any dirt or debris.
Be Careful Not to Spill the Dirt
When opening the dustbin, it’s important to proceed with caution to avoid the risk of spilling the accumulated dirt and debris. Here are some tips to help you empty the dustbin without making a mess:
Slow and Steady: Take your time when opening the dustbin latch or button to prevent the dust from flying out. Carefully move the latch or button while cradling the dustbin with your other hand.
Tilt Gently: If possible, tilt the dustbin slightly downwards over a trash can when emptying it. Use a gentle but firm movement to shake off the debris into the trash.
Avoid Overfilling: Make sure you don’t let the dustbin fill up to its maximum capacity. This will help you prevent spills and make the cleaning process much easier.
Use a Cloth: For larger spills, use a damp cloth to wipe the dustbin and the surrounding areas clean. Avoid using harsh chemicals that could damage the dustbin or affect its suction power.
By following these simple steps, you can empty the dustbin safely and efficiently without creating more work for yourself. Remember, a clean and well-maintained vacuum cleaner will keep your home free from dirt and allergens and help you breathe easy.
Step 4: Empty the Dustbin
Now that you’ve successfully opened the dustbin, it’s time to complete the task at hand and empty it. This step may seem simple, but there are things to keep in mind to ensure you don’t create an even bigger mess. Follow these instructions carefully to make the process smooth and easy. Let’s get started!
Remove Large Debris by Hand
When it comes to emptying the dustbin of a smart vacuum cleaner, it’s important to be thorough in the cleaning process to ensure it continues working efficiently. One of the crucial steps in this process is removing large debris from the dustbin by hand. This may include dirt, hair, or other small items that the vacuum has picked up during cleaning. Here’s how to do it:
Open the dustbin: Begin by locating the dustbin release button and removing the dustbin from the vacuum cleaner (as discussed in step 2).
Inspect the contents: Take a look inside the dustbin to get an idea of the size and type of debris you will be dealing with. For larger items, such as chunks of dirt or pet hair, you will need to remove them by hand.
Protect your hands: Before touching any debris, it’s important to put on gloves or protective hand coverings. This will help prevent any germs or bacteria from getting on your hands.
Remove the debris: Use your hands to remove any large debris from the dustbin. Be sure to do this in a slow and steady manner, taking care not to damage the inside of the bin or the vacuum itself. You may also want to use a brush or other tool to help loosen any stubborn debris.
Dispose of the debris: Once you have removed all the large debris from the dustbin, it’s time to dispose of it properly. This may include throwing it in the garbage or compost bin, depending on the type of debris.
By following these steps, you can ensure that the dustbin of your smart vacuum cleaner is thoroughly cleaned and ready for the next use. Remember that cleaning the dustbin regularly is an important part of maintaining your vacuum cleaner and ensuring that it continues working effectively.
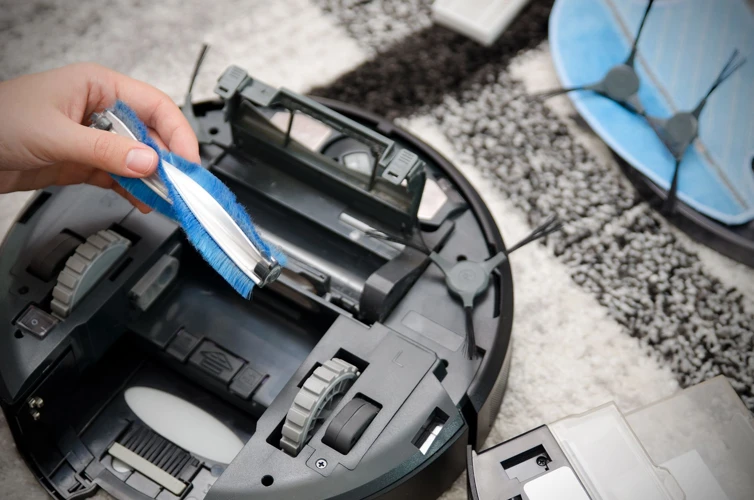
Use a Brush or Cloth for Fine Dust
While removing the large debris by hand can be effective, it’s important to note that there may still be fine dust particles in the dustbin that cannot be easily removed with your fingers alone. To tackle these finer particles, you can use a brush or cloth.
Here’s how to do it:
Choose a soft-bristled brush or lint-free cloth that won’t scratch the dustbin.
Use the brush or cloth to gently wipe away any remaining dust or debris from the walls and corners of the dustbin. Be sure to get into all the crevices, as these areas tend to collect fine dust.
If the dustbin is particularly dirty, you can dampen your cloth slightly with water or a mild cleaning solution. Just make sure to wring out the cloth thoroughly so that it’s only slightly damp – you don’t want to get the dustbin too wet and risk damaging the vacuum cleaner.
Continue wiping until the inside of the dustbin looks clean and free of dust and debris.
By using a brush or cloth, you can ensure that all the dust and debris is removed from the dustbin, leaving it clean and ready for the next use. Just be careful not to scratch or damage the dustbin during the cleaning process, and make sure that all the dust and debris is properly disposed of before reattaching the dustbin to the vacuum cleaner.
Step 5: Clean the Dustbin
Now that you have emptied the dustbin of your smart vacuum cleaner, it is important to give it a thorough cleaning. Neglecting this step can cause the vacuum’s suction power to weaken and lead to unpleasant odours. So, grab a few supplies and follow these instructions to get your dustbin sparkling clean and smelling fresh. Let’s dive in!
Wash the Dustbin with Water
After emptying the dustbin, it’s important to give it a good wash to ensure all the dirt and debris is completely gone. Follow these steps to give your smart vacuum cleaner’s dustbin a deep clean:
Remove any remaining debris: Before washing the dustbin, make sure you have removed any remaining debris. You can use a brush or cloth for this step.
Fill the sink with water: Once you have removed any remaining debris, fill a sink with warm water. Make sure the water is not too hot as it can cause damage to the dustbin.
Add soap: Add a small amount of soap or detergent to the water. This will help to break down any stubborn dirt or grime.
Wash the dustbin: Place the dustbin in the sink and use a sponge or cloth to wash the inside and outside of the dustbin. Focus on any areas that have stubborn dirt or grime. Be sure to clean the edges and corners of the dustbin, as these areas can be prone to dirt buildup.
Rinse well: Rinse the dustbin thoroughly with water to remove any soap or detergent residue.
Dry: Once the dustbin has been washed and rinsed, dry it with a clean towel or leave it to air dry completely.
Remember, washing the dustbin is an important step in keeping your smart vacuum cleaner working effectively. Make sure to clean your dustbin after every use or as often as necessary, especially if you have pets or a particularly dusty household.
Let It Air Dry
After washing your smart vacuum cleaner’s dustbin, it is important to let it air dry completely to avoid any moisture build-up that can damage the vacuum’s internal components. Here are some key points to keep in mind while letting it dry:
Step:
Action:
Step 1
Shake off excess water: Once you’re done washing the dustbin, firmly shake it to remove any excess water that’s still in it.
Step 2
Place it in a well-ventilated area: Find a place that is well-ventilated, dry, and away from direct sunlight. This can be a room with a ceiling fan or an area with good cross-ventilation.
Step 3
Avoid using a dryer: Do not use any type of dryer, heat or blow dryer, to dry the dustbin as this can damage the plastic and void the warranty.
Step 4
Patience is key: Air-drying the dustbin may take time, but it is important to wait until it is completely dry before re-assembling the vacuum cleaner.
Following these steps guarantees that your smart vacuum cleaner’s dustbin is clean, dry, and ready to be re-installed. This will ensure the longevity of your smart vacuum cleaner and guarantee its high-performance suction.
Step 6: Reattach the Dustbin
One of the most important steps in emptying a smart vacuum cleaner’s dustbin is to carefully reattach it. Failure to do so can lead to messy spills and ineffective cleaning. So, make sure to follow these simple yet crucial steps to properly reattach the dustbin to your vacuum cleaner.
Replace the Dustbin into the Vacuum Cleaner
Replacing the dustbin into the vacuum cleaner is a crucial step in the process of emptying a smart vacuum cleaner’s dustbin. It is important to ensure that the dustbin is properly reattached to avoid any potential leaks or malfunctions during the next cleaning cycle.
To replace the dustbin into the vacuum cleaner, follow these steps:
Step 1:
Hold the dustbin with both hands.
Step 2:
Align the dustbin with the slot inside the vacuum cleaner where it was removed.
Step 3:
Push the dustbin in firmly until you hear a click or feel it snap into place.
Step 4:
Check to make sure the dustbin is securely attached to the vacuum cleaner by gently lifting it up and down.
It is important to note that if the dustbin is not properly aligned or attached, it may not click into place, and the vacuum cleaner may not function properly. In such a case, repeat the steps above until you hear a click or feel the dustbin snap into place.
By following this step-by-step guide, you can rest assured that you have properly emptied and reattached the dustbin of your smart vacuum cleaner. With regular maintenance and cleaning, your smart vacuum cleaner is sure to provide you with a cleaner and more comfortable home environment.
Make Sure It Clicks into Place
It’s crucial to ensure that the dustbin is securely reattached into the vacuum cleaner before using it. Failure to do so may result in a loss of suction and poor cleaning performance. Here’s how to make sure it clicks into place:
Step
Description
1
Align the Dustbin: Ensure that the dustbin is properly aligned with the vacuum cleaner’s body. The dustbin should fit snugly into its slot.
2
Push the Dustbin: Once the dustbin is properly aligned, apply firm pressure and push it back into place until you hear a click. The click is an indication that the dustbin has been securely locked in place.
3
Check for Wobbling: After clicking the dustbin back into place, check to ensure whether it’s firmly held. If it wobbles, it means the dustbin is not correctly attached, and you should remove it and try again.
While reattaching the dustbin, be gentle, so you don’t cause any damages. It would help if you also avoided using too much force as you may break the dustbin or damage the vacuum cleaner body. Once you’re sure that the dustbin is well secured, you can turn on the vacuum cleaner and continue cleaning your home.
Step 7: Turn on the Vacuum Cleaner
It’s finally time to put your smart vacuum cleaner back to work! After you have meticulously emptied and cleaned the dustbin, it’s time to turn the vacuum back on and let it do its thing. But before you do, remember to follow these important final steps to ensure that the vacuum cleaner is working effectively and efficiently. So, gather your vacuum cleaner and plug it in, and let’s power it back on!
Plug in the Vacuum Cleaner
When it comes to plugging in your smart vacuum cleaner, it’s essential to make sure that you’re using the right power source. Before plugging in the vacuum cleaner, check that the cord is free of cuts and abrasions.
To avoid tripping and injuring yourself, make sure that the power source is far away from the area you will be cleaning. Once you’ve found an appropriate place to plug in the vacuum cleaner, firmly insert the electrical plug into the outlet. You’ll hear a faint click sound when it’s secure.
Note: Always make sure to unplug the vacuum cleaner before cleaning or performing maintenance tasks.
If your vacuum cleaner has a rechargeable battery, make sure it’s fully charged before using it. Some models come with a dock where you can place the vacuum to charge.
Caution: Never charge the vacuum cleaner near water or in a wet area. Doing so can cause a short circuit or damage to the vacuum cleaner.
Double-check that the vacuum cleaner is properly connected to the power source before using it. Once you’ve confirmed that it’s plugged in securely, you can now turn on the vacuum cleaner and start cleaning your home.
Tip: If you notice any issues with the vacuum cleaner or if it fails to turn on, unplug it immediately and consult the user manual for troubleshooting tips.
Press the Power Button to Turn It On
To turn on the vacuum cleaner, you need to press the power button. The power button is usually located on the handle or the body of the vacuum cleaner. Here are the steps to turn on the vacuum cleaner:
Step 1: Locate the power button on the vacuum cleaner.
Step 2: Make sure the vacuum cleaner is plugged into an electrical outlet.
Step 3: Press the power button firmly to turn it on.
Step 4: Wait for the vacuum cleaner to start up and the suction to kick in.
Step 5: Once the vacuum cleaner is on, you can start using it to clean your floors and carpets.
Remember to always turn off the vacuum cleaner before emptying the dustbin. This will prevent any accidents or injuries that could occur while handling the dustbin.
Conclusion
After following these simple steps, your smart vacuum cleaner will be ready to pick up dirt and debris once again. Remember to always turn off and unplug the vacuum cleaner before attempting to empty the dustbin, as recommended by the manufacturer.
Proper cleaning and maintenance of your smart vacuum cleaner can help prolong its lifespan and ensure maximum efficiency. Regularly emptying the dustbin and cleaning it thoroughly will prevent clogging and keep your vacuum cleaner running smoothly.
If you have pets or carpets, you may need to empty the dustbin more frequently to prevent blockages caused by hair or dust buildup. You can also use a vacuum cleaner with a larger dustbin if you have a particularly dusty or high-traffic area to clean.
Don’t forget to properly dispose of the dirt and debris from the dustbin after emptying it. You can simply dump it into a trash can, but be sure to recycle any items that can be recycled.
In conclusion, by following these simple steps, you can easily empty your smart vacuum cleaner’s dustbin and keep it functioning at its best. With regular maintenance and proper care, your vacuum cleaner can help keep your floors clean and dust-free.
Frequently Asked Questions
How often should I empty my smart vacuum cleaner’s dustbin?
It’s best to empty your smart vacuum cleaner’s dustbin after every use to ensure peak performance and prevent clogs.
What should I do if the dustbin is difficult to remove?
Check the manufacturer’s instructions for guidance on how to properly remove the dustbin. If it still won’t budge, contact customer support.
Can I wash the dustbin with soap?
It is recommended to only use water when washing the dustbin to avoid damaging any sensors or electronics.
Can I use a vacuum cleaner to clean the dustbin?
No, using a vacuum cleaner may cause damage to the dustbin sensors and electronics. It’s best to only use water and a cloth to clean the dustbin.
How do I know if the dustbin is full?
Your smart vacuum cleaner may have an indicator light that tells you when the dustbin is full. If not, you may need to manually check the dustbin after each use.
Can I reuse the dustbin filter?
It’s best to follow the manufacturer’s instructions on when to replace the dustbin filter. Reusing a dirty filter may decrease the suction and overall performance of the vacuum cleaner.
What is the best way to remove pet hair from the dustbin?
Use a brush or vacuum to remove any pet hair from the dustbin. You can also rinse it with water to help remove any remaining hair.
Can I use cleaning products on the dustbin?
It’s not recommended to use cleaning products on the dustbin since they may contain harsh chemicals that can damage the sensors or electronics.
What should I do if the dustbin won’t click into place?
Make sure the dustbin is properly aligned with the vacuum cleaner and try again. If it still won’t click into place, contact customer support.
How can I prevent debris from building up in the dustbin?
Emptying the dustbin after every use and regularly cleaning it with water can help prevent debris from building up and clogging the vacuum cleaner.