Are you tired of your smart vacuum cleaner stopping mid-cleaning because of a dead battery? Knowing how to properly check the battery life of your vacuum can help prevent these interruptions and prolong the life of your device. But with so many different models on the market, you may be unsure of where to start. Fear not! In this article, we’ll guide you through the steps of checking your smart vacuum’s battery life and provide tips to help you keep your vacuum running smoothly. Say goodbye to interrupted cleanings and hello to a well-maintained, long-lasting smart vacuum!
Why Check Your Smart Vacuum’s Battery Life?
It’s important to be aware of your smart vacuum’s battery life to prevent cleaning interruptions and extend its overall performance. A dead battery in the middle of a cleaning cycle could cause frustration and wasted time, and a degraded battery could require replacement earlier than expected. In this section, we’ll explore reasons why you should check your smart vacuum’s battery life and provide tips to prolong its lifespan. Don’t miss the valuable information we have for you!
Prevent Interruptions During Cleaning
When you’re in the middle of cleaning your home with your smart vacuum, the last thing you want is for it to suddenly stop working due to a dead battery. It’s important to regularly check the battery life of your device. Doing so can prevent interruptions during cleaning and save you time and effort.
Imagine having to stop your cleaning mid-session just because your smart vacuum’s battery was running low. It’s frustrating and time-consuming to re-charge and wait for it to have enough battery to finish the cleaning. However, if you make a habit of checking the battery life of your smart vacuum regularly, you can avoid this inconvenience. As cleaning professionals say, “a stitch in time saves nine.”
Checking your smart vacuum’s battery life can inform you of potential problems before they occur. Checking the battery is also important because it can prevent your smart vacuum from being forced to shut down suddenly due to a loss of power. This can help protect your device’s overall health and save you money from costly repairs.
Not only does regular checking of the battery life prevent interruptions, but it also prolongs the battery life of your device. Checking the battery life of your smart vacuum can help you detect the early signs of battery degradation, such as reduced suction power, increased noise, or a shorter battery life. Knowing this early can allow you to take preventive measures like cleaning your filter, changing your battery or updating the firmware for better performance.
Checking the battery life of your smart vacuum is crucial for uninterrupted cleaning and long-term health of the device. Remember, prevention is always better than cure.
Lastly, you can learn more about other relevant battery topics for your smart vacuum by checking out our smart vacuum cleaner battery troubleshooting guide.
Prolong Battery Life
One of the most important things you can do for your smart vacuum is to prolong its battery life. This ensures it is available when you need it and can clean your home effectively for longer periods of time. Here are some tips you can follow to help extend the lifespan of your smart vacuum’s battery:
| Tips to Prolong Your Smart Vacuum’s Battery Life |
|---|
| 1. Clean Your Vacuum’s Filter |
| 2. Clean the Brush Rollers |
| 3. Use the Right Cleaning Mode |
| 4. Keep Your Vacuum Charged |
| 5. Avoid Overcharging and Undercharging |
Regularly cleaning your vacuum’s filter and brush rollers can help prevent clogs and maintain optimal suction power, which reduces the strain on the battery. Also, be sure to use the right cleaning mode for the surface you’re cleaning. For example, using the highest power setting on hardwood floors could drain your battery faster than necessary.
To ensure your smart vacuum is always ready to go, it’s important to keep it charged. Make sure to avoid overcharging and undercharging, as this can shorten the lifespan of your battery.
By following these tips, you can help maintain the performance and prolong the battery life of your smart vacuum. For more information on the importance of checking your smart vacuum’s battery life, check out our article on the importance of checking the battery life of a smart vacuum cleaner.
How to Check Your Smart Vacuum’s Battery Life
Ensuring that your smart vacuum cleaner is always ready to clean when you need it requires checking its battery life regularly. Knowing how much battery life is left will help you avoid interruptions during cleaning and prolong the lifespan of your vacuum’s battery. In this section, we will guide you through the steps to properly check your smart vacuum’s battery life, so you can avoid unexpected downtime and maintain your vacuum’s peak performance. By following these steps, you can save time and effort, and keep your floors consistently clean.
Step 1: Check the Battery Indicator Light
When it comes to checking your smart vacuum’s battery life, the easiest and quickest method is to check the battery indicator light. This is usually located somewhere on the vacuum, either at the top or on the side. Checking the battery indicator light is an essential step in maintaining your smart vacuum’s battery life, and it’s crucial to know when it is time to recharge or replace the battery.
Here is a table that summarizes the different battery indicator light colors and what they mean:
| Battery Indicator Light Color | What it Means |
|---|---|
| Green | The battery is fully charged and ready to go. |
| Red | The battery is running low and needs to be recharged soon. |
| Blinking Red | The battery is critically low and needs to be recharged immediately. |
| No Light | The battery is either depleted or disconnected, and it needs to be recharged or checked to resolve the issue. |
It’s crucial to pay attention to the battery indicator light to prevent interruptions during cleaning and prolong battery life. If you notice that the battery is running low, it’s best to recharge it as soon as possible to avoid damaging the battery or reducing its overall lifespan.
In some cases, the battery indicator light might not be completely accurate, especially if your vacuum has an older battery. In this case, it’s important to also conduct a battery test run and check the app or built-in display to get a more accurate reading of the battery life.
If you’re unsure how to replace a battery or want to learn more about prolonging your smart vacuum’s battery life, check out these links: /top-signs-smart-vacuum-battery-replacement/, /lithium-ion-vs-nimh-batteries-for-smart-vacuums/, /charging-cycles-battery-runtime-smart-vacuums/, /smart-vacuum-battery-degradation-prevention/, and /battery-life-smart-vacuum-performance/.
Step 2: Check the App or Built-in Display
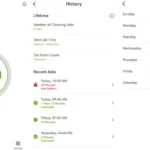
Your smart vacuum cleaner might come with an app that you can install on your smartphone or tablet. This app allows you to control your vacuum cleaner, and it can also provide you with information about the vacuum cleaner’s battery life.
To check the battery life using the app, follow these steps:
- Step 1: Connect your smart vacuum cleaner to the app using Wi-Fi or Bluetooth.
- Step 2: Launch the app on your smartphone or tablet.
- Step 3: Look for the battery status icon or option in the app’s interface.
- Step 4: Check the battery percentage or the estimated battery life remaining.
If your smart vacuum cleaner doesn’t come with an app, it might have a built-in display that shows you the battery life status. To check the battery life using the display, follow these steps:
- Step 1: Turn on your smart vacuum cleaner.
- Step 2: Locate the built-in display on the vacuum cleaner. It might be on the body or on the handle of the vacuum cleaner.
- Step 3: Look for the battery indicator on the display. It might be a battery icon, a percentage indicator or a time indicator.
- Step 4: Check the battery level or the remaining battery life.
Checking your smart vacuum cleaner’s battery life using the app or built-in display is an easy and quick way to ensure that you have enough battery life to finish cleaning your home. It’s important to check the battery life regularly to prevent interruptions during cleaning and also to prolong the battery life.
Step 3: Conduct a Battery Test Run
Now that you have checked the battery indicator light and consulted the app or built-in display, it’s time to conduct a battery test run to determine the actual running time of your smart vacuum cleaner. This step will require you to have some free time and a stopwatch or timer.
To perform a battery test run, follow these steps:
| Step | Action |
|---|---|
| 1 | Fully charge your smart vacuum cleaner |
| 2 | Reset the timer or stopwatch on your phone or other device |
| 3 | Put your smart vacuum cleaner in the cleaning mode you typically use the most |
| 4 | Start the timer or stopwatch |
| 5 | Let your smart vacuum cleaner clean your space until the battery is completely drained |
| 6 | Stop the timer or stopwatch |
| 7 | Record the exact time that the battery lasted |
Once you have recorded the battery life time, compare it to the manufacturer’s stated running time for your smart vacuum cleaner. If it falls well below the expected running time, it may be time to replace your battery.
Conducting a battery test run is an effective way to know exactly how much running time you have left before your smart vacuum cleaner needs to be recharged. Not only will it give you a better idea of the vacuum’s overall battery life, but it will also help you better plan for cleaning sessions and schedule regular maintenance to get the most out of your device.
Tips to Prolong Your Smart Vacuum’s Battery Life
Maintaining your smart vacuum’s battery life is essential if you want it to operate efficiently for an extended period of time. With regular use, your vacuum’s battery performance can decrease over time, leading to shorter cleaning times and slower suction power. To avoid such issues, it’s crucial to know how to prolong your vacuum’s battery life. In this section, we’ll explore some strategies that will help you extend the battery life of your smart vacuum cleaner. These techniques are simple to follow and won’t take too much elaboration. So, let’s dive in and discover the various ways to keep your vacuum’s battery in excellent condition.
Clean Your Vacuum’s Filter
One of the most important things you can do to prolong the life of your smart vacuum cleaner and ensure its battery performs optimally is to clean its filter regularly. A clogged filter can cause the motor to work harder, draining the battery more quickly and putting unnecessary strain on the machine.
Here are some steps to follow when cleaning your smart vacuum’s filter:
| Step | Action |
|---|---|
| Step 1 | First, make sure your vacuum is turned off and unplugged. |
| Step 2 | Locate the filter compartment. Depending on the make and model of your vacuum, this may be located on the side or bottom of the machine. |
| Step 3 | Remove the filter from the compartment. Some filters may be washable and reusable, while others need to be replaced periodically. |
| Step 4 | Clean the filter by gently tapping it over a trash can or sink to dislodge any loose dirt and debris. |
| Step 5 | For washable filters, rinse it under running water until it runs clear. Be sure to squeeze out any excess water before reinserting it into the vacuum. |
| Step 6 | For non-washable filters, replace it with a new one according to the manufacturer’s instructions. |
| Step 7 | Reinsert the filter back into the compartment, making sure it is securely in place before using the vacuum again. |
Remember, a clean filter not only helps your smart vacuum’s battery perform better, but it also improves the machine’s overall suction power and cleaning ability. In addition to cleaning the filter, you should also regularly clean the brush rollers to ensure they are free from hair and debris. This will reduce strain on the motor and extend the life of your vacuum, allowing it to continue to help keep your home clean for years to come.
Clean the Brush Rollers
One important step to take in order to prolong the life of your smart vacuum cleaner’s battery is to ensure that the brush rollers are kept clean at all times. Dirty brush rollers make the vacuum work harder than it needs to, which can drain the battery faster than necessary. In order to properly clean the brush rollers, you can follow these steps:
| Step | Action |
|---|---|
| Step 1: | Turn off your vacuum cleaner and unplug it from the power source to ensure your safety when cleaning the brush rollers. |
| Step 2: | Lift your vacuum cleaner’s cover and remove the brush roller to inspect it closely. |
| Step 3: | Use a comb or brush to remove any tangled hair, debris or dust from the brush roller. For stubborn dirt, you may need to use a pair of scissors or tweezers to pull it out. |
| Step 4: | Wipe down the brush roller with a damp cloth to remove any remaining dust or dirt. |
| Step 5: | Check that the brush roller is properly aligned and reinsert it back into the vacuum cleaner. |
| Step 6: | Secure the cover back onto your vacuum cleaner. |
By taking these steps to clean your vacuum cleaner’s brush rollers, you can help to improve its efficiency and prolong its battery life. Make sure to clean the brush rollers on a regular basis to ensure that they remain free of debris and dust.
Use the Right Cleaning Mode
Cleaning mode is an important component that determines the battery life of your smart vacuum cleaner. By choosing the right cleaning mode, you can not only achieve a deep cleaning but can also conserve battery power. Choosing the wrong mode may lead to excessive battery drain and may shorten the lifespan of the battery.
Here are the different cleaning modes of a smart vacuum cleaner and how it affects the battery life:
| Cleaning Mode | Battery Life Impact |
|---|---|
| Auto | Normal battery usage, but might take longer to clean larger surfaces. |
| Eco | Conserves battery life by decreasing suction power, suitable for light cleaning or regular maintenance. |
| Max | Maximizes suction power for deep cleaning, at the expense of significantly shorter battery life. |
As you can see, choosing the right cleaning mode for your cleaning needs is crucial to prolong battery life. For regular maintenance or light cleaning, using the Eco mode can help save battery power. It is recommended to use the Auto mode for larger surfaces, as it can provide normal battery usage and a thorough clean.
However, for a deeper clean or tougher dirt, the Max mode can do wonders, but keep in mind that it drains the battery much faster. It should only be used when necessary, such as when cleaning high-traffic areas or preparing for a special event.
Understanding the right cleaning mode to use in every situation is an essential step to prolonging your smart vacuum’s battery life.
Keep Your Vacuum Charged
One of the most important things you can do to prolong the life of your smart vacuum cleaner’s battery is to keep it charged. Here’s how you can do it:
- Charge After Use: It’s important to charge your smart vacuum after each use to ensure that the battery is fully charged the next time you need to use it. This will also help to prevent the battery from running down completely, which can shorten its overall lifespan.
- Use the Right Charging Cable: Make sure you use the charging cable that came with your smart vacuum to ensure that it’s getting the right amount of power. Using the wrong cable can cause the battery to charge too quickly or too slowly, which can damage the battery and reduce its overall lifespan.
- Store Your Vacuum Near an Outlet: If you keep your smart vacuum near an outlet, you’ll be able to plug it in and start charging it right away. This can help ensure that it’s always ready to use when you need it.
- Set Up a Charging Station: If you have multiple smart devices that need to be charged regularly, consider setting up a charging station with a power strip and multiple outlets. This can help you keep everything organized and ensure that all of your devices are fully charged when you need them.
- Consider a Smart Charging System: Some smart vacuums come with a smart charging system that automatically charges the battery when it’s running low. This can be a great feature if you’re forgetful or don’t want to worry about manually charging your vacuum.
By following these simple tips, you can ensure that your smart vacuum cleaner’s battery is always fully charged and ready to use. Remember, a fully charged battery not only ensures uninterrupted cleaning but also prolongs the battery’s overall lifespan, saving you money in the long run.
Avoid Overcharging and Undercharging
To ensure your smart vacuum’s battery lasts as long as possible, it’s essential to avoid overcharging and undercharging the battery. Here are some helpful tips to follow:
- Avoid Overcharging: Overcharging can damage the battery and drastically reduce its lifespan. Make sure to unplug your vacuum once it’s fully charged. If you’re not sure when that is, refer to the user manual for guidance.
- Avoid Undercharging: Undercharging your vacuum’s battery can also have a negative impact on its lifespan. Make sure to charge your vacuum regularly, and don’t let the battery run down completely before charging again.
- Follow Charging Instructions: Always follow the manufacturer’s instructions when it comes to charging your smart vacuum. Charging times and methods can vary depending on the model, so it’s important to read the user manual carefully.
- Don’t Interrupt Charging: Interrupting the charging process can also damage the battery. Once you start charging your vacuum, make sure to leave it plugged in until it’s fully charged.
- Don’t Overuse the Battery: While it’s important to keep your vacuum charged, it’s also important not to overuse the battery. Running your vacuum continuously for long periods can drain the battery quickly, which can also reduce its lifespan.
By following these simple tips, you can help prolong the life of your smart vacuum’s battery and ensure it continues to operate effectively. Additionally, it can help you avoid unnecessary expenses in replacing the battery or the vacuum altogether.
Conclusion
In conclusion, checking the battery life of your smart vacuum cleaner is crucial for uninterrupted cleaning sessions and prolonging the battery’s lifespan. By following the simple steps outlined in this article, you can easily check your smart vacuum’s battery life, from checking the battery indicator light to conducting a battery test run.
Remember to also take care of your vacuum’s maintenance, such as cleaning the filter and brush rollers, and using the right cleaning mode to not strain the battery unnecessarily. Keep your vacuum charged as well, but ensure that you’re not overcharging or undercharging the battery for optimal performance.
Investing in a smart vacuum cleaner is a smart choice for modern households, and taking care of its battery life will ensure it serves you for years to come. So be sure to follow these tips and tricks to maximize your smart vacuum’s potential and keep your home clean effortlessly.
Frequently Asked Questions
1. How often should I check my smart vacuum’s battery life?
You should check your smart vacuum’s battery life before every cleaning session. This will help prevent interruptions and ensure optimal performance.
2. What happens if I don’t check my smart vacuum’s battery life?
If you don’t check your smart vacuum’s battery life, you may experience unexpected interruptions during cleaning. Additionally, not monitoring your battery could lead to reduced battery life and the need for costly replacements.
3. Can I overcharge my smart vacuum?
Yes, overcharging your smart vacuum can damage the battery and reduce its lifespan. It’s important to monitor the battery and unplug the device once it’s fully charged.
4. How do I know when my smart vacuum is fully charged?
You can tell when your smart vacuum is fully charged by checking the battery indicator light or the app/built-in display. Additionally, many smart vacuums will automatically stop charging once the battery is full.
5. What should I do if my smart vacuum’s battery life seems low?
If your smart vacuum’s battery life seems low, try cleaning the filter and brush rollers to improve performance. You can also switch to a low-power setting or charge the device for a longer period of time.
6. How long does it take to charge a smart vacuum?
The charging time for a smart vacuum can vary depending on the manufacturer and model, but most devices take between 2-4 hours to fully charge.
7. Can I replace the battery in my smart vacuum?
Some smart vacuums have replaceable batteries, but not all. Check with the manufacturer to see if your device’s battery can be replaced.
8. How can I tell if my smart vacuum’s battery is damaged?
If your smart vacuum’s battery is damaged, you may notice reduced suction power or shorter battery life. Additionally, the battery may take longer to charge or not hold a charge at all.
9. What is the best way to store my smart vacuum when not in use?
The best way to store your smart vacuum when not in use is to keep it in a cool, dry place and ensure that the battery is not fully depleted or fully charged.
10. Can I use my smart vacuum while it’s charging?
While some smart vacuums can be used while they’re charging, this is not recommended as it can lead to reduced battery life and increased wear and tear on the device. It’s best to allow the device to fully charge before use.

