When it comes to keeping your home clean, a smart vacuum cleaner is an excellent choice. However, like any other device that’s powered by a battery, smart vacuum cleaners can experience issues with charging and power. Troubleshooting these issues can be frustrating, especially if you’re not sure where to start. That’s why we’ve put together this step-by-step guide to help you troubleshoot battery issues in your smart vacuum cleaner. From checking for power and charging to resetting the device and troubleshooting smart features, we’ve got you covered. So, let’s dive in and get your smart vacuum cleaner working as it should!
Step 1: Check Power and Charging
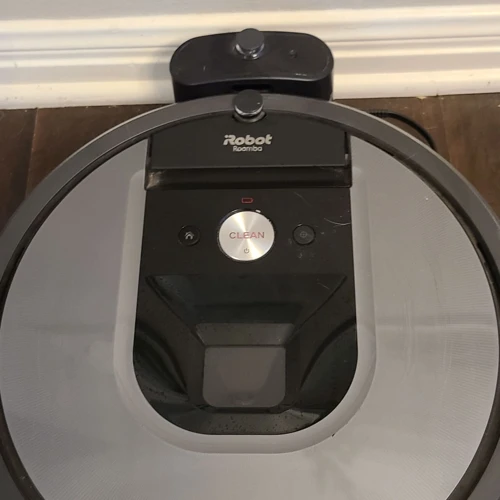
Upon discovering that your smart vacuum cleaner isn’t functioning as intended, it’s important to realize that troubleshooting starts with the basics. The first step involves checking the device’s power and charging system. Not having enough power or a faulty charging system can hinder the vacuum’s performance. In this section, we will dive deep into the process of properly checking the power and charging of your smart vacuum cleaner. It’s important to note that proper maintenance of your vacuum’s battery is essential. For more information on the importance of checking your battery, read our article on the importance of checking your smart vacuum’s battery.
Check Power Outlet
When troubleshooting a smart vacuum’s battery issue, it’s essential to check the power outlet first. A faulty power outlet could be the culprit for the vacuum’s battery not charging or powering on. Here are some steps to check the power outlet:
- Step 1: Check if the power outlet is working by plugging in another device. If the device powers on, then the power outlet is working correctly.
- Step 2: Check if the power outlet is compatible with the smart vacuum’s charging base. Some charging bases have a higher voltage requirement, and if the power outlet doesn’t meet the requirements, the battery may not charge or power on. Refer to the user manual for specific charging requirements for the smart vacuum.
- Step 3: Check if the power outlet is loose or worn out. A loose or worn-out power outlet can cause the charging cord to disconnect, which prevents the battery from charging. If the power outlet is loose or worn out, consider replacing it.
Checking the power outlet is a crucial first step in troubleshooting battery issues in smart vacuum cleaners. If there are no issues with the power outlet, consider checking the charging base and charging cord, as these could also contribute to battery problems. For more information on smart vacuum batteries, refer to our article on Smart Vacuum Battery Check.
Check Charging Base
When troubleshooting battery issues in your smart vacuum cleaner, it’s important to check the charging base. Here are some steps to follow:
- Check for power: Ensure that the charging base is plugged in and receiving power. You can test this by plugging in another device and seeing if it charges. If the outlet is functioning correctly, move onto the next step.
- Inspect the charging contacts: Dirty or damaged charging contacts can prevent your smart vacuum cleaner’s battery from charging properly. Check the charging contacts on both the docking station and the vacuum itself for any signs of damage or dirt buildup. Clean them with a dry cloth or a cotton swab if necessary.
- Check the LED indicators: Most smart vacuum cleaners have LED indicators on the charging base to show the current charging status. If these are not lighting up, there may be an issue with the charging base.
- Verify compatibility: Make sure that the charging base you’re using is the correct one for your vacuum cleaner model. Using an incompatible charging base can cause your vacuum’s battery to degrade faster or not charge at all.
By following these steps, you can identify and resolve any issues with the charging base that may be affecting your smart vacuum cleaner’s battery life. For more information on how to extend the lifespan of your smart vacuum’s battery, check out our article on smart vacuum battery degradation prevention.
Check Charging Cord
When troubleshooting battery issues in smart vacuum cleaners, you should also check the charging cord. A faulty charging cord can prevent the device from charging properly and therefore shorten the battery life. This step is especially important if you’ve already checked the power outlet and the charging base, but the vacuum cleaner still won’t charge.
Here are the steps to check the charging cord:
| Steps: | Actions: |
|---|---|
| Step 1: | Unplug the charging cord from both the vacuum cleaner and the power outlet. |
| Step 2: | Inspect the charging cord for any visible signs of damage, such as frayed wires or bent prongs. |
| Step 3: | If you notice any damage, replace the charging cord with a new one. |
| Step 4: | If there is no visible damage, use a multimeter to check the charging cord’s voltage output. The recommended voltage output should be listed in your vacuum cleaner’s user manual. |
| Step 5: | If the voltage output is below the recommended level, the charging cord is faulty and needs to be replaced. If the voltage output is above the recommended level, the issue may be with the vacuum cleaner’s charging port, and you should contact the manufacturer for assistance. |
If the charging cord is faulty, you can purchase a replacement cord from the manufacturer or a third-party retailer. When looking for a replacement, be sure to choose a cord that’s compatible with your smart vacuum cleaner model.
For more information about battery life and runtime for smart vacuums, check out our article on charging cycles and battery runtime. Additionally, read our article on lithium-ion vs. NiMH batteries to learn which battery type is best for your vacuum cleaner’s performance.
Step 2: Reset the Device
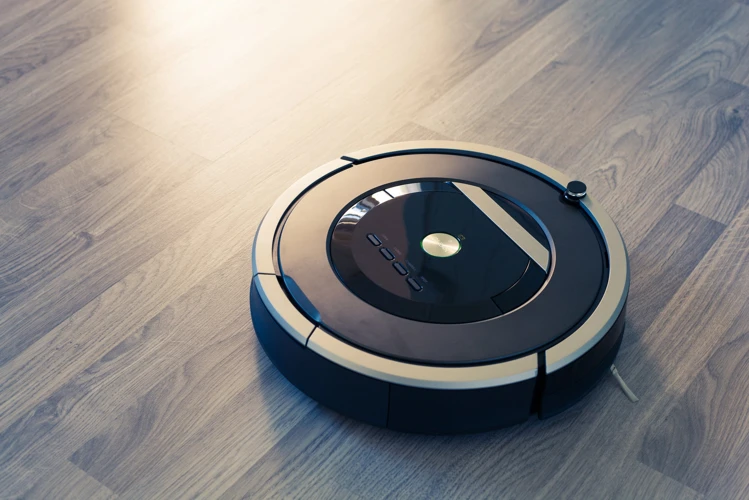
When your smart vacuum cleaner starts acting up, the first thing you should try is resetting the device. This is because sometimes, the device gets stuck and may need a reset to start working again. Also, a reset could help fix any minor software issues that may be affecting the performance of your device.
Here are the steps to reset your smart vacuum cleaner:
1. Turn off your vacuum cleaner by pressing and holding the power button for about 5 seconds.
2. Once the device is off, unplug it from the power source.
3. Wait for about 30 seconds before plugging the device back in.
4. Turn the device back on by pressing the power button.
It is important to note that the reset process may vary depending on the manufacturer and model of your vacuum cleaner. It is essential to refer to the user manual for specific instructions on how to reset your device.
If resetting your device doesn’t resolve the issue, you may need to consider replacing the battery. Sometimes, the battery may be the root cause of the problem, especially if the vacuum cleaner is old.
Before replacing your battery, consider the following:
• Check if your device is showing any top signs that the battery needs replacement.
• Confirm that the battery is responsible for the issue you are experiencing by checking if the vacuum cleaner performs better when plugged in. If it does, then it is likely that your battery needs to be replaced.
• Note that the battery life of a smart vacuum cleaner can affect the performance of the device. It is essential to know your device’s battery and take proper care of it to prolong its lifespan.
Resetting your smart vacuum cleaner is a simple and effective way to troubleshoot any minor issues affecting the device. If resetting the device doesn’t work, then you may need to consider replacing the battery to restore the performance of your smart vacuum cleaner.
Step 3: Check and Replace Battery
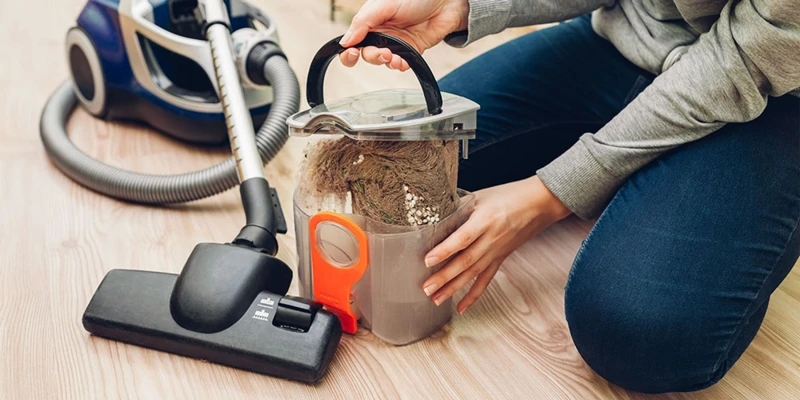
One of the common causes of battery issues in smart vacuum cleaners is a faulty battery. If you have already checked the power and charging components, it’s time to move to the next step of troubleshooting. In this stage, we will explore how to check and replace the battery of your smart vacuum cleaner. With detailed steps and guidance provided below, you’ll be able to identify the problem and get your device up and running again in no time.
Identify Battery Type
One of the first steps to troubleshooting battery issues in smart vacuum cleaners is to identify the type of battery the device uses. This is important because different types of batteries require different replacement and maintenance procedures. Here are some common types of batteries found in smart vacuum cleaners:
- Lithium-ion batteries: These batteries have become increasingly popular in recent years due to their high energy density and low self-discharge rate. They are typically lightweight and long-lasting, making them an ideal choice for portable devices like smart vacuum cleaners.
- Nickel-cadmium batteries: These batteries have been around for decades and are an affordable option for many devices. However, they are less efficient and have a higher self-discharge rate compared to lithium-ion batteries.
- Nickel-metal hydride batteries: These batteries are a step up from nickel-cadmium batteries and are slightly more efficient. However, they still have a higher self-discharge rate than lithium-ion batteries.
- Lead-acid batteries: These batteries are commonly used in larger appliances like cars and boats. They are heavy and require regular maintenance, but they are also the most affordable option.
Identifying the type of battery your smart vacuum cleaner uses is typically done by consulting the user manual or contacting the manufacturer. Once you know the type of battery, you can begin troubleshooting specific issues that may be affecting its performance.
Remove the Battery
Removing the battery from your smart vacuum cleaner may seem daunting, but with the right steps, it can be done easily. Here is a step-by-step guide on how to remove the battery:
- Turn Off the Device: Before removing the battery, make sure that the vacuum cleaner is turned off and unplugged from the charging base to avoid any accidental electrical shock.
- Locate the Battery: The battery is usually located at the back of the device. Look for any buttons, tabs or latches that are securing the battery in place. Depending on the brand and type of vacuum cleaner you have, the battery might be hidden underneath a cover or secured with screws.
- Remove the Cover or Screws: If the battery is hidden under a cover, gently slide the cover off or use a screwdriver to remove any screws holding it in place.
- Disconnect the Battery: Once you have access to the battery, carefully disconnect any cables or connectors that are attached to it. Some batteries snap in and out of place, while others may require unscrewing connections.
- Remove the Battery: Once the cables or connectors are removed, gently slide or pull out the battery. Be careful not to damage any wires or components during the process.
It is important to remove the battery only when it is necessary for troubleshooting or replacement. Remember to handle the battery gently and store it in a cool, dry place away from direct sunlight or water.
Clean Battery Contacts
To clean the battery contacts of your smart vacuum cleaner, you will need a few tools such as a soft cloth and rubbing alcohol. Follow these steps to clean the contacts:
- 1. Turn off the vacuum cleaner and unplug it from the charger.
- 2. Remove the battery from the device.
- 3. Using a soft cloth or cotton swab, gently wipe the battery contacts to remove any dirt and debris. Note: Be careful not to use any abrasive materials that could damage the contacts.
- 4. If the contacts are heavily soiled, use rubbing alcohol to clean them. Dampen a cloth or cotton swab with a small amount of rubbing alcohol and gently wipe the contacts. Allow the contacts to dry completely before reinserting the battery into the device.
- 5. Inspect the battery contacts for any signs of corrosion or damage. If the contacts are corroded or damaged, do not attempt to clean them yourself. Instead, seek assistance from a professional technician or contact the manufacturer for advice.
- 6. Once the contacts are clean and dry, reinsert the battery into the device.
- 7. Turn on the vacuum cleaner and charge the battery as needed.
By cleaning the battery contacts of your smart vacuum cleaner, you can help ensure that the battery is able to deliver optimal performance and longevity. Plan to clean the contacts regularly to prevent buildup of dust and dirt.
Replace the Battery
Replacing the battery is the final step in addressing battery issues in your smart vacuum cleaner. Follow these simple steps to replace the battery and restore your device’s performance:
- Identify the correct battery type: Make sure that the replacement battery you purchase matches the exact make and model of your device. Check the user manual or contact the manufacturer if you’re unsure about the battery type.
- Remove the old battery: Most smart vacuum cleaners feature an easily accessible battery compartment. Remove the old battery from its slot carefully, ensuring that you don’t damage any of the surrounding circuitry.
- Clean the battery contacts: Over time, dirt and debris can accumulate on the battery contacts, affecting the device’s ability to charge and discharge properly. Use a soft cloth or cotton swab to clean the contacts before installing the new battery.
- Insert the new battery: Carefully insert the new battery in the compartment and ensure that it is firmly seated in place.
- Power up the device: Once you’ve replaced the battery, it’s time to test the device. Reassemble the vacuum cleaner and turn it on, making sure that it powers up and runs without any problems.
Keep in mind that replacing the battery on your own can void the device’s warranty. If your vacuum cleaner is still under warranty or you’re unsure of your ability to replace the battery, contact the manufacturer or a qualified technician for assistance.
Step 4: Troubleshoot Smart Features
As smart technology continues to become more prevalent in our homes, it’s no surprise that many vacuum cleaners are now equipped with smart features. While these features can make cleaning more convenient, they can also lead to additional issues when troubleshooting battery problems. In this step, we will discuss how to troubleshoot the smart features of your vacuum cleaner, including resetting app connections and checking for firmware updates to get your device back on track.
Reset App Connection
One common issue that a smart vacuum cleaner may encounter is a faulty app connection. This can be frustrating for users who rely on the app to control and monitor their device. If you’re experiencing this problem, don’t worry. There are some simple steps you can take to troubleshoot this issue and get your smart vacuum cleaner back to working properly.
Resetting the App Connection:
The first step in troubleshooting a faulty app connection is to reset the connection between your device and the app. Here’s how to do it:
| Step | Description |
|---|---|
| Step 1 | Open the app and navigate to the settings menu |
| Step 2 | Locate the “Reset Connection” option |
| Step 3 | Tap “Reset Connection” and confirm |
| Step 4 | Wait for the app to reconnect to the device |
Other Troubleshooting Tips:
If resetting the app connection doesn’t solve the issue, there are some additional troubleshooting steps you can try:
- Make sure your device is connected to the same Wi-Fi network as your phone or tablet
- Restart both your device and your phone or tablet
- Update the app to the latest version
- Uninstall and reinstall the app
These tips can help ensure a smooth and stable connection between your smart vacuum cleaner and the app. By following these steps, you should be able to troubleshoot any app connection issues and get your device back to working properly.
Check for Firmware Updates
Is your smart vacuum cleaner not performing up to par? In addition to checking power, charging, and the battery, it’s essential to check for firmware updates. Firmware updates can improve the device’s performance, making it run smoother and more efficiently.
To check for firmware updates, follow these steps:
- First, identify the brand and model of your vacuum cleaner.
- Go to the manufacturer’s website and navigate to the support section.
- Find the firmware section and look for the latest updates.
- If there is an update available, download it to your computer.
- Connect your vacuum cleaner to your computer using a USB cable.
- Transfer the firmware update to your device, following the manufacturer’s instructions.
Note: It’s imperative to follow the manufacturer’s instructions when updating firmware. Failing to do so can result in damaging your device. Make sure to have a full battery charge when performing firmware updates.
Keep in mind that firmware updates may not solve all issues with your smart vacuum cleaner. If you’re still experiencing issues after updating the firmware, continue with the other troubleshooting steps listed in this article.
Conclusion
In conclusion, troubleshooting battery issues in smart vacuum cleaners can undoubtedly be a daunting task, but it’s always worth the effort. To ensure efficient and optimal performance, it is imperative to identify the specific problem and follow the necessary steps to fix it.
By checking the power and charging sources and resetting the device, you can rule out the possibility of a simple fix. It’s also important to identify the battery type, remove and clean the battery contacts, and replace the battery if necessary. Additionally, smart features like app connections and firmware updates should be checked and reset or updated accordingly.
Overall, the key to troubleshooting these battery issues is to remain calm, methodical, and patient. With the right steps and a little bit of effort, you can save yourself time and money and get your smart vacuum cleaner back to optimal performance. Remember, regular maintenance and care can help prevent battery issues in the first place, so don’t forget to keep your device clean and charged on a regular basis.
Frequently Asked Questions
What are some common battery issues with smart vacuum cleaners?
Some common battery issues include failure to charge, shorter battery life, difficulty holding a charge, and the vacuum cleaner suddenly shutting off.
What should I do if my smart vacuum cleaner is not charging?
Check the power outlet, charging base, and charging cord for any issues. Try resetting the device and replacing the battery if needed.
How do I reset my smart vacuum cleaner?
Usually, holding down the power button for 10-15 seconds will reset the device. Alternatively, check the user manual for specific instructions.
How do I check what type of battery my smart vacuum cleaner has?
Refer to the user manual or contact the manufacturer for information on the type of battery used in your vacuum cleaner.
How can I clean the battery contacts on my smart vacuum cleaner?
Use a small amount of rubbing alcohol or vinegar on a cotton swab to gently clean the contacts. Be sure to let them dry completely before using the vacuum cleaner again.
Can I replace the battery in my smart vacuum cleaner?
It depends on the model and manufacturer. Check the user manual or contact the manufacturer to see if the battery can be replaced and how to do it.
Why are the smart features on my vacuum cleaner not working?
There could be a variety of reasons, including a lost internet connection, outdated firmware, or app malfunction. Try resetting the app connection and checking for any available firmware updates.
How do I reset the app connection for my smart vacuum cleaner?
Usually, deleting and reinstalling the app or resetting the device will reset the app connection. Refer to the user manual or contact the manufacturer for specific instructions.
How often should I replace the battery in my smart vacuum cleaner?
It depends on the frequency of use and the specific battery type. Check the user manual or contact the manufacturer for guidelines on when to replace the battery.
What should I do if my smart vacuum cleaner is still experiencing issues after troubleshooting?
If the above steps do not resolve the issue, contact the manufacturer for further assistance or consider taking the vacuum cleaner to a professional for repair.

