How to Troubleshoot Common Issues with Smart Vacuums with Automatic Dirt Disposal
Warning: A non-numeric value encountered in /var/www/html/wp-content/themes/generatepress/inc/structure/post-meta.php on line 165
by Dwight Gibson
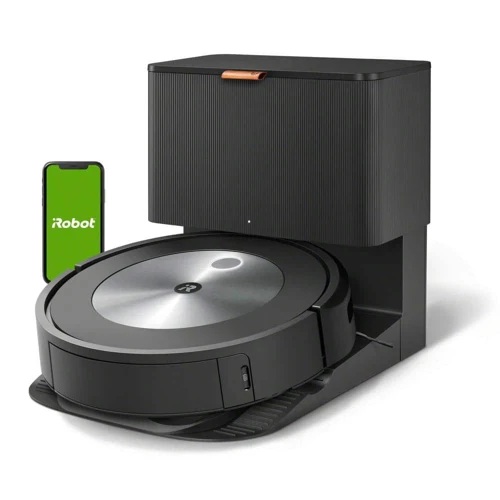
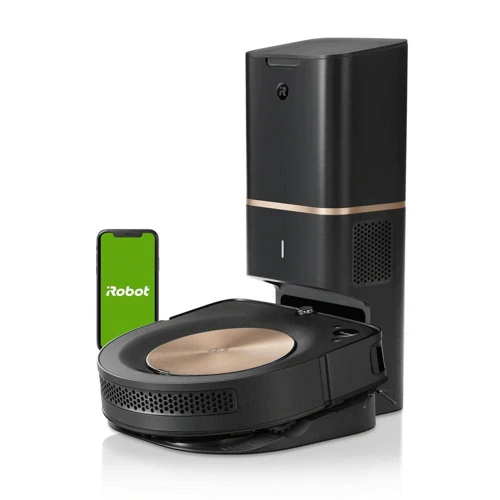
As technological advancements continue to shape our everyday lives, smart vacuums with automatic dirt disposal have become a popular choice for homeowners seeking a convenient way to keep their floors clean. However, with any technology, issues can arise that can leave users feeling perplexed and frustrated. In this article, we’ll tackle the most common issues with smart vacuums with automatic dirt disposal and provide step-by-step troubleshooting tips to help you get the most out of your investment. So sit back, relax, and let’s dive into the world of smart vacuums.
Table of Contents
Common issues with smart vacuums with automatic dirt disposal
Maintaining a smart vacuum with automatic dirt disposal is convenient, but it’s not always flawless. You may run into a few hiccups along the way, and this is where the troubleshooting comes in. You may notice a few things, such as the vacuum not picking up dirt, or the dirt bin indicator showing full despite being empty. Additionally, you may also encounter clogging or debris buildup issues, which can affect proper vacuuming. In this section, we’ll cover some of the most common issues with smart vacuums with automatic dirt disposal and what you can do to remedy them.
1. Vacuums not picking up debris
One of the most common issues that smart vacuum owners face is when their vacuums stop picking up debris. This can be frustrating, especially since the whole purpose of a vacuum is to clean the floors. If you’re facing this issue, don’t worry, there are a few things you can do to troubleshoot it.
Here are some steps to follow:
Check if the brush roll is spinning. If it’s not, check if it’s tangled with hair or debris. Gently remove the brush and clean it to ensure it’s rotating freely.
Make sure the vacuum’s suction power is set to maximum. Reduce it to a lower setting if it’s too high for the surface you’re cleaning. For example, high power on a bare floor can cause particles to scatter instead of being picked up.
Check the vacuum’s air filter. A dirty air filter can reduce the suction power of a vacuum. Replace it or clean it based on the manufacturer’s instructions.
Inspect the dustbin or dirt cup to see if it’s full. You might need to empty it for the vacuum to continue cleaning. Make sure you’re emptying the bin properly to avoid further issues.
Inspect the vacuum hose for clogs. Use a long object like a broom handle or a straightened hanger to remove the blockage if you find any.
Check the robotic vacuum’s sensors. Ensure they’re not faulty, and if they are, troubleshoot by cleaning the dirt or debris from the sensor. You can follow this guide for more information.
Following these steps should help to fix your vacuum if it has stopped picking up debris. Remember, regular maintenance will help to avoid such problems in the future; you can find more information about the benefits of smart vacuum maintenance here. Additionally, keeping an eye on important components like filters, brushes, and dustbins can help keep your vacuum in top condition. Clean the brushes using this guide to ensure they’re free of tangled hair and thread. Also, check if the filter is clean, and learn more about cleaning or replacing air filters in your smart vacuum for optimal performance. Don’t forget to empty the dustbin regularly; learn how to do it here.
2. Dirt bin full indication despite empty bin
It can be frustrating to see the “dirt bin full” indication on your smart vacuum when you know it is empty. However, this is a common issue that can happen with smart vacuums with automatic dirt disposal systems. There are a few reasons why this may be happening:
1. Sensor malfunction: The sensors that detect the amount of dirt in the bin may be malfunctioning, causing the vacuum to think that the bin is full when it’s actually empty.
2. Dirty sensors: The sensors may be dirty or covered in debris, which can interfere with their ability to accurately detect the dirt level in the bin.
3. Blocked air path: Sometimes, a blocked air path can force dirt and debris to accumulate in the sensors or the bin, causing the vacuum to wrongly indicate that the bin is full.
If you’re experiencing this issue, there are a few steps you can take to troubleshoot and fix it:
Step 1: Check the sensors and make sure they’re clean and functioning properly. You may need to refer to your vacuum’s user manual to locate the sensors and learn how to clean them.
Step 2: Inspect the air path and remove any clogs or blockages that may be interfering with the sensors or the bin. This includes checking the hoses, brushes, rollers, and any other areas where dirt and debris might accumulate.
Step 3: Restart your vacuum and see if the issue is resolved. If the vacuum still indicates that the bin is full despite being empty, you may need to contact customer service for further assistance.
To prevent this issue from happening in the future, it’s important to regularly clean and maintain your smart vacuum with automatic dirt disposal. This includes emptying the bin regularly, using high-quality filters and cleaning solutions, and inspecting the vacuum periodically. For more tips on maintaining and accessorizing your smart vacuum, visit our page on top smart vacuum accessories or read about the benefits of bagless vs. bagged smart vacuum disposal.
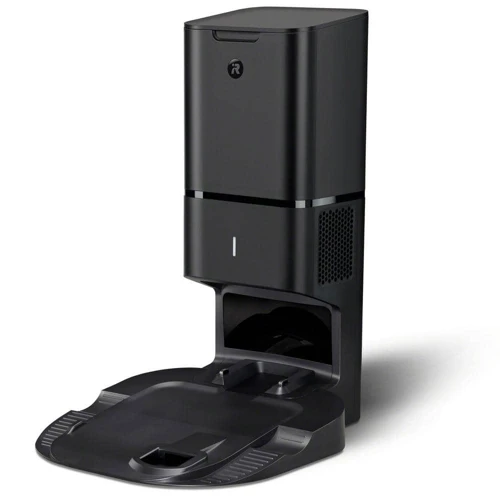
3. Clogging or debris buildup in the automatic dirt disposal system
One of the most common issues with smart vacuums that have an automatic dirt disposal system is clogging or debris buildup in the disposal system. This can lead to poor suction and overall cleaning performance.
The disposal system is an integral part of these smart vacuums that helps to keep the debris contained and easy to dispose of. However, if it gets clogged or has debris buildup, it can cause the vacuum to stop working altogether.
To address this issue, you need to identify where the clog or buildup is located in the disposal system. Refer to the user manual for the specific location of the disposal system for your vacuum model. Once you’ve identified the location, use the following steps to clear the clog or buildup:
Steps
Details
Step 1: Power off the vacuum
Make sure you unplug the vacuum and turn off the power to prevent any accidents from occurring during the cleaning process.
Step 2: Locate the clog or buildup
Look for the location of the clog or buildup in the disposal system. Some models may have a clear window, so it’s easy to see where the clog or buildup is located. Otherwise, you may need to remove the disposal system cover to get a better look.
Step 3: Use a tool to remove the clog or buildup
Use a specialized tool or small brush to gently remove the clog or buildup. Be careful not to damage any of the sensitive parts of the vacuum. You could also use compressed air to dislodge any debris.
Step 4: Reassemble the disposal system
Once you’ve cleared the clog or buildup, reassemble the disposal system cover and ensure it’s locked securely in place.
Step 5: Test the vacuum
Power on the vacuum and test it out to ensure it’s working properly. Check the suction power and quality of cleaning to verify that the clog or buildup has been fully cleared.
It’s recommended that you regularly check the disposal system for any signs of clogs or debris buildup. This will help to keep your smart vacuum running smoothly and prevent any issues from occurring in the first place.
How to troubleshoot smart vacuum issues with automatic dirt disposal
When your smart vacuum with automatic dirt disposal starts malfunctioning, it can be frustrating and perplexing. Luckily, there are several methods to troubleshoot the issue and get it back in tip-top shape. By following these simple steps, you can easily identify and solve common problems with your smart vacuum, so you can keep your home clean and healthy. Let’s dive into some effective troubleshooting techniques that will help you resolve the issues with your smart vacuum.
1. Check the sensors
When troubleshooting issues with your smart vacuum with automatic dirt disposal, one important place to start is by checking the sensors. The sensors on your vacuum may become dirty or damaged over time, which can cause issues with the vacuum’s functioning. Here are the steps to check the sensors:
Step
Instructions
Step 1
Locate the sensors on the vacuum. The exact location may vary depending on the model. Refer to your vacuum’s manual if you’re not sure where to find them.
Step 2
Use a soft, dry cloth to gently clean the sensors. Dirt or debris buildup on the sensors can cause issues with the vacuum’s functioning.
Step 3
Inspect the sensors for any signs of damage or wear. If you notice any damage, contact the manufacturer for assistance.
Step 4
After cleaning and inspecting the sensors, run a test cycle on your smart vacuum to see if the issue has been resolved.
Checking the sensors is a simple but important step in troubleshooting issues with your smart vacuum with automatic dirt disposal. If the sensors are dirty or damaged, it can cause issues with the vacuum’s navigation and overall functioning. By regularly cleaning the sensors and inspecting them for any signs of wear and tear, you can ensure that your vacuum continues to work effectively and efficiently.
2. Inspect and clean brushes and rollers
Inspecting and cleaning the brushes and rollers is an essential step in troubleshooting smart vacuums with automatic dirt disposal. Over time, these vital components can become clogged or tangled with debris, compromising the efficiency of the vacuum.
To inspect and clean the brushes and rollers, follow these easy steps:
Step 1:
Turn off the vacuum and unplug it from the power source.
Step 2:
Locate the brushes and rollers. Refer to the user manual if you’re unsure where to find them.
Step 3:
Remove any large debris or hair entangled around the brushes and rollers. Use scissors or a brush tool if necessary.
Step 4:
Use a damp cloth or cleaning brush to wipe the brushes and rollers clean properly.
Step 5:
Replace the brushes and rollers back in their correct position.
Step 6:
Plug the vacuum back in and turn it on to test if it’s working correctly.
By inspecting and cleaning the brushes and rollers, you can ensure that the vacuum’s suction power is maximized, allowing it to pick up debris more efficiently. Not to mention, regular cleaning of these components will prolong the life of the vacuum, leaving it operating as if brand new.
3. Clean the filter
Cleaning the filter is an important step in troubleshooting common issues with smart vacuums that come with automatic dirt disposal. A clogged or dirty filter can reduce suction power and decrease the vacuum’s efficiency.
To clean the filter, follow these steps:
Step 1: Turn off the vacuum and unplug it from the power source.
Step 2: Locate the filter compartment. It is usually at the back or side of the vacuum.
Step 3: Open the compartment and remove the filter. Most filters are washable, but some may need to be replaced.
Step 4: If the filter is washable, rinse it with water until all dust and debris are removed. Avoid using detergents or bleach to clean the filter as it may damage it.
Step 5: Gently squeeze the filter to remove excess water, and let it air dry for 24-48 hours. Ensure the filter is completely dry before placing it back in the vacuum.
Step 6: If the filter needs to be replaced, ensure you purchase a compatible filter to maintain efficiency.
It is essential to clean the filter regularly to maintain maximum suction power and avoid overheating. Depending on the frequency of use, it is recommended to clean the filter every six months or as often as once a month.
By cleaning the filter, you not only maintain the condition of your vacuum but also ensure a healthier environment. Clean filters help reduce allergens and maintain indoor air quality.
4. Remove clogs and debris buildup from the automatic dirt disposal system
When it comes to troubleshooting smart vacuums with automatic dirt disposal, one common issue that people face is clogging or debris buildup in the automatic dirt disposal system. This can cause a variety of problems, including reduced suction power or even a complete stop in operation. Here are some steps to remove clogs and debris buildup from the automatic dirt disposal system:
Step 1: Turn off the vacuum and unplug it. This step is important for safety reasons.
Step 2: Locate the automatic dirt disposal system. Depending on the model, this may involve removing a cover or accessing the back of the unit.
Step 3: Use a small brush or tool to gently remove any debris or clogs that may be present in the system. Be careful not to damage any of the components.
Step 4: If there is a particularly stubborn clog, you can try using compressed air to dislodge it. However, be sure to follow all safety guidelines and wear protective gear, as compressed air can be dangerous if not handled properly.
Step 5: Once you have removed any visible debris or clogs, use a clean cloth to wipe down the area and ensure that there is no remaining dirt or dust present.
Step 6: Finally, replace any covers or components that were removed and turn the vacuum back on to test its operation.
By following these steps, you can effectively remove clogs and debris buildup from the automatic dirt disposal system of your smart vacuum. However, it’s important to note that prevention is key when it comes to maintaining your vacuum. Regularly emptying the debris bin and performing routine maintenance tasks can go a long way in keeping your vacuum running smoothly.
5. Check for firmware update
As with any smart device, it’s important to keep the firmware on your smart vacuum with automatic dirt disposal up to date. Firmware updates can fix bugs and improve performance, and they’re often easy to install. Here are the steps you can follow to check for and install a firmware update on your smart vacuum:
Step 1: Check for available firmware update
First, check if there is an available firmware update for your smart vacuum. You can typically do this through the mobile app that controls your vacuum. Look for an option to check for updates in the app’s settings or on the vacuum’s settings menu. If an update is available, follow the prompts to download and install it.
Step 2: Ensure proper connectivity
Before installing a firmware update, ensure that your smart vacuum is connected to your Wi-Fi network and that it has a strong signal. You don’t want your vacuum to disconnect or lose power during the update process.
Step 3: Follow prompts for installation
Once you’ve verified that there is an available firmware update and that your vacuum is properly connected, follow the prompts to install the update. This may involve downloading the update file and then transferring it to the vacuum via the mobile app, or it may involve simply tapping a button to start the update process.
Step 4: Allow time for installation
Firmware updates can take several minutes to install, and during that time, your vacuum may be unusable. Plan to run the update when you don’t need to use the vacuum for an extended period. Don’t interrupt the update process, even if it seems to be taking a long time.
By keeping your smart vacuum’s firmware up to date, you can ensure that it’s running at its best and that you’re getting the most out of your investment. Check for updates regularly, and follow these steps to install them with confidence.
Other tips for maintaining your smart vacuum with automatic dirt disposal
Now that you’ve addressed the common issues with your smart vacuum with automatic dirt disposal, it’s important to take proactive steps to maintain its longevity and efficiency. To ensure your smart vacuum continues to operate at optimal performance levels, consider implementing the following tips and best practices. These tips are not only easy to follow but can also save you time, money, and effort in the long run. Let’s dive into some practical ways to keep your smart vacuum in top-notch condition.
1. Empty debris bin regularly
Keeping your smart vacuum’s debris bin empty is crucial for its functioning and longevity. Regularly emptying the debris bin ensures that the vacuum’s cleaning performance isn’t hindered by a full bin. Additionally, a full debris bin can spill and create a mess that defeats the purpose of using a smart vacuum in the first place. Here are some tips on how to empty the debris bin to maintain your smart vacuum’s efficiency:
Schedule regular debris bin emptying times: To ensure that the debris bin doesn’t get full, consider scheduling regular emptying times. This will depend on how often you use your smart vacuum. A busy household may require more frequent emptying times.
Take precautions when emptying the bin: When you’re ready to empty the debris bin, be sure to take necessary precautions. Wear gloves to avoid direct contact with the dirt and debris, and empty the debris bin into a plastic bag.
Clean the debris bin: After you’ve emptied the debris bin, take a minute to clean it up. You can use mild soap and water to get rid of any stubborn dirt residue. Allow the bin to dry completely before reattaching it to the vacuum.
By following these tips, you’ll be able to keep your smart vacuum’s debris bin clean and ensure that it runs efficiently. Remember, regular maintenance and upkeep is crucial for the proper functioning of any device.
2. Use high-quality filters and cleaning solutions
Maintaining your smart vacuum with automatic dirt disposal is important to ensure efficient and trouble-free operation. One of the key aspects of maintenance is the use of high-quality filters and cleaning solutions. Here are some reasons why using high-quality supplies is crucial:
Improve filtration: High-quality filters can effectively capture dust, allergens, and other microscopic particles, preventing them from recirculating in the air. This can greatly improve the indoor air quality and make your home a healthier place to live in.
Extend vacuum lifespan: Using low-quality filters or cleaning solutions can cause buildup in the vacuum’s system, which can lead to clogs or malfunction. This can shorten the lifespan of your vacuum and also affect its performance.
Effective cleaning: High-quality cleaning solutions can help remove dirt, stains, and grime effectively, leaving your floors and carpets clean and fresh. They are also less likely to cause damage to your flooring, ensuring a longer lifespan for your floors.
Save time and money: While high-quality filters and cleaning solutions may be more expensive upfront, they can save you time and money in the long run. They are more effective, so you’ll spend less time and effort cleaning, and they can help extend the lifespan of your vacuum so it won’t need to be replaced as often.
Investing in high-quality filters and cleaning solutions is a smart decision for the health and longevity of your smart vacuum with automatic dirt disposal. Be sure to choose products that are compatible with your specific vacuum model and to follow the manufacturer’s instructions for use and care.
3. Inspect the vacuum periodically
Regular inspection of your smart vacuum with automatic dirt disposal is essential to ensure that it works smoothly and efficiently for a long time. Here are some tips to help you inspect your smart vacuum regularly:
Inspect the brushes: The brushes are an essential component of the vacuum cleaner. Check them regularly for damage or wear and tear. If the brushes are worn out, replace them as soon as possible.
Check the wheels: The wheels are another essential element that needs to be inspected regularly. Ensure that they spin correctly and that there is no damage to them.
Examine the sensors: Sensors ensure that the smart vacuum moves correctly without any obstacles. Inspect and clean the sensors regularly. If they are damaged, your vacuum might not function correctly.
Inspect the dustbin: The dustbin of the smart vacuum has to be emptied regularly. Check for cracks, damage or any other signs of wear and tear. If you notice any damage to the dustbin, replace it immediately.
Look for wear and tear: The smart vacuum goes through a lot of wear and tear as it cleans your home. Inspect the vacuum for any signs of damage or wear and tear, such as loose parts, cracks, or any other issue that might affect its performance.
Regular inspections of your smart vacuum will ensure that it is always in top working condition. By following these simple tips regularly, you can prolong the lifespan of your smart vacuum and prevent any potential issues from occurring.
Conclusion
After going through the troubleshooting steps outlined in this article, you should now be better equipped to handle common issues that may arise with your smart vacuum with automatic dirt disposal. By regularly inspecting and maintaining your vacuum’s sensors, brushes and rollers, filter, and automatic dirt disposal system, you can ensure that it operates smoothly and effectively for years to come.
Additionally, it’s important to prioritize emptying the debris bin regularly and using high-quality filters and cleaning solutions to guarantee optimal performance. By taking these measures, you can extend the lifespan of your smart vacuum and keep your home clean and tidy.
Remember, if you encounter any issues beyond what has been covered in this article, don’t hesitate to consult the manufacturer’s manual or customer support. Solving vacuum-related problems may seem daunting at first, but with patience and persistence, you can troubleshoot and overcome any obstacle.
Frequently Asked Questions
1. Why is my smart vacuum not picking up debris?
There could be several reasons why your smart vacuum is not picking up debris including a clogged filter, dirty brushes, or a malfunctioning sensor.
2. What should I do if my vacuum keeps indicating a full dirt bin when it’s not full?
Check for any dirt or debris that might be stuck in the sensors or the automatic dirt disposal system. If you can’t find any obstructions, try resetting the vacuum.
3. How can I clean the filter on my smart vacuum?
You can clean the filter by removing it from the vacuum and gently washing it with soap and water. Be sure to let it dry completely before reinserting it into the vacuum.
4. What should I do if there’s a clog in the automatic dirt disposal system?
First, turn off the vacuum and unplug it from the power source. Then, carefully remove any debris or clogs from the system using a soft brush or cloth. Avoid using sharp objects that could damage the system.
5. Should I regularly check for firmware updates on my smart vacuum?
Yes, it’s a good idea to periodically check for updates and install them if available. These updates can improve the vacuum’s performance and fix any bugs or issues.
6. How often should I empty the debris bin on my smart vacuum?
You should empty the debris bin every time it gets full or after each use. This will help ensure that the vacuum continues to work efficiently and prevent any debris from getting stuck in the system.
7. Can I use any type of filter on my smart vacuum with automatic dirt disposal?
No, it’s best to use high-quality filters that are specifically designed for your particular vacuum model. Using the wrong type of filter could potentially damage the vacuum or reduce its performance.
8. Is it safe to inspect the vacuum while it’s still plugged in?
No, you should always turn off and unplug the vacuum before inspecting it or attempting to clean it. This will help prevent any accidents or injuries.
9. Should I use any particular type of cleaning solution on my smart vacuum?
It’s best to use cleaning solutions that are specifically designed for your vacuum model. Using the wrong type of solution could potentially damage the vacuum or reduce its performance.
10. How often should I inspect my smart vacuum with automatic dirt disposal?
You should inspect your vacuum periodically, at least once every few weeks, to ensure that it is functioning properly and that there are no visible signs of wear or damage.