How to Clean and Maintain the Sensors on Your Smart Vacuum Cleaner
Warning: A non-numeric value encountered in /var/www/html/wp-content/themes/generatepress/inc/structure/post-meta.php on line 165
by Dwight Gibson
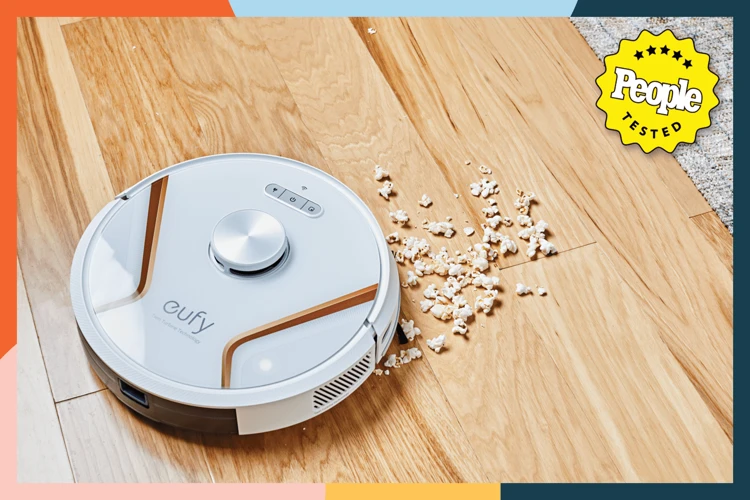
Picture this: after a tiring day at work, you come home to your cozy haven, ready to unwind and relax. But then you look around and realize that your floors are covered in dust, dirt, and debris. The last thing you want to do is to bust out the old vacuum cleaner and spend hours cleaning the house. But what if you had a smart vacuum cleaner that does the job for you effortlessly? Smart vacuum cleaners are a game-changer for homeowners, and they come equipped with a variety of sensors to help navigate around obstacles and clean your home effectively. However, as with any sophisticated technology, these sensors need proper care and maintenance to function correctly. In this complete guide, we will show you how to clean and maintain the sensors on your smart vacuum cleaner, so you never have to worry about a drop in performance or a shorter lifespan.
Table of Contents
Why is it important to clean and maintain the sensors on your smart vacuum cleaner?
Maintaining the sensors on your smart vacuum cleaner is a crucial step in ensuring its optimal performance and longevity. Not only does regular cleaning and maintenance of the sensors help to maintain the overall performance of your smart vacuum cleaner, but it also increases its lifespan. Ignoring this important aspect of smart vacuum cleaner maintenance could lead to serious issues which may require costly repairs. In this guide, we will take you through the essential aspects of keeping the sensors on your smart vacuum cleaner clean and well-maintained. If you want to know more about the benefits of smart vacuum maintenance, click here.
1. To maintain the performance of your vacuum cleaner
Maintaining the performance of your smart vacuum cleaner is essential for it to work effectively and efficiently. Using a vacuum cleaner with dirty or clogged sensors can reduce its suction power and affect its ability to detect obstacles, avoid collisions, and navigate around the house. Regularly cleaning and maintaining the sensors can help keep your vacuum cleaner in top condition and improve its performance.
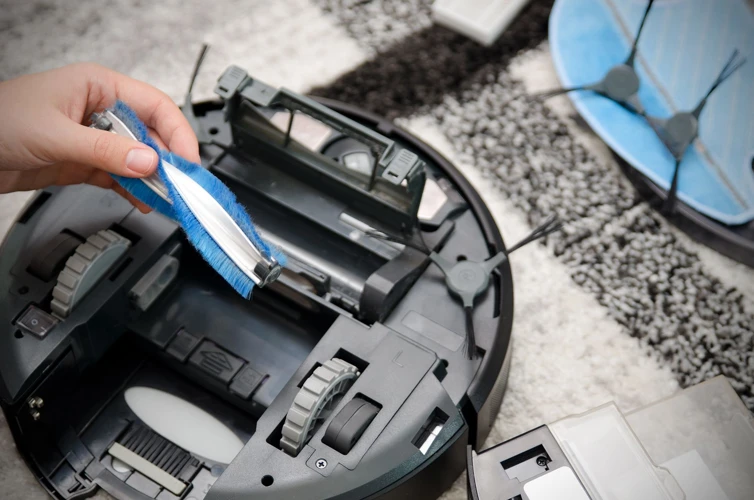
There are different types of sensors in a smart vacuum cleaner, such as bumper sensors, cliff sensors, optical sensors, laser sensors, and charging sensors. Each sensor has a specific purpose and needs to be cleaned in a particular way. Failure to maintain these sensors can result in a defective vacuum cleaner or worse, permanent damage. It is essential to have a step-by-step cleaning guide that caters to each unique sensor.
Here are some tips for maintaining the sensors of your smart vacuum cleaner:
Tip
Description
Clean the dustbin and filter
Empty the dustbin regularly, and clean the filter to prevent clogging, which can affect your vacuum cleaner’s suction power.
Clean the bumper sensor and cliff sensors
Use a soft-bristled brush to clean these sensors. Make sure no hair, dust, or debris is stuck in these sensors.
Clean the optical sensor and laser sensor
Use a microfiber cloth to clean these sensors to prevent scratches on the lenses. Do not use water or cleaning agents.
Clean the charging sensor
Make sure the charging contacts are clean and free from dirt or debris. Dirt on the charging sensor will prevent the battery from charging completely.
By following the above tips, you’ll be able to maintain the performance of your smart vacuum cleaner, which includes improved suction power, decreased chances of malfunction, and an extended lifespan of your device.
2. To increase the life span of your vacuum cleaner
Keeping the sensors on a smart vacuum cleaner clean and well-maintained is crucial for a variety of reasons, one of which is to increase the life span of your vacuum cleaner. Vacuum cleaners can be expensive, and it’s important to protect your investment by ensuring that it lasts as long as possible. One way to do this is by regularly cleaning and maintaining the sensors on the device.
Here are some ways that maintaining the sensors can extend the life of your smart vacuum cleaner:
Benefits of cleaning and maintaining sensors on your smart vacuum cleaner
1. Preventing malfunction: Over time, your vacuum cleaner’s sensors can become dirty, blocked, or damaged, which can lead to malfunction or even complete failure. Regular cleaning and maintenance can help prevent this from happening, which will save you from having to pay for costly repairs or a new vacuum cleaner altogether.
2. Improving overall performance: Dirt, dust, and debris can accumulate on the sensors of your smart vacuum cleaner over time, which can cause it to work less efficiently than it should. Routine cleaning can help improve the vacuum cleaner’s performance, making it more effective at picking up dirt and debris from floors and carpets.
3. Reducing wear and tear: A dirty sensor is more likely to fail, which could lead to your vacuum cleaner working harder than it needs to. This can cause undue wear and tear on the motor and other parts, eventually leading to breakdown or failure. Regular cleaning and maintenance of sensors can help reduce wear and tear, ultimately extending the lifespan of your smart vacuum cleaner.
By following the steps outlined in this article to clean and maintain the sensors, you can help ensure that your smart vacuum cleaner has a long and effective life. In addition to maintaining the sensors, there are other tips you can follow to ensure your smart vacuum cleaner lasts as long as possible, such as regularly emptying and cleaning the dustbin, replacing filters, and storing the device in a cool and dry place. For more information on these topics, see our articles on bagless vs. bagged smart vacuum disposal, cleaning smart vacuum brushes, troubleshooting smart vacuum automatic disposal, and top smart vacuum accessories.
Tools you need to clean and maintain the sensors on your smart vacuum cleaner
Before we dive into the process of cleaning and maintaining the sensors on your smart vacuum cleaner, it’s important to be equipped with the right set of tools. You don’t need anything fancy, just a few basic items that you probably already have at home. These tools will help you clean the sensors effectively and ensure that your vacuum cleaner operates at peak performance. Here are the essential tools you’ll need to maintain the sensors on your smart vacuum cleaner: a soft-bristled brush, a microfiber cloth, and a compressed air canister.
1. Soft-bristled brush
One important tool you’ll need to clean and maintain the sensors on your smart vacuum cleaner is a soft-bristled brush. This tool is an essential part of your kit as it helps you to gently remove dust and debris from the sensors without damaging their fragile components. It’s important to use a soft-bristled brush to avoid causing any scratches, marks, or other damages that may affect the overall performance of your vacuum cleaner.
Here are some of the features that you should look for when choosing a soft-bristled brush:
Features of a Good Soft-bristled Brush
Soft bristles – to avoid scratches or damages on the sensors of your vacuum cleaner
Flexible bristles – so you can reach tight spaces and corners without damaging the sensors listed above
Comfortable handle – to help prevent any hand cramping or discomfort during use
Easy to clean – so you can keep it in good condition over time
Having a good quality soft-bristled brush in your toolkit will certainly prove useful in maintaining your vacuum cleaner’s sensors. It’s always best to invest in a high-quality brush that is durable, long-lasting, and easy to clean. Taking care of your vacuum cleaner’s sensors will help maintain its efficiency, ensure it lasts longer, and save you money on the long run.
2. Microfiber cloth
When it comes to cleaning the sensors on your smart vacuum cleaner, you need to use the right tools to avoid damaging the delicate sensors. One of the most important tools that you will need is a microfiber cloth. Here are some of the reasons why a microfiber cloth is a must-have for cleaning and maintaining your vacuum cleaner sensors:
Benefits
Explanation
Non-abrasive
Microfiber cloths are designed to be gentle on delicate surfaces, making them ideal for cleaning the sensors on your vacuum cleaner without scratching or damaging them.
Highly absorbent
Microfiber cloths are made of tiny fibers that can absorb a lot of liquid and dirt compared to regular cloths, making them perfect for cleaning the sensors without leaving any residue behind.
Reusable
Microfiber cloths can be washed and reused multiple times, making them an eco-friendly choice for cleaning your vacuum cleaner sensors over disposable wipes or paper towels.
Multi-purpose
Aside from cleaning vacuum cleaner sensors, microfiber cloths can also be used for wiping down other surfaces in your home, such as glass, mirrors, and countertops.
When using a microfiber cloth to clean the sensors on your smart vacuum cleaner, make sure it is clean and free from any debris or dirt that can scratch the surface of the sensors. You can wash microfiber cloths in the washing machine with mild detergent and no fabric softener. Avoid using bleach or high heat when washing them, as this can damage the fibers and reduce their effectiveness.
3. Compressed air canister
One important tool you’ll need to clean and maintain the sensors on your smart vacuum cleaner is a compressed air canister. This tool can be highly effective in removing dirt and debris that may have become stuck inside the sensors.
Here are some key features and benefits of using a compressed air canister for cleaning and maintaining your vacuum cleaner sensors:
Feature
Benefit
High-pressure air
Quickly removes dirt and debris from sensors
Nozzle attachment
Enables precise targeting of specific sensors and areas
Eco-friendly
Does not require the use of harsh chemicals or solvents
Compact size
Easy to store and use as needed
When using a compressed air canister, it’s important to follow the manufacturer’s instructions carefully. Make sure to aim the nozzle directly at the sensor or area you want to clean, and avoid using too much pressure that could damage the sensor.
A compressed air canister can be a highly effective tool for cleaning and maintaining the sensors on your smart vacuum cleaner. By using this tool in combination with a soft-bristled brush and microfiber cloth, you can help ensure that your vacuum cleaner continues to operate at its best and have a longer lifespan.
How to clean and maintain the sensors on your smart vacuum cleaner?
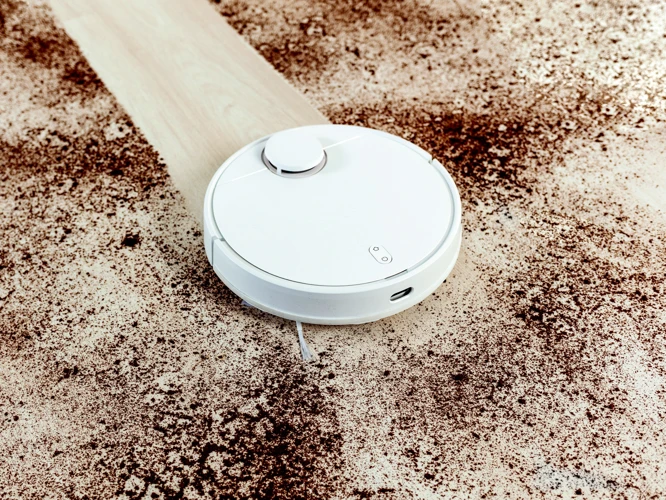
Your smart vacuum cleaner is equipped with sensors that help it navigate around your home and clean efficiently. These sensors play a crucial role in ensuring your vacuum cleaner works as it should. However, over time, these sensors can become dirty, affecting the performance of your vacuum cleaner. So, how do you go about cleaning and maintaining these sensors? Don’t worry; it’s easier than you might think. In this section, we’ll go step by step through the process of cleaning and maintaining the sensors on your smart vacuum cleaner to ensure it stays in top working condition.
1. Cleaning the dust bin and filter
Cleaning the dustbin and filter is an essential part of maintaining the sensors on your smart vacuum cleaner. Over time, the dustbin and filter can become clogged with dirt and debris which can affect the accuracy of the sensors. Here’s how to clean the dustbin and filter step by step:
Tools you need:
Materials you need:
Soft-bristled brush
Microfiber cloth
Dish soap
Warm water
Step 1: Turn off your vacuum cleaner and unplug it from the power source to avoid any accidents.
Step 2: Remove the dustbin from the vacuum cleaner and empty it into a trash can.
Step 3: Remove the filter from the dustbin and gently tap it on the side of a trash can to remove any loose dirt or debris.
Step 4: Use a soft-bristled brush to remove any stubborn dirt from the filter.
Step 5: Soak the filter in warm water mixed with a small amount of dish soap for 15-20 minutes.
Step 6: Rinse the filter thoroughly with clean water and allow it to air dry completely.
Step 7: Use a microfiber cloth to wipe down the dustbin and remove any dust or dirt that may have accumulated inside.
Step 8: Reattach the filter to the dustbin and reinsert it into the vacuum cleaner.
By cleaning the dustbin and filter on a regular basis, you’ll help maintain the performance of your vacuum cleaner and keep the sensors functioning properly.
2. Cleaning the bumper sensor and cliff sensors
The bumper sensor and cliff sensors are crucial components of your smart vacuum cleaner, as they help your device to detect obstacles and avoid falling off edges. Regularly cleaning these sensors is a vital part of maintaining your vacuum cleaner. Follow these steps to clean and maintain your bumper and cliff sensors:
Step 1: Turn off your vacuum cleaner and unplug it from the power source.
Step 2: Use a soft-bristled brush to remove any dirt or debris buildup on the bumper sensor. Gently brush the sensor until it is clean. Be careful not to damage the sensor while cleaning it.
Step 3: Next, move on to the cliff sensors. Use a microfiber cloth to gently wipe the sensors. Be sure to remove any dust or debris buildup on the sensors.
Step 4: If you still see debris buildup on the sensors, you can use a compressed air canister to blow air onto the sensors. This will help remove any remaining dirt or debris from the sensors.
Step 5: After cleaning the sensors, plug your vacuum cleaner back in and turn it on. Test your bumper and cliff sensors to make sure they are functioning correctly.
Regularly cleaning your bumper and cliff sensors will help your smart vacuum cleaner detect obstacles and navigate around them with ease. It will also reduce the chances of your device getting stuck in corners or falling off edges.
Remember to follow this cleaning process for all types of sensors on your smart vacuum cleaner. A tidy device is a happy device!
3. Cleaning the optical sensor and laser sensor
When it comes to cleaning the optical sensor and laser sensor on your smart vacuum cleaner, it’s important to be gentle and precise. These sensors are responsible for detecting obstacles, mapping out the room, and navigating the vacuum cleaner around your home. Cleaning them properly is essential for maintaining the performance of your device. Follow these steps to clean the optical and laser sensors on your smart vacuum cleaner:
Step 1: First, make sure your vacuum cleaner is turned off and unplugged from the power source. This will prevent any accidental damage or injury.
Step 2: Use a soft-bristled brush to gently remove any dust or debris from the sensors. Be careful not to scrub too hard, as this could scratch the surface of the sensors and affect their accuracy.
Step 3: Next, use a microfiber cloth to wipe the sensors clean. Make sure the cloth is clean and dry to avoid leaving any residue on the sensors.
Step 4: If you notice any stubborn dirt or grime on the sensors, you can use a compressed air canister to blow it away. Hold the canister several inches away from the sensors and use short bursts of air to dislodge any dirt.
Step 5: Once you’ve cleaned the sensors, double-check to make sure there are no visible smudges or marks. If there are, repeat the cleaning process until the sensors are sparkling clean.
It’s important to note that some smart vacuum cleaners have multiple optical and laser sensors, so be sure to check the user manual to make sure you’re cleaning all of them. Additionally, avoid using any harsh chemicals or substances on the sensors, as this could damage them and affect the accuracy of your vacuum cleaner.
Keeping your smart vacuum cleaner’s sensors clean and well-maintained is key to ensuring optimal performance and a longer lifespan. By following these simple steps regularly, you can keep your device running smoothly and efficiently.
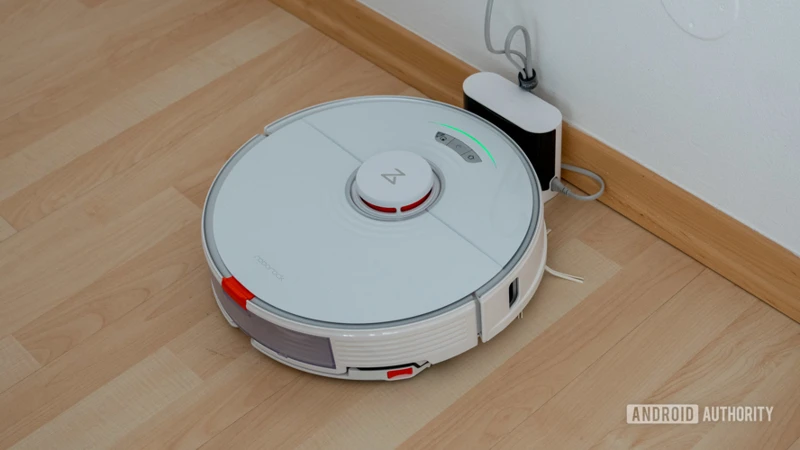
4. Cleaning the charging sensor
The charging sensor on your smart vacuum cleaner is an essential component that enables it to dock and charge itself. Over time, dust and dirt can accumulate on the charging contacts of the sensor, affecting its ability to charge the vacuum. Here’s how you can clean and maintain the charging sensor:
Gather your tools: Before you start cleaning the charging sensor, make sure you have the necessary tools on hand. You will need a soft-bristled brush, a microfiber cloth, and a compressed air canister.
Unplug your vacuum: To safely clean the charging sensor, make sure your vacuum cleaner is unplugged from the power source.
Brush away loose dirt and debris: Using the soft-bristled brush, gently brush away any loose dirt or debris from the charging contacts of the sensor.
Wipe the contacts with a microfiber cloth: After you have brushed away any loose dirt, use a microfiber cloth to wipe the charging contacts of the sensor. Make sure you wipe in a gentle swirling motion to avoid damaging the contacts.
Use compressed air: If there is still dust or dirt stuck in the charging contacts, use a compressed air canister to blow it out. Hold the canister a few inches away from the charging contacts and spray air in short bursts.
Regularly cleaning and maintaining the charging sensor on your smart vacuum cleaner will not only ensure that it docks and charges properly, but it will also increase the lifespan of the vacuum. Make sure to pay attention to your vacuum’s charging behavior and clean the contacts whenever necessary.
How often should you clean the sensors on your smart vacuum cleaner?
After understanding the importance of cleaning and maintaining the sensors of your smart vacuum cleaner, the question arises about how often you should clean them. The frequency of cleaning the sensors depends on how often you use the vacuum cleaner and the environment it’s being used in.
Bumper and Cliff Sensors: You should clean the bumper and cliff sensors with a soft-bristled brush or a microfiber cloth after every use if your vacuum cleaner is used in a cluttered or messy environment. However, if you use your vacuum cleaner in a relatively cleaner environment, you can clean these sensors once a week.
Optical and Laser Sensors: It’s recommended that you clean the optical and laser sensors with a microfiber cloth once a week. However, if you use your vacuum cleaner frequently and it cleans a large area, then it’s better to clean these sensors more often.
Charging Sensor: The charging sensor doesn’t require frequent cleaning like the other sensors. You can clean it once a month or when you notice that the vacuum cleaner is not charging efficiently.
It’s better to develop a habit of cleaning the sensors regularly to ensure the proper functionality of your smart vacuum cleaner. Neglecting the cleaning can lead to decreased performance and shorter lifespan of the sensors.
It’s essential to clean the sensors of your smart vacuum cleaner regularly to ensure excellent performance and longevity. Depending on the usage and environment, you can decide how often you should clean each sensor. Remember to maintain your vacuum cleaner if you want it to last longer and work efficiently.
Common issues with sensors and troubleshooting tips
Despite proper cleaning and maintenance, sometimes the sensors on your smart vacuum cleaner may encounter issues. These issues may hinder the performance of the vacuum cleaner and make it difficult to clean your house efficiently. When such issues arise, it is essential to troubleshoot the problem and fix it as soon as possible. In this section, we will discuss the common issues that you may encounter with your vacuum cleaner’s sensors and provide you with some troubleshooting tips to help you get it back up and running.
1. Sensors not working properly
It can be frustrating when the sensors on your smart vacuum cleaner aren’t working properly. However, this problem can be easily fixed with some troubleshooting tips. Here are some reasons why your sensors might not be working and how you can fix them:
Possible reasons
Troubleshooting tips
The sensors are dirty
Refer to the previous section and clean the sensors properly with the recommended tools.
The sensors are covered by something
Move any objects that might be covering the sensors. Make sure the path of the vacuum cleaner is clear and that there are no obstacles blocking the sensors.
The battery is low
Make sure the vacuum cleaner is charged and the battery is not low. Check if the charging sensor is clean and working properly.
Software updates needed
Check if there are any software updates available for your smart vacuum cleaner. Keeping the software up to date can help troubleshoot possible issues with the sensors.
Defective sensors
If none of the troubleshooting tips work, the sensors might be defective. Contact the manufacturer for assistance or replacement of the sensors.
It’s important to keep the sensors on your smart vacuum cleaner clean and maintain them properly. However, if the sensors still aren’t working after trying the troubleshooting tips, don’t hesitate to contact the manufacturer for further assistance.
2. Vacuum cleaner getting stuck in the same spot
If you notice that your smart vacuum cleaner is getting stuck in the same spot repeatedly during cleaning, it could be due to a sensor issue. This can cause frustration and lead to an incomplete cleaning job. Here are some possible causes and troubleshooting tips for this problem:
Possible Cause
Troubleshooting Tip
Dirty sensors
Clean the sensors on your vacuum cleaner as outlined in the previous section. Dirty sensors can cause your vacuum cleaner to get stuck in a certain area because they may not detect the surrounding area accurately.
Object on the floor
Remove any objects that may be obstructing the path of your vacuum cleaner. These objects can prevent your vacuum cleaner from moving forward or cause it to get stuck in one spot.
Worn out wheels
Inspect your vacuum cleaner’s wheels to see if they’re worn out. If they are, you’ll need to replace the wheels. Worn out wheels can cause the vacuum cleaner to get stuck in one spot or make it difficult for it to move around.
Low battery
Make sure your vacuum cleaner has enough charge to complete the cleaning job. A low battery can cause the vacuum cleaner to stop in the middle of cleaning or get stuck in one spot.
Obstructed brushroll
Clean the brushroll on your vacuum cleaner. Obstructions on the brushroll can cause the vacuum cleaner to get stuck in one spot or stop moving altogether.
By troubleshooting and addressing these potential causes, you can solve the issue of your vacuum cleaner getting stuck in the same spot and ensure that it can continue to clean effectively.
Tips for maintaining your smart vacuum cleaner
Keeping your smart vacuum cleaner in good condition is essential for ensuring efficient cleaning and long-lasting performance. Proper maintenance practices not only ensure that your vacuum cleaner is doing its job perfectly but also helps in extending its lifespan. In this section, we will discuss some valuable tips for maintaining your smart vacuum cleaner so that you can get the most out of it. From cleaning the dustbin to replacing the filter, we will cover all the essential aspects of maintaining your smart vacuum cleaner. So, let’s dive right in!
1. Empty and clean the dustbin regularly
Regularly emptying and cleaning the dustbin is an important step in maintaining the sensors on your smart vacuum cleaner. Here are some tips to help you do it right:
Step 1: First, turn off the vacuum cleaner and unplug it from the power outlet.
Step 2: Next, locate the dustbin on your vacuum cleaner. Depending on the model, it may be located at the back or the top of the device.
Step 3: Hold the dustbin over a trash can and press the release button to open it. Carefully remove the dustbin from the vacuum cleaner.
Step 4: Empty the contents of the dustbin into the trash can. If the dustbin is too full, use a soft-bristled brush or a microfiber cloth to remove any debris stuck to the sides or bottom of the bin.
Step 5: Rinse the dustbin with water and let it air dry completely before reattaching it to the vacuum cleaner. Make sure it is firmly secured in place.
Remember, emptying and cleaning the dustbin regularly not only helps maintain the sensors on your smart vacuum cleaner, but it also enhances the overall performance of the device. A dirty dustbin can clog the vacuum cleaner, leading to reduced suction power and can cause damage or maintenance issues in the long run. So make sure to make time for this task to maintain your device’s optimal performance.
2. Replace the filter periodically
One of the vital components that keep your smart vacuum cleaner’s performance at its peak is the filter. The filter’s primary function is to trap tiny dirt, dust, and allergen particles that your vacuum cleaner sucks up from your floor and carpet.
Over time, the filter can get clogged up, causing your vacuum cleaner to lose suction power and possibly distribute allergens back into the air, affecting your indoor air quality. It is crucial to replace the filter periodically, depending on the model and usage frequency.
Most manufacturers recommend replacing the filter once every three to six months. However, if you have a pet, live in a dusty area, or have heavy foot traffic, you may need to replace the filter more frequently.
To make sure you replace your filter as needed, check your owner’s manual for the manufacturer’s recommendations. You can also check your vacuum cleaner’s filter indicator light, which will signal when it’s time for a replacement.
When it’s time to replace the filter, it’s ideal to use a genuine replacement filter made by the manufacturer. However, if you can’t find an original filter, ensure you use a high-quality HEPA filter that fits your vacuum cleaner’s brand and model.
To replace the filter, follow the steps in your vacuum cleaner’s owner’s manual. In general, you will need to remove the dustbin, locate the filter housing unit, remove the old filter, and insert the new one.
Advantages of replacing the filter periodically
Disadvantages of not replacing the filter regularly
Improves indoor air quality
Keeps your vacuum cleaner’s suction power at its optimum level
Reduces the need for repairs
Reduces suction power
Shortens the lifespan of the vacuum cleaner
Distributes allergens back into the air
Replacing your smart vacuum cleaner’s filter periodically is crucial for the appliance’s longevity and optimal performance. Not replacing the filter regularly can lead to costly repairs, reduced suction power, and a negative impact on indoor air quality. It is essential to follow the manufacturer’s recommendations and replace the filter periodically to keep your smart vacuum cleaner in top condition.
3. Keep the charging contacts clean
Keeping the charging contacts clean is an important part of maintaining your smart vacuum cleaner. Over time, the contacts may become dirty or corroded, which can result in a poor connection between the vacuum cleaner and its charging dock. This can lead to charging issues and even prevent the cleaner from charging at all. To avoid this problem, make sure to clean the charging contacts regularly.
Tools you will need:
To clean the charging contacts, you won’t need any special tools. A soft-bristled brush and a microfiber cloth will do the job just fine.
Steps to clean the charging contacts:
Unplug your smart vacuum cleaner from the charging dock and turn it off.
Inspect the charging contacts to see if there is any dirt, debris, or corrosion on them
Use a soft-bristled brush to gently scrub the charging contacts to remove any dirt or debris that may be present.
Use a microfiber cloth to wipe the charging contacts to remove any leftover debris or dirt.
Once you have removed all the dirt and debris, take another look at the charging contacts to ensure that they are clean and free from any residue.
Plug in the smart vacuum cleaner back to the charging dock.
How often should you clean the charging contacts?
It is generally recommended to clean the charging contacts at least once a month. However, if you feel that the contacts are getting dirty faster, it’s important to clean them more frequently.
Tips for maintaining your smart vacuum cleaner:
Besides cleaning the charging contacts, there are other tips for maintaining your smart vacuum cleaner that can help extend its life and improve its performances. These include:
Tip
Description
Empty the dustbin regularly
Make sure to empty the dustbin after every cleaning session. This will help prevent clogs and keep your vacuum cleaner running smoothly.
Replace the filter periodically
Most smart vacuum cleaners come with a filter that needs to be changed periodically. Check the manufacturer’s instructions for specific guidance on when to replace the filter.
Store the vacuum cleaner properly
When not in use, store your vacuum cleaner in a dry and cool place. Avoid storing it in a humid environment, as this can damage the electronic components.
By following these tips, you can ensure that your smart vacuum cleaner performs well and lasts for many years to come.
4. Store the vacuum cleaner in a dry and cool place
Once you’re done cleaning and maintaining the sensors on your smart vacuum cleaner, you should also pay attention to where you store it. A proper storage environment can greatly improve the vacuum cleaner’s lifespan, ensuring that it remains in tip-top condition.
Why is it important to store your vacuum cleaner in a dry and cool place?
Storing your vacuum cleaner in a dry and cool place helps prevent the accumulation of moisture, which can lead to rust and corrosion. Moisture can also damage internal components of the vacuum cleaner, such as the motor, sensors, and charging system.
To ensure that you’re storing your vacuum cleaner in the best possible way, you should consider investing in a storage solution that’s specifically designed for vacuum cleaners. These storage solutions can help protect your vacuum cleaner from dust, moisture, and other harmful elements.
Factors to consider when choosing a storage solution:
Factor
Description
Airflow
Vacuum cleaners generate heat, so it’s important to choose a storage solution that allows for proper ventilation and airflow.
Protection
Look for a storage solution that offers protection from dust, moisture, and other environmental factors that can damage your vacuum cleaner.
Size
Choose a storage solution that’s appropriately sized for your vacuum cleaner. Too much space can cause the vacuum cleaner to shift around, while too little space can damage the vacuum cleaner.
Accessibility
Make sure that the storage solution allows for easy access to your vacuum cleaner so that you can quickly retrieve it when needed.
Other tips for storing your vacuum cleaner:
Empty the dustbin and clean the filter before storing your vacuum cleaner.
Disconnect the battery and remove any loose accessories, such as the brush roll, before storing your vacuum cleaner.
Avoid storing your vacuum cleaner in direct sunlight or near a heat source, as this can damage the internal components.
Store your vacuum cleaner in an upright position to prevent damage to the brush roll and other accessories.
By following these tips, you can ensure that your smart vacuum cleaner stays in good working condition and prolong its lifespan. With proper care and maintenance, your vacuum cleaner can provide you with years of reliable service.
Conclusion
After following the steps outlined in this guide, you should now have a better understanding of how to clean and maintain the sensors on your smart vacuum cleaner. By maintaining the sensors on your vacuum cleaner, you can prolong its lifespan and ensure that it continues to perform at its best.
Remember to clean the dustbin and filter regularly, as well as the bumper sensor, cliff sensors, optical sensor, laser sensor, and charging sensor. Using a soft-bristled brush, microfiber cloth, and compressed air canister, you can effectively remove any dust, debris or other particles that may be interfering with the sensors’ operation.
You should also keep in mind that regular maintenance of your smart vacuum cleaner is crucial to its longevity. By emptying and cleaning the dustbin, replacing the filter, and keeping the charging contacts clean, you can prevent potential issues from occurring. Always store the vacuum cleaner in a dry and cool place to avoid damage.
Overall, taking care of your smart vacuum cleaner’s sensors is an essential part of maintaining its overall performance and efficiency. By following these tips, you can ensure that your vacuum cleaner stays in top shape for years to come.
Frequently Asked Questions
1. How often should I clean the sensors on my smart vacuum cleaner?
You should clean the sensors on your smart vacuum cleaner once a month to maintain optimal performance.
2. Can I use any type of cleaning solution to clean the sensors?
No, it’s best to use a microfiber cloth and compressed air canister to clean the sensors. Avoid using any type of cleaning solution as it may damage the sensors.
3. My vacuum cleaner is constantly getting stuck in the same spot, what should I do?
You should check the bumper sensor and cliff sensors to see if they are dirty. Clean them with a soft-bristled brush and see if this resolves the issue.
4. Can I clean the optical sensor and laser sensor with a microfiber cloth?
Yes, you can use a microfiber cloth to clean the optical sensor and laser sensor. Be gentle while cleaning them to avoid damaging the sensors.
5. How do I clean the charging sensor on my smart vacuum cleaner?
You can use a soft-bristled brush to gently clean the charging sensor. Make sure to remove any dirt or debris from the sensor to ensure proper charging.
6. Should I store my smart vacuum cleaner in a damp area?
No, it’s best to store your smart vacuum cleaner in a dry and cool area to avoid damage to the sensors and other components.
7. How often should I replace the filter in my smart vacuum cleaner?
You should replace the filter in your smart vacuum cleaner once every six months to ensure optimal performance.
8. Can I use my smart vacuum cleaner on uneven surfaces?
Yes, most smart vacuum cleaners have cliff sensors that detect uneven surfaces and can navigate around them.
9. Do the sensors on my smart vacuum cleaner need to be calibrated?
No, the sensors on your smart vacuum cleaner are pre-calibrated and do not need to be adjusted.
10. What is the best way to maintain my smart vacuum cleaner?
The best way to maintain your smart vacuum cleaner is to regularly empty and clean the dustbin, replace the filter periodically, keep the charging contacts clean, and store the vacuum cleaner in a dry and cool place.