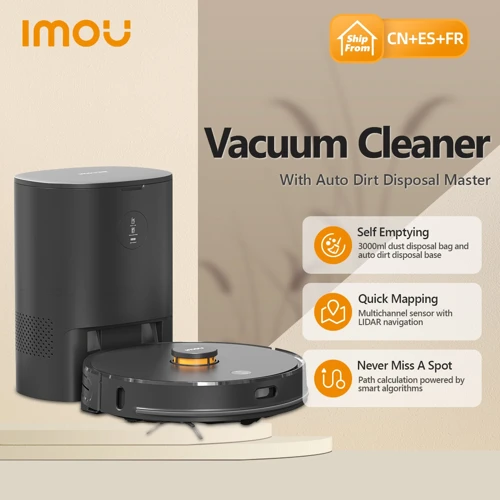
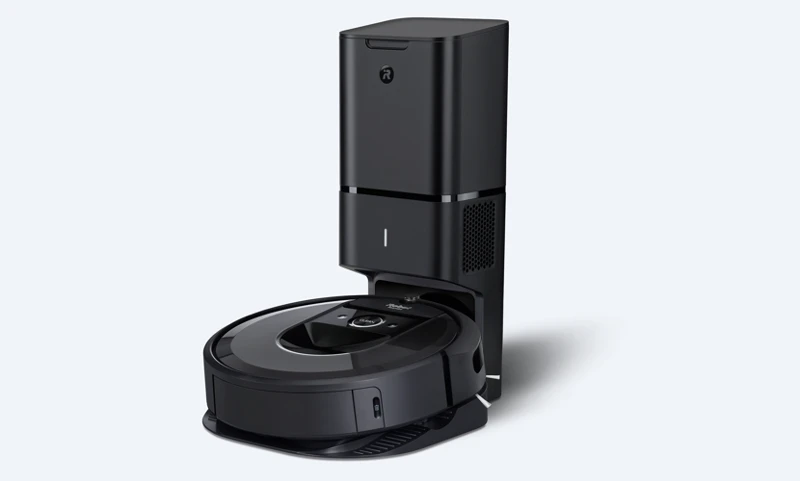
Imagine having a vacuum cleaner that does its cleaning tasks automatically without constantly emptying its bin. Sounds too good to be true, right? Well, that’s where an automatic dirt disposal vacuum cleaner comes in. It’s a perfect cleaning partner that requires minimal effort on your part. However, like any other machine, it needs maintenance and cleaning to ensure optimal performance. In this article, we’ll delve into the importance of cleaning and maintenance, step-by-step cleaning procedures, common troubleshooting issues, precautions to take, and more! So, let’s dive right in and learn how to maintain and clean your automatic dirt disposal vacuum cleaner.
Table of Contents
Why is Maintenance and Cleaning Important?
Maintenance and cleaning are crucial for the optimum performance and longevity of your automatic dirt disposal vacuum cleaner. Neglecting these tasks can lead to a host of issues that could have otherwise been avoided. Regular upkeep of your automatic dirt disposal vacuum cleaner is essential to ensure that it runs smoothly and effectively for several years.
Regular cleaning helps maintain the vacuum cleaner’s suction power and ensures that it continues to perform at its best. Dirt and debris accumulation in the filters and brushes can restrict airflow, causing your vacuum cleaner to lose suction power. A clogged filter can also lead to dust and dirt particles being released back into the air, reducing the indoor air quality. By cleaning and maintaining the various components of your automatic dirt disposal vacuum cleaner, you can greatly improve its cleaning effectiveness and efficiency.
Regular maintenance can help prevent malfunctions that can arise due to neglecting the device. Dust and debris can accumulate in the sensors and charging contacts, causing the robot to malfunction. Cleaning these components regularly helps ensure that the robot operates correctly, reducing the chances of any malfunction.
Cleaning and maintaining your automatic dirt disposal vacuum cleaner can also help extend its lifespan. Regular maintenance not only helps you identify potential problems before they become significant but also helps ensure that the device operates smoothly for many years to come. Neglecting your automatic dirt disposal vacuum cleaner could lead to long-term damage, and it may not function at its best, necessitating costly repairs or even requiring you to replace the entire vacuum cleaner.
By maintaining and cleaning your automatic dirt disposal vacuum cleaner, you can save time, energy, and money in the long run. Additionally, it can also help improve indoor air quality and reduce your home’s carbon footprint. Proper cleaning and maintenance can help you get the most out of your vacuum cleaner’s features and avoid any issues that may arise.
Prolongs Cleaning Efficiency
Maintaining and cleaning your automatic dirt disposal vacuum cleaner is crucial for its efficient functioning. Over time, the dust, dirt, and debris collected in the cleaner’s bin and filters can clog up the system, reducing its overall cleaning performance. This is where regular maintenance and cleaning come in, helping to prolong the cleaning efficiency of your automatic dirt disposal vacuum cleaner. With a clean and well-maintained robotic vacuum, you can enjoy cleaner floors with minimum effort. Plus, by taking care of your automatic vacuum, you can save yourself the hassle of costly repairs and replacement in the long run. Improving air quality and saving time and energy are just a few additional benefits you can enjoy with a well-functioning automatic dirt disposal vacuum cleaner.
Prevents Malfunction
Regular maintenance and cleaning of your automatic dirt disposal vacuum cleaner’s components, such as filters, brushes, and sensors, can prevent malfunction of the device. Accumulation of dirt and debris in the bin and filters can cause clogging, which can affect suction power and cause the vacuum to stop working properly.
Regular cleaning of the bin and filters can prevent such issues from occurring. It is recommended to clean the bin after every use and wash the filters every 1-2 months, depending on usage. Neglecting to maintain the device can lead to a decrease in efficiency and even complete breakdown.
Excessive wear and tear of the brushes and rollers due to accumulated debris can cause them to stop working eventually. Regularly cleaning these components can prevent such wear and tear and ensure the machine lasts longer.
Regular cleaning and maintenance of the sensors and charging contacts can ensure the machine remains in optimal condition. Dirt or debris accumulation in the sensors can cause the vacuum to malfunction or not function altogether. Similarly, charging contacts should be cleaned to prevent dirt from interfering with the charging process.
By regularly maintaining and cleaning your automatic dirt disposal vacuum cleaner, you can prevent unnecessary expenses for repairs or replacement. So, it is important to make the effort to follow the recommended cleaning routine as highlighted in this article.
Ensures Longevity
Proper maintenance and cleaning not only increases the overall efficiency of the automatic dirt disposal vacuum cleaner, but it also ensures its longevity. A well-maintained vacuum cleaner can last for several years, saving you money in the long run.
To ensure the longevity of your automatic dirt disposal vacuum cleaner, you should follow the maintenance schedule recommended by the manufacturer. This includes regular cleaning of the bin, filters, brushes, and rollers, as well as occasional servicing of the sensors, charging contacts, and battery.
Regular cleaning of the bin and filters are crucial for the longevity of the vacuum cleaner. Over time, the dirt and debris that accumulate in the bin can damage the motor and other parts of the machine, leading to costly repairs. By emptying the bin and cleaning the filters regularly, you can prevent this damage and extend the life of your vacuum cleaner.
Replacing the brushes and rollers every 6-12 months is also important for the longevity of the automatic dirt disposal vacuum cleaner. As these parts wear down over time, they become less effective at picking up dirt and debris. By replacing them regularly, you can ensure that your vacuum cleaner is working at maximum efficiency.
It’s also important to periodically check and clean the sensors and charging contacts, as well as replace the battery every 18-24 months. These components play a critical role in the functioning of the vacuum cleaner and can significantly impact its lifespan.
By following the recommended maintenance schedule and taking care to clean and replace components as necessary, you can ensure the longevity of your automatic dirt disposal vacuum cleaner. Investing in a high-quality vacuum cleaner with auto dirt-disposal features, like those discussed in our earlier article on “Best Auto Dirt Disposal Vacs”, can also further assist in minimizing maintenance requirements and maximizing longevity.
How to Clean Your Automatic Dirt Disposal Vacuum Cleaner?
Cleaning your automatic dirt disposal vacuum cleaner is an essential part of maintaining its efficiency and prolonging its lifespan. Neglecting to clean it regularly could lead to clogs, malfunctions or even permanent damage. Here are the five simple steps to help you clean your automatic dirt disposal vacuum cleaner:
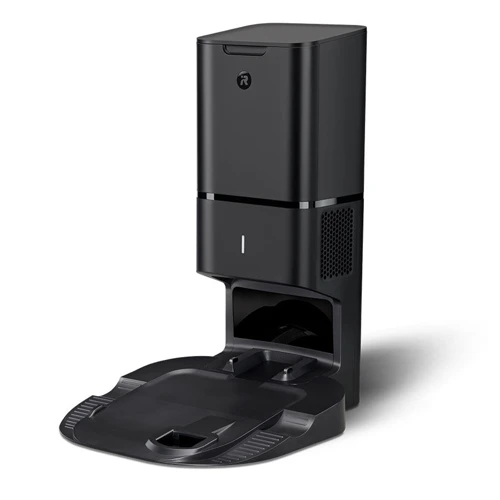
Step 1: Unplug and Empty the Bin
It’s important to unplug your automatic dirt disposal vacuum cleaner before you start cleaning it. Then, remove the dustbin or bag that holds the debris and empty it into a trash can. You can also use a brush to remove larger particles or debris that may be stuck inside the bin.
Step 2: Clean the Bin and Filters
When cleaning the bin, you can wash it with warm soapy water or use a damp cloth to wipe it clean. You can also use a vacuum cleaner brush to loosen and remove any dirt or debris that is stuck to the inside of the bin. Additionally, cleaning or changing the filters is essential to maintaining your vacuum cleaner’s efficiency. You can either wash washable filters with soap and water, or replace them if they are disposable.
Step 3: Clean the Brushes and Rollers
Over time, brushes and rollers can get tangled with hair or debris. To clean them, use a pair of scissors to carefully cut away any tangled debris. You can also use a brush to remove any remaining dirt or debris.
Step 4: Clean the Sensors and Charging Contacts
The sensors and charging contacts on your automatic dirt disposal vacuum cleaner can get dirty, which could interfere with the robot’s performance. To clean them, use a soft, dry cloth to remove any dirt or debris. You can also use a toothbrush or a cotton swab to reach difficult-to-clean areas.
Step 5: Check the Wheels and Side Brushes
Check the wheels and side brushes of your vacuum cleaner for any debris, hair or dirt that may have accumulated. You can use a brush or your hands to remove any debris, but make sure that you do not exert too much pressure on the wheels or side brushes, as you may cause damage to them.
By following these five simple steps, you can clean your automatic dirt disposal vacuum cleaner efficiently and prolong its lifespan. Remember to repeat this process regularly to maintain the optimal performance of your vacuum cleaner.
Before you begin cleaning your automatic dirt disposal vacuum cleaner, it is important to start with the first step: unplugging the device and emptying its bin. This may seem like an obvious step, but it is crucial for ensuring your safety while handling the machine and for effectively cleaning its parts without any obstructions. Plus, emptying the bin ensures that the vacuum cleaner is ready to collect new debris instead of just redistributing what is already inside. So, let’s get started with the first step of the cleaning process.
Step 2: Clean the Bin and Filters
Now that you’ve unplugged and emptied the bin, it’s time to give it a deep clean. Cleaning the bin and filters should be done regularly to ensure that your automatic dirt disposal vacuum cleaner works efficiently. Here’s how you can do it:
Step 2: Clean the Bin and Filters
Remove the filter: First, locate the filter on your automatic dirt disposal vacuum cleaner. It’s usually located inside the bin or somewhere in the vacuum cleaner’s body. Take it out and dispose of any dirt or debris that might be trapped in it.
Clean the bin: Once the filter is removed, it’s time to clean the bin. Use a soft cloth or brush to get rid of any dirt or debris that might be stuck in the bin. Avoid using harsh chemicals or solvents as they might damage the bin’s finish. If the bin is dishwasher safe, you can also choose to clean it in your dishwasher.
Clean the filter: Now that the bin is clean, it’s time to give the filter a deep clean. You can use running water to rinse off any dirt or debris that might be trapped in it. If the filter is washable, clean it with warm water and a gentle soap. Avoid using hot water or a high-pressure hose as this might damage the filter. Allow the filter to air-dry completely before replacing it.
Replace the filter: Once the filter and bin are completely dry, it’s time to replace the filter. Make sure that it’s properly secured and fits well in its place. If the filter is old or damaged, it’s always better to replace it with a new one. This will ensure that your vacuum cleaner works efficiently and efficiently removes dirt and debris from your home.
Cleaning the bin and filters should be a regular part of maintaining your automatic dirt disposal vacuum cleaner. Regular cleaning will ensure that your vacuum cleaner works efficiently and avoids any clogging issues, which might damage your vacuum cleaner’s motor. Remember to always read the manufacturer’s instructions before cleaning your vacuum cleaner’s filter and bin to avoid any potential damage.
Step 3: Clean the Brushes and Rollers
Cleaning the brushes and rollers of your automatic dirt disposal vacuum cleaner is essential to keep it running smoothly and efficiently. Here are the steps you should follow to properly clean them:
Turn off and unplug the vacuum cleaner.
Locate the brushes and rollers. They are usually found underneath the vacuum cleaner.
Remove any hair, dust, or debris from the brushes and rollers using your hands or a cleaning tool such as a brush or compressed air.
For stubborn debris, use scissors or a knife to carefully cut and remove it. Be careful not to damage the brushes or rollers.
Wipe the brushes and rollers with a clean, dry cloth to remove any remaining debris.
Inspect the brushes and rollers for any signs of damage such as frayed bristles or cracks. If you notice any, replace them immediately.
Regularly cleaning the brushes and rollers will prolong their lifespan and prevent them from getting clogged with debris. This will ensure that your vacuum cleaner is running efficiently and picking up dirt and debris effectively. Remember to follow the manufacturer’s guidelines for replacing the brushes and rollers every 6-12 months to keep your vacuum cleaner in top condition.
Step 4: Clean the Sensors and Charging Contacts
As automatic dirt disposal vacuum cleaners rely heavily on sensors to navigate around the home and locate their docking stations, it is crucial to clean these sensors regularly. Not only does keeping sensors clean ensure the vacuum can continue to function correctly, but it also helps to prolong the life of the machine.
Step 4: Clean the Sensors and Charging Contacts
To clean the sensors and charging contacts on your automatic dirt disposal vacuum cleaner, follow these simple steps:
Materials Needed:
– Soft cloth
– Rubbing alcohol
– Cotton swabs
Instructions:
1.
Start by unplugging the vacuum cleaner from the charger and turning it over to access the sensors and charging contacts.
2.
Using a soft cloth, gently wipe down the sensors and charging contacts to remove any dirt or debris that may have accumulated. Be sure to use a dry cloth for this step as using a wet cloth could damage the sensors.
3.
If there is any stubborn dirt or grime remaining on the sensors, dip a cotton swab in rubbing alcohol and gently clean the sensors with the swab. Be careful not to apply too much pressure as this could cause damage to the sensors.
4.
Once you have finished cleaning the sensors, use a soft cloth to wipe down the charging contacts on the vacuum cleaner as well as the docking station to ensure a strong connection between the two.
By regularly cleaning the sensors and charging contacts on your automatic dirt disposal vacuum cleaner, you can ensure that it continues to operate at peak efficiency and prolong its lifespan. If you encounter any issues with the sensors or charging contacts, be sure to refer to the troubleshooting section of your instruction manual or contact customer support for assistance.
Step 5: Check the Wheels and Side Brushes
After cleaning the filters, brushes, bin, and sensors, the next step is to check the condition of the wheels and side brushes of your automatic dirt disposal vacuum cleaner. These components, just like the other parts, are essential in ensuring the efficient performance of your machine.
Here are the steps on how to check the wheels and side brushes:
Step 1: Check the wheels if they are moving smoothly. Dirt or debris might have accumulated in the axle or bearings, which can cause them to malfunction.
Step 2: Inspect the wheels for any cracks or damages. Constant bumping or accidents might damage the wheels, making them less efficient in navigating and cleaning your floors.
Step 3: Check the side brushes if they are still intact and spinning properly. Dirt and hair can get tangled in the brush, causing it to malfunction or damage the motor.
Step 4: Clean the wheels and side brushes using a soft cloth or brush. Remove any dirt, hair, or debris that might have gotten stuck in the wheels, bearings, or brushes.
Step 5: Replace any damaged or worn-out wheels and side brushes. These components are vital in ensuring the seamless operation of your automatic dirt disposal vacuum cleaner, and any damage can affect its overall performance.
Regularly examining the wheels and side brushes of your vacuum cleaner can help prevent any malfunction or damages that could affect the cleaning efficiency of your machine. It is essential to keep these components well-maintained and in good condition to ensure the longevity and optimal performance of your automatic dirt disposal vacuum cleaner.
How to Maintain Your Automatic Dirt Disposal Vacuum Cleaner?
Maintaining your automatic dirt disposal vacuum cleaner is crucial to ensure its longevity and smooth operation. Follow these simple steps and keep your device in tip-top shape:
Regularly Empty the Bin: It is essential to empty the dirt bin after every cleaning session. A full-dirt bin can lead to clogging of the vacuum’s nozzle and filters, reducing its overall performance.
Clean the Filters Every 1-2 Months: Filters are responsible for trapping dirt and pollutants. Over time, they can become clogged, hindering the device’s suction power. Clean the filters every 1-2 months to avoid this issue and extend your vacuum’s lifespan.
Replace the Brushes and Rollers Every 6-12 Months: Dust and debris can accumulate on brushes and rollers, reducing their efficiency. Replace them every 6-12 months to ensure optimal performance.
Check and Clean the Sensors Every 3 Months: The vacuum’s sensors can accumulate dust and debris, leading to malfunction or inaccurate navigation. Check and clean them every 3 months to ensure proper operation.
Replace the Battery Every 18-24 Months: The battery is a vital component of your vacuum. Over time, it can lose capacity, leading to reduced run time and charging speed. Replace the battery every 18-24 months to keep the device running smoothly.
Service the Charging Contacts Every 6 Months: Under proper use conditions, charging contacts can become dirty, reducing the vacuum’s charging efficiency. Service them every 6 months to keep the vacuum charging efficiently.
By following these maintenance tips, you can keep your automatic dirt disposal vacuum cleaner in excellent condition, prolonging its lifespan and ensuring optimal performance.
Regularly Empty the Bin
You might think that your automatic dirt disposal vacuum cleaner can handle large amounts of debris without needing to be emptied frequently. However, neglecting to empty the bin can have serious consequences for the efficiency and longevity of your machine. Dirt and dust clog up the filters and parts, making it harder for the vacuum to function correctly. That’s why it’s essential to regularly remove the bin and empty its contents. But how frequently should you do this, and what are the best practices to follow? Let’s find out.
Clean the Filters Every 1-2 Months
The filters are an essential component of your automatic dirt disposal vacuum cleaner that help to trap dirt, dust, and allergens. Over time, these filters can become clogged, which can decrease the performance of your vacuum cleaner. As such, it is essential to clean your filters every 1-2 months to maintain the efficiency and suction power of your vacuum cleaner.
To clean the filters, follow these steps:
1. Turn off and unplug the vacuum cleaner to avoid any accidents while cleaning the filters.
2. Locate the filter compartment, which is usually located near the dustbin or under the cover of the vacuum cleaner.
3. Remove the filter from the compartment and gently tap it to remove any loose dirt and debris.
4. Use a soft-bristled brush or a dry cloth to gently clean the filter. Avoid using water or any liquid to clean the filter as it can damage the filter.
5. If the filter is extremely dirty, it may need to be replaced. Look for replacement filters that are compatible with your vacuum cleaner model.
6. Once the filter is clean or replaced, place it back in the filter compartment and securely close the cover or lid.
Remember to clean your filters every 1-2 months to maintain the efficiency and suction power of your automatic dirt disposal vacuum cleaner. Ignoring filter maintenance can lead to reduced performance, loss of suction power, and an increased risk of damage to your vacuum cleaner.
Replace the Brushes and Rollers Every 6-12 Months
Regularly replacing the brushes and rollers of your automatic dirt disposal vacuum cleaner is crucial for maintaining its cleaning efficiency and longevity. Over time, these components can become worn or damaged, hindering the robot’s ability to pick up debris and potentially causing damage to other parts.
To ensure you don’t forget to replace these components, it’s best to set a reminder to do so every six to twelve months. This will give enough time for the parts to wear out naturally without causing damage to other components.
When it gets to the time frame for replacement, follow these steps to replace the brushes and rollers:
Step 1: Turn off the robot and unplug it from the charging dock.
Step 2: Locate the brush rollers underneath the robot.
Step 3: Remove the brush rollers from the robot by pulling them gently out of their sockets.
Step 4: Check the rollers for any signs of wear and tear or damage. If they look worn or damaged, it’s time to replace them.
Step 5: Install the new brush rollers by pressing them firmly into the sockets.
Step 6: Repeat the process for the side brushes, located on the sides of the robot, making sure to replace them if needed.
Step 7: Once all parts have been replaced, turn the robot back on and let it run a cleaning cycle to ensure everything is working correctly.
By following these steps every six to twelve months and performing regular maintenance, you can ensure that your automatic dirt disposal vacuum cleaner stays in top working condition for years to come.
Check and Clean the Sensors Every 3 Months
Regularly checking and cleaning the sensors of your automatic dirt disposal vacuum cleaner is essential for ensuring its optimal performance. Over time, dust, dirt, and debris can accumulate on the sensors, which can affect its accuracy in detecting the surrounding environment. This can result in the robot cleaner getting stuck, hitting obstacles, or failing to clean certain areas of your home. To avoid such issues, be sure to check and clean the sensors every 3 months.
The following steps are recommended for checking and cleaning the sensors:
Step 1: Turn off and unplug the vacuum cleaner to ensure your safety.
Step 2: Remove the dustbin and locate the sensors. These sensors are typically located at the bottom of the robot cleaner, and they are responsible for detecting obstacles, cliffs, and other hazards in its path.
Step 3: Using a soft, dry cloth or cleaning brush, gently dust off the sensors to remove any dirt or debris that may have accumulated on them.
Step 4: If there are any stubborn debris or dirt that cannot be removed by dusting alone, use a wet cloth or cotton swab to gently wipe the sensors. Avoid using harsh chemicals or abrasive materials that can scratch or damage the sensors.
Step 5: Once you have cleaned the sensors, replace the dustbin and turn on the robot cleaner to check whether the sensors are working correctly. You can use the remote control or mobile app to test the robot cleaner’s accuracy in detecting obstacles and other hazards.
By cleaning the sensors every three months following these steps, you can avoid any malfunctions and continue enjoying the benefits of your automatic dirt disposal vacuum cleaner.
Replace the Battery Every 18-24 Months
One of the most important components of an automatic dirt disposal vacuum cleaner is the battery. Over time, the battery degrades and loses its ability to hold a charge. If you want to ensure optimal performance of your vacuum cleaner, it’s recommended that you replace the battery every 18-24 months. The following table provides an overview of the steps involved in replacing the battery.
Step 1
Turn off the robot and unplug the charging dock.
Step 2
Locate the battery compartment on the vacuum cleaner.
Step 3
Remove the old battery from the compartment.
Step 4
Replace the old battery with a new one that’s compatible with your vacuum cleaner model. Make sure the battery is properly seated in the compartment.
Step 5
Close the battery compartment.
Step 6
Plug in the charging dock and turn on the robot. Allow the vacuum cleaner to charge for at least 3 hours or until the battery is fully charged.
Remember, when replacing the battery, it’s important to use a battery that’s compatible with your vacuum cleaner model. Using an incompatible battery can damage your vacuum cleaner and potentially void your warranty. If you’re unsure which battery to use, consult your vacuum cleaner’s instruction manual or contact the manufacturer for assistance. By replacing the battery every 18-24 months, you can ensure that your automatic dirt disposal vacuum cleaner continues to operate at optimal performance, providing you with a cleaner and healthier living space.
Service the Charging Contacts Every 6 Months
As part of regular maintenance for your automatic dirt disposal vacuum cleaner, it is necessary to service the charging contacts at least every 6 months. These charging contacts can become dirty or corroded over time, which can reduce their effectiveness and prevent your vacuum from charging properly. It’s important to keep these contacts clean and free from debris.
To service the charging contacts, follow these steps:
Step 1:
Unplug the vacuum cleaner and remove the dustbin.
Step 2:
Use a soft cloth or microfiber towel to gently clean the charging contacts on both the vacuum and the charging dock. Be sure to remove any dirt, dust, or debris that may have accumulated on the contacts.
Step 3:
If the charging contacts are corroded or heavily soiled, you may need to use a small amount of rubbing alcohol on a cloth to help clean them. However, be sure to avoid getting any alcohol on other parts of the vacuum or charging dock.
Step 4:
Once the contacts are clean, use a dry cloth to wipe away any remaining moisture or debris.
Step 5:
Replace the dustbin and plug in the vacuum cleaner. You should now be able to charge your automatic dirt disposal vacuum without any issues.
By servicing your charging contacts every 6 months, you can ensure that your automatic dirt disposal vacuum cleaner charges efficiently and without any problems. Taking the time to maintain your vacuum on a regular basis will help to prolong its life and maximize its cleaning efficiency, saving you time and money in the long run.
Troubleshooting Common Issues
When it comes to maintaining and cleaning your automatic dirt disposal vacuum cleaner, it’s not uncommon to experience some common issues. However, with a bit of upfront troubleshooting, you can save yourself from the headache of dealing with a malfunctioning machine. Here are some of the most common issues that users face, along with some tips for how to address them:
Bin Full or Bin Missing Error: One of the most common issues that users face is a “Bin Full” or “Bin Missing” error. This error typically indicates that the bin is not seated properly or is full of debris. To address this issue, start by checking the bin to see if it is full. If it is, remove the debris and try again. If the bin is not full, remove it from the vacuum and re-seat it firmly on the machine. This should reset the sensor and eliminate the error.
Robot Not Docking Correctly: Another common issue is when the robot does not dock properly with the charging station. This can happen if the robot is not aligned correctly, if the charging contacts are dirty or damaged, or if there is an obstruction in the way. To address this issue, start by cleaning the charging contacts and making sure that they are not bent or damaged. Next, check to make sure that the robot is properly aligned with the charging station. If there is an obstruction in the way, remove it and try again.
Robot Not Returning to Base: Sometimes, the robot may fail to return to its charging base after a cleaning cycle. This can happen if the battery is low or if the sensors are obstructed or dirty. To address this issue, start by checking the battery level and recharging the robot if necessary. If the battery is not the issue, check the sensors to see if they are obstructed or dirty. If they are, clean them carefully and try again.
Robot Not Picking Up Debris: If the robot seems to be skipping over debris or missing spots, there could be a few different issues at play. One possibility is that the brushes or rollers are dirty or worn and need to be cleaned or replaced. Another possibility is that the robot is not programmed to clean certain areas of the room. Check the brushes and rollers first, and if that doesn’t solve the issue, review the programming settings.
Wheel, Brush, or Roller Issues: Finally, it’s not uncommon for users to experience issues with the wheels, brushes, or rollers of their automatic dirt disposal vacuum cleaner. This can happen if the machine is used on uneven or rough surfaces, if debris becomes lodged in the wheels or brushes, or if the machine is simply old and in need of replacement parts. In most cases, the best solution is to perform regular maintenance and replace worn parts as necessary.
By taking the time to troubleshoot these common issues, you can keep your automatic dirt disposal vacuum cleaner running smoothly and efficiently for years to come. Just remember to refer to your instruction manual for guidance on specific issues and to take precautions when using the machine to avoid damaging it or causing harm to yourself or others.
Bin Full or Bin Missing Error
Have you ever encountered a situation where your automatic dirt disposal vacuum cleaner stops functioning due to a “bin full” or “bin missing” error? It can be quite perplexing and frustrating, especially if you don’t know how to resolve the issue. These errors can occur due to a variety of reasons, ranging from a clogged bin to improper placement of the bin. In this section, we will guide you through some troubleshooting steps that can help you resolve the “bin full” or “bin missing” error on your automatic dirt disposal vacuum cleaner.
Robot Not Docking Correctly
One common issue that may arise with your automatic dirt disposal vacuum cleaner is that the robot may not dock correctly. This can be frustrating, especially if the robot is not able to charge, leading to a dead battery and reduced cleaning time. Here are some steps to take if you encounter this issue:
Step 1: Check the charging station placement. Make sure that the charging station is placed on a flat surface and that it is not in an area with extreme temperatures.
Step 2: Clean the charging contacts. Over time, dust and debris can accumulate on the charging contacts which prevents the robot from properly docking on the charging station. Use a clean, dry cloth to gently wipe the contacts.
Step 3: Check the robot’s bumper. The robot may not be docking correctly due to a malfunction in its bumper system. Inspect the bumper for any damage or blockages that may be preventing the robot from initiating the docking sequence.
Step 4: Reset the robot. If none of the steps above work, try resetting the robot by turning it off and unplugging the charging station for a few minutes before plugging it back in.
Step 5: Contact customer support. If the issue persists, contact the manufacturer’s customer support for further assistance in resolving the issue.
It’s important to note that regular maintenance and cleaning can help prevent issues like this from occurring. Make sure to regularly clean the charging contacts and the bumper system, as well as keep the charging station in a suitable location. By following these steps and taking precautions, you can keep your automatic dirt disposal vacuum cleaner running smoothly for a long time.
Robot Not Returning to Base
One common issue that can arise with automatic dirt disposal vacuum cleaners is when the robot doesn’t return to base. This can be frustrating, as it means the vacuum cleaner will not be able to recharge itself and resume cleaning on its own. If you are experiencing this issue, there are several steps you can take:
Check the battery: The first thing to do is to check the battery level. If the battery is empty or low, the robot will not be able to return to the base. Ensure that the charger is working correctly and try charging it again. If the problem persists, consider replacing the battery.
Check the charging contacts: The charging contacts on the robot and base may become dirty or damaged over time, affecting the charging process. Wipe the contacts clean with a soft cloth and check that they are aligned correctly. If they are damaged, consider replacing them.
Check for obstacles: Make sure that there are no objects blocking the path between the robot and its base. If the robot cannot find its way to the base, it will not be able to recharge itself. Remove any obstacles and try again.
Reset the robot: Try resetting the robot to its factory settings. This can clear up any software issues that may be preventing the robot from returning to the base. Refer to the instruction manual for detailed instructions on how to reset your specific model.
Contact customer support: If the problem persists after trying these steps, contact the manufacturer’s customer support team. They may be able to provide further troubleshooting or offer a repair or replacement if necessary.
Remember, prevention is always better than dealing with the problem later on. Regular maintenance and cleaning of your automatic dirt disposal vacuum cleaner can help prevent issues like this from occurring in the first place.
Robot Not Picking Up Debris
If your automatic dirt disposal vacuum cleaner is not picking up debris, there could be a number of reasons why. Here are some troubleshooting tips to get your vacuum cleaner back to its optimum performance:
Possible Causes
Solutions
Clogged Bin and Filters
Empty the bin and clean the filters as per the instructions given in the manual. A dirty bin and filters can negatively impact the suction and cleaning efficiency of the vacuum cleaner.
Worn Out Brushes and Rollers
Check if the brushes and rollers are tangled or damaged. If so, replace them immediately. Worn out brushes and rollers are unable to pick up debris effectively and can also damage the floor.
Low Battery
Make sure that the vacuum cleaner has enough battery to complete a full cleaning cycle. If not, charge it fully and run the cleaning cycle again.
Incorrect Cleaning Mode
Check if the vacuum cleaner is in the correct cleaning mode for the type of floor it is cleaning. Some vacuum cleaners need to be switched manually to clean carpets or hard floors.
Dirty Sensors
The sensors in the vacuum cleaner detect obstacles and dirt, and if they get dirty, they may not function properly. Clean the sensors with a soft cloth as per the instructions given in the manual.
If none of these solutions work, try resetting the vacuum cleaner or contacting customer support for further assistance. Remember to always follow the precautions listed in the manual to prevent any damage to the vacuum cleaner.
Wheel, Brush, or Roller Issues
When using an automatic dirt disposal vacuum cleaner, some common issues that may arise involve the wheels, brushes, or rollers. These components are crucial in ensuring the effectiveness of your machine, and any issues with them should be addressed promptly. Here are some common issues and solutions:
Issue
Solution
Wheels not working
Check if there is any obstruction affecting the movement of the wheels. If the wheels are clogged with debris, remove the obstruction and try again. If this does not work, you may need to clean or replace the wheels entirely.
Brushes not rotating
Check if there is any debris tangled in the brushes. Remove the brushes and clean them thoroughly. If this does not work, you may need to replace the brushes.
Rolled up hair or string caught on rollers
Manually remove the tangled hair or string from the rollers. If there is a significant buildup of hair, consider replacing the rollers.
Ensuring that your wheels, brushes, and rollers are working correctly is essential in maintaining your automatic dirt disposal vacuum cleaner. These issues may seem small, but they can significantly affect the performance of your machine. By addressing them promptly, you can ensure that your machine is working optimally and prolong its lifespan.
Precautions to Take
It is crucial to take necessary precautions while maintaining and cleaning your automatic dirt disposal vacuum cleaner to ensure safe and effective operation. Here are some crucial precautions that you should take:
Read the Instruction Manual: It is essential to read the instruction manual carefully before using or performing any maintenance on your automatic dirt disposal vacuum cleaner. The manual provides information on how to operate the vacuum cleaner safely and correctly, and also offers guidance on what to do in case of any problems.
Do Not Overload the Bin: Overloading the bin can lead to the accumulation of debris and dirt, which can interfere with the performance of the vacuum cleaner. It is crucial to ensure that you empty the bin regularly to avoid such problems.
Do Not Use on Wet Surfaces: It is important to avoid using an automatic dirt disposal vacuum cleaner on wet surfaces, as moisture can damage the components of the vacuum cleaner. This can lead to malfunctions and may even cause accidents.
Keep the Vacuum Cleaner Away from Children and Pets: Automatic dirt disposal vacuum cleaners are not toys and should always be kept out of the reach of children and pets to prevent accidents. Additionally, make sure to switch off the vacuum cleaner when not in use to avoid any unintentional injuries.
Use Genuine Replacement Parts: While replacing parts of your automatic dirt disposal vacuum cleaner, always use genuine replacement parts provided by the manufacturer. Using counterfeit parts can lead to malfunctions and may even cause accidents.
By following these precautions, you can ensure safe and effective operation of your automatic dirt disposal vacuum cleaner, preventing potential damage to the equipment and avoiding accidents.
Read the Instruction Manual
You may be tempted to skip the instruction manual and dive straight into using your automatic dirt disposal vacuum cleaner, but this is a mistake. The manual contains crucial information on how to properly operate and maintain your device, as well as important safety precautions to keep in mind. Ignoring the manual could lead to damage to your vacuum cleaner, or worse, injury to yourself or others. So, take the time to read the manual thoroughly before using your device. Trust us, it’s worth it.
Do Not Overload the Bin
One important precaution to take when using an automatic dirt disposal vacuum cleaner is to make sure that you do not overload the bin. This can cause several issues that may affect the performance of your machine.
Here are some reasons why overloading the bin is not recommended:
Debris may get stuck: If the bin is overfilled, there is a higher chance that debris may get stuck in the machine, which can damage the motor or other components.
Reduced suction power: If the bin is filled beyond its capacity, it can reduce the suction power of the automatic vacuum cleaner, making it harder for the machine to pick up dirt and debris effectively.
Inefficient cleaning: Overloading the bin can also result in inefficient cleaning, as the machine may not be able to collect all the debris properly, leaving some dirt and debris on the floor.
Here are some tips to avoid overloading the bin:
Empty the bin regularly: To prevent overloading, it is essential to empty the bin regularly. The frequency of emptying the bin may depend on the size of the bin and the level of dirt and debris in your home.
Monitor the bin level: Keep an eye on the level of the debris in the bin. When it reaches the limit, empty it immediately to avoid overloading it.
Use the right setting: Some automatic vacuum cleaners have different settings for different floor types. Using the right setting can prevent overloading by adjusting the suction power according to the type of surface.
By following these precautions, you can prevent overloading the bin and ensure that your automatic dirt disposal vacuum cleaner continues to perform as expected.
Do Not Use on Wet Surfaces
One important precaution to keep in mind is to avoid using your automatic dirt disposal vacuum cleaner on wet surfaces. Water and electronics don’t mix well, and moisture can cause damage to your vacuum cleaner’s internal components. It’s important to remember that these vacuums are designed for dry cleaning only!
Here are some reasons why using your vacuum cleaner on wet surfaces can be harmful:
Risk of electrical shock: Water is an excellent conductor of electricity, and using your vacuum cleaner on wet surfaces can put you at risk of electrical shock.
Potential damage to the vacuum: Moisture can damage the vacuum cleaner’s electronics, rendering it unusable.
Reduced cleaning performance: If the vacuum cleaner’s parts, particularly the filters, get wet, it may reduce the vacuum’s suction power and cleaning efficiency.
To avoid these issues, be sure to keep your automatic dirt disposal vacuum cleaner away from any wet surfaces. If you accidentally spill liquid on your robot vacuum, turn it off immediately and unplug it from the power source. Then, wipe it down thoroughly with a dry towel and let it air dry completely before using it again.
Remember, prevention is the key to avoiding any potential issues. By following the manufacturer’s recommendations and keeping your vacuum cleaner away from wet surfaces, you can maintain its cleaning efficiency and ensure its longevity.
Conclusion
As we conclude this article, it’s important to reiterate the significance of maintaining and cleaning your automatic dirt disposal vacuum cleaner. By doing so, you not only keep the cleaning efficiency intact but also extend the longevity of the machine.
Regular checking and cleaning of the filters, sensors, wheels, and rollers ensure optimal performance and prevents potential malfunctioning. It’s also essential to regularly empty the bin, replace the brushes and rollers every 6-12 months, replace the battery every 18-24 months, and service the charging contacts every 6 months.
Despite the automated nature of these devices, caution must be exercised while using them. Overloading the bin, using on wet surfaces or uneven flooring, and ignoring the instruction manual can all lead to damaging the device or reducing its efficiency.
Remember, your automatic dirt disposal vacuum cleaner is an investment, and proper maintenance and care can go a long way. By following these steps and precautions, you’ll ensure that your machine provides you with cleaning convenience, efficiency, and longevity for years to come.
Frequently Asked Questions
1. How often should I clean my automatic dirt disposal vacuum cleaner?
It’s recommended to clean your automatic dirt disposal vacuum cleaner after every use or at least once a week if it’s used frequently.
2. How do I empty the bin of my automatic dirt disposal vacuum cleaner?
Simply unplug the vacuum cleaner and remove the bin. Dump the debris into the trash and then clean the bin with a damp cloth or rinse it under running water.
3. How often should I replace the brushes and rollers of my automatic dirt disposal vacuum cleaner?
It’s recommended to replace the brushes and rollers every 6-12 months or when they show signs of wear and tear.
4. Can I use my automatic dirt disposal vacuum cleaner on carpets?
Yes, automatic dirt disposal vacuum cleaners are designed to clean all types of surfaces including carpets.
5. How do I maintain the sensors and charging contacts of my automatic dirt disposal vacuum cleaner?
You can clean the sensors and charging contacts with a dry cloth every 3 months to ensure proper functioning and charging.
6. Why is it important to clean the filters of my automatic dirt disposal vacuum cleaner?
Cleaning the filters regularly ensures proper airflow and suction, and also prevents the vacuum cleaner from overheating.
7. What should I do if my automatic dirt disposal vacuum cleaner shows a “bin full” error?
Empty the bin and clean the sensors located on the bin and inside the vacuum cleaner. This should resolve the error.
8. Can I replace the battery of my automatic dirt disposal vacuum cleaner?
Yes, the battery of some automatic dirt disposal vacuum cleaners can be replaced. Check the instruction manual or contact the manufacturer for information on how to replace the battery.
9. Is it safe to leave my automatic dirt disposal vacuum cleaner charging overnight?
Yes, it’s safe to leave the vacuum cleaner charging overnight as long as you’re using the charger provided by the manufacturer and following the instructions.
10. How do I troubleshoot if my automatic dirt disposal vacuum cleaner is not returning to base?
Check if the charging contacts are clean and properly aligned. Make sure there are no obstacles blocking the path to the charging base. If the issue persists, contact the manufacturer for assistance.