There’s no denying that smart vacuums have revolutionized the way we clean our homes. Whether it’s a quick clean up or a deep cleaning session, smart vacuums are always ready to take on the challenge. However, many users often overlook one crucial aspect of maintaining their smart vacuum: cleaning and replacing the filters. But why is this so important? In this article, we’ll take a closer look at the role of filters in a smart vacuum, how clogged filters can affect performance, and why it’s crucial to clean and replace them regularly. We’ll also provide you with expert tips and a step-by-step guide on how to keep your smart vacuum’s filters in top condition. So, let’s dive in!
Why Cleaning and Replacing Filters is Important
Maintaining a clean and functioning filter system is crucial to ensuring the efficient performance of your smart vacuum. Cleaning and replacing filters can help prevent dust, dirt, and debris from getting trapped and causing blockages, which can significantly affect your smart vacuum’s suction power and overall cleaning ability. Over time, filters can get clogged and become less effective, so it’s important to know when it’s time to clean or replace them. In this article, we will discuss why cleaning and replacing filters is important and provide step-by-step guidance on how to do it properly. Don’t neglect this essential maintenance task, as it can greatly impact the quality of your smart vacuum’s cleaning performance. For more information on smart vacuum maintenance, see our guide to the benefits of smart vacuum maintenance.
What Filters Do in a Smart Vacuum
Filters are an integral component of a smart vacuum that helps in removing impurities, dirt, and debris from floors, carpets, and other surfaces. They ensure that the air released by the vacuum into the room is clean and fresh as well. In short, filters are the lungs of the smart vacuum.
Here is a table listing the types of filters in smart vacuums and their functions:
| Filter Type | Function |
|---|---|
| Pre-motor filters | Prevent dirt and debris from entering the vacuum motor and damaging it. |
| Post-motor filters | Trap fine dust and allergens that escape from the vacuum motor. |
| HEPA Filters | Traps the smallest particles (0.3 microns) which includes dust, pollen, and pet dander. Ideal for people with allergies and asthma. |
Smart vacuums can have one or more of the above filters. Usually, there are different types of filters in a smart vacuum to cater to separate requirements. The pre-motor filters are typically made of foam, while the post-motor filters and HEPA filters are made of paper or cloth.
It is crucial to keep the filters clean and replace them on time to keep the vacuum working effectively. A dirty filter will not only reduce suction power but will also release a bad odor into the air. Ultimately, filters play a crucial role in ensuring that your smart vacuum continues to run smoothly, keeping your home clean and fresh.
If you’re facing issues with your smart vacuum, such as automatic disposal not working, improper dustbin emptying, or any other issue related to maintaining your smart vacuum, please check out our troubleshooting guide from the link.
How Clogged Filters Affect Performance
Clogged filters can significantly reduce the performance of your smart vacuum. When the filters are clogged, the suction power is weakened, and the vacuum cannot pick up dirt and debris as effectively. This can lead to unsatisfactory cleaning results and even leave your floors looking just as dirty as they were before vacuuming.
A clogged filter can also make the vacuum work harder to try and achieve the same results, which can cause stress on the motor and other parts, leading to a shorter lifespan for the machine. Additionally, clogged filters can cause the vacuum to overheat, which can damage the machine or even create a fire hazard.
To avoid these issues, it’s essential to regularly clean and replace the filters in your smart vacuum. This will ensure that it performs at its best and keeps your floors clean and healthy. It’s worth checking the filters more often if you have pets or if you vacuum frequently.
To learn how to clean and replace your smart vacuum filters, keep reading the next section. And, to explore further tips to maintain your smart vacuum, check out our article on how to clean smart vacuum brushes.
When to Clean or Replace Filters
Keeping the filters in your smart vacuum clean and replacing them when necessary are crucial for ensuring its optimal performance. It is recommended to check your vacuum’s filter every month and clean or replace it as needed. Here are a few signs indicating that it’s time to clean or replace the filters:
- Weak suction: If you notice that your vacuum cleaner doesn’t have the same suction power as it did when new, it’s likely that the filters are clogged and need cleaning.
- Foul odors: If your smart vacuum is producing an unpleasant smell or odor, it’s possible that the filters are dirty and need cleaning.
- Visible debris: If you see dust or debris accumulating on the surface of your vacuum’s filter or in the dustbin, it’s time for a cleaning or replacement.
- Longer cleaning time: If your vacuum is taking longer to clean your home, it’s possible that the filters are clogged and need cleaning or replacing.
Ignoring these signs can damage your smart vacuum or reduce its lifespan, so it’s important to address these issues as soon as possible. In order to avoid this situation, regular maintenance of your smart vacuum cleaner is necessary. You should pay close attention to your vacuum’s filters and clean or replace them proactively to prevent any potential damage or costly repairs in the future.
How to Clean and Replace Filters in Smart Vacuums
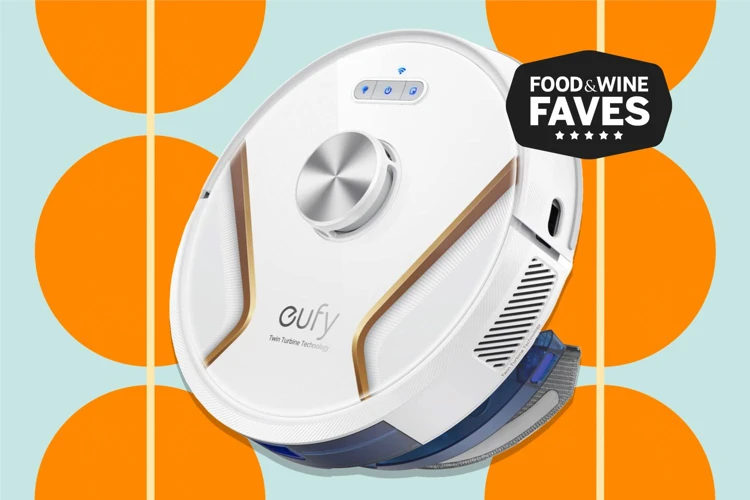
Keeping your smart vacuum in top performing condition is essential to ensure your floors stay clean and your home stays healthy. One key aspect of maintaining your smart vacuum is cleaning and replacing filters. Over time, filters can become clogged with dirt and debris, which can negatively impact the suction and overall performance of your smart vacuum. In this section, we’ll provide you with a step-by-step guide on how to clean and replace filters in your smart vacuum to keep it running at its best. And, if you’re interested in learning more about other ways to maintain your smart vacuum, check out our article on top smart vacuum accessories.
Step-by-Step Guide to Cleaning Filters
To ensure that your smart vacuum functions efficiently, it is crucial to clean and replace its filters regularly. Here is a step-by-step guide to cleaning the filters in your smart vacuum.
Step 1: Begin by referring to the user manual to identify the location of the filters in your smart vacuum. Typically, these filters are found near the dustbin.
Step 2: Open the latch to access the filters. Remove the filter carefully, making sure not to damage it.
Step 3: Tap the filter gently on a hard surface, such as a table or a sink, to remove any loose dust and debris.
Step 4: Rinse the filter with water. Make sure to use cold water, as hot water can damage the filter’s fibers. Gently massage the filter to remove any stubborn dirt.
Step 5: If your filter is particularly dirty or clogged, you may need to soak it in water for about 10 minutes. Again, make sure to use cold water.
Step 6: Once you’re done soaking the filter, rinse it thoroughly with water.
Step 7: Squeeze the filter gently to remove any excess water. Do not wring the filter; doing so may damage it.
Step 8: Leave the filter to air-dry completely before you reinstall it in your smart vacuum. Avoid using any heat sources to speed up the drying process, as this may damage the filter.
By following these steps regularly, you can prolong the life of your smart vacuum’s filters and improve its overall performance. Remember to clean the dustbin and sensors as well for optimal functionality. For more information on maintaining a smart vacuum, check out our detailed article on how to clean and maintain smart vacuum sensors.
Step-by-Step Guide to Replacing Filters
Replacing filters is often necessary to keep your smart vacuum running smoothly and maintaining good cleaning performance. Here is a guide on how to replace the filters in your smart vacuum:
| Step | Description |
|---|---|
| Step 1 | Refer to the user’s manual to ensure that you know exactly which filter to replace and where to find it. |
| Step 2 | Turn off the smart vacuum and remove it from the charging dock. |
| Step 3 | Locate the filter that needs to be replaced. Take it out of the vacuum by pulling it straight out. |
| Step 4 | If you have a replaceable filter, simply insert a new one into the slot. Make sure it is properly secured in place. |
| Step 5 | If you have a washable filter, rinse it under running water until it is clean. Allow it to air-dry completely before inserting it back into the vacuum. |
| Step 6 | Once you have replaced or washed the filter, place it back into the vacuum. Ensure that the filter is properly secured in place. |
| Step 7 | Return the smart vacuum to its charging dock and turn it back on. Your replacement or newly washed filter should provide optimal cleaning performance. |
It’s recommended to replace your smart vacuum filters at least once a year or when they become visibly dirty. Regularly replacing the filters will ensure optimal cleaning performance and prolong the lifespan of your smart vacuum.
Pro Tip: To ensure the longevity and effectiveness of your smart vacuum filters, properly empty the dustbin before replacing the filter. Regular maintenance and disposal will ensure your smart vacuum is always ready to clean effectively.
Tips for Maintaining Smart Vacuum Filters
As smart vacuums continue to grow in popularity, it’s important for owners to understand the proper maintenance and care required to keep them working at their best. One critical component to consider is the filter. Without proper maintenance, filters can become clogged, affecting the performance of the vacuum and preventing it from effectively cleaning your home. To help you maintain your smart vacuum and filters, we’ve compiled a list of essential tips and tricks that will make filter cleaning and replacement a breeze.
Choose the Right Replacement Filters
When it comes to maintaining your smart vacuum’s filters, one crucial thing to keep in mind is choosing the right replacement filters. Not all filters are created equal, so it’s essential to invest in high-quality, compatible filters that will work efficiently with your smart vacuum. Here are some factors to consider when selecting replacement filters:
| Filter Type | Compatibility | Quality |
|---|---|---|
| HEPA Filter | Check to ensure the filter is compatible with your smart vacuum model | Look for HEPA filters with high-efficiency ratings to ensure maximum filtration |
| Pre-Filter | Ensure the filter is the correct size and shape for your smart vacuum | Choose pre-filters that are durable and easy to clean |
| Carbon Filter | Check to ensure the filter is compatible with your smart vacuum model | Choose carbon filters with high-quality activated carbon for maximum odor absorption |
Make sure to read the product specifications carefully and check the manufacturer’s recommendations for replacement filters. Using the wrong filters could compromise the performance and suction power of your smart vacuum, and may even damage your unit in the long run. It’s also important to note that using generic or off-brand replacement filters could void your warranty.
Investing in the right replacement filters and regularly replacing them will ensure that your smart vacuum continues to work its best and maintain its performance over time.
Regularly Inspect Filters
As a responsible owner of a smart vacuum, it’s important to regularly inspect the filters to ensure they’re clean and working effectively. Inspecting the filters can help you identify any damage or clogs early on, preventing potential damage to your machine. Here are some key steps to take when inspecting your smart vacuum filters:
- Remove the Filters: Before inspecting the filters, make sure your smart vacuum is turned off and unplugged. Remove the filters from the vacuum to get a clear view of their condition.
- Look for Visible Dirt and Debris: Take a close look at the filters and check for any visible dirt, debris, or damage. If there is any visible dirt, use a soft-bristled brush or a vacuum cleaner’s brush attachment to gently sweep away the debris. If there is any damage, such as tears or holes, you may need to replace the filters.
- Check for Clogs: Hold the filters up to the light and check for clogs. If you notice any areas that are especially dirty, try shaking or tapping the filters on a hard surface to dislodge any dirt. If the clogs seem severe or persistent, consider cleaning the filters or replacing them entirely.
- Follow the Manufacturer’s Instructions: To ensure you’re inspecting your smart vacuum filters correctly, consult the manufacturer’s instructions for guidance. They may have specific recommendations for when to inspect and clean the filters, as well as tips for doing so effectively.
By regularly inspecting your smart vacuum filters, you can help maintain the longevity of your vacuum and ensure it is working effectively to keep your home clean. Remember to be gentle when cleaning the filters and to replace them as needed to keep your smart vacuum running at peak performance.
Don’t Neglect Cleaning the Dustbin
When it comes to maintaining your smart vacuum, cleaning and replacing the filters is essential for optimal performance. However, many people forget to clean the dustbin, which can lead to decreased suction power and an unpleasant odor.
Why is cleaning the dustbin important?
The dustbin is where all the dirt and debris collected by your smart vacuum are stored. Over time, this can accumulate and cause blockages that prevent your vacuum from working efficiently. Neglecting to clean the dustbin can also lead to an unpleasant odor caused by the accumulation of dirt and bacteria.
How often should you clean the dustbin?
The frequency of cleaning your smart vacuum’s dustbin depends on how often you use it and the amount of debris it picks up. However, as a general rule of thumb, it’s recommended to empty the dustbin after every use and clean it thoroughly at least once a week.
Steps to clean the dustbin:
- Step 1: Turn off the smart vacuum and unplug it from the power source.
- Step 2: Remove the dustbin from the vacuum.
- Step 3: Open the dustbin lid and empty the contents into a garbage bag. Use a brush or a cloth to remove any debris that is stuck to the dustbin.
- Step 4: Fill a bucket with warm water and add a few drops of dish soap. Submerge the dustbin in the water and let it soak for about 10-15 minutes.
- Step 5: Use a brush or a cloth to scrub the inside of the dustbin. Pay special attention to the corners and edges where dirt and debris can accumulate.
- Step 6: Rinse the dustbin thoroughly with clean water and let it dry completely before reattaching it to the vacuum.
Tips for maintaining your smart vacuum’s dustbin:
- Tip 1: Avoid overfilling the dustbin. This can cause blockages and decrease suction power.
- Tip 2: Use a vacuum with a removable dustbin for easy cleaning.
- Tip 3: For extra freshness, sprinkle some baking soda in the dustbin before cleaning it.
By following these simple steps and tips, you can ensure that your smart vacuum’s dustbin is always clean and odor-free, and that your vacuum is working at its best. Don’t neglect cleaning the dustbin, as it can make a massive difference in your smart vacuum’s performance and overall lifespan.
Conclusion
In conclusion, keeping your smart vacuum’s filters clean and replacing them when necessary is crucial for maintaining peak performance and extending the lifespan of your device. Remember to regularly inspect the filters and dustbin to ensure they are functioning properly and not interfering with the vacuum’s suction power.
By following the step-by-step guide we provided, you can easily clean and replace your smart vacuum’s filters. Remember to choose the right replacement filters and dispose of old filters properly.
Additionally, keeping your smart vacuum’s filters clean and well-maintained not only ensures their effectiveness, but also contributes to a healthier indoor environment by removing allergens and dust from the air.
Avoid neglecting your smart vacuum’s filters and make a habit of cleaning or replacing them as needed. Trust us, your nose (and your home’s cleanliness) will thank you.
Frequently Asked Questions
Can you clean and reuse smart vacuum filters?
Yes, smart vacuum filters can generally be cleaned and reused multiple times. However, some filters may need to be replaced completely after a certain number of uses or if they become excessively clogged.
How often should I clean my smart vacuum filters?
It depends on how often you use your vacuum and how dirty your floors are. As a general rule, most manufacturers recommend cleaning your filters every 2-3 months.
What should I use to clean my smart vacuum filters?
You should use mild soap and water to clean your filters. Be sure to rinse them thoroughly and allow them to air dry completely before putting them back in your vacuum.
Can I wash HEPA filters?
Most HEPA filters are washable, but you should check the manufacturer’s instructions first to make sure. If they are washable, be sure to use mild soap and water and allow them to air dry completely.
How do I know when it’s time to replace my smart vacuum filters?
If your filters are excessively dirty or have tears or holes in them, it’s probably time to replace them. Additionally, if your vacuum’s performance is suffering despite regular filter cleaning, it might be time for new filters.
Should I replace all of my smart vacuum filters at once?
It’s not always necessary to replace all of your filters at the same time. If one of your filters is particularly dirty or damaged, you might consider replacing just that one. However, if it’s been a while since you’ve replaced any of your filters, you might want to replace them all for maximum performance.
What happens if I don’t clean or replace my smart vacuum filters?
If you don’t clean or replace your filters regularly, they can become clogged and cause your vacuum’s performance to suffer. Additionally, dirty filters can cause dust and allergens to be released back into the air, which can be a problem for people with allergies or asthma.
How can I make my smart vacuum filters last longer?
You can make your filters last longer by cleaning them regularly, choosing high-quality replacement filters, and not neglecting to clean the dustbin.
Are there any special tips for cleaning HEPA filters?
When cleaning HEPA filters, be sure to use mild soap and water and avoid using any harsh chemicals or cleaners. Additionally, be gentle when cleaning the filter to avoid damaging it.
Do different types of smart vacuums require different types of filters?
Yes, different types of vacuums may require different types of filters. It’s important to check the manufacturer’s instructions for your specific vacuum to ensure that you’re using the correct type of filter.
