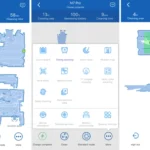
Are you having trouble with your remote vacuum scheduler? Do you find yourself frustrated with missed schedules or unreliable cleaning? Don’t worry, we’ve got you covered. In this article, we will provide you with tips and tricks to troubleshoot your remote vacuum scheduling issues so that you can get the most out of your device. From connectivity and scheduling settings to device power and software updates, we will guide you step-by-step to ensure that your scheduling runs smoothly. So sit back, relax, and let’s dive into the world of troubleshooting remote vacuum scheduling.
Check Your Connectivity
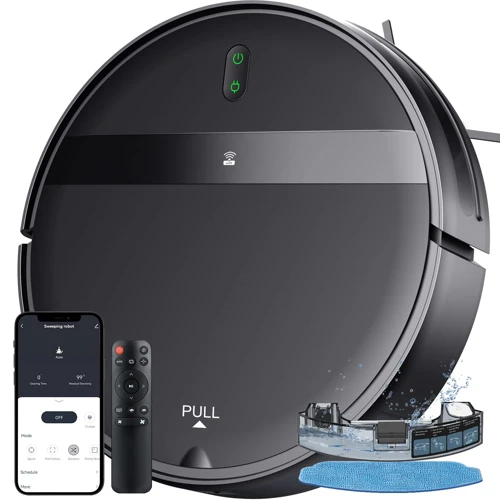
One of the key aspects of troubleshooting remote vacuum scheduling is ensuring that your device is properly connected. Without a stable connection, your scheduled cleaning tasks may not be executed properly, leaving your home feeling less clean than you’d like it to. In this section, we’ll explore a few essential tips and tricks to help you ensure that your device is properly connected and ready to run. Whether you’re utilizing remote vacuum scheduling for the convenience, energy conservation or security benefits, you’ll want to follow these steps to ensure that your device is functioning at its best.
Check Your Wi-Fi Signal
When troubleshooting remote vacuum scheduling issues, the first step is to check your Wi-Fi signal to ensure that it is strong and stable. A weak Wi-Fi signal can cause connectivity issues, resulting in scheduling errors and inconsistent cleaning cycles.
To check your Wi-Fi signal, you can perform a speed test using a free online service like Speedtest.net. This will give you an idea of your current upload and download speeds. Ideally, your speeds should be at least 10 Mbps for smooth and consistent operation.
You can also check the signal strength on your device’s app or on your smart home hub if you have one. Most devices will show the Wi-Fi signal strength in bars or percentages. If the signal is weak or intermittent, try moving your device closer to your router or invest in a Wi-Fi booster to extend the signal range.
Another option is to check your router’s channel settings. Overlapping channels or interference from other devices can affect your Wi-Fi signal. Switching to a less crowded channel can help improve your device’s connectivity.
Ensuring a strong Wi-Fi signal is essential for successful remote vacuum scheduling.
If you want to learn more about the benefits of remote vacuum scheduling, check out our article “The Benefits of Scheduling Your Vacuum Remotely”.
Check Your App Settings
When troubleshooting remote vacuum scheduling, one of the first things to check is your app settings. Many issues can stem from incorrect or outdated settings. Here are some things to look out for:
- Ensure the app is up to date: Make sure you have the latest version of the app installed. Check your app store for updates, or enable automatic updates for convenience. This can often solve many issues and improve the overall performance of the app. Remember, updating your app regularly can also help keep your device secure!
- Check your device’s compatibility: Ensure that your smartphone or tablet is compatible with your remote vacuum device. It’s best to consult the manufacturer’s website or user manual to check for compatibility issues.
- Verify your account information: Make sure that your account information, such as your email and password, are correct. This can sometimes cause issues when connecting or communicating with your device.
- Inspect your device settings: Double-check the settings in your app and compare them to the recommended settings from the manufacturer. This includes cleaning preferences, notification settings, or language settings. Knowing what type of settings, such as energy-conservation or security, works best for you and your home can help maximize remote scheduling to benefit you and your smart home system.
When working remotely with a device, getting the app settings right is important. And if you’re ever unsure about something, consult the manufacturer’s website, user manual, or customer support. Having updated and accurate app settings can help maximize remote scheduling access and convenience for you and your home.
For more information on remote vacuum scheduling or regarding smart home artificial intelligence, see also our article on /future-remote-vacuum-smart-home/.
Check Your Scheduling Settings
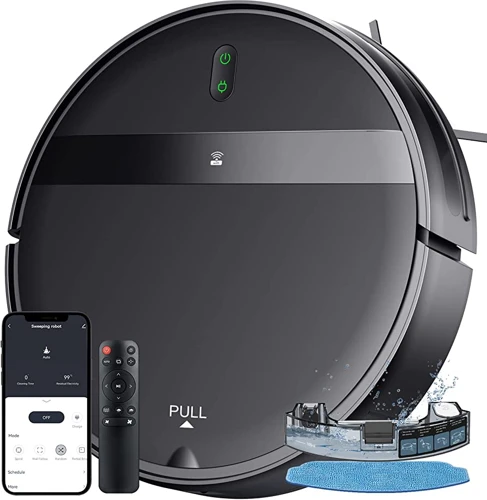
Are you having trouble with your remote vacuum scheduling? It can be frustrating when your device doesn’t perform as expected. One potential issue could be with your scheduling settings. These settings determine when and how frequently your vacuum will clean your home, so it’s important to make sure they are set correctly for your needs. Let’s take a closer look at some tips and tricks to check your scheduling settings and ensure your device is working efficiently. And if you want to learn more about the benefits of remote vacuum scheduling, check out our article on convenience and accessibility.
Check Your Time Zone Settings
One of the troubleshooting steps in remote vacuum scheduling is to check your time zone settings. This is important because if your device is not properly set to your time zone, it may not clean at the scheduled time, or worse, it could start cleaning in the middle of the night and disturb your sleep.
To check your time zone settings on your device, go to the settings menu and look for the option to set your time or date. Make sure that the correct time zone is selected. If you’re unsure about your time zone, you can check it online easily.
Pro tip: If you often travel across time zones but want to ensure that your smart vacuum still runs on schedule, consider adjusting the time zones within the app as you move around.
Another thing to keep in mind is that some devices may automatically adjust for daylight savings, while others require you to make that adjustment manually. So, if your vacuum’s schedule seems to have shifted inexplicably, double-check whether daylight savings has kicked in and adjust accordingly.
Keep in mind that while the smart software is flexible, the actual hardware of your device is much less forgiving. So, make sure your device’s time zone is set to match that of your location so it can run smoothly.
Checking time zone settings may seem like a minor detail, but taking the extra time to ensure that your device’s time is accurate can save you a lot of hassle in the long run.
If you want to learn more about maximizing remote scheduling, you can check out our article on maximizing remote scheduling to get more tips and tricks.
Check Your Notification Settings
When it comes to remote vacuum scheduling, notification settings are a crucial aspect to consider. With the right notification settings, you can make sure you are always informed about your device’s cleaning progress and any issues that might arise.
Checking your notification settings is simple, and here’s how to do it:
| Step | Description |
|---|---|
| 1 | Open your device’s app and go to the “Settings” menu. |
| 2 | Look for the “Notification” or “Alert” settings and tap on it. |
| 3 | Check to see if your device is set to send you notifications. If it is, make sure the notifications are enabled. If not, turn on the notifications. |
| 4 | Take a look at the types of notifications your device is set to send. This can include notifications for when the device completes a cleaning cycle, runs into an issue, or needs maintenance. Make sure you have the notifications set up for the types of events you want to be informed about. |
| 5 | If your device is set to send notifications, but you are not receiving them, make sure that your notification settings allow the app to send push notifications. Check your phone’s settings to see if the app is allowed to send notifications and enable them if necessary. |
In addition to managing your notification settings, it’s also a good idea to consider the security of your remote vacuum scheduling. You can also explore the convenience and accessibility of remote scheduling or ways to conserve energy when using this feature. You can compare different smart vacuum scheduling options by reading this guide to find the one that suits your needs best.
Check Your Cleaning Preferences
One essential factor to consider when troubleshooting remote vacuum scheduling is to “Check Your Cleaning Preferences”. These settings determine how your vacuum device cleans your home or office.
Cleaning Preferences offer a lot of variety when it comes to scheduling your device. Thankfully, vacuum devices come with a range of customizable cleaning modes, based on the type of surface, cleaning duration, fan speed, and suction power.
The table below explains the different cleaning modes and the scenarios in which they work best:
| Cleaning Mode | Description |
|---|---|
| Spot Cleaning | cleans an area measuring between 1-2 meters square. This mode is suitable for cleaning up small spills or messes. |
| Auto Cleaning | cleans the whole room, going from room to room autonomously. This mode is suitable for everyday cleaning and deep cleaning. |
| Edge Cleaning | cleans the edges of the floor and corners, where dust and debris usually accumulate. This mode is best suited for homes with lots of corners and edges. |
| Silent Cleaning | cleans your home or office in a quiet mode, so you can use it without disturbing the people around you, especially at night or early morning. |
| Manual Cleaning | lets you control the cleaning device with a remote control. This mode is best suited for cleaning hard-to-reach areas, under the bed or furniture, or for spot cleaning. |
The “Cleaning Preferences” also allows you to set a cleaning schedule, so your device cleans automatically while you are away. Make sure to set the right day and time, and the cleaning mode that suits your home or office. Also, check your device’s dustbin, brush, filter, and other components to make sure they are cleaned or replaced regularly.
Tip: You can also combine several cleaning modes to fit your preferences. For example, you can set the device to clean your home twice a day using the Auto Cleaning mode in the morning, and the Silent Cleaning mode at night.
Make sure to regularly check your cleaning preferences to guarantee that your remote vacuum scheduling runs smoothly. Consider the different cleaning modes and customize them to suit your cleaning needs. With these tips, you can maximize the efficiency and convenience of your vacuum device.
Power Up Your Device
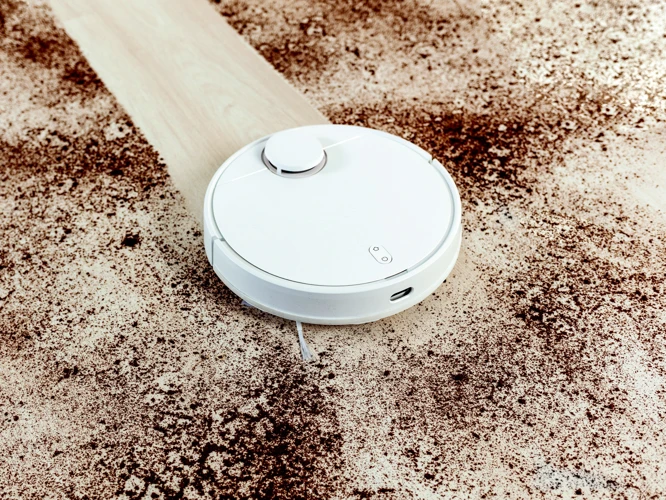
When your remote vacuum scheduling is not working, it can be quite frustrating. One of the reasons might be that your device needs to be powered up properly. In order to troubleshoot this particular problem, you need to find out why your device is not turning on or is not working at its full capacity. In this section, we will take a look at some of the steps you can take to ensure that your device is powered up and working efficiently. So let’s dive right in and get your device up and running!
Check Your Batteries
When dealing with remote vacuum scheduling issues, one of the first things to check is the state of your device’s batteries. Weak batteries can hinder the proper functioning of your vacuum schedule, so it’s essential to ensure they’re fully charged or in good condition. Here are some troubleshooting tips to help you check your batteries:
- Ensure proper installation: Sometimes, weak batteries are caused by an incorrect battery installation. Make sure the batteries are installed correctly and that the polarity is correct. Check if there’s any debris on the connection points that could be causing poor connectivity.
- Check the battery voltage: You can use a multimeter to check the battery voltage. A fully charged battery should measure around 1.5V or more. If the reading is lower than this, it’s a sign that your battery needs to be replaced or recharged.
- Charge your batteries: If your device uses rechargeable batteries, ensure that they’re fully charged. Connect the charger to an outlet and insert the batteries into the charging slot. Allow them to charge fully, which usually takes a few hours, depending on the battery’s capacity.
- Replace the batteries: If you’ve ruled out improper installation and charging issues and your vacuum is still not working as it should, it may be time to replace the batteries. Make sure to use the right type of batteries for your device.
Checking your batteries doesn’t take much time, and it could save you a lot of trouble in the long run. If you’re still having issues, move on to the next troubleshooting tip to get your remote vacuum scheduling back on track.
Reset Your System
If you’ve tried checking your connectivity and scheduling settings to no avail, it may be time to reset your system. A reset can help troubleshoot any deeper issues that may be hindering your remote vacuum scheduling. Here are the steps to reset your system:
- Step 1: Locate the reset button on your device. It may be labeled as “Reset” or be represented by a small hole.
- Step 2: Use a pin or paperclip to press and hold down the reset button for 10-15 seconds.
- Step 3: Release the button and wait for the device to restart.
After resetting your device, you will need to set up your scheduling preferences once again. It’s important to note that resetting your system can result in the loss of any settings or schedules you had previously saved. It’s recommended to document your preferences or take screenshots prior to resetting. If resetting your system does not resolve the issue, it may be time to contact the manufacturer for further assistance.
Update Your Software
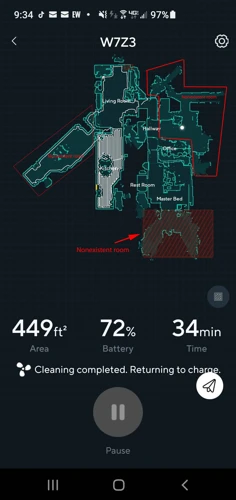
As technology advances at an increasingly rapid pace, so do the software programs that power our devices. Updating your device’s software is essential for improving its performance, ensuring smooth operation, and adding new features. Keeping your device’s software up-to-date is like giving it a tune-up, and can make all the difference between a well-working and sluggish device. In this section, we’ll cover everything you need to know about updating your remote vacuum scheduling software, so you can keep your device working at its best.
Check for Updates
One of the most overlooked causes of issues when scheduling a remote vacuum is simply outdated software. It is essential to regularly check for updates and upgrade your device’s software to ensure that it is running smoothly. Here are some tips to help you check for updates:
| Step | Description |
|---|---|
| Step 1: | Open your vacuum app on your device |
| Step 2: | Locate the “settings” or “options” button within the app |
| Step 3: | Locate the “software update” section |
| Step 4: | Click on the “check for updates” button |
| Step 5: | If an update is found, make sure to follow the instructions on your screen to download and install it. |
By following these simple steps, you can stay up to date with the latest features and improvements for your vacuum system. Keeping your software updated can also help to prevent potential security threats or bugs, ensuring that your device runs as efficiently as possible. Remember, prevention is always better than a cure, so take proactive measures to keep your system up to date.
Upgrade Your Software
When it comes to troubleshooting remote vacuum scheduling, upgrading your software is an essential step that could help you solve most of the issues you might be facing. Here are some steps to help you upgrade your software:
- Step 1: Check for updates
- Step 2: Make sure you have a stable internet connection
- Step 3: Start the upgrade process
- Step 4: Restart your device
- Step 5: Test your device
The first thing you need to do is check for any available updates. You can do this by opening the app and checking for a notification that tells you that a new update is available. If there is an update available, make sure to download and install it as soon as possible to get the latest features and bug fixes.
Before you start upgrading your software, make sure that you have a stable internet connection. This prevents any interruption in the upgrade process and ensures that you have the latest version of the software.
Once you have confirmed that you have a stable internet connection, you can start the upgrade process. Go to the app settings and look for the software upgrade section. Click on the “upgrade now” button and wait for the process to complete.
After the upgrade process is complete, it is recommended that you restart your device. This ensures that all the changes made during the upgrade process are saved and applied correctly.
Finally, test your device to ensure that everything is working as it should be. Check if the issue you were facing has been resolved or if there are any new features that you can take advantage of.
By upgrading your software, you can ensure that your remote vacuum scheduling device is working at its best. It’s a simple step to take, but it can have a significant impact on the performance of your device. So, make sure to always check for updates and upgrade your software whenever possible.
Clear Your Device’s Memory
As your remote vacuum scheduling device continues to operate, it retains more and more information in its memory, which can ultimately lead to decreased performance. If you’re experiencing issues with your scheduling system, it might be time to clear your device’s memory. In this section, we’ll explore some tips and tricks for clearing your device’s memory effectively so that you can get back to enjoying the convenience of scheduled cleaning. Let’s dive in!
Delete Old Schedules
One effective way to troubleshoot your remote vacuum scheduling is to delete old schedules. Over time, you may have accumulated a large number of schedules that are no longer needed or relevant. This can cause your device to slow down or even malfunction. Here are some steps to help you delete old schedules:
- Identify the Schedules: Open your app and navigate to the schedule menu. Look for schedules that have already been completed or are no longer relevant.
- Select the Schedules: Once you have identified the old schedules, select them by tapping on the checkboxes next to each schedule. You can select multiple schedules at once.
- Delete the Schedules: After selecting the old schedules, delete them by clicking on the delete button. This will remove the schedules from your device’s memory and free up space for new schedules.
By deleting old schedules, you can optimize your device’s performance and ensure that it runs smoothly. It’s important to note that deleting schedules will not affect your device’s ability to clean or schedule new tasks. In fact, it may even improve its efficiency and accuracy. Make sure to regularly clear out old schedules to keep your device running smoothly.
Clear the Cache
Over time, your vacuum’s cache can become clogged with excess data, which can impact its performance. Clearing the cache is a simple process that can help improve the functionality of your device. Here’s how to clear your vacuum’s cache in a few easy steps.
| Step 1: | Open the settings menu on your device. The location of this menu may vary depending on your device, so consult your device’s user manual if you are unsure. |
|---|---|
| Step 2: | Look for the option to clear the cache. This will typically be located under the “storage” or “memory” section of the settings menu. |
| Step 3: | Once you’ve found the option to clear the cache, select it. Your device will then begin the process of clearing temporary files and excess data from its memory. |
| Step 4: | Wait for the process to complete. This may take a few minutes depending on the amount of data stored in your cache. |
| Step 5: | Once the process is complete, restart your device. This will ensure that any remaining cache files are cleared from memory and that your device is operating at its best. |
Clearing your vacuum’s cache is an effective way to improve its performance and ensure that it’s operating at peak efficiency. By taking the time to clear your cache, you’ll be able to enjoy a more seamless experience when scheduling your device to clean your home.
Reboot Your Device
If you’ve tried all the troubleshooting tips but your remote vacuum is still giving you problems, it might be time to reboot your device. Rebooting your device can help clear out any temporary bugs or glitches that may be causing issues with your scheduling. Here are the steps you should follow when rebooting your device:
- Turn off your device: Start by turning off your remote vacuum scheduling device. You can do this by pressing and holding the power button until the device turns off.
- Unplug the device: Once the device is turned off, unplug it from the power source to ensure that there is no power supply to the device.
- Press and hold the Power Button: Without plugging your device back in, press and hold the power button for about 30 seconds. This will help to release any remaining charge in the device and ensure that it completely powers off.
- Plug Your Device Back in: After waiting for a few minutes, plug your device back into the power source.
- Power On Your Device: Turn on your device and check if this has resolved the scheduling issue.
Rebooting your device can help resolve any issues with the scheduling system and it should be carried out periodically to ensure optimal performance. However, if the issue persists, you should get in touch with your device’s technical support team to guide you on what to do next.
Conclusion
In conclusion, troubleshooting remote vacuum scheduling can be a frustrating process, but by following the tips and tricks outlined in this article, you can quickly get your device back to functioning properly.
First and foremost, it’s important to check your connectivity, as a weak Wi-Fi signal or incorrect app settings could be the root of the problem. Ensure that your device is connected to a strong and stable network, and double-check your app settings to make sure everything is set up correctly.
Next, you should check your scheduling settings to make sure that your device’s time zone, notification preferences, and cleaning preferences are all set up correctly. Even a small error in these settings could cause major problems in the scheduling process.
If your device still won’t function after checking these settings, you should try powering it up by checking the batteries and resetting the system.
Additionally, it’s always a good idea to keep your software up to date by checking for updates and upgrading when necessary. This can eliminate any bugs that may be causing scheduling issues.
Lastly, clearing your device’s memory can also help solve scheduling problems, by deleting old schedules, clearing the cache, and rebooting your device.
By following these tips and tricks, you can troubleshoot your remote vacuum scheduling with ease and get back to enjoying a clean and tidy home. Remember to always stay patient and persistent when dealing with technical difficulties, and don’t hesitate to reach out to customer support if the problem persists.
Frequently Asked Questions
What can cause my remote vacuum to stop scheduling cleaning sessions?
There are several reasons why your remote vacuum may stop scheduling cleaning sessions. It could be due to poor connectivity, scheduling settings, low batteries or outdated software among other reasons.
How do I check my Wi-Fi signal to ensure that it is strong enough for my remote vacuum?
You can use your smartphone to test the Wi-Fi signal strength using a Wi-Fi signal strength app or by simply moving closer to the router. You can also move your remote vacuum closer to the router or use a Wi-Fi extender.
What steps can I take to reset my remote vacuum system?
You can reset your remote vacuum by turning it off, unplugging it from the wall, waiting for a few minutes, then plugging it back in and turning it on. You can also refer to the manufacturer’s manual for specific instructions on how to reset your device.
What is the best way to upgrade the software on my remote vacuum?
You can upgrade the software on your remote vacuum by checking for updates on the app or website of the manufacturer. Download the latest software version and follow the instructions to upgrade your device.
Why am I not getting notifications from my remote vacuum?
You may not be getting notifications from your remote vacuum because the notification settings are turned off or the device is not connected to the internet. Check your app settings and ensure that your device has a stable internet connection.
What can I do to optimize my remote vacuum’s battery life?
You can optimize the battery life of your remote vacuum by turning off unnecessary features, scheduling cleaning sessions during off-peak hours when there is no one at home, using the right charger, and replacing the batteries when they are low.
Is it necessary to clear the cache on my remote vacuum?
Clearing the cache on your remote vacuum can help to improve performance and eliminate glitches. It is important to clear the cache at least once every few weeks to ensure optimal performance.
Can I delete old schedules on my remote vacuum?
Yes, you can delete old schedules on your remote vacuum to make space for new ones. This can also help to improve the performance of your device by freeing up memory space.
How often should I update the software on my remote vacuum?
You should update the software on your remote vacuum as soon as a new version is released by the manufacturer. This will ensure that your device has the latest features, bug fixes, and security upgrades.
What should I do if my remote vacuum keeps losing connection to the app?
You can try to solve the connection loss issue by resetting your router, moving your device closer to the router, or updating the software on your device. Consult the manufacturer’s manual or customer support for more help.
