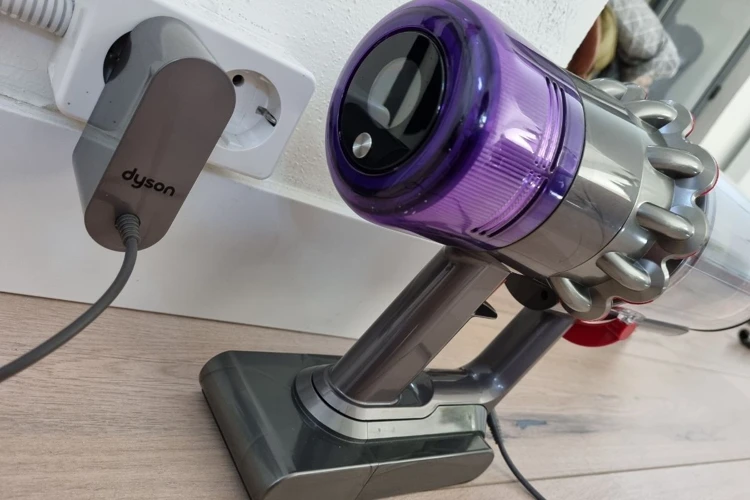
Are you having trouble charging your smart vacuum cleaner? Don’t panic! It’s a common issue that many users face. Sometimes, the battery won’t hold a charge, the vacuum won’t properly dock, or the charger may simply not work. In this article, we’ll explain some troubleshooting steps to fix these issues and prevent them from happening in the future. So, let’s delve into the world of smart vacuum cleaners and learn how to troubleshoot their charging problems!
Common Charging Issues and Solutions
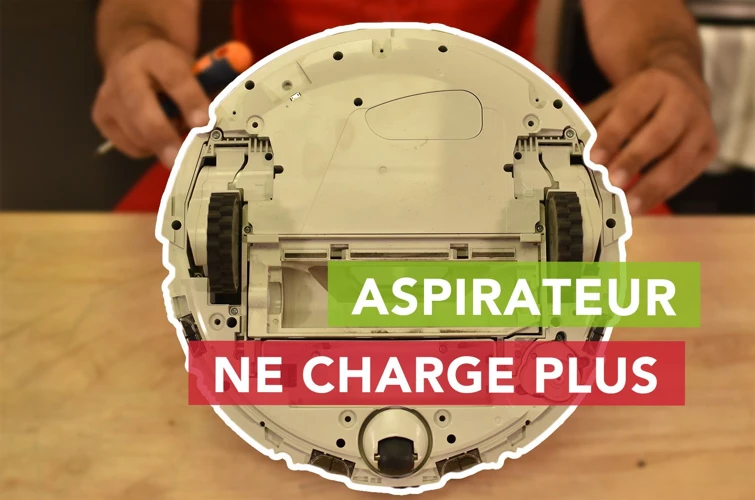
Is your smart vacuum cleaner not charging as it should be? Charging issues are some of the most common problems that most smart vacuum cleaner owners face. However, most of these issues can be resolved with a few simple troubleshooting steps as well as adopting preventive measures to ensure that your vacuum cleaner is always charging seamlessly. In this section, we will discuss some of the most common charging issues with smart vacuum cleaners and their solutions, including how to maximize battery life, the impact that room temperature can have on charging, and how to distinguish a defective charger from a smart vacuum issue.
Issue #1: Battery not holding a charge
One of the most common issues with smart vacuum cleaners is when the battery is not holding a charge, and it can be frustrating to have your vacuum run out of power before finishing a cleaning cycle. There are several possible reasons why this issue may arise, but fortunately, there are also several solutions to try.
In the table below, we have listed the possible causes and solutions for a smart vacuum cleaner that is having trouble holding a charge.
| Possible causes | Solutions |
|---|---|
| Defective battery | Replace the battery with a new one. Make sure to purchase a battery that is compatible with your specific vacuum model. |
| Multiple charging cycles | Allow the vacuum to go through a full charging cycle before using it again. This may require leaving the vacuum on the charging dock for several hours. |
| Defective charger | Replace the charger with a new one. It is important to use a charger that is specifically designed for your vacuum model. |
| Room temperature | Make sure the vacuum is charging in a location with a temperature within the recommended range specified for your vacuum model. Extreme temperatures can impact the charging cycle of a smart vacuum cleaner. |
If you have tried all of these solutions and are still experiencing problems, it may be best to contact the manufacturer for further assistance or read more about how to deal with smart vacuum not charging issue.
To prevent this issue from occurring again in the future, you can take safety measures when charging your smart vacuum cleaner. This is especially important if you have had to replace the battery or charger. Additionally, you can learn more about how smart vacuum charging cycle works, and how to avoid overcharging the battery.
Issue #2: Vacuum not docking properly
One of the most frustrating issues that vacuum owners encounter is when their smart vacuums fail to dock properly. This can lead to the vacuum not charging, or stopping its cleaning cycle unexpectedly. Here are some possible causes and solutions to this issue:
- Dirty charging contacts: Over time, dust and debris can build up on the vacuum’s charging contacts, preventing a proper electrical connection when docked. This can be fixed by cleaning the contacts with a dry cloth or brush.
- Misaligned docking station: If the docking station is not properly aligned with the vacuum’s charging contacts, it may not be able to charge. Make sure the docking station is level and aligned with the contacts on the vacuum.
- Defective docking station: If the docking station itself is defective, it may not properly charge the vacuum. Try using a different docking station, or contact the manufacturer to get a replacement.
- Low room temperature: Smart vacuums may have trouble charging in extremely low temperatures. If the vacuum is located in a cold room or garage, try to move it to a warmer location.
In addition to these solutions, it’s also important to take preventative measures to avoid issues with docking. Regularly cleaning the charging contacts can help prevent build-up, and storing the docking station and charger in a dry, cool place can help reduce wear and tear. By following these steps, vacuum owners can ensure their smart vacuum stays charged and running smoothly.
To learn more about whether a defective charger could be causing charging issues, check out our guide “Defective Charger vs. Smart Vacuum Issue”. Additionally, how room temperature can impact smart vacuum charging and safety measures when charging your smart vacuum can be found in our guides titled “Impact of Room Temperature on Smart Vacuum Charging” and “Safety Measures When Charging Your Smart Vacuum” respectively.
Issue #3: Charger not working
One of the most frustrating issues that you may encounter with your smart vacuum cleaner is a malfunctioning charger. If your vacuum cleaner is not charging in spite of being connected to the charger, the problem might be with the charger itself. Here are some reasons why your charger might not be working:
- Broken cable: If the cable or wire of the charger is broken or frayed, the charger might not transmit power to the vacuum cleaner. Check the cable carefully to see if there are any damages, and if there are, replace it immediately.
- Loose connections: Check the connections between the cable and the charger, as well as the connections between the charger and the vacuum cleaner. If they are loose, the charger might not be able to charge the vacuum cleaner properly. Tighten the connections as needed to ensure that they are secure.
- Faulty charger: If none of the above seem to be the issue, it’s possible that the charger itself is faulty. This can happen due to wear and tear or due to mishandling of the charger. Test the charger with other devices to see if it is functioning properly, and if not, replace it with a new one.
Remember to always handle the charger with care, as it is a sensitive device that is necessary for the proper functioning of your vacuum cleaner. By following these tips, you can ensure that your charger stays in good condition and that your vacuum cleaner is always charged and ready to go when you need it.
Issue #4: Vacuum not charging at all
If you find that your smart vacuum cleaner isn’t charging at all, don’t panic. There are various potential reasons why this might be happening, but with a bit of troubleshooting, you should be able to identify and correct the issue.
Possible Causes of Vacuum Not Charging at All
When your vacuum isn’t charging at all, there can be a number of root causes that need to be addressed. Let’s take a look at some of the possible causes of this issue and how to address them:
| Possible Cause | Solution |
|---|---|
| The vacuum isn’t properly docked to the charging station | Make sure the vacuum is securely docked |
| The power source is not working properly | Check that the outlet the charging station is plugged into is functioning correctly and try a different outlet if necessary |
| Charging contacts are dirty or damaged | Clean charging contacts on both the vacuum and charging dock with a soft cloth and check for any visible signs of damage. If contacts are damaged, replace the part or contact the manufacturer for further assistance. |
| Faulty charging station or charger | Try using a different charger or docking station if available. If not, contact the manufacturer for a replacement or repair. |
| The battery is completely dead | If the battery is completely depleted, it may take some time to charge up. Try leaving the vacuum on the charging station for several hours, or overnight, before attempting to use it again. |
Steps to Take
If your vacuum isn’t charging at all, there are several steps you can take to try and fix the issue:
- Check to ensure that the vacuum is docked properly on its charging station.
- Check the power source to make sure it is working correctly, and try using a different outlet if necessary.
- Check and clean the charging contacts on both the vacuum and the charging dock.
- Try using a different charger or docking station if available.
- Leave the vacuum on the charging station for several hours or overnight.
Conclusion
A vacuum that’s not charging at all can be a frustrating experience, but it’s important to remain calm and work through the potential issues one by one. By using the above steps, you can get your smart vacuum cleaner charging effectively and back to keeping your home clean in no time.
Troubleshooting Steps
When it comes to troubleshooting charging issues with your smart vacuum cleaner, it can be frustrating to pinpoint the exact problem. Fortunately, with a few simple troubleshooting steps, you can quickly diagnose and resolve the issue. Let’s dive into the essential troubleshooting steps that will help you get your vacuum cleaner charging again in no time.
Step #1: Check the power source
The first step in troubleshooting common charging issues with your smart vacuum cleaner is to check the power source. Sometimes, the simplest solution can be overlooked, but it’s important to ensure that your vacuum cleaner is receiving power from a reliable source.
Here are some things you can do to check the power source:
- Check the power outlet: Make sure the power outlet you are using is working properly. You can test it by plugging in another device and seeing if it turns on.
- Check the power cord: Inspect the power cord for any visible signs of damage, such as fraying or cuts. If there is damage, replace the power cord immediately.
- Check the circuit breaker: If the power outlet is working properly and the power cord is not damaged, check the circuit breaker. Sometimes, the circuit breaker can trip and cut off power to a specific outlet. Check the circuit breaker and reset it if necessary.
- Check the voltage: Check the voltage requirements for your vacuum cleaner and make sure the power outlet you are using meets those requirements. Using a power outlet with the wrong voltage can damage your vacuum cleaner.
By checking the power source first, you can eliminate a simple fix and move on to other troubleshooting steps if necessary. Remember to always take safety precautions when dealing with electrical appliances and power sources.
Step #2: Check the charging contacts on the vacuum and the docking station
To troubleshoot common charging issues with your smart vacuum cleaner, one of the important steps is to check the charging contacts on both the vacuum and the docking station. This is because any debris or dirt on the charging contacts can prevent the vacuum from charging properly.
Here are the steps to check the charging contacts:
- Step 1: Turn off the vacuum and unplug it from the power source.
- Step 2: Remove the vacuum from the docking station and check the charging contacts on both the vacuum and docking station.
- Step 3: If there is any sign of dirt, debris or corrosion on the charging contacts, use a dry cloth or cotton swab to gently clean them. Avoid using water or any liquid as it can damage the contacts.
- Step 4: Once you have cleaned the charging contacts, put the vacuum back on the docking station and check if it’s charging properly.
It’s important to inspect the charging contacts regularly and keep them free from any debris or dirt to avoid any charging issues in the future. If you find any signs of corrosion, you may need to replace the charging contacts.
Step #3: Check the charger and cable
Step #3: Check the charger and cable
It’s important to make sure that the charging cable and adapter are in good working condition. Otherwise, your vacuum cleaner might not be receiving enough power to charge the battery fully.
To check the charger and cable:
- Inspect the cables for any visible signs of wear and tear, such as frayed wires or exposed metal. If you notice any damage, replace the cable with a new one.
- Check the voltage output of the adapter. Use a voltmeter to test the voltage output of the charger. The recommended voltage output for most smart vacuums is between 16 and 18 volts. If the voltage is below or above the recommended range, consider replacing the charger or cable with a new one.
- Test the charger with another device to determine if it’s functioning correctly. If you don’t have another device, consider borrowing one from a friend or family member. If the charger works fine with another device, the issue might be with the vacuum itself or the docking station.
Checking the charger and cable may seem like a small task, but it can make a significant difference in your smart vacuum cleaner’s performance. By taking the time to inspect and test these components, you can ensure that your vacuum cleaner is receiving the power it needs to operate fully.
Step #4: Reset the vacuum and docking station
Resetting the vacuum and docking station can be an effective solution for resolving charging issues with your smart vacuum cleaner. Here are the steps to perform a reset:
- Turn off the vacuum: To begin the reset process, turn off the vacuum cleaner and ensure that it is not connected to any power source.
- Disconnect the charging dock: Once the vacuum is turned off, disconnect it from the charging dock. Unplug the charger from the outlet as well.
- Remove the battery: Most smart vacuum cleaners allow the battery to be removed. Take out the battery from the vacuum cleaner and leave it out for at least 10 minutes. This will allow the vacuum to reset completely.
- Reset the docking station: While the battery is out, reset the docking station. Consult the manufacturer’s instructions for details on how to do this. In general, this can be done by pressing and holding the reset button on the docking station for a few seconds.
- Reassemble the vacuum: After the battery and docking station have been reset, reassemble the vacuum cleaner. First, insert the battery back into the vacuum, and then place the vacuum back on the charging dock. It’s important to ensure that the charging contacts on both the vacuum and the docking station are aligned properly.
- Charge the vacuum: Finally, plug in the charging dock and turn on the power supply. Allow the vacuum cleaner to charge for a few hours or until the battery is fully charged, as indicated by the manufacturer’s instructions.
By performing a reset, you can clear any errors or glitches that may be causing charging issues with your smart vacuum cleaner. If the problem persists, it may be necessary to replace the battery, docking station, or charger.
Step #5: Replace or repair the battery, docking station, or charger
After trying the previous steps and still having issues charging your smart vacuum cleaner, it’s time to consider replacing or repairing some of the equipment.
1) Battery: If the battery is not holding a charge or is not charging at all, it may need to be replaced. Look for a replacement battery that is compatible with your specific vacuum model.
2) Docking Station: If the vacuum is not docking properly, the docking station may need to be repaired or replaced. Check for any physical damage, loose connections, or obstruction preventing the vacuum from properly docking. If the issues persist, consider contacting the manufacturer for a replacement docking station.
3) Charger: If the charger is not working, it may need to be replaced. Look for a replacement charger that is compatible with your specific vacuum model. It’s important to note that using an incompatible charger can cause damage to your vacuum or battery.
If you’re unsure whether to replace or repair any of the equipment, seek assistance from the manufacturer’s customer support or a professional repair service. They can provide guidance on the best course of action and any options available.
Before replacing any equipment, make sure to properly dispose of the old equipment in accordance with local regulations. Many electronic stores and manufacturers offer recycling programs for old batteries, docking stations, and chargers.
By following these troubleshooting steps, you can easily identify and fix common charging issues with your smart vacuum cleaner. Remember to also take preventative measures like regularly cleaning the charging contacts, storing the docking station and charger in a dry, cool place, and avoiding overcharging the battery to extend the lifespan of your vacuum’s charging equipment.
Preventing Charging Issues
Maintaining a fully functioning, charged smart vacuum cleaner is essential to keeping your home clean and tidy. However, as with any electronic device, charging issues can arise and cause frustration. Fortunately, there are preventative measures you can take to reduce the likelihood of running into these issues. By incorporating these best practices into your routine, you can keep your smart vacuum cleaner running smoothly and efficiently. Let’s take a closer look at some simple yet effective preventative measures you can implement.
Clean the charging contacts regularly
To prevent common charging issues with your smart vacuum cleaner, it is important to clean the charging contacts regularly. Dirty or corroded contacts can prevent proper charging and may even damage your vacuum. To properly clean the contacts, follow these steps:
| Step 1: | Turn off and unplug the vacuum and docking station. |
| Step 2: | Remove the vacuum from the docking station. |
| Step 3: | Inspect the charging contacts on both the vacuum and docking station, looking for any dirt, dust, or corrosion. |
| Step 4: | Clean the contacts using a soft, dry cloth. You may also use a mild soap and water solution, but be sure to rinse and dry the contacts thoroughly afterwards. |
| Step 5: | Reattach the vacuum to the docking station and make sure the contacts are properly lined up. |
| Step 6: | Plug in the docking station and make sure the charging process begins. |
By cleaning the charging contacts regularly, you can ensure that your vacuum is charging properly and will perform at its best. It is recommended to clean the contacts once a week or more often if you notice any issues with charging. Remember to always unplug the vacuum and docking station before cleaning and to use a soft, dry cloth or mild soap and water solution. With proper maintenance, you can prevent common charging issues and keep your smart vacuum cleaner in top condition for years to come.
Store the docking station and charger in a dry, cool place
Proper storage of your smart vacuum cleaner’s docking station and charger is essential to ensure that they remain in good working condition. Storing them in a dry, cool place can help prevent potential charging issues in the future.
Here are some tips for storing the docking station and charger:
- Avoid storing them in direct sunlight: Direct sunlight and heat can damage the sensitive electronic components in the docking station and charger. Store them in a shaded area or a cool, dry room.
- Avoid storing them in humid areas: Moisture can also damage the electronic components in your docking station and charger. Avoid storing them in areas with high humidity, such as a bathroom or a damp basement.
- Keep them away from water: Water and electronics don’t mix. Make sure to store your docking station and charger away from any areas where water could potentially come into contact with them.
- Store them upright and on a flat surface: Storing them upright on a flat surface can help prevent any accidental damage or falls that could lead to charging issues.
- Keep them away from other electronic devices: Storing your docking station and charger close to other electronic devices, such as a router or microwave, can interfere with their signals and cause potential charging issues.
By following these simple storage tips, you can help prevent potential charging issues with your smart vacuum cleaner and ensure that it remains in good working condition.
Avoid overcharging the battery
To avoid overcharging your smart vacuum cleaner’s battery, it’s important to follow a few key tips. Overcharging can lead to decreased battery life and performance, which can impact the effectiveness of your vacuum.
Tip #1: Use a charger specifically designed for your vacuum’s battery. Using a charger that isn’t compatible can cause overcharging and other issues.
Tip #2: Always unplug the charger once the battery is fully charged. Leaving your vacuum plugged in for extended periods of time can lead to overcharging and decreased battery life.
Tip #3: Don’t use your vacuum while it’s charging. This can not only lead to overcharging but also damage your vacuum’s battery.
Tip #4: Follow the manufacturer’s guidelines for charging times. Overcharging is more likely to occur if you leave your vacuum charging for longer than recommended.
Tip #5: Monitor your vacuum’s charging progress. Many newer models have indicators that let you know when the battery is fully charged. If your vacuum doesn’t have this feature, set a timer to remind yourself to unplug it.
By following these tips, you can avoid overcharging your smart vacuum cleaner’s battery and keep it operating at peak performance. Remember to always use the recommended charger, unplug it when the battery is fully charged, and avoid using your vacuum while it’s charging.
Conclusion
In conclusion, troubleshooting charging issues with your smart vacuum cleaner can be a frustrating task, but with the right steps and precautions, it can be easily resolved. Remember to always check the power source, charging contacts, charger, and cable before assuming the worst.
Regularly cleaning the charging contacts and storing the docking station and charger in a dry, cool place can also prolong the life of your vacuum’s battery and prevent charging issues. Additionally, avoid overcharging the battery as it can cause irreversible damage.
If you’ve tried all the troubleshooting steps and still have charging issues, it may be necessary to replace or repair the battery, docking station, or charger. Don’t hesitate to contact the manufacturer or a professional technician for help.
Overall, taking the time to properly care for and maintain your smart vacuum cleaner can ensure that it runs smoothly and efficiently, leaving you with a clean home and peace of mind.
Frequently Asked Questions
1. Why does my vacuum cleaner not hold its charge?
The battery may be old and needs to be replaced. Alternatively, there could be a problem with the charging contacts or the charger itself.
2. Why is my vacuum cleaner not docking properly?
The docking station may be dirty or damaged, causing it to not make proper contact with the vacuum. Try cleaning the docking station contacts and the vacuum charging contacts.
3. Can I use a different charger for my smart vacuum cleaner?
You should only use the charger that came with your vacuum cleaner. Using a different charger could cause damage to the battery or the vacuum.
4. How long should I charge my vacuum cleaner?
Refer to the manufacturer’s instructions for the recommended charging time. Overcharging the battery can damage it, so it’s important to follow the recommended charging time.
5. How often should I clean the charging contacts?
Cleaning the charging contacts once a week is recommended to ensure a proper connection and to prevent charging issues.
6. Can I repair my vacuum cleaner battery?
In most cases, it’s not recommended to repair a vacuum cleaner battery. It’s best to replace the battery with a new one.
7. My vacuum cleaner isn’t charging at all. What should I do?
Check that the power source is working and that the charging contacts on the vacuum and docking station are clean and making proper contact. If the problem persists, you may need to replace the battery, docking station, or charger.
8. How do I reset my vacuum and docking station?
Refer to the manufacturer’s instructions for resetting your specific vacuum and docking station.
9. Can I overcharge my vacuum cleaner battery?
Yes, overcharging the battery can damage it. Always follow the recommended charging time and avoid leaving the battery charging for an extended period of time.
10. How do I store my docking station and charger?
Store the docking station and charger in a dry, cool place, away from direct sunlight or any heat sources.
