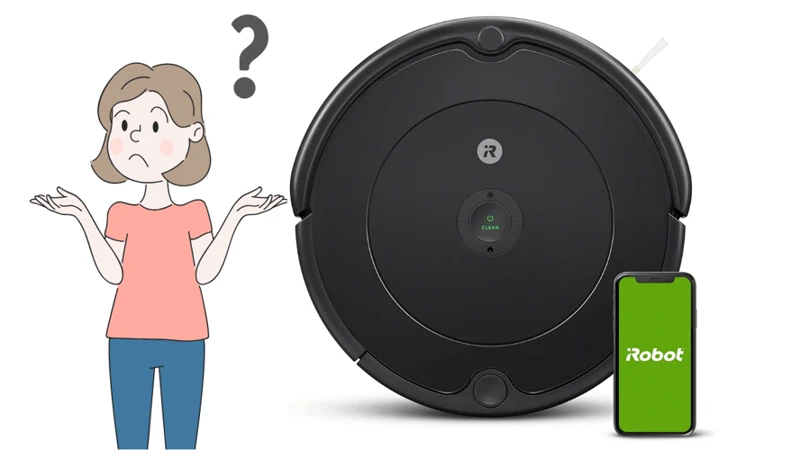
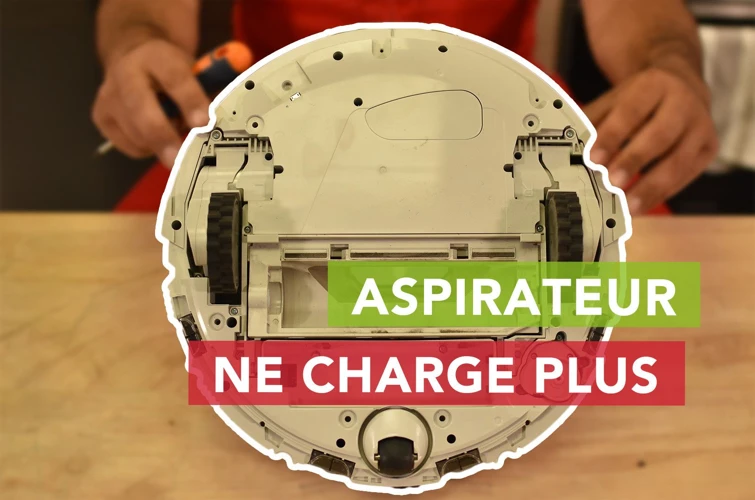
You’ve scheduled a cleaning session for your home and excitedly set your smart vacuum cleaner to work. However, upon returning, you notice that it hasn’t finished cleaning and is now dead as a doornail. You plug it in, but to your dismay, it is not charging. What could have gone wrong? Don’t panic just yet, as there are several reasons why your smart vacuum cleaner may not be charging properly. In this article, we will explore the possible causes and provide step-by-step solutions on how to resolve these issues. By the end of this article, you’ll have a better understanding of how to maintain and troubleshoot your smart vacuum cleaner for optimal performance.
Table of Contents
Reasons Why Your Smart Vacuum Cleaner is Not Charging
As a smart vacuum cleaner owner, you might have come across the frustrating issue of your device not charging. There could be several reasons why your smart vacuum cleaner is not charging properly. These problems could range from power source issues to problems with the charging station or battery itself. It’s important to figure out what’s causing the issue to properly troubleshoot and maintain your device. In this section of the article, we’ll explore the possible reasons why your smart vacuum cleaner is not charging and provide guidance on how you can fix the problem yourself. If you want to learn more about smart vacuum charging issues, make sure to check out our comprehensive guide on this topic.
1. Power Source Issues
When your smart vacuum cleaner fails to charge, it can be very frustrating. One of the potential reasons why your smart vacuum cleaner is not charging is due to power source issues. These issues involve any problem that prevents the power source from delivering the electricity needed for the smart vacuum to charge properly.
Here are some common power source issues that may be preventing your smart vacuum cleaner from charging, along with how to troubleshoot them:
Power Source Issue
Troubleshooting Steps
The power outlet is not working
Plug a different device into the outlet to make sure it’s working. Check the circuit breaker to see if it was tripped. If the breaker has been tripped, reset it.
The cable is damaged
Examine the cable for any visible damage. If there is damage to the cable, replace it with a new one.
The charging dock is not properly connected to the power source
Unplug the charging dock and plug it back in. Make sure it’s properly connected to the power source.
The power source is not providing enough power
Check the voltage of the power source to see if it’s within the recommended range. Make sure that you’re using the correct charger for your smart vacuum cleaner. Refer to the manufacturer’s website for more information on the proper charging specifications for your specific smart vacuum model.
Keep in mind that using the wrong charger or power source can damage your smart vacuum cleaner’s battery. Also, be aware that there are other potential issues besides power source issues that can prevent your smart vacuum cleaner from charging. Troubleshooting these other issues will require different steps.
To ensure that your smart vacuum cleaner continues to function properly, it’s important to be aware of the various factors that can impact its charging performance. Consider reading our article on smart vacuum charging cycle and smart vacuum battery life tips to maximize the life of your vacuum cleaner. Charging your smart vacuum cleaner properly and following safety measures when charging can go a long way in reducing charging-related issues.
2. Battery Problems
One of the common reasons why your smart vacuum cleaner may not be charging is due to battery problems. The battery is a crucial component of the vacuum cleaner and if it is not working properly, it may hinder the charging process.
There are several reasons why the battery may be causing charging issues. Some of these reasons include:
Possible Battery Problems
Possible Solutions
The battery is not properly installed in the vacuum cleaner
Check the battery placement and ensure that it is securely plugged in to the unit.
The battery is defective or damaged
You may need to replace the battery with a new one. If your smart vacuum cleaner is still under warranty, contact customer support to see if they can provide a replacement battery.
The battery is not holding a charge
Test the battery life by using a voltmeter to check the voltage output. If it is not holding a charge, it may be time to replace the battery.
The battery is impacted by room temperature
Avoid charging the smart vacuum cleaner in extreme temperatures. Very hot or very cold environments may reduce the battery’s ability to hold a charge. Try to charge the cleaner in a temperature-controlled room.
Battery problems can be frustrating, but with proper maintenance and care, you can minimize the likelihood of encountering these issues. If you determine that the battery is the source of the charging issue and have already tried troubleshooting it yourself without success, it may be time to contact customer support for additional help.
In some cases, battery problems may be the result of another issue, such as a defective charger. To learn more about how to identify and resolve issues with the charging station, check out our article on /defective-charger-vs-smart-vacuum-issue/ for more information.
It is also important to note that temperature can have a significant impact on battery performance. To learn more about the effects of room temperature on charging your smart vacuum cleaner, see our article on /impact-room-temperature-smart-vacuum-charging/.
Don’t let battery problems stop you from keeping your home clean and tidy. With the right maintenance and care, you can help ensure that your smart vacuum cleaner is always ready to go when you need it.
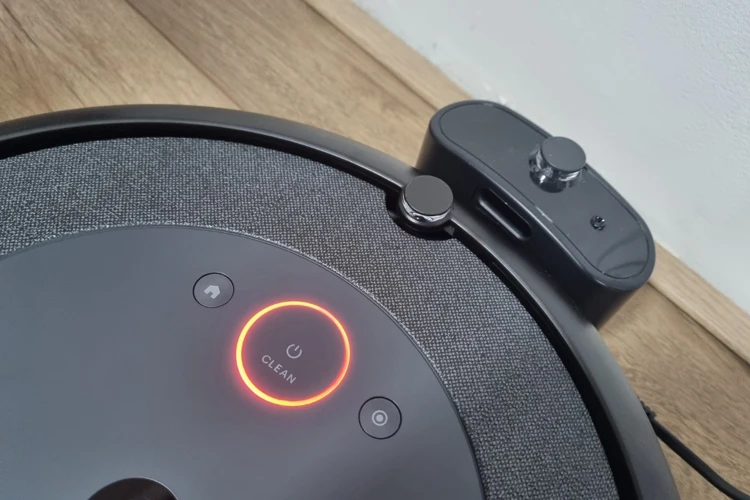
3. Charging Station Malfunctions
One possible reason why your smart vacuum cleaner may not be charging is a charging station malfunction. This can occur due to various reasons, such as a damaged power cord, defective charging components, or power surges. Here are some signs that your charging station may be malfunctioning:
No LED Light: When you plug in the charging station, the LED light should turn on to indicate that it’s receiving power. However, if the light doesn’t turn on, it could be a sign of a malfunctioning station.
Intermittent Charging: If your vacuum cleaner is only charging intermittently or not at all, it could indicate a problem with the charging station.
Noise: Unusual noises or hissing sounds coming from the charging station could be a sign of a short circuit or damaged components.
If you suspect that your charging station is malfunctioning, there are some troubleshooting steps you can take to try to fix the issue.
Check the Power Cord: Make sure that the power cord is connected securely to the charging station and the outlet. Look for any damage or frayed wires that could be causing a short circuit.
Reset the Charging Station: Unplug the charging station and let it cool down for at least 15 minutes. Then, plug it back in and see if the LED light turns on.
Inspect the Charging Contacts: Check the charging contacts on both the vacuum cleaner and the charging station for any dirt, debris, or physical damage. Clean them carefully with a soft cloth or brush if needed.
If none of these steps work, it may be time to contact customer support or invest in a new charging station. Remember, proper maintenance and care can help prevent charging station malfunctions, so make sure to regularly clean the charging contacts and store your vacuum cleaner properly.
4. Dirty Charging Contacts
One of the most common causes of a smart vacuum cleaner not charging is dirty charging contacts. Over time, dust and dirt can accumulate on the charging contacts, blocking the flow of electricity from the charging station to the vacuum cleaner. This can lead to charging issues and potentially damage the battery.
Here are some signs that your charging contacts may be dirty:
The vacuum cleaner is not charging or taking longer than usual to charge.
The charging station is flashing an error code or not lighting up.
The charging contacts appear dirty or corroded.
How to Clean the Charging Contacts:
Unplug the charging station before cleaning.
Use a clean, dry cloth to gently wipe away any dust or dirt on the charging contacts.
If the contacts appear especially dirty or corroded, use a small amount of rubbing alcohol on the cloth to gently clean them. Avoid using water or other liquids.
Allow the charging contacts to dry completely before plugging the charging station back in.
Preventing Dirty Charging Contacts:
Keep the charging station and vacuum cleaner in a clean, dry area to minimize the accumulation of dust and dirt.
Regularly wipe down the charging contacts with a dry cloth to prevent buildup.
Consider investing in a charging station cover to protect the contacts from dust and dirt.
By keeping your charging contacts clean and taking preventative measures against buildup, you can avoid charging issues with your smart vacuum cleaner and maintain its performance for years to come.
How to Resolve Charging Issues with Your Smart Vacuum Cleaner
Are you tired of your smart vacuum cleaner not charging? We understand how frustrating it can be to have a cleaning tool that’s not functioning properly. Luckily, there are steps you can take to resolve charging issues with your smart vacuum cleaner. Follow these simple but effective solutions to keep your smart vacuum cleaner functioning optimally. Let’s dive in!
1. Check the Power Source
If your smart vacuum cleaner is not charging, the first thing you should do is to check the power source. A faulty power source can be the root cause of your charging issues, and it’s important to rule this out before moving on to other potential culprits.
Here’s how to check the power source:
Step 1:
Check if your smart vacuum cleaner is properly plugged into the power outlet. Ensure that the connection is secure and the plug is properly inserted.
Step 2:
Try using a different power outlet. It’s possible that the outlet you’re using is faulty, and this could be causing your charging issues. Plug your vacuum cleaner into a different outlet to see if it charges properly.
Step 3:
Inspect the power cord for any signs of damage. If you notice any cuts or tears, it’s possible that the cord is not transmitting power properly. In this case, you should replace the power cord as soon as possible.
Step 4:
Check if the power outlet you’re using is functioning properly. You can test this by plugging in another device and seeing if it powers on. If the outlet is not functioning properly, you may need to contact an electrician for assistance.
By checking the power source, you can eliminate one of the most common reasons for smart vacuum cleaner charging issues. If the power source is not the culprit, then you can move on to other potential problems with your vacuum cleaner’s battery or charging station.
2. Troubleshoot Battery Problems
When it comes to troubleshooting battery problems with your smart vacuum cleaner, there are several things you can do before deciding that your battery needs to be replaced. Here are some steps you can take to troubleshoot battery problems:
Check the Charging Connections: The first thing you should do is check if the battery connections are properly seated in the charging station. Make sure that the contacts on the battery and charging station are clean and free from any dirt or debris. If you find any debris, gently clean the connections with a clean, dry cloth, and then put the battery back into the charging station to see if it charges.
Reset the Battery: Try resetting the battery by removing it from the charging station and leaving it unplugged for a few minutes. After waiting, put it back into the charging station to check if it charges. If it still does not charge, try resetting the battery again a few more times.
Test with a Different Charger: If the above steps haven’t worked, try testing the battery with a different charger. If it charges with a different charger, then the issue is with the charger, and you need to get a new one. If it still doesn’t charge, then the battery may be the problem.
Replace the Battery: If you have tried all of the above steps and your battery is still not charging, you may need to replace it. Make sure to purchase a replacement battery that is compatible with your specific vacuum cleaner model.
Remember, proper maintenance and care can help prolong your battery’s lifespan. Keeping the charging contacts clean and storing your vacuum cleaner properly can ensure that your battery functions optimally for as long as possible.
3. Clean the Charging Station Contacts
Keeping the charging contacts on your smart vacuum cleaner clean is essential for ensuring that it charges properly. Over time, dirt, dust, and debris can build up on the charging contacts and prevent the charger from making a proper connection.
To clean the charging station contacts, follow the steps below:
Step
Instructions
Step 1
Unplug the charging station from the power source before cleaning.
Step 2
Use a dry cloth or soft-bristled brush to gently remove any dirt or debris from the charging contacts. Be careful not to use water or cleaning solutions, as these could damage the contacts or the charging station.
Step 3
If the charging contacts are particularly dirty or corroded, you may need to use a small amount of rubbing alcohol to clean them. Dampen a soft cloth or cotton swab with the rubbing alcohol and gently wipe the contacts clean. Make sure the charging contacts are completely dry before plugging the charger back in.
By regularly cleaning the charging contacts on your smart vacuum cleaner, you can ensure that it charges as expected and avoid any charging issues in the future. Keeping the charging station clean also helps to extend the life of the charging contacts and the battery, saving you money in the long run.
4. Contact Customer Support
It can be frustrating when you’ve tried all the troubleshooting steps and your smart vacuum cleaner is still not charging. In such a scenario, it is time to reach out to the customer support team of the manufacturer. They are the experts who can guide you through the process of diagnosing your smart vacuum cleaner’s issue and resolving it. Here are the steps that you may need to take to contact customer support:
Step 1:
Look for the contact details of the manufacturer in the user manual or on their website.
Step 2:
Call or email the customer support team and explain the issue you are facing with your smart vacuum cleaner.
Step 3:
Provide the customer support team with the model number of your smart vacuum cleaner and any other relevant details they may ask for.
Step 4:
Follow the instructions provided by the customer support team to troubleshoot the issue or to set up a repair or replacement of your smart vacuum cleaner.
Remember to stay patient and polite when communicating with the customer support team, as they are there to help you. If your smart vacuum cleaner is still under warranty, you may be able to get your charging issue resolved without incurring any additional costs. However, if your smart vacuum cleaner is no longer under warranty, you may need to consider investing in a new battery or charging station.
5. Invest in a New Battery or Charging Station
If you have tried all the troubleshooting steps above and your smart vacuum cleaner is still not charging, it might be time to consider investing in a new battery or charging station. This can be a bit of an expense, but it’s a smart investment if you rely on your vacuum cleaner regularly.
Here are some things to keep in mind when investing in a new battery or charging station:
Make sure the new battery or charging station is compatible with your smart vacuum cleaner model. Check the manufacturer’s website or contact customer support to confirm compatibility.
Compare prices and read reviews before making a purchase to ensure you are getting a good deal on a reliable product.
If you’re not confident in installing a new battery yourself, consider taking your vacuum cleaner to a professional for assistance.
If your vacuum cleaner is no longer under warranty and a new battery or charging station doesn’t solve the charging issue, it might be time to consider purchasing a new vacuum cleaner altogether.
Investing in a new battery or charging station can be a wise decision, especially if it extends the life of your smart vacuum cleaner. Be sure to do your research, compare prices and make an informed decision before making a purchase.
Tips for Maintaining Your Smart Vacuum Cleaner
Maintaining your smart vacuum cleaner is essential for ensuring its longevity and optimal performance. To achieve this, you need to follow a few simple tips that will help you keep your vacuum cleaner in top condition. These tips involve cleaning the charging contacts, storing your vacuum cleaner properly, replacing the battery when needed, and performing regular maintenance. By implementing these tips, you can ensure that your smart vacuum cleaner stays in good working condition, giving you a better cleaning experience every time. So, let’s dive into the details!
1. Keep the Charging Contacts Clean
One of the most common reasons why your smart vacuum cleaner may fail to charge is due to dirty charging contacts. These contacts are responsible for transferring electricity from the charging dock to the vacuum cleaner. Over time, dust, dirt, and debris can accumulate on these contacts, leading to charging issues.
To avoid this problem, it’s important to keep the charging contacts clean regularly. Here are some tips to help you do so effectively:
Use a dry cloth: Before cleaning the charging contacts, make sure that the vacuum cleaner is unplugged from the charger. Then, use a dry cloth to wipe the contacts gently. Avoid using damp or wet cloths as this could damage the contacts.
Use a soft-bristled brush: For stubborn dirt and debris, you can use a soft-bristled brush to gently scrub the contacts. Be careful not to apply too much pressure, as this could also damage the contacts.
Avoid harsh chemicals: When cleaning the charging contacts, avoid using harsh chemicals or solvents, as they can corrode the contacts or cause other forms of damage.
Inspect the contacts regularly: Make it a habit to inspect the charging contacts regularly, even when you’re not experiencing any charging issues. This way, you can detect any signs of damage early on and take action before the problem gets worse.
By keeping the charging contacts clean, you can ensure that your smart vacuum cleaner charges properly and functions efficiently. Additionally, taking these steps can extend the life of your vacuum cleaner by preventing charging related problems.
2. Store Your Smart Vacuum Cleaner Properly
When it comes to storing your smart vacuum cleaner, it’s important to take proper care to ensure it remains in good condition and ready for your next use. Here are some tips to help you store your smart vacuum cleaner properly:
Clean and empty the dustbin: Before storing your smart vacuum cleaner, make sure to empty the dustbin and give it a thorough cleaning. This will prevent any buildup of debris or dust that could lead to clogs or other issues.
Store in a cool, dry place: It’s important to store your smart vacuum cleaner in a cool and dry place, away from direct sunlight or excessive heat. This will prevent any damage to the battery or other electronics.
Keep it away from water: It’s also important to keep your smart vacuum cleaner away from water or any other liquids. This can cause damage to the electronics and could even be a safety hazard.
Store with accessories: If your smart vacuum cleaner comes with accessories, such as brushes or extra filters, make sure to store them with the vacuum itself. This will ensure that you have everything you need when it comes time to use your vacuum again.
Use a dust cover: To keep your smart vacuum cleaner protected from dust or other debris, consider using a dust cover. This will help to keep the vacuum clean and ready for use.
Keep it out of reach: Finally, it’s important to store your smart vacuum cleaner in a safe place, out of reach of children or pets. This will prevent any accidental damage or injury.
By following these tips, you can ensure that your smart vacuum cleaner is stored properly and ready for your next cleaning session. Proper storage will also help to extend the life of your smart vacuum and keep it running smoothly for years to come.
3. Replace the Battery When Needed
As with any device, the battery of your smart vacuum cleaner has a limited lifespan. When you notice that the battery is not holding a charge like it used to, it’s time to consider replacing it. Continuing to use a worn-out battery can lead to further charging and performance problems.
How often should you replace your battery?
The answer to this question depends on several factors, such as the frequency of use of your vacuum cleaner, the quality of the battery, and how it is maintained. However, it is recommended that you replace your battery every 2-3 years to ensure optimal performance.
How to Replace the Battery of Your Smart Vacuum Cleaner?
The process for replacing the battery of your smart vacuum cleaner will vary depending on the model and manufacturer. Refer to the user manual for specific instructions. In general, follow these steps:
1. Turn off the vacuum and unplug it from the charging station.
2. Locate the battery compartment on the machine.
3. Remove the old battery carefully.
4. Replace with a new battery of the same model and brand.
5. Close the battery compartment securely.
6. Charge the new battery fully before using it.
Where to find replacement batteries?
When looking for replacement batteries for your smart vacuum cleaner, be sure to purchase one that is compatible with your machine. You can buy replacement batteries directly from the manufacturer, third-party websites, or online retailers. Be sure to read reviews and compare prices before making a purchase.
Benefits of Replacing Your Battery
Replacing your battery can have several benefits, including:
– Extended run time: A new battery will provide your smart vacuum cleaner with more run time, meaning you can use it longer without having to recharge it.
– Enhanced suction power: A fresh battery can provide better suction power for picking up debris and dirt.
– Improved overall performance: A new battery can improve the overall performance of your smart vacuum cleaner.
Tips for Maintaining Your New Battery
To make sure your new battery lasts as long as possible, follow these tips:
– Always charge the battery fully before using it.
– Store the battery in a cool, dry place when not in use.
– Avoid exposing the battery to extreme temperatures, which can damage it.
– Do not overcharge the battery, as this can shorten its lifespan.
By replacing the battery when needed and following proper maintenance tips, you can ensure that your smart vacuum cleaner continues to perform at a high level for years to come.
4. Perform Regular Maintenance
Regular maintenance is essential to ensure that your smart vacuum cleaner functions optimally and lasts longer. Here are some tips to help you maintain your smart vacuum cleaner:
Clean brushes and filters regularly: Over time, dust, hair, and other debris can accumulate on the brushes and filters. To prevent clogs and maintain suction power, clean these parts regularly. Check your vacuum’s manual for instructions on how to remove and clean the brushes and filters.
Inspect the wheels: The wheels on your smart vacuum cleaner can become clogged with dust and hair, which can affect the overall performance of your device. Check your wheels regularly and clean them if necessary.
Empty the dustbin: As your vacuum cleaner collects dirt and dust, it accumulates in a dustbin. Empty the bin regularly to prevent clogs and improve the suction power of your device.
Check the battery: If you notice that your vacuum cleaner is losing power more quickly than usual, check the battery. If it’s not holding a charge, it may be time to replace it.
Keep your vacuum cleaner dry: Moisture can damage your vacuum’s motor and other components. To prevent this, avoid using your vacuum cleaner on wet surfaces or using it to clean up liquids.
Store your vacuum properly: Store your vacuum cleaner in a cool, dry place, away from direct sunlight and heat sources. This will help prevent damage to the device and extend its lifespan.
By following these simple maintenance tips, you can help ensure that your smart vacuum cleaner operates efficiently and effectively for years to come. Remember to consult your vacuum’s manual for additional maintenance instructions and recommendations.
Conclusion
After going through the various reasons why your smart vacuum cleaner may not be charging, it is evident that there are several things you can do to resolve the issue. Whether it is a power source problem, battery issue, or dirty charging contacts, you can take simple measures to get your vacuum cleaner up and running again.
By following the troubleshooting steps outlined in this article, you can determine the root cause of the problem and take appropriate action. It is important to note that if you are not comfortable troubleshooting the problem yourself, you should contact customer support for assistance.
Moreover, investing in a new battery or charging station can also be a practical solution in some cases. Additionally, maintaining your smart vacuum cleaner will help extend its lifespan and prevent charging issues from occurring in the first place.
Regular maintenance and proper storage should become a part of your cleaning routine, as neglecting these aspects can lead to more complicated problems down the line. Always keep the charging contacts clean to ensure proper charging, and replace the battery when needed.
Overall, understanding the reasons why your smart vacuum cleaner is not charging and taking the necessary steps to fix the problem will keep your cleaning routine on track and ensure that your home remains spotless.
Frequently Asked Questions
1. Why won’t my smart vacuum cleaner charge?
There could be a variety of reasons, including power source issues, battery problems, charging station malfunctions, or dirty charging contacts.
2. How do I know if my charging station is working properly?
You can check if the charging indicator light is on when the vacuum cleaner is docked in the station.
3. Can I clean my smart vacuum cleaner charging contacts with water?
No, never clean the charging contacts with water. Instead, use a dry cloth or slightly damp one.
4. Do I need to buy a new battery if my smart vacuum cleaner is not charging?
It depends on the severity of the battery problem. Sometimes a simple reset or cleaning of contacts can solve the issue, but in other cases, a new battery may be necessary.
5. Can I charge my smart vacuum cleaner with a different charger?
No, it is not recommended to charge your vacuum cleaner with a different charger because it could damage the battery or the device itself.
6. How often should I replace the battery in my smart vacuum cleaner?
It depends on the usage and how well you maintain the vacuum cleaner. Generally, you should replace the battery every 1-2 years.
7. What should I do if my smart vacuum cleaner battery is swollen?
Do not attempt to charge or use the vacuum cleaner. Remove the battery and contact customer support immediately.
8. How do I troubleshoot battery problems?
You can try resetting the battery or cleaning the charging contacts. If that doesn’t work, consult the manufacturer’s manual or contact customer support.
9. Can I leave my smart vacuum cleaner plugged in to charge overnight?
Yes, you can leave it plugged in to charge overnight, but don’t leave it charging for extended periods, as it could overheat and damage the battery.
10. Can I use my smart vacuum cleaner while it is charging?
Most vacuum cleaners disable usage when it’s charging. It’s best to wait until it’s fully charged to use it again.