Handheld Vacuum Cleaner Maintenance: Tips and Tricks
Warning: A non-numeric value encountered in /var/www/html/wp-content/themes/generatepress/inc/structure/post-meta.php on line 165
by Dwight Gibson
When it comes to maintaining your handheld vacuum cleaner, keeping it clean and well-maintained is essential for optimal performance. However, with so many parts and components to consider, it can be tricky to know where to start. That’s why we’ve put together a comprehensive guide to help you keep your handheld vacuum cleaner in top condition. From general maintenance tips to deep cleaning techniques and storage advice, this guide will cover everything you need to know to ensure your vacuum runs smoothly for years to come. So, let’s dive in and discover how to clean and maintain your handheld vacuum cleaner step-by-step!
Table of Contents
General Maintenance and Care
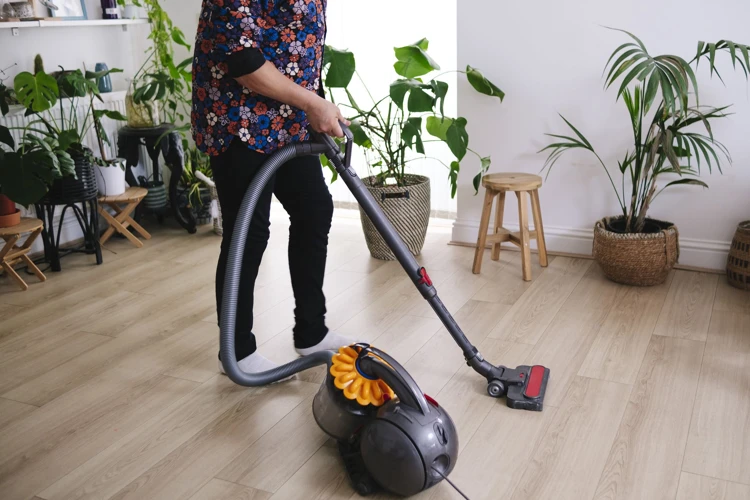
Your handheld vacuum cleaner is a trusted tool when it comes to cleaning small spaces and picking up accidental spills. It is important to keep it well-maintained and cared for, so it can continue to serve you well in the long run. Regular upkeep not only extends its lifespan, but also ensures that it continues to operate at peak performance. In this section, we’ll provide you with some essential maintenance and care tasks that will keep your handheld vacuum cleaner in top condition. Whether you have a handheld vacuum for your car, your home or your pets, these tips will be useful. Before we dive in, if you’re interested, you can read more about the benefits of handheld vacuums in this article.
Empty and Rinse the Dustbin
Empty and Rinse the Dustbin
One of the most important steps in maintaining your handheld vacuum cleaner is to regularly empty and rinse the dustbin. A full dustbin can lead to a decrease in suction power, making your vacuum less effective. Here are some tips on how to properly empty and rinse your vacuum’s dustbin:
Step
Description
Step 1
Turn off and unplug the vacuum cleaner.
Step 2
Remove the dustbin from the vacuum cleaner. Depending on your model, this may require pressing a release button or twisting the bin to detach it from the vacuum.
Step 3
Dispose of the dust and debris in a trash can.
Step 4
Rinse the dustbin under running water to remove any remaining debris or dust particles.
Step 5
Shake the bin gently to remove any excess water, then let it air dry completely before reattaching it to the vacuum cleaner.
Regularly emptying and rinsing the dustbin will not only keep your vacuum cleaner functioning properly but will also help keep unpleasant odors at bay. To avoid any damage to your vacuum cleaner or harm to you and your family, make sure to read the manufacturer’s instructions before cleaning your vacuum cleaner’s dustbin.
If you are looking to buy a handheld vacuum cleaner, make sure to check out our handheld vacuum buying guide for helpful tips and product recommendations.
Clean the Filter
Cleaning the filter is a crucial step in maintaining the efficiency of your handheld vacuum cleaner. Over time, the filter can become clogged with dirt and debris, which can reduce the suction power of the vacuum. To avoid this, it’s recommended to clean the filter regularly.
Here are the steps you can follow to clean the filter of your handheld vacuum cleaner:
Step
Instruction
Step 1
Turn off the vacuum cleaner and detach the dustbin or the filter housing unit from the main unit. If the filter is washable, you can remove it from the dustbin or the housing unit.
Step 2
Tap the filter gently to remove any loose dirt or debris. You can also use a soft-bristled brush to remove the dirt from the filter.
Step 3
Rinse the filter with water until the water runs clear. Do not use hot water as it can damage the filter.
Step 4
Let the filter air dry completely before putting it back in the dustbin or the housing unit. It’s important to ensure that the filter is completely dry, as a damp filter can restrict the suction power of the vacuum.
Cleaning the filter regularly can help maintain the suction power of your vacuum cleaner and ensure that it lasts longer. If you’re unsure about how often you should clean the filter, refer to the manufacturer’s instructions or check out some of our other articles on handheld vacuums, such as Best Handheld Vacuums for Pet Hair or How to Choose Handheld Vacuum Attachments.
Check the Battery
One of the most important parts of maintaining and caring for your handheld vacuum cleaner is checking its battery regularly. After all, a vacuum cleaner with a depleted battery is as good as useless. Here are some simple steps to follow when checking your handheld vacuum’s battery:
Check the battery level indicator: Most handheld vacuum cleaners have an indicator that shows the battery level. Check this indicator to determine whether or not you need to charge the battery.
Monitor the battery run time: If you notice that the vacuum cleaner battery is not as efficient as it used to be, it might be time for a replacement. Some of the signs to look out for include a shorter run time and a slower charging time.
Store the battery properly: Proper battery storage is crucial to the performance and longevity of your vacuum cleaner. Don’t leave your vacuum cleaner in storage with a depleted battery for a long time. Charge the battery to around 50% and remove it from the unit before storing it in a cool, dry place.
Checking the battery regularly eliminates the possibility of being stuck with a dead battery when you need to use your vacuum cleaner. In case you need to replace your vacuum cleaner battery, consider getting a high-quality replacement from a certified dealer. If you’re unsure which handheld vacuum cleaner is right for you or need more information, check out our list of top 10 handheld vacuums for small spaces.
Untangle the Brush Roll
When it comes to maintaining your handheld vacuum cleaner, it’s essential not to forget about the brush roll. The brush roll is responsible for agitating and gathering dirt and debris from various surfaces, but over time it can get tangled with hair and other fibers, reducing its efficiency. To ensure your vacuum cleaner stays in tip-top shape and effectively cleans your home, it’s crucial to regularly untangle the brush roll.
Steps for Untangling the Brush Roll
Step
Description
Step 1
Lay the vacuum cleaner on a flat surface with the brush roll facing up.
Step 2
Use a pair of scissors or a seam ripper to carefully cut away any hair or fibers that are tightly wound around the brush roll.
Step 3
Use a clean cloth or a soft-bristled brush to remove any remaining debris from the brush roll and surrounding areas of the vacuum cleaner.
Step 4
Spin the brush roll manually to ensure it moves freely and doesn’t make any unusual sounds. Check for any signs of damage, such as broken or missing bristles.
It’s important to note that if the brush roll has significant damage or wear and tear, it may need to be replaced. However, regular maintenance, including untangling the brush roll, can help prolong its lifespan and keep your vacuum cleaner working effectively.
By following these simple steps, you can easily untangle the brush roll of your handheld vacuum cleaner and keep it running in tip-top shape. Don’t forget to conduct this maintenance regularly for optimal performance. For more tips and tricks on handheld vacuum cleaners, check out our article on the benefits of a handheld vacuum for cleaning cars or our article on the differences between handheld and stick vacuum cleaners.
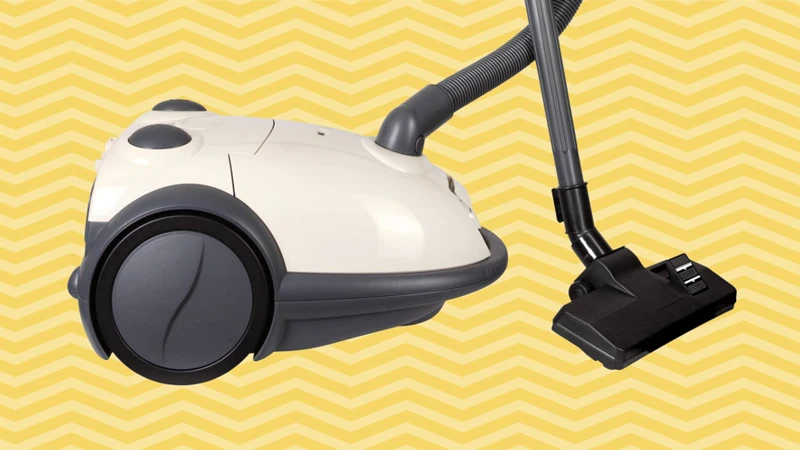
Deep Cleaning Your Handheld Vacuum Cleaner
After several uses, your handheld vacuum cleaner may start to lose its suction power, or the brush roll may get tangled with hair and dust, hindering its performance. This is a sign that it’s time for a deep clean. Deep cleaning your device will not only help extend its life but also keep it working as efficiently as possible. In this section, we’ll provide you with step-by-step guidance on how to deep clean your beloved handheld vacuum cleaner to get it working like new. By the way, if you’re curious about the history of handheld vacuum cleaners, check out our article on the evolution of portable vacuums. If you’re struggling to keep your handheld vacuum working well on hardwood floors, be sure to read our tips and tricks for using handheld vacuums on hardwood floors.
Disassemble the Vacuum Cleaner
Before deep cleaning your handheld vacuum cleaner, it’s important to disassemble it properly. This will allow you to clean each component individually and ensures that you don’t damage any parts during the cleaning process.
Step 1: Begin by unplugging or turning off your handheld vacuum cleaner.
Step 2: Refer to the manufacturer’s instructions on how to disassemble your particular model, as each vacuum cleaner may have slightly different parts and components.
Step 3: To disassemble your handheld vacuum cleaner, you may need to use a screwdriver or other tools. Make sure you have the appropriate tools on hand before beginning to disassemble.
Step 4: Remove the dustbin and filter from the vacuum cleaner. Wash the dustbin and filter under running water and dry thoroughly.
Step 5: Remove the brush roll and nozzle. Use a pair of scissors to cut away any tangled hair or debris from the brush roll. Clean the nozzle using a damp cloth.
Step 6: If your vacuum cleaner has a detachable battery, remove it. Clean the battery with a soft, dry cloth to remove any dirt or debris.
Once you have disassembled your handheld vacuum cleaner, you can move on to cleaning each component thoroughly. Remember to refer to the manufacturer’s instructions on how to reassemble your vacuum cleaner once you have completed the deep cleaning process.
Clean the Dustbin and Filter
Cleaning the dustbin and filter of your handheld vacuum cleaner is a crucial step in maintaining optimal performance. The dustbin is where all the dirt and debris are collected and the filter is responsible for trapping dust and preventing it from being released back into the air. Follow these simple steps to ensure your handheld vacuum cleaner is clean and functioning at its best.
Step 1: First, remove the dustbin from the vacuum cleaner. Depending on the model of your handheld vacuum cleaner, you may need to press a release button or twist to remove the dustbin.
Step 2: Empty the dustbin over a trash can, being careful not to spill any debris.
Step 3: Using a soft brush or cloth, gently clean the dustbin to remove any remaining debris or dirt. Avoid using water to clean the dustbin, as this can cause damage to the motor or other parts.
Step 4: Now it’s time to clean the filter. Remove the filter from the dustbin, following the instructions in your user manual. Typically, the filter can be washed in warm water and mild soap. Be sure to remove any excess water from the filter and allow it to air dry completely before reinstalling.
Step 5: Once the filter is completely dry, reattach it to the dustbin. Make sure it is securely in place before continuing.
Step 6: Finally, reattach the dustbin to the handheld vacuum cleaner. Ensure it clicks or twists into place before use.
Regularly cleaning the dustbin and filter of your handheld vacuum cleaner will not only increase the lifespan of the vacuum, but also ensure optimal suction power for picking up dirt and debris.
Step
Action
1
Remove the dustbin from the vacuum cleaner.
2
Empty the dustbin over a trash can.
3
Clean the dustbin with a soft brush or cloth to remove any remaining debris or dirt.
4
Remove the filter and wash it in warm water and mild soap.
5
Allow the filter to air dry completely before reinstalling.
6
Reattach the filter to the dustbin and then reattach the dustbin to the vacuum cleaner.
Clean the Brush Roll and Nozzle
One of the most important parts of maintaining your handheld vacuum cleaner is to clean the brush roll and nozzle regularly. Over time, dust, hair, and other debris can accumulate in these areas, causing the vacuum cleaner to lose suction power and making it less effective. Here’s how to clean the brush roll and nozzle:
Step 1: Start by turning off the vacuum cleaner and unplugging it from the power source.
Step 2: Locate the brush roll and nozzle. These are typically located at the bottom of the vacuum cleaner.
Step 3: Using a pair of scissors or a knife, carefully cut away any hair or fibers that may be tangled around the brush roll. Be sure to do this carefully as the brush roll can be delicate and difficult to replace.
Step 4: Use a dry brush or a clean cloth to remove any debris that may be stuck to the brush roll.
Step 5: Next, remove the nozzle from the vacuum cleaner. You can usually do this by pressing a button or pulling a lever.
Step 6: Using a soft-bristled brush or a clean cloth, gently clean the inside of the nozzle. Be sure to remove any debris or dust that may have accumulated inside.
Step 7: Rinse the nozzle under running water to remove any remaining debris.
Step 8: Allow the brush roll and nozzle to dry completely before reassembling your vacuum cleaner.
By following these simple steps, you can ensure that your handheld vacuum cleaner continues to function at its best. Regularly cleaning the brush roll and nozzle will help to maintain suction power and increase the overall lifespan of your vacuum cleaner.
Reassemble the Vacuum Cleaner
Now that you have thoroughly cleaned your handheld vacuum cleaner, it’s time to put it back together. Follow these steps to reassemble your vacuum cleaner:
Step
Instructions
1.
Insert the filter back into the dustbin. Make sure it is secure and properly aligned.
2.
Reattach the dustbin to the main body of the vacuum cleaner. You should hear a click sound when it is properly attached.
3.
Carefully insert the brush roll back into the nozzle of the vacuum cleaner. Ensure that the end caps are properly secured and aligned with the slots in the nozzle.
4.
If applicable, put back the crevice or other attachments you removed earlier for cleaning.
5.
Turn on the vacuum cleaner and test it to ensure it is running smoothly.
It’s important to note that if you encounter any difficulty during reassembly, consult the manufacturer’s manual or seek professional assistance. Putting it back together incorrectly could result in the vacuum cleaner malfunctioning or not working at all. Take your time and ensure that each component is properly aligned and securely attached before moving on to the next step. With these simple steps, you can keep your handheld vacuum cleaner in top condition for years to come.
Storage Tips
As important as maintaining and cleaning your handheld vacuum cleaner is, proper storage is also crucial for its longevity and optimal performance. You don’t want to realize the hard way that improper storage led to battery failure or dusty and clogged up components. In this section, we’ll go over some essential storage tips that will help keep your vacuum cleaner in top condition and ready for use at any given time. Let’s dive in!
Empty the Dustbin before Storage
Removing Debris from the Dustbin Before Storage
Properly cleaning your handheld vacuum cleaner at the end of each use is essential for ensuring effective operation and a long-lasting lifespan. One of the key steps in maintaining your device is to empty the dustbin before storage. Here are the steps to follow:
Steps
Instructions
Step 1
Turn off the handheld vacuum cleaner and remove the dustbin component.
Step 2
Hold the dustbin over a trashcan or empty it into the trash.
Step 3
Use your hands to remove any large, visible debris.
Step 4
Bring the dustbin under running water and rinse the inside thoroughly, making sure all debris has been washed away.
Step 5
Shake the dustbin gently to remove any excess water.
Step 6
Allow the dustbin to air-dry completely before reattaching it to the handheld vacuum cleaner. This will prevent any mold or mildew from forming in the dustbin during storage.
By following these simple steps for emptying the dustbin before storage, you can keep your handheld vacuum cleaner working effectively for years. Remember to store the device in a cool and dry place, and not to store it with high humidity or dusty areas.
Charge the Battery before Storage
Before storing your handheld vacuum cleaner, you should ensure that the battery is fully charged to keep it in good condition. Here are some steps you can take to properly charge your vacuum’s battery before storage:
Plug the charging cable into the vacuum cleaner
Insert the charging cable into a power outlet
Check the charging status lights to see if the vacuum cleaner is charging
Allow the battery to fully charge, this usually takes several hours
Make sure you unplug the charging cable when the battery is fully charged
Charging the battery before storage ensures that it is ready to use when you need it again. It also helps to prolong the battery’s lifespan. Leaving the battery to sit for long periods without use, or storing it partially charged, can cause damage to the battery, making it lose its ability to hold a charge over time.
By following these steps, you’ll be able to keep your handheld vacuum’s battery in good shape before storing it away. This simple action ensures that your vacuum cleaner is always ready to go when you need it, without suffering from any unexpected issues.
Store in a Clean and Dry Place
When it comes to storing your handheld vacuum cleaner, it’s important to find a location that is clean and dry to avoid any damage or mildew growth. Here are some tips for storing your handheld vacuum cleaner properly:
Tip
Description
Find a Storage Space
Look for a storage location that is not exposed to direct sunlight, humidity, or extreme temperatures. A closet, pantry or basement could be great options for storage.
Clean the Vacuum
Before storing your handheld vacuum cleaner, make sure it’s completely clean. Empty the dustbin, rinse the filter, and clean the brush roll and nozzle as necessary.
Wrap the Cord
Wrap the vacuum’s cord around the designated cord wrap hook, making sure it isn’t tangled or twisted. This will help prevent damage and prolong the life of the cord.
Store in a Bag
If possible, store your vacuum in a bag to protect it from dust and moisture. Vacuum cleaner storage bags are available for purchase, or a large plastic bag could suffice.
By following these storage tips, you can ensure that your handheld vacuum cleaner stays in good condition and performs as expected when you need it. Don’t forget to check the battery charge before using it again, and if you notice any issues with its performance, refer to our previous tips on general maintenance and deep cleaning to keep it running smoothly.
Conclusion
In conclusion, keeping your handheld vacuum cleaner clean and maintained is essential for it to work properly and last longer. Neglecting its care can lead to poor performance and even permanent damage.
Remember to regularly empty and rinse the dustbin, clean the filter, check the battery, and untangle the brush roll. These simple steps will make a big difference in how well your vacuum cleaner works.
And don’t forget to periodically deep clean your vacuum cleaner by disassembling it and thoroughly cleaning the dustbin, filter, brush roll, and nozzle. This will ensure that all the dirt and debris are removed and your vacuum cleaner is functioning at its best.
When storing your vacuum cleaner, make sure to empty the dustbin and charge the battery before putting it away. It’s also important to store it in a clean and dry place to prevent mold or mildew from forming.
By following these tips and regularly maintaining your handheld vacuum cleaner, you can ensure it will last for years and continue to clean your home effectively. With a clean and well-maintained vacuum cleaner, you’ll be able to enjoy a cleaner and healthier home environment. So go ahead and give your handheld vacuum cleaner the care it deserves!
Frequently Asked Questions
1. How often should I clean my handheld vacuum cleaner?
You should empty and clean the dustbin and filter after each use. Check the battery and untangle the brush roll as needed.
2. Can I rinse the filter of my handheld vacuum cleaner?
Yes, you can rinse the filter with water. To dry it, allow it to air dry for at least 24 hours before reattaching it.
3. How long does the battery of a handheld vacuum cleaner last?
The battery life varies depending on the model and usage. Check the user manual for information on the battery life of your model.
4. How should I untangle the brush roll of my handheld vacuum cleaner?
Using scissors or other sharp objects is not recommended. Instead, use your hands or a comb to gently remove any hair, debris or tangled fibers.
5. What should I do if my handheld vacuum cleaner loses suction power?
Check the dustbin and filter for clogs. Make sure the brush roll is free of tangles or debris. Also, check the battery level and charge if necessary.
6. Can I use a handheld vacuum cleaner on all floor types?
Not all handheld vacuum cleaners are designed to be used on all floor types. Check the user manual to see if there are any restrictions in use.
7. How should I store my handheld vacuum cleaner?
Store your handheld vacuum cleaner in a cool, dry place. Empty the dustbin, charge the battery and store it in a dust bag if possible.
8. How can I prevent my handheld vacuum cleaner from overheating?
Allow the vacuum cleaner to cool down between uses. Do not use the device continuously for an extended period of time.
9. Can I use my handheld vacuum cleaner for wet spills?
Not all handheld vacuum cleaners are designed to be used for wet spills. Check the user manual to see if your model can be used for wet spills.
10. How long should I charge my handheld vacuum cleaner?
The charging time varies depending on the model and battery life. Check the user manual for information on the charging time of your model.