Ways to Check the Suction Power of Your Smart Vacuum Cleaner
Warning: A non-numeric value encountered in /var/www/html/wp-content/themes/generatepress/inc/structure/post-meta.php on line 165
by Dwight Gibson
Have you recently noticed that your smart vacuum cleaner is not picking up as much dirt and debris as it used to? If so, you may be experiencing a loss of suction power. Suction power is a vital aspect of any vacuum cleaner – it determines how much debris can be pulled into the dustbin. Without proper suction power, your smart vacuum cleaner may leave behind dust and dirt, leaving your floors less than spotless. In this guide, we’ll delve into the importance of suction power and provide step-by-step instructions on how to check the suction power of your smart vacuum cleaner. By following these tips, you’ll be able to diagnose any issues and have your vacuum cleaner back to peak performance in no time!
Table of Contents
Why Suction Power is Important
Maintaining the suction power of your smart vacuum cleaner is crucial to its cleaning performance. Without proper suction power, your vacuum cleaner will not be able to extract dirt, debris, and pet hair from your floors, carpets, and furniture as effectively. This can lead to a dirty and unhygienic living space, which defeats the purpose of owning a smart vacuum cleaner altogether. In this section, we’ll discuss the importance of suction power and how it affects your vacuum cleaner’s cleaning performance. We’ll also pinpoint some common causes of low suction power, which you can read about in more detail in our article on smart vacuum not picking up dirt. To keep your smart vacuum cleaner functioning at full capacity, check out our smart vacuum troubleshooting tips, including how to clean the brushroll in your vacuum.
Understanding Suction Power
Understanding Suction Power: Suction power is a critical feature of a smart vacuum cleaner. Without it, your cleaner can’t pick up dirt and pollutants from your floors, leaving them unclean and hazardous to your health. Before you can learn how to check your vacuum’s suction power, let’s take a look at what it is and how it works.
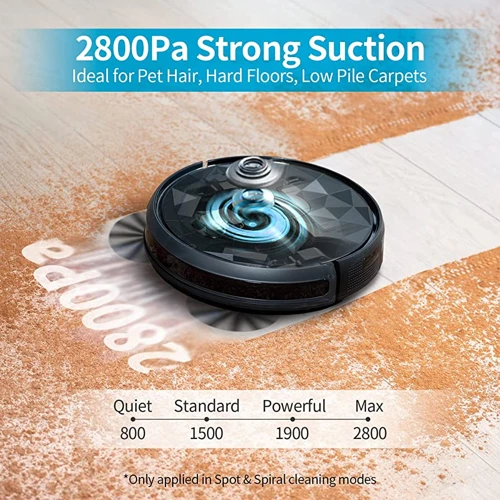
Suction power is the force that a vacuum cleaner’s motor generates to pull and trap dirt, debris, and other foreign objects from your floors. A vacuum cleaner’s suction power is measured in pascals (Pa) or air watts (AW). The higher the suction power, the more powerful the motor, and the better cleaning performance.
There are two primary factors that determine a vacuum’s suction power – airflow and sealed suction. Airflow is the volume of air that flows through the machine’s system, while sealed suction measures the vacuum’s ability to create and maintain a vacuum seal between the cleaning head and the floor surface. A vacuum cleaner with a high airflow and strong sealed suction will have better cleaning performance.
It’s important to note that suction power is not the only factor that determines a vacuum’s cleaning performance. Factors such as brushroll cleaning, filtration, and overall design also play a role in how well a vacuum cleaner picks up dirt and debris from your floors.
Now that you know what suction power is and how it affects cleaning performance, let’s move on to the next section and learn how to check your vacuum’s suction power.
If you want to learn more about cleaning mistakes you might be making with your smart vacuum cleaner, check out our previous article. Additionally, it’s important to clean and maintain the brushroll of your smart vacuum cleaner. Learn more about that in our guide on how to clean the brushroll of a smart vacuum.
How it Affects Cleaning Performance
The suction power of your smart vacuum cleaner is crucial for its cleaning performance. If the suction power is low, the vacuum cleaner will not be able to pick up dirt and debris properly, leaving your floors and carpets dirty. Here are some ways in which low suction power can impact the cleaning performance of your smart vacuum cleaner:
Reduced cleaning efficiency: When the suction power is low, the vacuum cleaner will not be able to pick up dirt and debris properly. This can leave dirt and debris on the floor or carpet, making it look dirty even after vacuuming.
Incomplete cleaning: Low suction power can result in incomplete cleaning. The vacuum cleaner may leave behind dirt and debris that is not visible to the naked eye, but can still cause allergies and respiratory problems.
Increased cleaning time: If the suction power is low, you may have to go over the same area multiple times to pick up dirt and debris, increasing the cleaning time.
Damage to the vacuum cleaner: Low suction power can put extra strain on the motor, which can damage the vacuum cleaner in the long run.
It is important to maintain the suction power of your smart vacuum cleaner to ensure optimal cleaning performance.
Common Causes of Low Suction Power
Low suction power is a common problem that many robotic vacuum cleaner owners face. There are various reasons why your smart vacuum cleaner might be experiencing this issue. Here are some of the most common causes of low suction power:
Clogged Filter: A dirty or clogged filter can greatly decrease the suction power of your robot vacuum cleaner. Over time, dust, dirt, and debris accumulate in the filter and cause it to become clogged. As a result, the suction power reduces and you might notice that the cleaning performance is not as efficient as before.
Brushes Are Dirty: The brushes of robot vacuum cleaners are designed to pick up dirt and debris from surfaces. However, when these brushes get dirty or tangled, they become less effective and cause the suction power to decrease. Make sure to clean the brushes regularly to avoid this problem.
Blockage in the Hose: A blockage in the vacuum hose can also lead to low suction power. The hose can get clogged with debris and prevent the air from flowing freely, resulting in a reduction in suction power. Check the hose for any blockages and remove them if necessary.
Defective Motor: Another reason why your vacuum cleaner might be experiencing low suction power is a defective motor. The motor is responsible for generating the suction power that the vacuum cleaner produces. If the motor is not functioning properly, it can lead to a decrease in suction power. In this case, you might need to replace the motor or get it repaired.
Low Battery: A low battery can also cause the suction power to decrease. When the battery is low, the vacuum cleaner might not be able to produce the same level of suction power as before. Make sure to charge your vacuum cleaner regularly to avoid this problem.
Identifying the cause of low suction power is the first step in fixing the problem. By addressing these common causes, it is possible to restore the suction power of your smart vacuum cleaner and ensure that it is performing efficiently.
How to Check Suction Power
When your smart vacuum cleaner isn’t picking up dirt and debris like it used to, it’s time to check its suction power. But how exactly do you go about that? With several components involved in the vacuuming process, pinpointing the cause of low suction power can be a bit perplexing. In this section, we’ll walk you through some simple yet effective ways to identify and check the suction power of your smart vacuum cleaner. Let’s dive in!
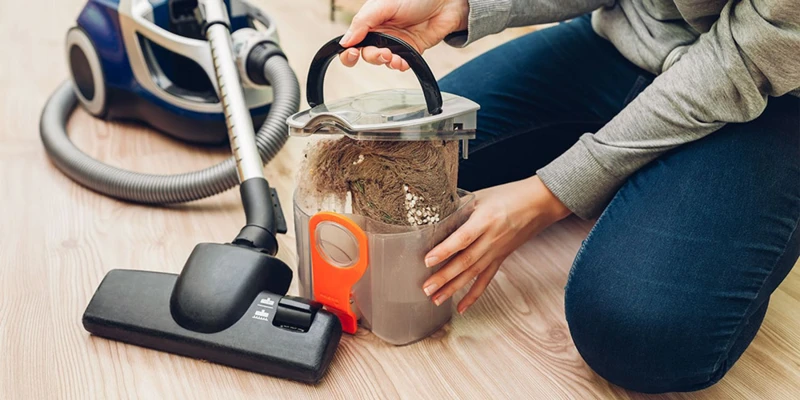
Clean the Filter
To ensure proper suction power, the first step is to clean the filter of your smart vacuum cleaner. A dirty or clogged filter can significantly reduce suction power, making the cleaning process less effective. Follow these steps to clean the filter:
Step 1: Turn off the vacuum cleaner and unplug it from the power source to prevent accidents.
Step 2: Locate the filter, which is usually found near the dustbin, and detach it from the vacuum cleaner.
Step 3: Inspect the filter for dirt, dust, and debris. If the filter appears dirty, gently tap it on a hard surface to remove loose debris.
Step 4: Wash the filter in lukewarm water with a mild detergent. Avoid using harsh chemicals, as they can damage the filter.
Step 5: Rinse the filter thoroughly with clean water and allow it to air dry completely before reattaching it to the vacuum cleaner.
By keeping the filter clean, you can maintain the suction power of your smart vacuum cleaner and ensure effective cleaning performance. Additionally, replacing the filter regularly can further improve the suction power of your vacuum cleaner. Check with the manufacturer to determine the recommended replacement schedule for your specific model.
Inspect the Brushes
When it comes to checking the suction power of your smart vacuum cleaner, inspecting the brushes is another important step. Over time, brushes can become worn or tangled with hair, reducing the effectiveness of your vacuum cleaner. Here’s how to inspect your brushes:
Turn off the vacuum cleaner: Before inspecting the brushes, make sure the vacuum cleaner is turned off and unplugged from the power source.
Remove the brushes: Depending on the make and model of your smart vacuum cleaner, the brushes may be easily removable or require some tools to access. Refer to the user manual for instructions on how to remove the brushes.
Check for tangles: Once removed, check for any hair or debris that may be tangled around the brushes. Use scissors or any other tool to remove the tangles, taking care not to damage the brushes.
Inspect the bristles: After removing any tangles, inspect the bristles for wear and tear. Look for any signs of fraying or bending, as these could indicate that it’s time to replace the brushes.
Clean the brushes: If you notice any debris or dust on the brushes, use a soft cloth or brush to gently clean them.
Reattach the brushes: Once you’ve finished inspecting and cleaning the brushes, reattach them back to the vacuum cleaner according to the user manual’s instructions.
By inspecting and maintaining the brushes of your smart vacuum cleaner, you can ensure that it remains effective in picking up dirt and debris as it moves through your home. Remember to check the brushes on a regular basis, and replace them as needed, to get the most out of your vacuum cleaner.
Use a Suction Gauge
If you want to get an accurate measurement of the suction power of your smart vacuum cleaner, using a suction gauge can be a great option. A suction gauge comes with a hose that connects to the vacuum cleaner and measures the suction power as you run the cleaner over the gauge.
Here are the step-by-step instructions for using a suction gauge:
Step 1:
Choose a suction gauge that is compatible with your vacuum cleaner model.
Step 2:
Locate the inlet valve on your vacuum cleaner and plug the gauge’s hose into it. If your vacuum cleaner has a detachable hose, you can plug the gauge’s hose directly into the hose.
Step 3:
Turn on your smart vacuum cleaner and run it over the gauge. Make sure the gauge is flat and level on the floor.
Step 4:
Observe the reading on the gauge. A suction power reading of 20 kPa (kilopascals) or above is considered good, while a reading lower than that may indicate that your vacuum cleaner needs maintenance.
Step 5:
Repeat the test on different surfaces to get an accurate reading of your vacuum cleaner’s suction power.
Using a suction gauge can give you a more quantifiable measurement of your smart vacuum cleaner’s suction power. If you don’t have a suction gauge, you can still assess your vacuum cleaner’s suction power using the other methods mentioned in this article.
Check the Hose
A vacuum cleaner’s hose plays a crucial role in directing the airflow and ensuring efficient suction power. Over time, the hose can become clogged or develop cracks, which can significantly reduce the effectiveness of your smart vacuum. Here are some steps to check the hose and identify any issues:
Detach the hose: First, remove the hose from the vacuum cleaner. Make sure to turn off and unplug the device before doing so.
Inspect for visible wear and tear: Examine the hose for any cracks, holes, or other types of visible damage. If you notice any issues, you may need to replace the hose or have it repaired by a professional.
Check for clogs: Blockages are a common cause of reduced suction power. First, use your fingers to feel along the length of the hose. If there’s a clog, you should be able to feel it. If not, use a long thin object like a broom handle or coat hanger to carefully push through any blockages.
Use water to flush out debris: If you suspect there’s a serious clog deep within the hose, try running water through it. Use a gentle stream of water from a faucet or hose and hold the hose at the opposite end. This can help you to dislodge any debris that is trapped inside.
Reconnect hose and test: After checking the hose, reattach it to the vacuum cleaner and turn it on. Test the suction power by holding your hand in front of the hose. If the suction seems weak, repeat the previous steps until you’ve identified and resolved any issues.
By regularly checking and maintaining your vacuum cleaner’s hose, you can prevent clogs and ensure maximum suction power, thereby improving the overall efficiency and performance of your smart vacuum.
Assess the Battery
As smart vacuum cleaners are powered by batteries, it’s essential to ensure they are functioning well to optimize suction power. Here are some steps to assess the battery:
Step 1: Check battery health
You can check the health of the battery by examining the battery pack’s voltage and current output. You can easily do this with a digital multimeter. Check the voltage and current during charging and discharging to determine if the battery is reaching its potential. If you find that the battery isn’t reaching its full potential, it might be time to replace the battery.
Step 2: Check the charge time
Check the charging time by unplugging the charger and plugging it back in. Observe how long it takes the battery to fully charge – it should take the amount of time specified in the product manual. If it takes longer than this, there might be an issue with the charger or the battery itself.
Step 3: Ensure proper placement
Ensure the battery is correctly placed in the vacuum. If the battery is not correctly placed, it might not provide optimum suction power. Make sure to follow the manufacturer’s instructions regarding battery placement.
Here’s a table summarizing the steps to assess the battery of your smart vacuum cleaner:
Step
Action
1
Check battery health with a digital multimeter
2
Check charging time
3
Ensure proper placement
By taking these steps to assess the battery of your smart vacuum cleaner, you can potentially identify any areas where suction power might be lacking and take the necessary steps to solve them.
Test on Different Surfaces
When checking the suction power of your smart vacuum cleaner, it’s important to test it on a variety of surfaces to ensure its effectiveness. Here are some surfaces to consider testing on:
Carpet: Carpets are known to trap dirt and debris deep within their fibers. Test your vacuum’s suction power on both high-pile and low-pile carpets to see how well it can extract dirt from different depths.
Hardwood Floors: Hardwood floors are prone to collecting dust and pet hair. Test how well your vacuum cleaner performs on hardwood floors, as it may have a different suction power requirement than for carpets.
Tile: Tiles have tight seams where dirt and debris can accumulate. Test your vacuum cleaner’s suction power on the tile to see how well it can extract dirt from these tight spots.
Upholstery: Upholstery, such as sofas and chairs, can capture pet hair, dust and dander. Test your vacuum cleaner’s suction power with an upholstery tool to see how well it can clean fabrics.
By testing on different surfaces, you can get an overall assessment of your vacuum cleaner’s suction power and its effectiveness for various cleaning tasks.
Additional Tips
As much as we love our smart vacuum cleaners for their suction power, we must not forget that these appliances also need proper maintenance to continue performing at their best. If you want to keep your robot vacuum in top shape, here are some useful tips that you should keep in mind. Incorporating these simple steps into your cleaning routine can help prolong the lifespan of your vacuum and ensure that your floors are always spotless.
Maintain Regular Cleaning Schedule
Keeping a regular cleaning schedule for your smart vacuum cleaner is essential in ensuring its maximum suction power and overall cleaning performance. Failure to keep your vacuum clean could result in clogged filters, brushes, and hoses, which would eventually lead to a drastic decrease in suction power.
What to include in your cleaning schedule?
To keep your smart vacuum cleaner functioning efficiently, you should include the following tasks in your cleaning schedule:
Task
Frequency
Clean the dustbin and filter
After every use
Inspect the brushes
Every week
Clean the brushes
Every month
Check the hose for blockages
Every month
Replace the filter
Every 3-6 months
Why is a regular cleaning schedule important?
Cleaning your smart vacuum cleaner regularly not only helps to maintain its suction power but also increases its lifespan. Dirt and debris that are left in the dustbin or caught in the filters, brush rolls, and hoses can cause permanent damage to your vacuum cleaner, resulting in costly repairs or even a complete breakdown.
A filthy smart vacuum cleaner can lower the indoor air quality in your home, spreading allergens and dust in the air. This can lead to respiratory problems or worsen existing conditions such as asthma or allergies.
How to stick to your cleaning schedule?
To ensure that you stick to your cleaning schedule, consider creating reminders or alerts on your phone or calendar to prompt you when it’s time to carry out each task. You could also set a specific day and time for cleaning your vacuum, making it a routine task like any other household chore.
Conclusion
Maintaining a regular cleaning schedule for your smart vacuum cleaner is crucial in keeping its suction power at its maximum and prolonging its life span. Remember to clean the dustbin and filter after every use, inspect and clean the brushes every week, and check the hose for blockages and replace the filter every few months. By following these simple steps, you can keep your smart vacuum cleaner running efficiently for years to come.
Empty Dustbin and Replace Parts as Needed
Proper maintenance of your smart vacuum cleaner is essential for ensuring peak performance. One simple yet crucial step is to regularly empty the dustbin. When the dustbin is full, it can negatively impact the suction power of your vacuum, making it less effective at picking up dirt and debris.
Here are some tips for emptying your dustbin:
Locate the dustbin. This is typically located on the back or bottom of the vacuum cleaner and is often easily detachable.
Open the dustbin. Depending on the model, this may involve pressing a button, flipping a latch or sliding a cover.
Hold the dustbin over a trash can and carefully dump out the contents. It may be helpful to use a small brush or tool to remove any debris that is stuck to the sides or bottom of the bin.
Wipe down the dustbin with a damp cloth to remove any remaining dirt or debris. Allow it to air dry before replacing it.
In addition to regularly emptying the dustbin, it’s also important to replace parts as needed. Over time, the brushes and filters on your vacuum cleaner can become worn or clogged, reducing the suction power and overall effectiveness of your device.
Here are some signs that it’s time to replace parts:
Brushes that are frayed or no longer rotating properly
A clogged or dirty filter that cannot be cleaned effectively
When replacing parts, be sure to use manufacturer-approved replacement parts to ensure optimal performance. By regularly emptying the dustbin and replacing worn parts, you can help maintain the suction power and overall effectiveness of your smart vacuum cleaner.
Consider Professional Maintenance
As much as you can do some simple checks and maintenance on your smart vacuum cleaner, there may be times when you need to turn to professional maintenance services. It’s important to have your vacuum cleaner serviced on a regular basis to ensure that it continues to perform at its best. Here are some reasons why it’s worth considering professional maintenance:
Expertise: A professional technician has the knowledge and expertise to quickly diagnose and fix any issues with your smart vacuum cleaner.
Advanced Tools and Equipment: Professional maintenance services have access to specific tools and equipment that aren’t available to the general public. These tools can reveal issues that simple home checks may not, and help resolve them more efficiently.
Longevity: Regular professional maintenance can help increase the longevity of your smart vacuum cleaner. A skilled technician can identify potential problems before they become major issues, saving you money in the long run.
Warranty: If your smart vacuum cleaner is still under warranty, it may require professional maintenance to maintain its warranty. Be sure to read your warranty carefully to see what’s required.
By considering professional maintenance for your smart vacuum cleaner, you’re investing in your investment. Regular maintenance can help ensure that your vacuum cleaner continues to perform at its best, and save you time and money by preventing major issues from arising.
Conclusion
After following the steps mentioned in this article, you should now have a good idea about how to check the suction power of your smart vacuum cleaner. It is important to keep in mind that having a strong suction power is crucial for effective cleaning performance.
Regular maintenance of your vacuum cleaner’s parts such as the filters, brushes, hose and battery can enhance its suction power, ensuring that it performs optimally.
In addition to checking suction power, it is also important to empty the dustbin and replace parts as needed. A clogged dustbin or worn out parts can cause low suction power or poor cleaning performance.
If you are unable to identify the cause of low suction power or require professional maintenance, it is recommended to seek help from an expert. A professional can diagnose and fix the issue efficiently, saving you time and effort.
By keeping your smart vacuum cleaner in good condition and regularly checking its suction power, you can ensure that it functions effectively and efficiently, providing a cleaner home environment.
Frequently Asked Questions
What is suction power?
Suction power refers to the vacuum cleaner’s ability to create suction or pull in air, debris, and dust through its nozzle and into the dustbin.
What can cause low suction power in a smart vacuum cleaner?
A dirty filter, clogged brushes, a faulty battery, damaged hose, or worn-out parts can all contribute to low suction power in a smart vacuum cleaner.
Is suction power the only factor that affects cleaning performance?
No, there are other factors that can affect cleaning performance, such as the brush roll design, navigation system, and dustbin capacity.
How do I know if I need to clean the filter?
You can check the filter indicator on your smart vacuum cleaner or inspect the filter yourself for dirt and debris buildup.
What should I do if the brushes are tangled or clogged?
You can use a pair of scissors or a brush cleaning tool to remove the hair and debris from the brush roll.
Can I replace the battery myself?
It depends on the model of the smart vacuum cleaner. Some models allow you to replace the battery easily, while others require professional assistance.
How can I test the suction power on different surfaces?
You can use a suction gauge or test the vacuum cleaner on different floor types, such as hardwood, carpet, and tile.
How often should I clean my smart vacuum cleaner?
You should clean the filter and brushes after every use and deep clean the vacuum cleaner every few months.
What should I do if I notice a decrease in suction power?
You should check the filter, brushes, battery, hose, and parts for any damage or wear and tear. You may also need to empty the dustbin or adjust the suction settings.
Can professional maintenance improve suction power?
Yes, professional maintenance can help identify and fix any issues that are affecting suction power and prevent future problems.