How to Troubleshoot a Smart Vacuum Cleaner That’s Not Picking Up Dirt
Warning: A non-numeric value encountered in /var/www/html/wp-content/themes/generatepress/inc/structure/post-meta.php on line 165
by Dwight Gibson
Have you ever been frustrated by your smart vacuum cleaner not picking up dirt? You’ve invested money in a machine that should make your life easier, but it seems to be creating more problems than solving them. Before you let your frustration get the better of you and send your vacuum cleaner to the landfill, let’s explore some troubleshooting tips to get it back up and running efficiently. In this article, we’ll cover some basic and advanced steps to troubleshoot your smart vacuum cleaner and make it perform optimally. Let’s get started!
Table of Contents
Basic Troubleshooting Steps
Facing an issue with your smart vacuum cleaner that refuses to pick up dirt? Fret not! There are several basic troubleshooting steps that you can take to solve this problem. Before you head to the advanced troubleshooting steps, let’s start with the basics. Here are some quick and easy ways to fix your smart vacuum cleaner so that you can get back to your cleaning tasks in no time. Check out these simple tips to troubleshoot your smart vacuum cleaner. If you want to learn more about why your smart vacuum cleaner might not be picking up dirt, check out our related article on top mistakes people make with their smart vacuum cleaners.
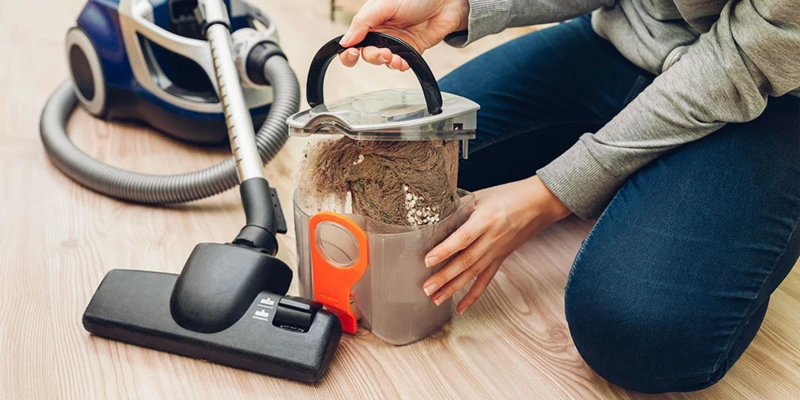
1. Check the Dustbin and Filter
One of the most common issues with smart vacuum cleaners is when they don’t pick up dirt. If you’re facing this problem, the first thing you should check is the dustbin and filter. Make sure they are not clogged, which can lead to poor suction performance. Here are the steps you can follow to ensure there are no issues with the dustbin and filter:
Steps
Description
Step 1:
Turn off the smart vacuum cleaner and unplug it from the power source.
Step 2:
Remove the dustbin from the smart vacuum cleaner. You can refer to the user manual if you’re not sure how to do this.
Step 3:
Empty the dustbin and inspect it for any debris or clogs. Remove any debris or clogs you find.
Step 4:
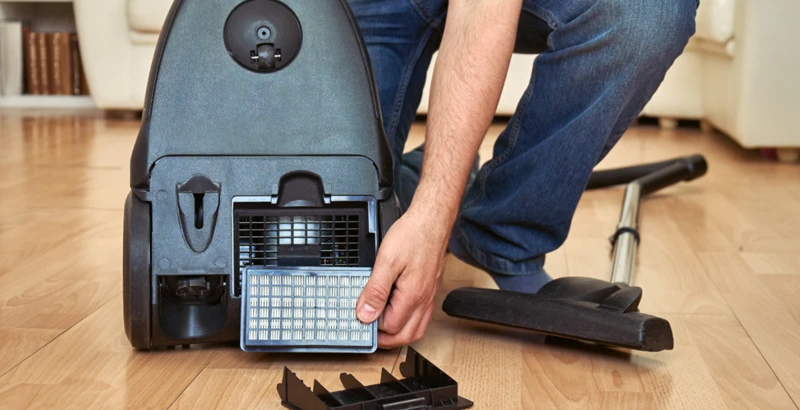
Next, locate the filter- it is usually located on top of or inside the dustbin. Remove the filter and inspect it for any dust or debris. If it appears dirty, rinse it under water or replace it with a new one- depending on the type of filter your smart vacuum cleaner uses.
Step 5:
Allow the dustbin and filter to dry completely before reinserting the filter and dustbin into the smart vacuum cleaner.
Regularly emptying the dustbin and cleaning the filter is important for the performance of your smart vacuum cleaner. If this troubleshooting step doesn’t solve the issue, then move on to the next step- suction checks. Don’t skip this step before moving onto advanced troubleshooting steps like cleaning the brush roll or contacting customer support.
2. Inspect the Brush Roll
When it comes to troubleshooting smart vacuum cleaners that don’t pick up dirt, checking the brush roll is an essential step. Over time, the brush roll can become tangled with hair, carpet fibers, and other debris, which can reduce its effectiveness in cleaning. Here are the steps to inspect the brush roll:
Step
Action
Step 1
First, unplug the vacuum cleaner to avoid any accidents.
Step 2
Locate the brush roll, which will be underneath the vacuum cleaner’s head.
Step 3
Gently remove any hair, fibers, or debris that have wrapped around the brush roll. A pair of scissors or a seam ripper can be used to cut away any entangled strands. Be careful not to damage the bristles or the belt of the brush roll.
Step 4
Manually rotate the brush roll to ensure that it turns freely. If it doesn’t, there may be an object stuck in the brush roll that needs to be removed.
Step 5
Reattach the brush roll cover and plug the vacuum cleaner back in. Test the vacuum cleaner to see if the brush roll is picking up dirt effectively.
It is important to note that not all smart vacuum cleaners have a brush roll, so this step may not be applicable in all cases. However, if your vacuum cleaner has a brush roll, it is essential to check it regularly and keep it free of debris to ensure that it works effectively.
If you are still having trouble with your smart vacuum cleaner after inspecting the brush roll, there may be other issues at play. For more tips on troubleshooting smart vacuum cleaners, check out our article on common mistakes to avoid when using a smart vacuum cleaner: 10 Smart Vacuum Cleaner Mistakes You Might Be Making.
3. Clean the Sensors
One of the most important parts of your smart vacuum cleaner are its sensors. These tiny devices help your vacuum to navigate around your home with ease. However, if the sensors become dirty or damaged, your smart vacuum cleaner may not be able to detect the obstacles and dirt around your home as accurately as it should. In order to clean the sensors, follow these steps:
Step 1: Firstly, make sure that your vacuum cleaner is turned off.
Step 2: Locate the sensors on your vacuum cleaner. You can refer to the user manual for help in identifying them.
Step 3: Use a soft cloth or a cotton swab to clean the sensors. Be very gentle during this process as they are extremely sensitive and can be easily damaged.
Step 4: Make sure that the sensors are completely dry before turning the vacuum cleaner back on.
Step 5: Test the sensors by turning the vacuum cleaner back on and observing how it performs. If the sensors were the cause of the problem, cleaning them should solve the issue. If the problem persists, try the advanced troubleshooting steps or contact customer support.
By following these steps, you can clean the sensors on your smart vacuum cleaner and ensure that it is working effectively. Keep in mind that regular maintenance of your vacuum cleaner can help prevent such issues in the future.
Advanced Troubleshooting Steps
When basic troubleshooting steps fail to solve the issue with your smart vacuum cleaner not picking up dirt, it’s time to take things to the next level with advanced troubleshooting steps. These additional measures can help identify and address some of the more complex issues that could be preventing your device from functioning correctly. In this section, we’ll discuss a few advanced tips to help get your smart vacuum cleaner performing optimally again.
1. Check the Battery
When your smart vacuum cleaner is not picking up dirt, one of the reasons could be a drained or faulty battery. So, the first step in advanced troubleshooting is to check the battery. Here are the things you should do:
Check the battery level: If your vacuum cleaner is cordless, check the battery level indicator on the device. If the battery is low, plug it into the charger and wait for it to charge fully.
Inspect the battery connections: If your vacuum cleaner has removable and replaceable batteries or a battery pack, make sure the battery is correctly seated and the connections are clean. Dirt or dust on the battery connections can cause poor performance or no performance at all.
Replace the battery: If the battery is old, damaged or not responding after charging, replace it with a new one. Make sure the replacement battery is compatible with the smart vacuum cleaner model.
Ignoring a faulty battery can result in a vacuum cleaner that is sluggish or completely unresponsive. So, if you notice any issues with the battery, address them promptly to ensure your vacuum cleaner is always ready for use.
2. Reset the Smart Vacuum Cleaner
If basic troubleshooting steps don’t help to solve the problem, try resetting the Smart Vacuum Cleaner. Resetting the device will restore the original factory settings, which can fix any software or hardware issues that are preventing the device from picking up dirt. Here are the steps to reset your Smart Vacuum Cleaner:
Step
Instruction
Step 1
Make sure the Smart Vacuum Cleaner is turned off and disconnected from the charging dock.
Step 2
Press and hold the power button for 10-15 seconds.
Step 3
The Smart Vacuum Cleaner will beep and the indicator lights will flash, indicating that it has been reset.
Step 4
Turn on the Smart Vacuum Cleaner and test it by running a cleaning cycle.
Note: If resetting the Smart Vacuum Cleaner doesn’t solve the problem, try contacting customer support or consider taking the device to a professional for repair. Don’t attempt to disassemble the device yourself as it can cause irreversible damage and void the warranty.
3. Contact Customer Support
When all else fails and your smart vacuum cleaner still refuses to pick up dirt, it’s time to consider contacting customer support. Most manufacturers offer customer support services to assist customers in resolving any issues that they have with their products.
To prepare for this step, make sure that you have all the necessary information before contacting customer support. This may include the model number, the date of purchase, and a detailed description of the issue you’re experiencing. When you contact customer support, they will most likely ask you for this information to determine the best course of action.
Here’s a step-by-step guide on how to contact customer support:
Step 1:
Locate the customer support phone number or email address for your smart vacuum cleaner’s manufacturer. This information can typically be found on the manufacturer’s website, the user manual, or even the product packaging.
Step 2:
Call or email the customer support team to report the problem with your vacuum cleaner. Make sure to provide all of the necessary information, including the model number, date of purchase, and a detailed description of the issue.
Step 3:
Depending on the severity of the issue, the customer support team may provide you with troubleshooting steps to try at home. Follow these steps carefully and make note of the results.
Step 4:
If the troubleshooting steps do not resolve the issue, the customer support team may provide you with information on how to ship the vacuum cleaner back to them for repair.
Step 5:
Once your vacuum cleaner has been repaired, you will receive it back with a detailed report outlining what was fixed.
It’s important to note that some manufacturers may offer a warranty on their products that may cover any repairs that are needed. Make sure to check your warranty information before contacting customer support to see if you’re covered.
In general, customer support teams are there to help you resolve any issues that you have with your smart vacuum cleaner. Don’t hesitate to reach out to them for help if you’ve tried all of the basic and advanced troubleshooting steps and still can’t get your vacuum cleaner to pick up dirt.
Conclusion
After following the basic and advanced troubleshooting steps discussed in this article, your smart vacuum cleaner should be working effectively again. It’s important to regularly maintain and clean your device to ensure its longevity and optimal performance.
Remember to check and clean the dustbin and filter, inspect the brush roll, and clean the sensors. These are basic steps that can make a big difference in the vacuum’s performance. If these steps don’t work, try checking the battery, resetting the device, or contacting customer support.
In some cases, the issue may require professional repair or replacement. Don’t hesitate to reach out to customer support or a professional repair service if you’re having trouble resolving the issue on your own.
By taking the time to troubleshoot and maintain your smart vacuum cleaner, you can prolong its lifespan and ensure that it continues to pick up dirt effectively. Investing in a smart vacuum cleaner is a great way to simplify your cleaning routine, but it’s important to properly care for and maintain the device for optimal performance.
Frequently Asked Questions
1. Why is my smart vacuum cleaner not picking up dirt?
There could be several reasons for this. The most common ones are the dustbin and filter being full, the brush roll being clogged, or sensors being dirty.
2. How often do I need to clean the dustbin and filter?
It is recommended to clean the dustbin and filter after every use of the smart vacuum cleaner, especially if you have a lot of pet hair or dust in your home.
3. How do I check the brush roll?
You can easily check the brush roll by flipping the smart vacuum cleaner over and looking at the brush. If it is tangled with hair or other debris, use scissors or a brush to clear it.
4. What is the best way to clean the sensors?
You can clean the sensors using a soft cloth or a cotton swab. Gently wipe the sensors with the cloth or cotton swab to remove any dirt or dust.
5. Can a low battery affect the performance of my vacuum cleaner?
Yes, a low battery can affect the performance of your smart vacuum cleaner. It is recommended to charge the battery fully before using the vacuum cleaner.
6. How do I reset my smart vacuum cleaner?
You can reset your smart vacuum cleaner by pressing and holding the power button for 10 seconds.
7. What should I do if these basic troubleshooting steps don’t work?
You can try more advanced troubleshooting steps like checking the battery or contacting customer support.
8. How often do I need to replace the dustbin and filter?
You should replace the dustbin and filter every 6 months to ensure the optimal performance of your smart vacuum cleaner.
9. Can I use my smart vacuum cleaner on all types of floors?
Yes, most smart vacuum cleaners are designed to work on all types of floors including hardwood, carpet, and tile.
10. Is it safe to leave my smart vacuum cleaner unattended?
Yes, it is safe to leave your smart vacuum cleaner unattended as long as you follow the manufacturer’s instructions and keep the area clear of any obstacles.