Maintenance Differences Between Robot Vacuums and Traditional Vacuums
Warning: A non-numeric value encountered in /var/www/html/wp-content/themes/generatepress/inc/structure/post-meta.php on line 165
by Dwight Gibson
Maintaining cleanliness in your home can be a daunting task, especially when it comes to vacuuming. While traditional vacuums have been around for decades, the rise of technology has brought about the creation of robot vacuums. These two types of vacuums have their own unique cleaning methods that require different maintenance techniques. If you’re wondering about the maintenance differences between robot vacuums and traditional vacuums, you’ve come to the right place. In this article, we’ll explore the various steps you can take to keep your vacuum running smoothly, from cleaning the dustbin to replacing filters and batteries. Let’s dive in!
Table of Contents
Differences in Maintenance
Maintaining your vacuum is crucial to ensure its longevity and efficiency, but did you know that traditional vacuums and robot vacuums have different maintenance needs? Understanding these differences is essential to keeping your vacuum in top condition. In this section, we will highlight the key differences in maintenance between traditional vacuums and robot vacuums. From cleaning the dustbin to replacing filters, we’ll cover it all. Make sure to read on, and if you’re interested in learning more about robot vacuum maintenance, check out our robot vacuum maintenance tips article.
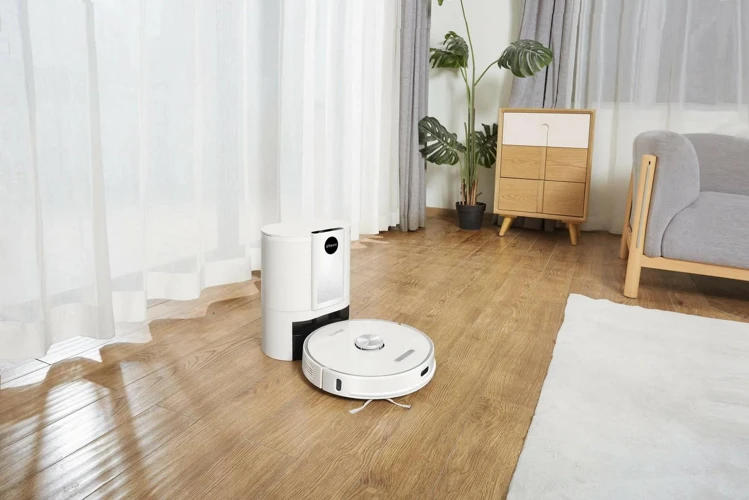
Cleaning the Dustbin
Cleaning the dustbin is an important aspect of maintaining your vacuum, especially for Robot vacuums. The dustbin collects all the dirt, debris, and dust that your vacuum picks up during cleaning. Regular cleaning of the dustbin is necessary to ensure that your vacuum continues to function at optimal levels. Here are some steps to follow when cleaning the dustbin:
First, remove the dustbin from the vacuum. In the case of Robot vacuums, this may involve pressing a button or pulling a latch to release the bin from the rest of the machine.
Next, carefully dispose of the debris in the dustbin. For Robot vacuums, this may involve emptying the dustbin into a trash can, while for traditional vacuums, this may involve removing a bag that collects the dust and debris.
After emptying the dustbin, inspect it for any remaining debris or dirt particles. Using a soft-bristled brush or a microfiber cloth, gently wipe the inside of the bin to remove any stuck-on dirt, especially in the corners and the crevices.
For Robot vacuums, it is recommended that you clean the dustbin after every use or when it is full. However, for traditional vacuums, this can depend on the capacity of the bag or the dustbin.
Finally, replace the dustbin back into the vacuum after ensuring that it is completely dry and clean.
It is important to note that the frequency of cleaning your vacuum’s dustbin may vary depending on usage and the amount of debris and dirt it collects from your home. Cleaning the dustbin regularly goes a long way in improving the performance of your vacuum and increasing its lifespan.
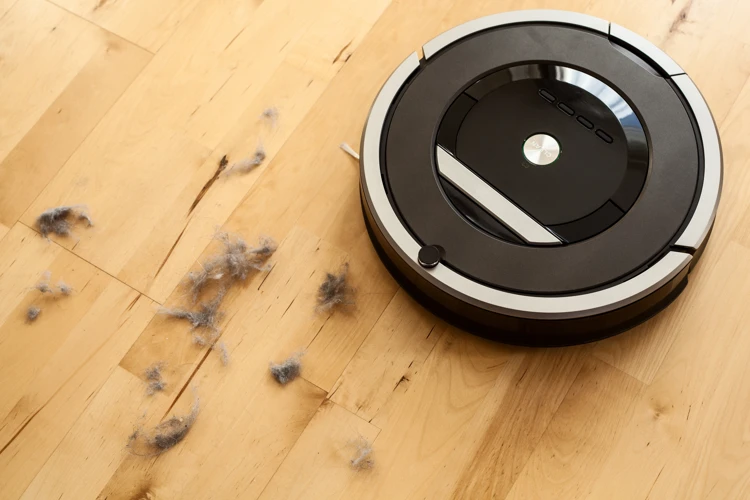
Keeping the brush roll clean is an essential part of robot vacuum maintenance. Over time, hair, dust, and debris can get tangled with the brush, causing it to work less effectively. To keep your robot vacuum operating correctly, it is essential to clean the brush roll regularly.
Cleaning the brush roll is a bit different between traditional and robot vacuums, and the process may take a bit more effort with traditional vacuums. Let’s take a look at the differences in the table below:
Traditional Vacuums
Robot Vacuums
How Often
After every use or as needed
Once a week or as needed
Tools Needed
Bristle brush or scissors, screwdriver (depends on the model)
Cleaning tool included with robot vacuum (typically)
Steps to Clean
Unplug the vacuum.
Flip the vacuum over so you can access the brush roll.
Use a bristle brush or scissors to remove the hair and debris from the brush roll.
If there are screws holding the brush, use a screwdriver to remove them and remove the brush roll.
Clean the end caps or bearings holding the brush roll and remove all the debris carefully.
Replace the brush roll and secure it with screws.
Flip the vacuum back to its upright position and resume cleaning.
Remove the dustbin from the robot and empty it.
Remove the brush roll.
Clean the brush roll and bearings from the debris and hair using the cleaning tool provided by the manufacturer.
Replace the brushroll back in and secure it properly.
Reattach the dustbin to the robot.
As we can see, cleaning the brush roll of traditional vacuums is a bit more complicated than with robot vacuums, which often include a cleaning tool to make the job quicker and more manageable. Nevertheless, cleaning the brush rolls regularly is essential to keep your vacuum running effectively.
Filter Replacements
One of the key differences in maintenance between robot vacuums and traditional vacuums is filter replacements. Both types of vacuums require regular filter replacements to maintain optimal performance and air quality.
Traditional vacuums typically use a combination of filters, including pre-motor filters, post-motor filters, and/or HEPA filters, depending on the make and model. These filters need to be replaced periodically to prevent reduced suction power and to avoid clogging. The frequency of filter replacements will vary depending on how much the vacuum is used, as well as the environment in which it is used. For example, a home with pets may require more frequent filter changes due to the larger amount of pet hair and dander in the air.
Robot vacuums, on the other hand, typically have a single filter that needs to be replaced. Additionally, some robot vacuums have washable filters that can be rinsed and re-used. The frequency of filter replacements will vary depending on the frequency of use and the environment. For example, a home with a lot of dust or pet hair may require more frequent filter changes.
To help keep track of filter replacements, some robot vacuums come with a filter replacement indicator. This can help ensure that the filter is changed at the appropriate intervals. It is important to follow the manufacturer’s recommendations for filter replacement to ensure optimal performance and air quality.
Here is a comparison table for filter replacements between traditional vacuums and robot vacuums:
Task
Traditional Vacuums
Robot Vacuums
Number of filters
Multiple (pre-motor, post-motor, HEPA)
Single (some washable)
Frequency of filter changes
Varies depending on use and environment
Varies depending on use and environment
Filter replacement indicator
Some models have an indicator
Some models have an indicator
As you can see, while the tasks of filter replacements for traditional vacuums and robot vacuums are relatively similar, there are differences in terms of the number of filters and the frequency of changes. Paying attention to these differences will help ensure that your robot or traditional vacuum continues to perform well and maintain healthy air quality in your home.
If you want to learn more about the benefits of robot vacuums, check out our article on the benefits of robot vacuums. Or, if you are interested in a comparison between traditional and robot vacuums, check out our article on traditional vs robot vacuums. Additionally, if you are experiencing maintenance issues with your robot vacuum, you may find our article on robot vacuum maintenance fixes helpful.
Battery Maintenance
A significant difference between robot vacuums and traditional vacuums is battery maintenance. Since robot vacuums are powered by rechargeable batteries, it’s crucial to keep those batteries in excellent condition for the vacuum to run efficiently. Here are some tips to keep your robot vacuum’s battery in optimal condition:
Charge Regularly: Robot vacuums require regular charging. If the battery runs out, the vacuum may not make it back to its charging station, leaving it powerless and unable to vacuum. It’s essential to keep your vacuum charged to ensure that it’s always ready to clean.
Allow Full Discharges: When you first receive a new robot vacuum, it’s critical to charge it fully and then allow it to run until the battery is almost depleted before recharging it. It may seem counterintuitive, but allowing the battery to have a full discharge helps to calibrate the vacuum’s sensors, optimizing the accuracy and efficiency of the vacuum.
Storage: If you’re planning on storing your robot vacuum for an extended period, it’s crucial to charge the battery fully before storing it. If you’re not going to use the vacuum for several months, you should consider removing the batteries to prevent corrosion or damage to the vacuum.
Temperature: Extreme temperatures, both hot and cold, can damage a robot vacuum’s battery. It’s essential to store and charge the vacuum in a room with a comfortable room temperature, avoiding direct sunlight or other heat sources.
Replace Old Batteries: If your robot vacuum has been in use for a few years, the battery’s capacity may have diminished, leading to shorter run times and less efficient cleaning. If this occurs, consider purchasing a new battery to keep your robot vacuum running at its best.
Keeping your robot vacuum charged and maintained is crucial for optimal performance. By following these battery maintenance tips, you can ensure that your robot vacuum will always be ready to clean when you need it.
Maintenance Needs of Traditional Vacuums
When it comes to maintaining traditional vacuums, there are several key areas that require attention. These machines are reliable and effective, but they do require some maintenance to keep them running at their best. From replacing bags and filters to cleaning the brush roll and hose, traditional vacuums have specific needs that should not be ignored. In this section, we will discuss the maintenance needs that are unique to traditional vacuums, and offer some tips for keeping your vacuum in top condition for years to come. So, let’s dive into the world of traditional vacuums and explore their unique maintenance requirements.
Bag Changes
Traditional vacuum cleaners require bags to capture dirt, dust, and debris. Over time, these bags become full and clogged, which reduces the suction power of the vacuum. It’s essential to change the bags regularly to keep the vacuum working efficiently. Here are some steps to follow when changing the bags:
Step 1: Turn off and unplug the vacuum cleaner.
Step 2: Locate the bag compartment, which is usually at the front or rear of the vacuum.
Step 3: Open the compartment and remove the full bag. Be careful not to spill its contents all over the floor.
Step 4: Check the bag compartment for any debris or dirt and clean it out if necessary, using a damp cloth or a vacuum brush attachment.
Step 5: Insert the new bag into the compartment, making sure it fits snugly and securely. Some bags have clips or hooks that need to be fastened to the compartment.
Step 6: Close the compartment securely, making sure there are no gaps or openings.
Step 7: Dispose of the full bag in a trash bin or garbage bag. Make sure to tie the bag tightly to prevent any dust or debris from escaping.
Changing vacuum bags is an essential part of maintaining traditional vacuums. It’s recommended to change the bag after it’s 2/3 full to prevent any loss of suction power. Additionally, using the right type of bags for your vacuum model is crucial to ensure a proper fit and optimum performance. Consult your vacuum’s user manual or manufacturer’s instructions to choose the right bags for your model.
Filter Replacements
One of the most important aspects of vacuum maintenance, for both traditional and robot vacuums, is the replacement of filters. Filters play a crucial role in keeping your home clean and ensuring the longevity of your vacuum. Over time, filters can become clogged with dirt and debris, which can reduce suction power and even lead to mechanical problems.
Here are some details on filter replacements for both types of vacuums:
Traditional Vacuums
Robot Vacuums
Traditional vacuums typically have two types of filters: the pre-motor filter and the post-motor filter.
Robot vacuums usually only have one filter, but it is just as important as those in traditional vacuums.
The pre-motor filter is typically a foam or paper filter that removes dirt and debris before it reaches the motor.
The filter in robot vacuums is usually made of HEPA (High-Efficiency Particulate Air) material, which can trap even the tiniest particles, such as pollen and pet dander.
The post-motor filter is located after the motor and helps to capture any additional dirt and debris that may have been missed by the pre-motor filter.
It is important to clean or replace the filter in robot vacuums every three to six months, depending on usage frequency and the manufacturer’s recommendations.
It is recommended to replace the filters in traditional vacuums every three to six months, depending on the manufacturer’s recommendations and usage frequency.
Some robot vacuums have filters that are washable and reusable, which can save you money over time. However, it is important to follow the manufacturer’s instructions for cleaning and replacing filters.
Note: It is important to buy the correct filter for your vacuum model, as using the wrong filter can lead to reduced suction power and even damage to your vacuum. It is also important to follow the manufacturer’s instructions for replacing filters to ensure proper installation and optimal performance.
Belt Replacements
Traditional vacuums like upright or canister vacuums come with a belt that drives the brush roll or the beater bar. Over time, this belt can wear out and stretch, affecting the vacuum’s suction and cleaning performance. It’s important to replace the belt periodically. Here are some things to keep in mind:
Check the belt regularly: You can inspect the belt by removing the brush roll and checking for signs of damage or stretching. If the belt looks worn out, it’s time to replace it.
Buy the right belt: Make sure to buy the correct replacement belt for your vacuum model. Using the wrong belt can cause damage to the motor or the brush roll.
Replace the belt as needed: Most manufacturers recommend replacing the belt every 6 months to a year, depending on usage. If you have pets or vacuum frequently, you may need to replace the belt more frequently.
Replace the belt if it’s loose: A loose belt can affect the vacuum’s performance and cause the brush roll to stop spinning. If you notice that the brush roll isn’t spinning properly, check the belt tension and replace the belt if necessary.
Proper maintenance of your traditional vacuum’s belt is crucial to ensure that your vacuum performs at its best. By checking the belt regularly, buying the correct replacement, and replacing it as needed, you can ensure that your vacuum is cleaning your floors effectively and efficiently.
Cleaning the Brush Roll
One essential aspect of maintaining a traditional vacuum is regularly cleaning the brush roll. The brush roll is the cylindrical brush located at the bottom of the vacuum head that agitates the carpet fibers and dislodges dirt and debris.
To clean the brush roll, start by unplugging the vacuum and laying it on its side. Use a pair of scissors or a seam ripper to cut and remove any hair or fibers that have become wrapped around it. Be sure to use caution when handling sharp objects!
Next, use a damp cloth or paper towel to wipe down the brush roll and remove any dust or dirt. Ensure that the brush roll is completely dry before reinserting it back into the vacuum.
Regularly cleaning the brush roll not only helps to keep your vacuum running smoothly but also prevents potential fire hazards that can occur if hair or debris becomes tangled around it. By including this simple task in your vacuum maintenance routine, you can prolong the life of your vacuum and prevent costly repairs in the future.
To summarize:
Unplug the vacuum and lay it on its side
Use scissors or a seam ripper to cut and remove wrapped hair and fibers on the brush roll
Use a damp cloth or paper towel to wipe down the brush roll and remove dirt and dust
Ensure that the brush roll is completely dry before putting it back into the vacuum
Cleaning the Hose
When it comes to traditional vacuums, cleaning the hose is an essential part of maintenance that is often overlooked. Over time, dust and debris can get trapped inside the hose and affect the suction power of the vacuum. Here are some steps to follow when cleaning the hose:
Step 1: First, turn off and unplug the vacuum to prevent any accidents.
Step 2: Detach the hose from the vacuum by releasing any clips or latches holding it in place.
Step 3: Stretch out the hose as much as possible and use a long, straight object such as a broomstick to gently push any clogs or debris towards the opening of the hose.
Step 4: Use a soft-bristled brush or a damp cloth to wipe the inside of the hose and remove any remaining dust or dirt.
Step 5: Rinse the hose with water to remove any remaining debris.
Step 6: Allow the hose to dry completely before reattaching it to the vacuum.
It is important to note that hoses can become worn or cracked over time, which can decrease the suction power of the vacuum. If you notice any tears or holes in the hose, it may be time to replace it to ensure that your vacuum is working at maximum efficiency.
Maintenance Needs of Robot Vacuums
When it comes to maintenance, robot vacuums have their own set of unique needs that differ from traditional vacuums. These little machines may seem low-maintenance, but they require regular attention to perform at their best. Let’s take a closer look at some of the key maintenance requirements for robot vacuums. From cleaning the sensors to replacing batteries, proper maintenance can extend the lifespan and efficiency of your robot vacuum.
Cleaning the Sensors
One important maintenance task for robot vacuums is cleaning the sensors. These sensors play a crucial role in allowing the robot vacuum to navigate and avoid obstacles as it cleans your floors. Neglecting to clean the sensors can lead to reduced performance and even malfunction.
To clean the sensors, you’ll need to follow these steps:
Step
Instructions
Step 1
Remove the dustbin from the robot vacuum and set it aside.
Step 2
Locate the sensors on the bottom of the robot vacuum. Depending on the model, there may be various sensors, such as cliff sensors, bumper sensors, and proximity sensors.
Step 3
Use a soft, dry cloth to wipe the sensors clean. Be gentle and avoid using water, as moisture can damage the sensors.
Step 4
Inspect the sensors for any signs of damage or wear. If any sensors are damaged, contact the manufacturer for repair or replacement.
Step 5
Replace the dustbin and test the robot vacuum to ensure the sensors are functioning properly.
Cleaning the sensors should be done regularly, as buildup of dust and debris can interfere with the sensors’ ability to function properly. By keeping the sensors clean, you’ll help ensure that your robot vacuum is able to effectively navigate your home and keep it clean.
Battery Replacements
Robot vacuums are dependent on rechargeable batteries to run efficiently. These batteries can gradually lose their charging ability over time, making battery replacement an essential part of maintenance. Regularly testing and replacing these batteries are critical to keep your robot vacuum operating effectively.
Here are some details on how to replace batteries in your robot vacuum:
Check the battery life: Most robot vacuums have indicators that display the remaining battery life. Check the battery life frequently and be aware of the average cycle life of your particular vacuum model.
Order replacement batteries: If you notice that the battery life is continually decreasing or the vacuum is not performing up to standard, it may be time to purchase replacement batteries. Check with the manufacturer or authorized distributors to order the batteries that are compatible with your robot vacuum.
Locate the battery compartment: The battery compartment is usually located on the bottom of the robot vacuum. You may need to remove screws or use a tool to detach the compartment cover to access the battery.
Remove the old battery: Use caution when removing the old battery from the compartment to avoid damaging any wires or connectors. Follow the manufacturer’s instructions on how to safely remove the battery. Some robot vacuums may require unscrewing the battery before removing it.
Insert the new battery: Once you have removed the old battery, insert the new battery carefully and make sure it is properly seated in the compartment. Reattach the compartment cover and screw it back on.
Charge the new battery: Before using your robot vacuum with the new battery, it is essential to charge it fully. Follow the manufacturer’s instructions on charging time and disconnecting the charger once the battery is full.
Test the new battery: After charging the new battery, test it to ensure it is fully functional. Turn on your robot vacuum and let it run for a few minutes.
Remember, batteries are an essential component of robot vacuums. Proper battery maintenance is paramount to ensure that your robot vacuum operates at maximum efficiency and continues to keep your home floors clean. Replace batteries frequently, and follow the manufacturer’s instructions on battery care and maintenance.
Tips for Maintaining Your Vacuum
Maintaining your vacuum cleaner is essential for ensuring its longevity and consistent performance. A well-maintained vacuum cleaner will not only keep your floors clean but also extend its lifespan, saving you money in the long run. However, the question is, how can you maintain your vacuum cleaner effectively? In this section, we’ll discuss some essential tips for maintaining your vacuum cleaner, which will keep it working effectively and efficiently for years to come. Let’s dive in!
Clean Your Vacuum Regularly
Regular cleaning of your vacuum is essential for maintaining its performance and prolonging its life. Here are some tips for cleaning your vacuum regularly:
First, unplug the vacuum and allow it to cool down before cleaning.
Next, empty the dustbin or replace the vacuum bag.
Take out the filter and tap it gently over a trash bin to remove any loose dirt and debris. If the filter is washable, rinse it thoroughly with water and let it dry completely before placing it back in the vacuum.
Use a soft brush to clean the vacuum’s brush roll, removing any hair or tangled debris that may be obstructing it.
Inspect the hose and attachments for blockages or clogs. Use a long, thin object such as a coat hanger or a chopstick to remove any obstructions.
Wipe down the exterior of the vacuum with a damp cloth or antibacterial wipe, paying special attention to the handle and other frequently touched areas.
Store the vacuum in a dry, cool place where it won’t be exposed to excessive heat or moisture.
Remember, regular cleaning of your vacuum not only improves its performance but also ensures that it remains hygienic and free from harmful bacteria and allergens. Make sure to prioritize cleaning your vacuum regularly to keep your home clean and healthy.
Replace Filters and Bags as Needed
When it comes to vacuum maintenance, replacing filters and bags is a crucial step that should not be ignored. Over time, filters and bags can become clogged and dirty, making it harder for your vacuum to work effectively. When this occurs, airflow is reduced and your vacuum’s suction power decreases.
To ensure that your vacuum is working at peak performance, it’s important to replace filters and bags as needed. This will not only improve suction, but it will also help to maintain the lifespan of your vacuum.
Filters: Different vacuums may have different types of filters. Some vacuums have washable filters that can be reused many times before they need to be replaced. Other vacuums have disposable filters that need to be replaced after a certain amount of use.
It’s important to check your vacuum’s manual to see what type of filter your vacuum has and how often it should be replaced. Some vacuums even come equipped with an indicator light that will let you know when it’s time to replace the filter.
When replacing the filter, be sure to dispose of the old one properly and insert the new filter correctly. This will ensure that it fits properly and functions effectively.
Bags: Traditional vacuums use bags to collect dust, dirt, and other debris. Over time, the bag can become full and may even tear if not replaced in a timely manner. This can result in dust and debris being released back into the air.
Again, it’s important to check your vacuum’s manual to see what type of bag your vacuum uses and how often it should be replaced. Some bags have an indicator that will let you know when it’s time to replace it.
When replacing the bag, be sure to follow the instructions in the manual to ensure that it is installed correctly. This will prevent any dust from escaping during use.
Filter Type
Recommended Replacement Frequency
Washable
Once per month
Disposable
Every 2-3 months
Bag Type
Recommended Replacement Frequency
Paper Bag
Every 1-2 months
Cloth Bag
Every 6 months
By replacing filters and bags as needed, you’ll ensure that your vacuum is working at its full potential and that the air in your home is as clean as possible. This will also extend the life of your vacuum, saving you money in the long run. Don’t neglect this important step in vacuum maintenance!
Check for Clogs and Blockages
One important tip to keep your vacuum functioning at its best is to regularly check for clogs and blockages. Over time, debris can accumulate in the hoses and tubes of both traditional and robot vacuums, which can negatively impact their suction and cleaning capabilities.
To prevent this, you should make it a habit to check your vacuum for clogs and blockages every few uses. First, turn off the vacuum and unplug it to prevent any accidents while you’re inspecting it. Then, follow these steps:
Remove the dustbin or bag: With traditional vacuums, you’ll need to remove the bag or dustbin and empty it out. With robot vacuums, you’ll just need to remove the dustbin and set it aside.
Inspect the hoses and tubes: Carefully examine the hoses and tubes of your vacuum for any visible signs of clogs or blockages. Look for clumps of dirt, pet hair, or other debris that may be obstructing the flow of air.
Clear out any blockages: If you do spot a clog or blockage, use a long, thin object like a coat hanger or a vacuum attachment to gently clear it out. Be sure not to force anything through the hose or tube, as this can damage the vacuum.
Reassemble the vacuum: Once you’ve cleared out any blockages, reassemble the vacuum and turn it back on to make sure it’s functioning properly.
By taking the time to check for clogs and blockages on a regular basis, you can help ensure that your vacuum is operating at peak performance and getting your floors as clean as possible.
Store Your Vacuum Properly
Proper storage is essential to prolonging the life of both traditional vacuums, as well as robot vacuums. Here are a few tips for storing your vacuum:
Empty the dustbin or bag: Before storing your vacuum, make sure to empty the dustbin or replace the bag. This will prevent any unpleasant odors from developing and will also ensure that your vacuum is ready for use when you need it next.
Detach the brush or brush roll: If your vacuum has a brush or brush roll, detach it and clean it thoroughly before storing. This will prevent any hair, debris, or dust from collecting on the bristles and will also prevent any damage from occurring.
Clean any attachments: If your vacuum comes with attachments such as a hose, crevice tool, or dusting brush, take the time to clean them before storing. This will prevent any debris or dust from clogging these tools and making them less effective.
Wrap the cord: When storing your vacuum, make sure to wrap the cord neatly and fasten it securely to prevent any tangles or kinks from forming. This will extend the life of your vacuum’s cord.
Store in a dry location: It is important to store your vacuum in a dry location, away from any moisture or humidity. This will prevent any mold or mildew growth and will also prevent any rust from forming on metal parts.
Keep out of direct sunlight: Store your vacuum in a cool, dark place away from direct sunlight. Sunlight can cause the plastic to become brittle and can also fade colors.
Protect from pests: To prevent pests such as mice, rats, or insects from nesting in your vacuum, cover it with a sheet or place it in a plastic bag. This will also prevent any dust or debris from settling on your vacuum.
By taking the time to properly store your vacuum, you can extend its lifespan and keep it in top working order.
Conclusion
In conclusion, both robot vacuums and traditional vacuums require maintenance to ensure they perform optimally. While traditional vacuums require more frequent maintenance, robot vacuums still need to be taken care of to keep them running smoothly.
One of the key differences in maintenance between the two types of vacuums is the method of cleaning. Robot vacuums typically have a smaller dustbin and require more frequent emptying, while traditional vacuums may require more involved tasks such as changing bags or cleaning out the hose.
In terms of filter replacements, both types of vacuums require regular replacements to maintain suction power and prevent dust and debris from being recirculated into the air. However, robot vacuums generally have washable filters that can be reused, while traditional vacuums may require more expensive replacements.
Battery maintenance is also a crucial factor for robot vacuums, as the battery life can directly impact their cleaning ability. Regularly charging and replacing the battery as needed can help extend the life of the machine.
Overall, whether you choose a robot vacuum or a traditional vacuum, maintenance is key to keeping it functioning at its best. Follow manufacturer instructions and regular cleaning schedules to make sure your vacuum lasts as long as possible. With proper care, both types of vacuums can provide a clean and dust-free home.
Frequently Asked Questions
1. How often should I clean the dustbin of a robot vacuum?
It’s recommended to clean the dustbin after every use to prevent debris buildup and maintain suction power.
2. Can I use the same filters for both traditional and robot vacuums?
No, the filters are not interchangeable as the mechanisms and sizes of the vacuums differ.
3. How often should I replace the filter in a traditional vacuum?
It depends on the type of filter and how often you use the vacuum. Typically, it’s recommended to replace the filter every 3-6 months.
4. Should I replace the battery in my robot vacuum myself?
No, unless you have experience with hardware and wiring. It’s best to have a professional replace the battery to ensure safety and accuracy.
5. How often should I replace the bag in a traditional vacuum?
It depends on the size of the bag and how often you use the vacuum. Generally, it’s recommended to replace the bag when it’s 75% full to maintain suction power.
6. Can I use a traditional vacuum on carpets and hard floors?
Yes, most traditional vacuums are designed for both carpet and hard floor use. Just be sure to adjust the height setting accordingly.
7. How should I store my robot vacuum?
Store it in a cool, dry place with enough space for the robot to maneuver.
8. How often should I clean the brush roll on a traditional vacuum?
It’s recommended to clean the brush roll once a month to prevent hair and debris buildup, especially if you have pets.
9. Can I use a robot vacuum on stairs?
No, robot vacuums are not designed for stair use and can fall off the edge.
10. How often should I clean the sensors on a robot vacuum?
It’s recommended to clean the sensors once a week to ensure accurate navigation and obstacle avoidance.