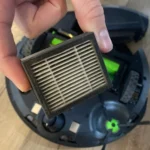
Have you invested in a robot vacuum to keep your floors clean and tidy without the hassle of manual labor? These little machines are a game-changer for busy households, but like any appliance, they require maintenance to keep functioning at their best. Neglecting maintenance can lead to a shorter lifespan and reduced performance, which defeats the purpose of having a robot vacuum in the first place! That’s why we’ve put together these 7 essential maintenance tips to help you extend the life of your robot vacuum and ensure it’s always running smoothly. So, let’s dive in!
Why maintenance is key
Why is maintenance important for your robot vacuum?
Robot vacuums have become a popular solution for busy homeowners who want to keep their homes tidy with minimal effort. These little machines can save you a lot of time and energy, but they do require regular maintenance to keep them running smoothly.
Maintenance is key for your robot vacuum because it helps extend the lifespan of the machine and ensures optimal performance. Neglecting maintenance can lead to malfunctions and breakdowns, which can be costly to repair or replace. Plus, it will not work effectively if it is not maintained properly.
Regular maintenance tasks such as cleaning the dustbin and filter, clearing the floors of obstacles, checking the software and firmware, inspecting the brushes and wheels, keeping it charged, and storing it in a dry place, are all simple yet effective ways to prevent damage to the machine and prolong its lifespan.
The benefits of a well-maintained robot vacuum are significant. You’ll get more suction power, better battery life, and fewer breakdowns, which means you’ll get a better clean for longer. Plus, maintenance ensures your robot vacuum is operating at its full potential, so you can get the most out of your investment.
To learn more about the benefits of robot vacuums over traditional vacuums and the importance of robot vacuum maintenance, check out our detailed comparison article and our guide to robot vacuum maintenance.
Don’t let a lack of maintenance be the reason your robot vacuum underperforms or breaks down. Stay on top of the essential maintenance tasks, and enjoy a cleaner home for longer.
7 Essential Maintenance Tips for Your Robot Vacuum
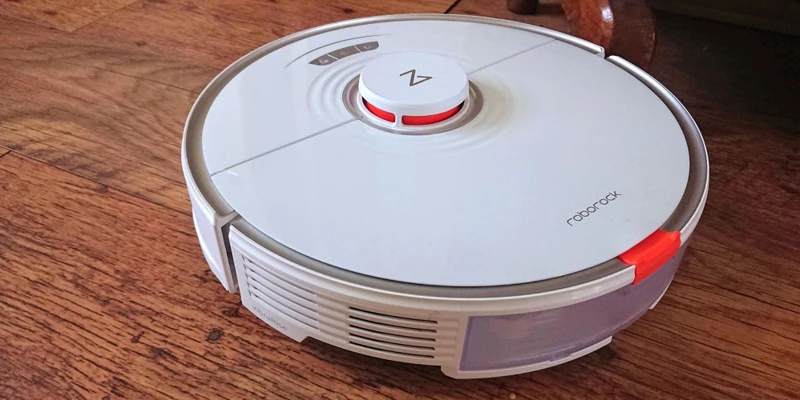
Maintaining your robot vacuum is crucial for ensuring that it performs optimally for years to come. Robot vacuums are an incredible time saver, making cleaning a breeze, but they do require some upkeep. By putting a few simple practices in place, you can extend the lifespan of your robot vacuum and enjoy its benefits for longer. In this section, we’ll explore 7 essential maintenance tips that will help keep your robot vacuum in peak condition. From cleaning the dustbin and filter to scheduling regular maintenance checks, we’ve got you covered. Let’s dive in!
1. Clean the dustbin and filter
Maintaining your robot vacuum is essential to ensure it works optimally for a long time. One of the essential maintenance tips for your robot vacuum is cleaning the dustbin and filter. A dusty and dirty filter can reduce the suction power of your robot vacuum, leading to poor cleaning performance.
Here are the steps to clean the dustbin and filter of your robot vacuum:
- First, switch off the power of your robot vacuum and remove the dustbin from the robot body. Most robot vacuums have a dustbin release button that you can press to remove it.
- Next, empty the contents of the dustbin into a trash can. Be careful not to inhale the dirt and dust particles, as this can be harmful to your health.
- After emptying the dustbin, use a clean and dry cloth to wipe it clean. Make sure to remove any dirt, dust, and debris that may have stuck on the walls and corners of the dustbin.
- Once you have cleaned the dustbin, proceed to remove the filter from the dustbin. Most robot vacuums have a filter release button that you can press to remove the filter.
- After removing the filter, use a brush or a clean dry cloth to remove any dust or dirt stuck on the filter. Be gentle when cleaning the filter to avoid damaging it, and ensure that you clean both sides of the filter.
- Once you have cleaned the filter, rinse it with clean water and allow it to dry completely before reinstalling it. Do not use any soap or cleaning agents when washing the filter, as this can damage it.
- Reinstall the filter into the dustbin and ensure that it clicks into place. Once you have reinstalled the filter, reinstall the dustbin into the robot vacuum body and switch it on.
- It is recommended to clean the dustbin and filter of your robot vacuum every few weeks, depending on how often you use it and the amount of debris it collects.
By following these simple steps, you can ensure that your robot vacuum works optimally and efficiently in cleaning your floors. For more information on cleaning and maintaining your robot vacuum, see our article on robot vacuum maintenance fixes.
2. Clear your floors of obstacles
A cluttered floor can be a robot vacuum’s worst enemy. Not only can obstacles prevent the device from getting a complete clean, but they can also cause damage to the robot vacuum or even cause it to become stuck. This is why it’s important to clear your floors of obstacles before using your robot vacuum.
Here are some tips to keep your floors obstacle-free:
- Before starting your robot vacuum, go through the room and pick up any large debris, such as toys or shoes, that may be on the floor. This will prevent them from getting caught in the robot vacuum’s brushes or wheels and causing damage.
- Make sure any small objects, like loose paper or pet toys, are also picked up. These can easily get caught in the vacuum’s mechanisms and cause it to malfunction.
- Ensure electrical cords or wires are tucked away or elevated. These can be a tripping hazard for both people and the robot vacuum.
- If you have furniture with low clearance, like a coffee table or shelf, make sure there is enough space for the vacuum to move freely underneath it. If necessary, move the furniture slightly to create more space.
- Use boundary markers to block off any areas that you don’t want the robot vacuum to clean. This can prevent the device from bumping into objects or getting stuck in tight spaces.
By following these tips and clearing your floors of obstacles, you can ensure that your robot vacuum operates smoothly and effectively. For more information on the benefits of robot vacuums or traditional vs. robot vacuums, check out our previous articles on /benefits-robot-vacuum/ and /traditional-vs-robot-vacuums/. And for tips on robot vacuum maintenance and fixes, visit /robot-vacuum-maintenance-fixes/.
3. Check the software and firmware
The software and firmware of your robot vacuum play a crucial role in its performance, so it’s essential to check and update them regularly. Here are some steps you can follow:
- Check for updates: Check the manufacturer’s website to see if any updates are available for your robot vacuum’s software and firmware. These updates often include bug fixes and performance enhancements that will extend the lifespan of your robot vacuum.
- Download the updates: If any updates are available, download and install them following the manufacturer’s instructions. Make sure to use a reliable internet source and not to interrupt the update process in any way.
- Factory reset: If your robot vacuum is experiencing any issues, consider performing a factory reset. This will erase all the data and restore the robot vacuum to its default settings. Refer to the manufacturer’s instructions on how to perform a factory reset.
- Backup settings: Before performing a factory reset, make sure to back up your robot vacuum’s settings if possible. This will ensure that you can restore your preferred settings once the reset is complete.
- Monitor performance: After updating the software and firmware or performing a factory reset, monitor your robot vacuum’s performance closely for any issues. If you notice any problems or anomalies, refer to the manufacturer’s troubleshooting guide or contact customer support.
Keeping the software and firmware of your robot vacuum up to date can prevent issues and ensure optimal performance. It’s important to follow the manufacturer’s instructions carefully to avoid any potential problems, but don’t be afraid to reach out for additional help if needed.
4. Inspect the brushes and wheels
Keeping your robot vacuum’s brushes and wheels in good condition is essential to ensure its longevity and performance. Here are the steps you can take to properly inspect and maintain them:
- Step 1: Start by turning off and unplugging your robot vacuum. You do not want to accidentally trigger the device while working on it.
- Step 2: Remove the brushes from the vacuum. Depending on the model, this may require unscrewing them or pulling them out of their sockets. Take note of how the brushes were positioned before removing them so you can put them back in the right direction when you’re done.
- Step 3: Use your fingers or a cleaning tool to remove any tangled hair, dust, or debris from the brushes. Be gentle when doing this to avoid damaging the bristles.
- Step 4: Take a closer look at the brushes to see if any of the bristles are worn down or broken. If so, it’s time to replace the brushes to maintain your robot vacuum’s effectiveness.
- Step 5: Check the wheels of the robot vacuum for any debris or hair that may be wrapped around them. Use a cleaning tool to remove any unwanted material.
- Step 6: Ensure that the wheels are properly attached to the vacuum and rotate smoothly. If you notice any problems, follow the manufacturer’s instructions for fixing them or consider contacting a professional for assistance.
- Step 7: Once you’ve cleaned and inspected the brushes and wheels, put everything back in place and turn on your robot vacuum to test its movement and suction.
Regularly inspecting and maintaining the brushes and wheels of your robot vacuum will not only extend its lifespan but also ensure that it continues to clean effectively. Remember to perform this task at least once a month and follow any additional recommendations from the manufacturer.
5. Keep your robot vacuum charged
One of the essential things to keep in mind when it comes to maintaining your robot vacuum is to ensure that it always has a sufficient charge. A robot vacuum with a low battery will not be able to complete its cleaning cycle, and it may even cause the appliance to malfunction. Keeping your robot vacuum charged is key to ensuring that it operates at its best.
To keep your robot vacuum charged, follow these tips:
- Charge it after every use: Ideally, you should charge your robot vacuum after every use to ensure that it is fully charged each time you need to use it. This will help prevent any malfunctions due to a low battery.
- Don’t overcharge the battery: Overcharging a battery can damage it, so make sure you unplug the robot vacuum as soon as it’s fully charged. Most robot vacuums have a charging indicator that lets you know when the battery is fully charged.
- Store it near a power source: Keep your robot vacuum charging dock near a power source so that it’s always accessible for charging. This will also help you remember to charge it after use.
- Check the charging contacts: Over time, the charging contacts on your robot vacuum may accumulate dust and debris, which can disrupt the charging process. Clean them regularly so that the robot vacuum charges efficiently.
- Replace the battery if necessary: If you notice that your robot vacuum’s cleaning time is decreasing or if it doesn’t hold a charge anymore, it may be time to replace the battery. Most robot vacuum batteries last between 2-3 years, depending on usage.
By following these charging tips, you can ensure that your robot vacuum is always ready to clean your floors efficiently and effectively.
6. Store it in a dry place
Proper storage is crucial in extending the lifespan of your robot vacuum. Whether you’re moving, going on vacation or simply need to store it away, keeping it in a dry place is essential. Here are some tips to make sure you store it properly.
Why Store Your Robot Vacuum in a Dry Place?
Robot vacuums are designed to clean floors inside of homes, but they’re not meant to be exposed to water or dampness. Moisture can damage the motors and electronics of your robot vacuum, and this can also pose a safety risk. You need to store your robot vacuum in a dry place to protect it from damage and prevent accidents.
Where to Store Your Robot Vacuum?
When it comes to storing your robot vacuum, you have a few options. First, you can store it in the area where you normally store cleaning supplies or common household tools, such as a closet or pantry. Alternatively, you can use a storage bin or a storage bag designed specifically for robot vacuums.
Tips for Storing Your Robot Vacuum Safely
No matter where you choose to store your robot vacuum, there are some basic tips you should follow to keep it safe and in good condition:
| Tip #1 | Remove the batteries if you’re not going to use the robot vacuum for an extended period. This will prevent any damage to the batteries. |
| Tip #2 | Make sure the robot vacuum is turned off before you store it. |
| Tip #3 | Wipe down the robot vacuum with a dry cloth to remove any dust or debris before you put it away. |
| Tip #4 | Don’t store your robot vacuum near heat sources, such as radiators or heaters. This could damage the motors and electronics. |
| Tip #5 | Store your robot vacuum away from direct sunlight or UV rays as they can discolor the unit. |
By following these tips, you can keep your robot vacuum safe and in good condition while it’s not in use. Remember, proper storage is key to extending the lifespan of your robot vacuum.
7. Schedule regular maintenance checks
Regular maintenance checks are essential to ensure that your robot vacuum is functioning at its best. Through regular checks, you can identify small issues before they become big problems that could damage your robot vacuum.
Scheduling regular maintenance checks can be done easily by using a calendar or reminder app on your phone. You can set the reminder for the same time each month, and make it a routine.
During the maintenance check, use the following table to keep track of what you have done and what still needs to be done:
| Maintenance Check | Done | Not Done |
|---|---|---|
| Clean the dustbin and filter | ||
| Clear your floors of obstacles | ||
| Check the software and firmware | ||
| Inspect the brushes and wheels | ||
| Keep your robot vacuum charged | ||
| Store it in a dry place | ||
| Place boundary markers to avoid areas | ||
| Use a robot vacuum with mapping capabilities | ||
| Limit the amount of rugs that need to be cleaned | ||
| Vacuum larger debris yourself | ||
| Empty the dustbin before every use |
Once you have completed a task during the maintenance check, mark it as done in the table. If you were unable to complete a task, mark it as not done and make a note of why you were unable to do so.
Regular maintenance checks are not just about cleaning your robot vacuum. They also involve checking the software and firmware, as well as the brushes, wheels, and other components of the robot vacuum. It will also help to ensure that your robot vacuum continues to operate at its best, and that you get the most out of your investment.
Additional Tips for Optimal Robot Vacuum Performance
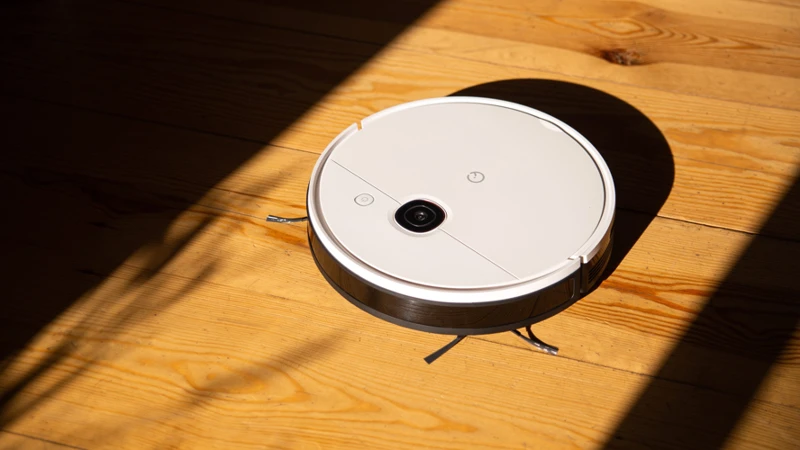
Now that we’ve covered the essential maintenance tips for extending the lifespan of your robot vacuum, let’s take a look at some additional tips that can help you get the most out of your vacuum’s performance. These tips may not be necessary for everyone, but they can be especially helpful if you have specific cleaning needs or if you want to optimize your robot vacuum’s capabilities. So, without further ado, let’s dive into some pro tips that can help keep your home clean and your vacuum running smoothly.
1. Place boundary markers to avoid areas
One great way to keep your robot vacuum safe and ensure that it doesn’t damage any valuable belongings in your home is to place boundary markers around areas that you want your robot vacuum to avoid. These markers create virtual boundaries that your robot vacuum won’t cross, keeping it on the right path.
But how do you use boundary markers with your robot vacuum?
First, determine which areas of your home you want the robot vacuum to avoid. Then, create a virtual boundary around those areas using physical boundary markers or by using an app to set up digital boundaries.
Robotic vacuum models like the iRobot Roomba come with boundary markers that you can use to define the no-go zones for your robot vacuum. These magnetic strips create an invisible barrier that your robot vacuum will recognize and won’t cross.
For instance, if you want to keep your robot vacuum from getting tangled in cords under your desk, just place the magnetic strip near the cords, and your robot vacuum will redirect its cleaning path to avoid this area altogether.
Here’s an overview of how to use boundary markers with your robot vacuum:
| Steps | What to Do |
|---|---|
| Step 1 | Determine which areas of your home you want the robot vacuum to avoid |
| Step 2 | Create a physical boundary using magnetic strips or digital boundaries using an app if available |
| Step 3 | Place the boundary markers around the no-go area |
| Step 4 | Activate your robot vacuum, and let it do its job while avoiding the restricted areas |
Why is it important to use boundary markers to avoid certain areas?
Without these markers, your robot vacuum can sometimes do more harm than good. It might run into breakable items or disrupt cords and small objects. By putting up boundaries that your device can recognize, you’ll enable it to clean around your home without running into these types of problems.
The Benefits of Using Boundary Markers:
– Protects your home and belongings
– Prevents your vacuum from getting stuck in places it shouldn’t be
– Reduces the risk of breakage or damage to furniture and other objects
– Helps your robot vacuum save energy and time by ensuring that its cleaning path is uninterrupted
By using boundary markers, you’ll be able to ensure that your robot vacuum is working at maximum efficiency while keeping your home and belongings protected.
2. Use a robot vacuum with mapping capabilities
One of the best ways to ensure optimal performance and extend the lifespan of your robot vacuum is to invest in one with mapping capabilities. These advanced robots use lasers or cameras to scan and map the layout of your home, creating a virtual map that it uses to navigate and clean more efficiently.
Advantages of a Robot Vacuum with Mapping Capabilities:
| Advantages | Explanation |
|---|---|
| Efficient Cleaning | A robot vacuum with mapping capabilities can clean your floors more efficiently, as it can identify previously cleaned areas and avoid repeating them. |
| Less Bumping into Obstacles | Mapping capabilities allow the robot vacuum to navigate around furniture and obstacles in a more methodical manner. |
| Precise Navigation | With a virtual map of your home, the robot vacuum can clean in straight lines and ensure complete coverage of your floors. |
| Customizable Cleaning | Some robot vacuums with mapping capabilities allow you to create zones and no-go areas, so you can tell the robot which areas to clean and which to avoid. |
Investing in a robot vacuum with mapping capabilities can be more expensive than a basic model, but the advantages are numerous. A mapping robot vacuum is more efficient, thorough, and customizable, which means you’ll spend less time cleaning and more time enjoying your clean home.
When shopping for a mapping robot vacuum, look for brands that have a proven track record of reliability and consistent performance. Some of the top brands on the market include Roomba, Neato BotVac, and Shark IQ. Be sure to read reviews and compare features before making your purchase to ensure you get the best model for your needs and budget.
So, if you want to take your robotic cleaning game to the next level, consider investing in a robot vacuum with mapping capabilities – your floors (and your free time) will thank you!
3. Limit the amount of rugs that need to be cleaned
It’s important to limit the amount of rugs that your robot vacuum needs to clean to maximize its efficiency and extend its lifespan. Here are a few tips to keep in mind:
- Strategic rug placement: If possible, try to limit the number of rugs in high traffic areas. Instead, place them in areas that get less foot traffic or in rooms that don’t get used as frequently. This will reduce the amount of time your robot vacuum spends cleaning rugs and increase its battery life.
- Invest in low-pile rugs: While plush and fluffy rugs may be cozy and comfortable underfoot, they can pose a challenge for robot vacuums. The long fibers can get tangled in the vacuum’s brushes and wheels, causing it to get stuck or break down. Opt for low-pile or flatweave rugs, which are easier for robot vacuums to handle and clean.
- Avoid shaggy or high-pile rugs: It’s best to avoid shaggy or high-pile rugs altogether if possible. These types of rugs are difficult for robot vacuums to navigate and can cause them to lose suction or get stuck. If you must have a shaggy rug, consider manually vacuuming it instead of relying on your robot vacuum.
- Use boundary markers: If you have a rug that your robot vacuum struggles with, consider using boundary markers to keep it away. This will prevent your robot vacuum from getting stuck or tangled in the rug, and allow it to focus on cleaning other areas of your home.
- Clean rugs separately: If you have a large area rug that needs to be cleaned, consider cleaning it separately from the rest of your floors. This will prevent the robot vacuum from spending unnecessary time on the rug and allow it to focus on other areas that require cleaning.
By limiting the amount of rugs your robot vacuum needs to clean and following these tips, you’ll not only extend the lifespan of your device but also optimize its performance.
4. Vacuum larger debris yourself
Robot vacuum cleaners are intelligent machines that can easily pick up dirt, dust, and smaller debris. However, they are not always equipped to handle larger debris without getting clogged or breaking down. In order to prolong the life of your robot vacuum, it’s important to vacuum larger debris yourself.
Why vacuum larger debris yourself?
When larger debris, such as pieces of paper or even larger particles of dust, are vacuumed by a robot vacuum, they can get caught in the wheels or brush of the machine. This can slow down the cleaning process or even damage the robot vacuum. By removing larger debris yourself, you’re not only avoiding damage but also ensuring your robot vacuum cleans more efficiently.
How to vacuum larger debris
Vacuuming larger debris yourself may seem tedious, but it’s a step that shouldn’t be skipped. This can be done in a few simple steps:
| Step 1: Clear the area | Start by clearing the area of larger debris items. Pick up any papers or other large items that may have accumulated on the floor, so your robot vacuum does not try to clean them. |
| Step 2: Use a broom or dustpan | Once the area is cleared, use a broom or dustpan to sweep up any remaining larger debris. If you have a dustpan with a long handle, this will be easier on your back, but a regular dustpan will also work. |
| Step 3: Dispose of the debris | Once the debris is swept up, dispose of it in the trash or recycling bin. |
Conclusion
Vacuuming larger debris yourself will help extend the lifespan of your robot vacuum. By taking the time to clear your floors, you can avoid damage and ensure that your robot vacuum continues to clean efficiently. Remember, while robot vacuums are convenient, they still require upkeep and maintenance to function at their best.
5. Empty the dustbin before every use
Consistently cleaning the dustbin of your robot vacuum is an essential step to keep your robot vacuum functioning properly. It prevents the robot vacuum from clogging and makes it more effective at cleaning your floors. Make it a habit to empty the dustbin before every use to get the best results.
Here are some reasons why emptying the dustbin before every use is so important:
- Dust and debris can accumulate quickly in the dustbin, reducing suction power and making it difficult for the robot vacuum to pick up dirt.
- If the dustbin is not emptied regularly, it may cause damage to your robot vacuum, reducing its lifespan.
- Leaving dirt and debris to accumulate in the bin for long periods can also cause unpleasant odors in your home.
Here’s what you can do to make sure the dustbin is emptied before every use:
- Check the dustbin before every cleaning session.
- If the dustbin is full, remove it from the robot vacuum and empty it in a trash can.
- Make sure to clean any debris that is visible in the bin to avoid clogs before placing it back in the vacuum.
By making sure to empty the dustbin before every use, you will ensure your robot vacuum is working efficiently, and will keep your home cleaner and fresher. Remember, maintenance of your robot vacuum is just as important as regular cleaning of your house.
When to Call for Professional Maintenance
As a robot vacuum owner, it’s important to know when to call for professional maintenance to ensure the long-term longevity of your device. While regular maintenance can help prevent major issues, there are certain situations that may require the help of a professional.
Malfunctioning: If you notice that your robot vacuum is not working correctly, such as failing to start or stop on its own or going off track, you may need to call for professional maintenance. Attempting to fix the issue yourself could cause further damage to the device or even harm yourself.
Physical damage: If your robot vacuum experiences physical damage, such as cracked or broken parts or damage to the sensors or motors, it’s best to call for professional maintenance. Trying to fix physical damage yourself may result in further damage and could void any warranty you may have.
Battery issues: If you notice that your robot vacuum is not holding a charge as long as it used to, it may be time for a battery replacement. Attempting to replace the battery yourself can be dangerous and may cause damage to the device.
Software or firmware issues: If you notice that your robot vacuum is not updating or responding to software or firmware updates, it may require professional maintenance. Attempting to fix software or firmware issues yourself can lead to irreversible damage to the device.
Regular maintenance: It’s always a good idea to schedule regular maintenance check-ups with a professional service to ensure that your robot vacuum is working to its optimal capacity. A professional can help clean and inspect internal parts that may not be accessible to the average user.
Remember, attempting to fix issues yourself may cause further damage and should only be done by those with proper training and experience. By calling for professional maintenance when needed, you can extend the lifespan of your robot vacuum and keep it working at its best for years to come.
Conclusion
In conclusion, maintaining your robot vacuum is crucial to ensure that it functions optimally and has a longer lifespan. The 7 essential maintenance tips we’ve discussed are relatively simple and easy to carry out, yet they go a long way in improving your robot vacuum’s performance. Regularly cleaning the dustbin and filter, clearing floors of obstacles, checking software and firmware, inspecting brushes and wheels, keeping the vacuum charged, storing it in a dry place, and scheduling maintenance checks will all help prevent issues that may require costly repairs or even replacement of the device.
In addition to these essential tips, there are several other ways to optimize your robot vacuum’s performance. For example, using boundary markers to avoid specific areas, using a vacuum with mapping capabilities, limiting the number of rugs that need to be cleaned, vacuuming larger debris manually, and emptying the dustbin before every use can all extend your robot vacuum’s lifespan and increase its efficiency.
While most robot vacuum maintenance can be carried out on your own, there may be instances when it’s best to call in a professional. It’s essential to be aware of the warning signs that indicate your device needs professional help. Some of these signs may include strange noises, overheating, or malfunctioning sensors. In such cases, reach out to the manufacturer’s customer support team or a professional repair technician to diagnose and solve the issue.
In conclusion, maintaining your robot vacuum does not have to be complex or time-consuming. By adhering to these essential tips and optimizing your device’s performance further, you can maximize its lifespan and enjoy its benefits for years to come. Remember, a small investment of time and effort in maintaining your robot vacuum now can save you the cost of expensive repairs or replacement in the future.
Frequently Asked Questions
1. How often should I clean my robot vacuum’s dustbin and filter?
It’s recommended to clean the dustbin and filter after every use to ensure proper suction and prevent clogging.
2. Can my robot vacuum clean multiple floor types?
Yes, most robot vacuums are designed to clean multiple floor types such as carpet, hardwood, and tile.
3. Can I schedule my robot vacuum to clean while I’m away from home?
Yes, many robot vacuums have scheduling features that allow you to set specific cleaning times for when you’re not at home.
4. Is it safe to leave my robot vacuum charging overnight?
Yes, it’s safe to leave your robot vacuum charging overnight. Most models have built-in safety features to prevent overcharging.
5. Will my robot vacuum continue cleaning after it runs out of battery?
No, most robot vacuums will return to their charging dock when their battery is low and will not continue cleaning until charged.
6. Can I control my robot vacuum with my smartphone?
Yes, many robot vacuums have smartphone apps that allow for remote control and scheduling.
7. How often should I replace my robot vacuum’s brushes?
It depends on usage, but it’s recommended to replace brushes every 6-12 months for optimal cleaning performance.
8. Will my robot vacuum clean under furniture?
Most robot vacuums are designed to clean under furniture with a low profile design.
9. How do I clean my robot vacuum’s wheels?
You can use a damp cloth or brush to remove any debris or hair tangled around the wheels.
10. What should I do if my robot vacuum isn’t working properly?
You can refer to the troubleshooting section of your robot vacuum’s manual, or contact the manufacturer for assistance.
