Warning: A non-numeric value encountered in /var/www/html/wp-content/themes/generatepress/inc/structure/post-meta.php on line 165
by Dwight Gibson
It’s time to make life easier with the power of automation! Are you tired of manually controlling your smart vacuum cleaner? Well, you’re in luck! With the help of IFTTT, you can easily integrate your smart vacuum cleaner to create a seamless and efficient cleaning experience. In this article, we’ll explore the benefits of using IFTTT, connect your smart vacuum cleaner with IFTTT, set up applets for your specific cleaning needs, and customize existing applets or create new ones. So, let’s dive in and discover how you can maximize the potential of your smart vacuum cleaner with IFTTT!
Table of Contents
What is IFTTT?
With the ever-increasing popularity of smart homes, new technologies are constantly emerging to make everyday tasks more convenient. One such technology is IFTTT, which stands for “If This Then That.” This innovative platform allows users to connect multiple devices and services, integrating them in new ways to automate everyday tasks. In this section, we will dive into the details of IFTTT, including its definition, benefits, and how it can be used to enhance the functionality of your smart vacuum cleaner.
Definition of IFTTT
IFTTT, short for “If This Then That”, is a popular automation tool that allows users to create triggers and actions, called applets, based on specific tasks they perform online or with their devices. The applets consist of a simple “if this happens, then do that” logic that automates tasks between two different apps or devices, saving users time and effort.
IFTTT is unique because it integrates with hundreds of different apps and smart home devices, including smart vacuum cleaners. This means that IFTTT applets can create opportunities for smart home devices to work together in ways that were not previously possible, streamlining users’ daily routines.
IFTTT’s integration with smart vacuum cleaners opens up a wide range of possibilities for users to automate cleaning tasks. For instance, users can use IFTTT to create applets that automatically start cleaning with the vacuum cleaner once they leave their home or when the air quality reaches a certain level. By integrating their smart vacuum cleaner with IFTTT, users can create a personalized and more convenient cleaning experience that fits their lifestyle.
IFTTT is a powerful tool that enables users to connect different apps and devices to automate their workflows. Smart vacuum cleaners are just one of the many devices that can be integrated with IFTTT. The ability to create applets that automate cleaning tasks opens up a world of possibilities for smart homes, making life easier for users. If you are interested in using IFTTT with your smart vacuum cleaner, continue reading to find out how to get started in the section on “Connecting Your Smart Vacuum Cleaner with IFTTT.”
Benefits of Using IFTTT
Using IFTTT with your smart vacuum cleaner can bring several benefits to your home cleaning routine. Here are some key advantages of integrating IFTTT with your smart vacuum cleaner:
Benefits of Using IFTTT with Your Smart Vacuum Cleaner
Automation
IFTTT can automate your smart vacuum cleaner according to your cleaning requirements. You can create smart routines that run automatically and take care of cleaning tasks with greater efficiency.
Customization
IFTTT allows you to customize your smart vacuum cleaner’s settings, as well as create custom applets that cater to your cleaning needs. You can also select different cleaning modes depending on the surface, and fine-tune your preferences as required.
Flexibility
IFTTT allows you to connect multiple smart home devices, such as lights, thermostats, and security cameras, which can be triggered in conjunction with your smart vacuum cleaner. This way, you can create a truly automated and flexible smart home ecosystem that adapts to your lifestyle.
Ease of Use
IFTTT is user-friendly and simple to use, even for those with limited technical knowledge. The platform guides you through the steps required to connect your smart vacuum cleaner, create applets, and customize settings as needed.
Efficiency
By using IFTTT with your smart vacuum cleaner, you can clean your home more efficiently and effectively. This can save you time and energy, as well as improve the overall cleanliness of your living space.
So, you have a smart vacuum cleaner and want to take its capabilities to the next level by integrating it with IFTTT. This is an excellent decision as it can automate various tasks and free up your time. But before you dive in, there are a few things to consider. Firstly, it is crucial to check your smart vacuum cleaner’s compatibility with IFTTT. Secondly, you will need to create an IFTTT account if you don’t already have one. Once you have done these two things, you can connect your smart vacuum cleaner with IFTTT and start setting up applets. Let’s explore these steps in more detail.
Checking Your Smart Vacuum Cleaner’s Compatibility
Before getting started with IFTTT, it is essential to ensure that your smart vacuum cleaner supports IFTTT integration. While many modern smart vacuum cleaners are compatible, it is always best to double-check before investing time and effort into the integration process. Here are the steps to check your smart vacuum cleaner’s compatibility:
1. Check the User Manual: The first step is to check your smart vacuum cleaner’s user manual. Look for any information regarding the device’s compatibility with third-party integrations or IFTTT. If the manual specifically mentions IFTTT, you’re good to go.
2. Visit the Product’s Website: If you do not have the user manual or cannot find the relevant information, the next step is to visit the smart vacuum cleaner’s website. Check the product specifications or features section for any mentions of IFTTT or third-party integrations.
3. Contact Customer Support: If the above steps do not yield any results, reach out to the manufacturer’s customer support. Explain that you want to use IFTTT with your smart vacuum cleaner and ask if it is compatible. If it is, ask for any additional instructions or guidance specific to your device.
Remember that IFTTT integration is not a universal feature in every smart vacuum cleaner, and some may have limitations or require additional hardware to work. To ensure a smooth integration process, it is critical to check your device’s compatibility beforehand.
Creating an IFTTT Account
To connect your smart vacuum cleaner with IFTTT, you’ll first need to create an IFTTT account. Here’s how to do it:
Visit the IFTTT website: Go to the IFTTT website and click on the “Sign up” button in the top right corner of the page.
Enter your email and create a password: Enter your email address and create a password that’s at least 8 characters long.
Verify your email: IFTTT will send you an email to verify your email address. Click the link in the email to continue with the account creation process.
Provide your basic information: After verifying your email address, provide your basic information like your name and location.
Agree to the terms of service and privacy policy: Before you can start using IFTTT, you’ll need to agree to their terms of service and privacy policy.
Connect your social media accounts: If you want to, you can connect your social media accounts to IFTTT at this point. This will allow you to create applets that use your social media accounts as triggers or actions.
Continue to the IFTTT dashboard: Once you’re done with the sign-up process, you’ll be taken to the IFTTT dashboard where you can start creating applets.
Creating an IFTTT account is quick and easy. Once you have your account set up, you can start connecting your smart vacuum cleaner to IFTTT.
Connecting Your Smart Vacuum Cleaner and IFTTT
To connect your smart vacuum cleaner with IFTTT, follow the simple steps provided below:
Step
Description
1
Ensure that your smart vacuum cleaner supports IFTTT. Check the manufacturer’s website for a list of compatible devices.
2
Create an IFTTT account if you haven’t already. You can do this by visiting the IFTTT website and clicking on the “Sign Up” button.
3
Go to the “Services” page on the IFTTT website and search for your smart vacuum cleaner in the list of available devices. Click on the respective icon and grant IFTTT access to your smart vacuum cleaner’s features, if prompted.
4
Link your smart vacuum cleaner to your IFTTT account by entering your device login credentials when prompted.
5
Once you have completed these steps, your smart vacuum cleaner will be connected to IFTTT, and you can start setting up applets to automate your cleaning tasks.
It’s important to note that the steps involved in connecting your smart vacuum cleaner with IFTTT may vary depending on the device you own. However, most devices require you to login to your device account through IFTTT and provide permission for IFTTT to access the device’s functions.
Once the connection has been established, you may customize various aspects of the applets to tailor the automation to your specific needs. With IFTTT, the possibilities are nearly endless, and you can create applets to trigger your smart vacuum cleaner based on factors such as time of day, location, or even the weather outside.
By completing the steps outlined above, you’ll be well on your way to maximizing the capabilities of your smart vacuum cleaner with IFTTT. But before diving into applet creation, it’s important to learn how to create a simple applet as well as more advanced ones. Keep reading to find out how to create and customize applets to suit your cleaning needs.
Setting Up IFTTT Applets for Your Smart Vacuum Cleaner
So, you’ve successfully connected your smart vacuum cleaner with IFTTT – great news! Now, it’s time to unlock the full potential of this integration by setting up applets that will automate certain cleaning tasks, making your job even easier. With the help of IFTTT, you can create advanced applets for specific cleaning needs, use IFTTT services to trigger your vacuum cleaner, and even customize existing applets or create new ones to suit your unique cleaning preferences. In this section, we’ll guide you step-by-step on how to set up IFTTT applets for your smart vacuum cleaner and make the most of this powerful automation tool.
Creating a Simple Applet
One of the best things about IFTTT is how easy it is to create simple applets that can automate tasks and save you time. To create a simple applet for your smart vacuum cleaner, follow these steps:
Step 1: Choose your trigger
The first step is to choose a trigger that will activate your applet. For example, if you want your vacuum cleaner to start cleaning automatically when you leave the house, you can select the “Location” service and set it to trigger when you exit a specific location such as your home.
Step 2: Choose your action
Once you have chosen your trigger, the next step is to choose the action that your applet will perform. In this case, you would select your smart vacuum cleaner as the action device, and then choose the action you want it to perform, such as “Start Cleaning.”
Step 3: Customize your applet
The final step is to customize your applet as per your requirements. For instance, you can specify which cleaning mode you want your vacuum cleaner to operate in, or set a schedule for when the applet should run.
One thing to keep in mind when creating a simple applet is that the options will depend on the capabilities of your smart vacuum cleaner and the services that are compatible with IFTTT. However, with a little creativity, you should be able to find an applet that fits your needs perfectly.
By creating a simple applet, you can make your smart vacuum cleaner work more efficiently and help you get the most out of it. It’s amazing how this automation tool can make our lives simpler and easier. Try it out, and see just how much time and effort you can save.
Advanced Applets for Specific Cleaning Needs
As you become more familiar with IFTTT and its capabilities, you may want to create advanced applets to meet specific cleaning needs. Here are some ideas to get you started:
Custom Scheduling: Create an applet that schedules your smart vacuum cleaner to run on specific days or times that suit your cleaning needs. For example, you can create an applet that turns on your smart vacuum cleaner every day at 9:00 am when you leave for work.
Smart Room Cleaning: Use IFTTT to create applets that activate your smart vacuum cleaner only when someone enters a specific room. You can create an applet that starts vacuum cleaning when motion is detected in the living room, for example.
Vacuum When Air Quality is Low: If you have a smart air quality monitor at home, you can create an applet that triggers your smart vacuum cleaner to run when the air quality is poor. This ensures that your home stays clean and healthy at all times.
Vacuum During Pet Shedding Season: Pets are lovely to have but can leave a lot of pet hair. Suppose you want to automate cleaning hair when they shed. You can set up an applet that turns on your smart vacuum cleaner to clean up pet hair for 30 minutes every day during shedding season.
Keep in mind that these advanced applets require specific triggers and actions. You may need to connect additional smart home devices to your IFTTT account to create these applets. Make sure to check for device compatibility before creating advanced applets.
Using IFTTT Services to Trigger Your Smart Vacuum Cleaner
Now that you have connected your smart vacuum cleaner to IFTTT, you can start using some of the services provided by IFTTT to trigger your device. There are a variety of services that can be used to automate your cleaning experience, which saves you both time and effort.
Here is a table of some of the most popular services that can be used to trigger your smart vacuum cleaner:
Service Name
Description
Google Assistant
You can use your voice to turn your smart vacuum cleaner on or off using Google Assistant. By linking your IFTTT and Google Assistant accounts, you can use simple voice commands such as “Hey Google, turn on the vacuum cleaner”.
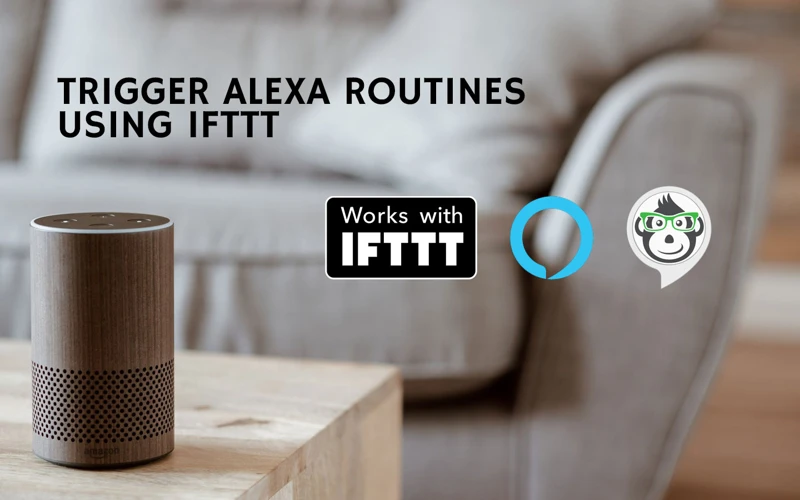
Amazon Alexa
Similar to Google Assistant, you can use Alexa to control your smart vacuum cleaner. By linking your IFTTT and Alexa accounts, you can use voice commands such as “Alexa, clean the living room”.
Weather Underground
This service allows you to schedule your vacuum cleaner to turn on or off based on the weather conditions in your area. For example, you can set up an applet to turn on your vacuum cleaner every time it rains. This saves you the trouble of having to manually turn on your vacuum cleaner after a messy day outside.
Date & Time
You can schedule your smart vacuum cleaner to turn on or clean at specific times using date and time triggers. For example, you can schedule your vacuum cleaner to start cleaning every day at 9 am so that you come back to a clean home after work.
Location
This service allows you to set up triggers based on your location. You can set up your vacuum cleaner to start cleaning your home every time you leave your house or your office. This ensures that your home is clean and fresh every time you come back from a trip.
Using these services can help you automate your cleaning tasks seamlessly. With IFTTT, you don’t have to worry about manually turning on or scheduling your vacuum cleaner. Set up these applets, and let IFTTT do the rest for you!
Customizing IFTTT Applets for Your Smart Vacuum Cleaner
As you get more comfortable with IFTTT and your smart vacuum cleaner, you may want to explore ways to customize your applets for even better cleaning results. Whether it’s adjusting the scheduling or adding additional triggers for your vacuum, there are plenty of ways to enhance your cleaning experience. In this section, we’ll go over how to edit existing applets, create new ones from scratch, and even share them with the IFTTT community. So let’s dive in and see how you can unlock the full potential of your smart vacuum cleaner with IFTTT!
Editing Existing Applets
Editing Existing Applets
Editing existing applets is a great way to make adjustments to your IFTTT integration with your smart vacuum cleaner. Here’s how to do it:
Log in to your IFTTT account.
Click “My Applets” at the top of the screen.
Find the applet you want to edit and click on it.
Click “Edit” at the bottom of the screen.
Make your desired changes and click “Update” when finished.
It’s important to note that editing an applet will not affect any existing triggers, actions, or filters that have already occurred. It will only affect future triggers, actions, or filters.
Some tips for editing applets include:
Make small, incremental changes to avoid breaking the applet.
Test the applet after making changes to ensure it still works properly.
Consider the impact of your changes on other applets or devices in your IFTTT ecosystem.
By editing existing applets, you can fine-tune the functionality of your smart vacuum cleaner and make it work even better for your unique cleaning needs.
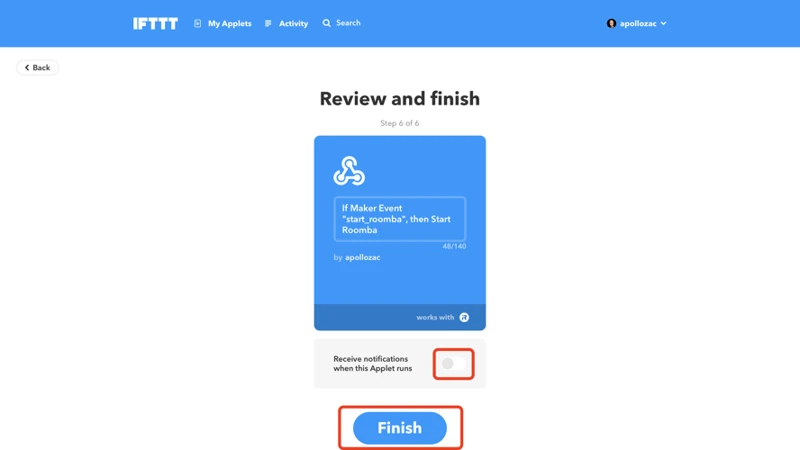
Creating New Applets
When it comes to creating new applets for your smart vacuum cleaner with IFTTT, the possibilities are endless. Here are a few easy-to-follow steps for creating new applets:
Log in to your IFTTT account.
Before you can create a new applet, you’ll need to be logged in to your IFTTT account. Make sure you’re using the same account that’s connected to your smart vacuum cleaner.
Click on “Create” in the top right corner of the screen.
Once you’re logged in, navigate to the “Create” button located in the top right corner of your screen. This will bring up the “Create a New Applet” page, where you can start building your new applet.
Select the trigger for your applet.
The trigger is the event that will start your applet. For example, you might create an applet that starts your vacuum cleaner whenever you leave the house. To do this, you’d select the “Location” trigger and choose “You exit an area” as the trigger event.
Choose the action for your applet.
The action is what your applet will do once the trigger event occurs. For example, you might create an applet that turns on your vacuum cleaner whenever you leave the house. To do this, you’d select the “Device” action and choose “Turn on” as the action event.
Customize your applet.
After you’ve selected your trigger and action, you can customize your applet to suit your needs. For example, you might want to specify which smart vacuum cleaner you want the applet to control, or you might want to add a delay between the trigger and the action.
Save your new applet.
Once you’ve customized your applet, make sure to save it by clicking the “Create Action” button. This will save your applet to your IFTTT account, where you can edit or delete it at any time.
Creating new applets can be an exciting way to maximize the functionality of your smart vacuum cleaner with IFTTT. By following these steps, you can create a wide range of applets that automate your cleaning process and make your life easier.
Sharing Applets with the IFTTT Community
Once you have created and customized your IFTTT applets for your smart vacuum cleaner, you have the option to share them with the IFTTT community. This is a great way to showcase your automations and help others who may be struggling to create their own.
Sharing your applets with the IFTTT community is a straightforward process. First, go to your applets tab and locate the applet you want to share. Click on the applet to access its settings, and then select the “Share” button.
This will bring up the sharing options. You can choose to share via social media or email, or you can simply copy the link to the applet and share it with anyone you choose.
Table: Sharing Applets on IFTTT
Step
Description
1
Locate the applet you want to share in your applets tab
2
Access the applet’s settings by clicking on it
3
Select the “Share” button
4
Choose your preferred sharing method (social media, email, or link)
Sharing your applets can help others discover new and creative ways to use their own smart vacuum cleaners. It can also give you the opportunity to connect with other automators and share tips and ideas. So don’t be afraid to share your applets with the world!
Tips for Successful IFTTT Integration with Your Smart Vacuum Cleaner
As you approach the end of the integration process between your smart vacuum cleaner and IFTTT, there are a few important tips to keep in mind to ensure everything runs smoothly. While IFTTT can be a powerful tool, it requires a bit of know-how and attention to detail to avoid any missteps. This section will provide you with some key tips to help you make the most of your IFTTT applets and optimize the functionality of your smart vacuum cleaner. From making sure your applets work properly to considering safety and security concerns, these tips will ensure that your IFTTT integration is a success.
Making Sure Your Applets Work Properly
Making sure your applets work properly is crucial for maintaining a seamless integration between your smart vacuum cleaner and IFTTT services. Here are some tips to help you troubleshoot any issues that may arise:
1. Double-check your device connections: Ensure that your smart vacuum cleaner is correctly connected to IFTTT and that all your applets are properly set up to function with the device.
2. Verify device compatibility: Before creating an applet, make sure that your vacuum cleaner is compatible with the specific action you want it to perform through IFTTT.
3. Test your applets: Check that your applets trigger your vacuum cleaner as intended by running a few tests. Make sure your devices are properly connected and that your Wi-Fi connection is stable.
4. Check IFTTT app and services: Verify that the correct services are active and up-to-date within the IFTTT app, and that you have allowed necessary permissions for the services.
5. Confirm your triggers and actions: Review your applets to ensure that the triggers and actions are properly set up. Often, problems can arise from simple syntax errors.
By following these steps, you can ensure that your smart vacuum cleaner works seamlessly with IFTTT services, making your life easier and more convenient.
Consider Safety and Security When Using IFTTT Applets
When integrating your smart vacuum cleaner with IFTTT, it’s important to keep safety and security in mind. Here are some key considerations to help ensure a safe and secure integration:
Choose secure passwords: When creating your IFTTT account, be sure to choose a strong, unique password that you don’t use for any other accounts. Additionally, make sure your smart vacuum cleaner is protected by a secure password to prevent unauthorized access.
Be mindful of personal information: IFTTT applets may require access to certain personal information, such as your location. Be cautious when granting this type of access, and only allow it if it’s necessary for the applet to function properly.
Regularly check your IFTTT account activity: Keep an eye on the activity logs in your IFTTT account to ensure that no unauthorized access has occurred. If you notice any unusual activity, change your password immediately and consider revoking access from any suspicious applets.
Check for security updates: Regularly check for software updates for both your smart vacuum cleaner and the IFTTT service to ensure that any known security vulnerabilities are patched in a timely manner.
Use caution when sharing applets: While IFTTT’s applet sharing feature is a great way to discover new applets and share your own creations with the community, be cautious when using applets from untrusted sources. Only use applets from sources that you trust, and carefully review the applet’s permissions before enabling it.
Be aware of potential risks: Finally, keep in mind that integrating your smart vacuum cleaner with IFTTT may not be appropriate for all users. Be aware of the potential risks, such as unauthorized access or data breaches, and make an informed decision about whether to use IFTTT with your smart vacuum cleaner.
By taking these precautions, you can help ensure that your integration with IFTTT remains safe and secure. Remember, your privacy and security should always be a top priority, even when using fun and innovative services like IFTTT.
Maximizing the Potential of Your Smart Vacuum Cleaner with IFTTT
One of the main benefits of integrating your smart vacuum cleaner with IFTTT is the ability to automate tasks and maximize its potential. Here are some tips for getting the most out of your smart vacuum cleaner with IFTTT:
Tip
Description
Use Sensor Triggers
IFTTT allows you to use sensor triggers to start your smart vacuum cleaner. For example, you can set up the applet to start cleaning when the temperature drops below a certain temperature or when the humidity in a room reaches a certain level.
Create Custom Applets
One of the great things about IFTTT is the ability to create custom applets tailored to your specific cleaning needs. Experiment with different trigger and action combinations to find the perfect applet for your home.
Combine Triggers for Enhanced Automation
Combining multiple triggers can create a more powerful and efficient system. For example, you can set up an applet that starts cleaning when you leave the house and the temperature drops below a certain level.
Integrate with Other Smart Home Devices
IFTTT allows you to integrate your smart vacuum cleaner with other smart home devices, such as smart lights and cameras. This can create a more holistic and efficient smart home system.
Share Applets with the Community
The IFTTT community is a great resource for finding new and innovative ways to use your smart vacuum cleaner. Share your applets with the community and explore what others have created.
By following these tips and experimenting with different trigger and action combinations, you can maximize the potential of your smart vacuum cleaner with IFTTT to create a more efficient and effective smart home system.
Conclusion
In conclusion, integrating your smart vacuum cleaner with IFTTT can greatly enhance your cleaning experience. With IFTTT, you can create custom applets to automate specific cleaning tasks, saving you time and effort.
By checking the compatibility of your smart vacuum cleaner and creating an IFTTT account, you can easily connect the two platforms. Creating simple or advanced applets, as well as using IFTTT services to trigger your smart vacuum cleaner, can provide a tailored cleaning solution to match your needs.
Customizing applets, editing existing ones or sharing them with the IFTTT community can also expand your cleaning options. However, it’s important to make sure your applets work properly and consider safety and security measures when using IFTTT.
Incorporating IFTTT into your cleaning routine can maximize the potential of your smart vacuum cleaner and provide a more efficient and effective way of maintaining a clean home. Give it a try and see the difference for yourself!
Frequently Asked Questions
Can I control my smart vacuum cleaner with IFTTT?
Yes, you can control your smart vacuum cleaner with IFTTT by creating applets that allow you to start, stop, and schedule cleaning tasks.
Do all smart vacuum cleaners work with IFTTT?
No, not all smart vacuum cleaners work with IFTTT. You’ll need to check your vacuum cleaner’s compatibility before connecting it to IFTTT.
What are the benefits of using IFTTT with my smart vacuum cleaner?
The benefits of using IFTTT with your smart vacuum cleaner include the ability to schedule cleaning tasks, start and stop cleaning remotely, and integrate with other smart home devices for a seamless cleaning experience.
Do I need to create an IFTTT account to use it with my vacuum cleaner?
Yes, you’ll need to create an IFTTT account to use it with your vacuum cleaner.
What kind of applets can I create for my smart vacuum cleaner with IFTTT?
You can create simple applets that start or stop cleaning tasks, advanced applets for specific cleaning needs, and applets that trigger your smart vacuum cleaner based on pre-defined events or conditions.
Can I edit or customize existing applets for my smart vacuum cleaner?
Yes, you can edit and customize existing applets to better suit your cleaning needs.
Is it safe to use IFTTT with my smart vacuum cleaner?
Yes, it’s safe to use IFTTT with your smart vacuum cleaner as long as you follow basic safety and security guidelines.
Can I share my customized applets with the IFTTT community?
Yes, you can share your customized applets with the IFTTT community to help others enhance their cleaning experience.
What do I do if my applets are not working properly?
If your applets are not working properly, you should check your internet connection and ensure that your smart vacuum cleaner is connected to IFTTT. You can also contact customer support for further assistance.
How can I maximize the potential of my smart vacuum cleaner with IFTTT?
You can maximize the potential of your smart vacuum cleaner with IFTTT by exploring different applets, customizing them to suit your needs, and integrating with other smart home devices for a seamless cleaning experience.