Why Cleaning The Charging Components of Your Smart Vacuum Cleaner is Crucial
Warning: A non-numeric value encountered in /var/www/html/wp-content/themes/generatepress/inc/structure/post-meta.php on line 165
by Dwight Gibson
Table of Contents
The Basics of Smart Vacuum Cleaners
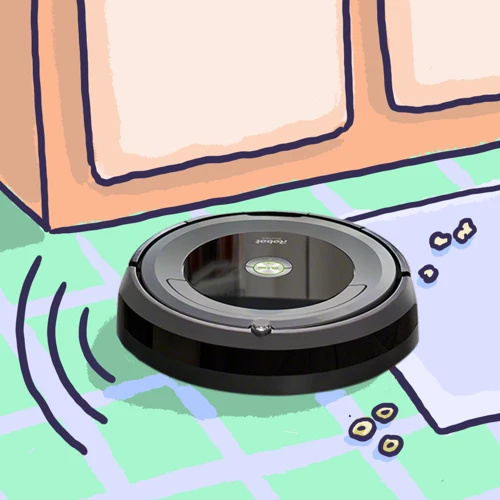
Smart vacuum cleaners have revolutionized the way we clean our homes – from hassle-free cleaning to innovative features, these cleaning tools have become a staple in households worldwide. Understanding the basics of how these devices work and their components is important for their maintenance and longevity. Additionally, being able to troubleshoot potential issues with your smart vacuum, such as a not powering on or no power can save you a headache in the long run. In this article, we’ll take a closer look at the importance of cleaning the charging components for smart vacuum cleaners and how to properly maintain them for optimal performance and extended battery life, as well as touch on some safety features of these devices.
What are Smart Vacuum Cleaners?
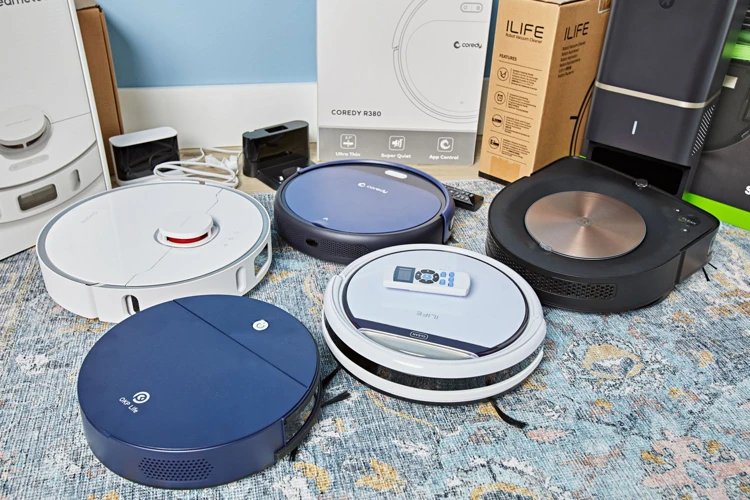
Smart Vacuum Cleaners are a modern-day device that has revolutionized the way we clean our homes. These devices are equipped with advanced technology that allows them to clean our homes effortlessly. Here are some features that make these gadgets stand out:
Auto Navigation: Smart vacuum cleaners use sensors to navigate around furniture, stairs, and other obstacles. This feature allows them to clean every nook and corner of your house effectively.
Voice Control: You can control your smart vacuum cleaner using voice commands. This feature is particularly useful for people with disabilities or mobility issues.
Remote Control: You can also control your smart vacuum cleaner using a remote control from the comfort of your couch.
Mobile App: Many smart vacuum cleaners come with a mobile app that you can use to schedule cleaning sessions and control your device from your phone.
Automatic Charging: These devices are equipped with charging components that allow them to automatically charge when the battery runs low.
These features make smart vacuum cleaners a valuable asset to any home. But it’s essential to understand that like any other device, they require maintenance to function efficiently. In the next sections, we’ll discuss the importance of cleaning the charging components of smart vacuum cleaners and provide a step-by-step guide on how to do it.
How do They Work?
Smart vacuum cleaners are cleaning devices that utilize advanced technology to make cleaning easier and hassle-free. Unlike traditional vacuum cleaners, smart vacuum cleaners are capable of autonomously moving around the house and effectively cleaning different surfaces such as carpets, hardwood floors, and tiles without human input.
To understand how smart vacuum cleaners work, it is essential to look at their component parts and how they interact. The table below outlines the major components and their functions:
Component
Description
Motor
A power source that creates suction and drives the cleaning mechanism of the vacuum cleaner.
Sensors
Smart vacuum cleaners have many sensors that help them navigate and detect obstacles. These include cliff sensors which prevent the vacuum cleaner from falling off stairs, and bumper sensors which detect obstacles and redirect the vacuum cleaner’s path away from them.
Battery
The battery provides power to the vacuum cleaner during cleaning, and it is rechargeable using the charging components. Smart vacuum cleaners have longer battery life compared to traditional vacuum cleaners.
Charging Components
These components include the charging dock or station that the vacuum cleaner returns to when it needs to recharge.
Cleaning Mechanism
This refers to the brushes and suction components that effectively remove dirt and debris from carpets and hardwood floors. Smart vacuum cleaners use different brushes that adjust based on the surface it’s cleaning, ensuring that even the edges and corners are cleaned thoroughly.
Smart vacuum cleaners use a combination of sophisticated sensors, motors, and cleaning mechanisms to make cleaning more convenient and more efficient for homeowners. With the rise of smart home technology, smart vacuum cleaners are becoming an essential part of modern households.
The Importance of Cleaning Charging Components
When it comes to the proper maintenance of your smart vacuum cleaner, there are many crucial components that require regular cleaning. One of the most important parts of these devices are the charging components, which ensure that your robotic vacuum cleaner is working efficiently and consistently. Failure to clean these components can lead to a whole host of problems that can interrupt the functionality of your smart vacuum cleaner. In this section, we will explore what charging components are, why cleaning them is vital, and how to properly clean them to ensure your device stays in top condition.
What are Charging Components?
Smart vacuum cleaners are advanced cleaning devices that operate using intelligent technology. They are battery-powered and require charging to function efficiently. Charging components are the parts of the smart vacuum cleaner that enable it to charge its battery.
Charging Components of Smart Vacuum Cleaners
Component
Description
Charging Station
The charging station is a dock where the vacuum cleaner is placed when it is not in use. It connects the vacuum cleaner to a power source to charge the battery automatically.
Power Cord
The power cord is a wire that connects the charging station to an electrical outlet.
Battery
The battery is a rechargeable component that powers the vacuum cleaner. It requires charging to maintain its optimal performance.
The Importance of Cleaning Charging Components
Charging components are vital for the proper functioning of smart vacuum cleaners. Neglecting their cleaning can lead to suboptimal performance, battery damage or depletion, and even fire hazards. The charging station and power cord can collect dust, dirt, pet hair, and other debris that impede their function, leading to poor connectivity and slow charging times. Additionally, a dirty battery can shorten its lifespan or reduce its total runtime on a single charge.
How to Clean the Charging Components?
Before cleaning the charging components, ensure they are unplugged and turned off. Here are the things you will need for the cleaning process:
Things You’ll Need
Clean Cloths or paper towels
Cleaning solution
Step by Step Cleaning Guide
Unplug the charging station from the electrical outlet
Using a clean cloth or paper towel, wipe the surface of the charging station carefully.
To clean the power cord, wipe it using a damp cloth and dry it thoroughly.
For cleaning the battery, use a dry and clean cloth to remove any dirt or dust on the surface.
If the cleaning solution is required, mix a small amount of it with water, dampen a clean cloth, and carefully wipe the charging components.
Allow the charging components to dry completely before reassembling them.
Other Tips for Smart Vacuum Cleaner Maintenance
Regular Filter Cleaning, Cleaning the Brushes, and Emptying the Dustbin are also crucial for the optimal performance of smart vacuum cleaners.
Conclusion
Cleaning the charging components should be a routine part of your smart vacuum cleaner maintenance. It is imperative to ensure that the battery life and the overall performance of the vacuum cleaner are at their best. Cleaning the charging components is easy, and it takes only a few minutes to complete. With proper maintenance, you can prolong the lifespan of your smart vacuum cleaner and enjoy efficient cleaning for years to come.
Why Cleaning is Important?
Regular cleaning of the charging components is crucial to ensure the longevity and optimal performance of your smart vacuum cleaner. These components include the charging dock, charging pins, and charging contacts on both the vacuum cleaner and the dock. Not only does a clean charging component help in efficient charging, but it also reduces the risk of damages and malfunctions. Here are some reasons why cleaning is important for the charging components:
Dirt and debris can accumulate on the charging components, hindering the charging process and causing the vacuum cleaner to charge slowly or not charge at all.
Overtime, dust and grime can cause corrosion or rust on the charging contacts, leading to permanent damage, and the need for expensive repairs or replacements.
Dirty charging pins can cause a poor connection between the vacuum cleaner and the dock, which can lead to power loss, reduced battery life or even total failure.
Unclean charging dock and pins can also cause electrical issues, like short circuits or improper charging that may permanently damage the vacuum cleaner.
To prevent all these problems, it’s essential to maintain the cleanliness of the charging components of your smart vacuum cleaner.
How to Clean the Charging Components?
Keeping your smart vacuum cleaner charged up and ready to tackle any mess is essential for maintaining a clean and tidy home. However, over time, the charging components can become clogged with dust, dirt, and debris, which can impact the efficiency of your robot cleaner. That’s why it’s important to regularly clean the charging components to ensure optimal performance. In this section, we’ll dive into the step-by-step guide for cleaning the charging components of your smart vacuum cleaner, so you can keep it running like new for years to come.
Things You’ll Need
Before you start cleaning the charging components of your smart vacuum cleaner, you need to gather a few items to make the process smooth and easy. Here’s a quick rundown of the things you’ll need:
Items
Quantity
Microfiber cloth
1
Cotton swabs
5-6
Dish soap
1-2 drops
Bowl of warm water
1
Gloves (optional)
1 pair
A microfiber cloth is needed to wipe the charging components clean. It is important to use a microfiber cloth because it is soft and won’t scratch the surface of the charging components.
Cotton swabs come in handy to clean tight spaces or corners that the microfiber cloth cannot reach. They are also good for cleaning the contact areas of the charging components.
Dish soap is needed to dissolve any stubborn dirt or grime that may have accumulated on the charging components. Remember to use only a small amount of dish soap to avoid damaging the components.
A bowl of warm water is needed to mix with the dish soap. The warm water helps to break down the grime on the charging components, making it easier to clean.
Gloves are optional but can be useful if you want to protect your hands from the dish soap or other cleaning agents that you might use during the cleaning process.
Having all of these items ready before you start cleaning will help make the process easier and ensure your smart vacuum cleaner is charged efficiently.
Step by Step Cleaning Guide
Cleaning the charging components of your smart vacuum cleaner is an essential maintenance task that every smart vacuum cleaner owner should perform regularly. A well-maintained charging component ensures efficient charging of the vacuum cleaner, which leads to optimal performance. Here is a step-by-step guide to help you clean the charging components of your smart vacuum cleaner.
Gather the Required Items: Before you start cleaning your smart vacuum cleaner’s charging components, make sure you have all the necessary items you’ll need. You’ll need a soft-bristled brush, a microfiber cloth or a soft cloth, a small vacuum, and a mixture of water and mild soap or detergent.
Unplug the Charging Base: To clean the charging components of your smart vacuum cleaner, the first step is to unplug the charging base from the power supply. This step ensures that you’re working safely while cleaning the charging components.
Clean the Charging Pins: The next step is to clean the charging pins. You can use a soft-bristled brush to remove any dirt or dust particles around the charging pins. Make sure you’re gentle to avoid damaging the charging pins.
Clean the Charging Contacts: After cleaning the charging pins, the next step is to clean the charging contacts. Use a microfiber cloth or a soft cloth to wipe the charging contacts gently. You may need to use a little water and mild soap or detergent to remove any stains or dust on the charging contacts. Ensure that you don’t saturate the contacts with water to prevent any damage.
Use a Vacuum Cleaner: After cleaning the charging pins and contacts, you can use a small vacuum to suck any remaining dirt or dust on the charging components. This step ensures that there’s no debris left that may affect the charging efficiency of your smart vacuum cleaner.
Reassemble the Charging Base: Once you’re confident that you’ve cleaned the charging components thoroughly, you can reassemble the charging base. Ensure that all the parts fit correctly and plug the charging base back to the power supply. Your smart vacuum cleaner is now ready for efficient charging.
By following these six simple steps, you can maintain your smart vacuum cleaner’s charging components and ensure it operates efficiently. Remember to clean the charging components at least once a month or more if you notice any dirt or dust accumulation.
Other Tips for Smart Vacuum Cleaner Maintenance
Now that you know the importance of keeping the charging components of your smart vacuum cleaner clean, it’s time to delve into other essential tips to ensure a long lifespan and high performance of your device. From regular filter cleaning to emptying the dustbin and cleaning the brushes, maintaining your smart vacuum cleaner is essential to keep your home clean and healthy. Let’s explore some additional tips that will help you get the most out of your smart vacuum cleaner.
Regular Filter Cleaning
One of the important maintenance tasks for smart vacuum cleaners is regular filter cleaning. Filters play a crucial role in keeping the air clean while the vacuum is in use. Over time, dust and dirt accumulate on the filter, which can hinder its performance and decrease its lifespan. Not to mention, a dirty filter can put additional strain on the vacuum’s motor, which can eventually lead to breakdowns.
To keep your smart vacuum cleaner in top condition, it’s recommended to clean the filter at least once a month. Here are the steps you can take to clean the filter:
Things You’ll Need:
A clean cloth or brush
Water
Step by Step Cleaning Guide:
First, check your vacuum cleaner’s user manual to see where the filter is located. Some models have a washable filter, which can be removed and rinsed under running water. Others may require replacement filters, which can be purchased from the manufacturer.
Once you have located the filter, remove it from the vacuum cleaner’s body. If it’s washable, gently rinse it under running water to remove any loose dust and dirt. Be sure to avoid using any cleaning products or soap, as these can damage the filter.
After rinsing, use a clean cloth or brush to gently remove any stubborn dirt or debris. Avoid using too much force, as this can also damage the filter.
Once you have finished cleaning the filter, set it aside to air dry completely. It’s important to ensure that the filter is completely dry before putting it back in the vacuum cleaner, as dampness can cause mold to grow.
Finally, once the filter is dry, replace it back in the vacuum cleaner. Make sure that it is securely in place to avoid any damage to the vacuum cleaner.
By following these steps, you can easily maintain a clean and well-functioning filter, which will ensure that your smart vacuum cleaner continues to deliver optimal performance for years to come. Don’t forget to add this simple yet important task to your vacuum cleaner maintenance routine!
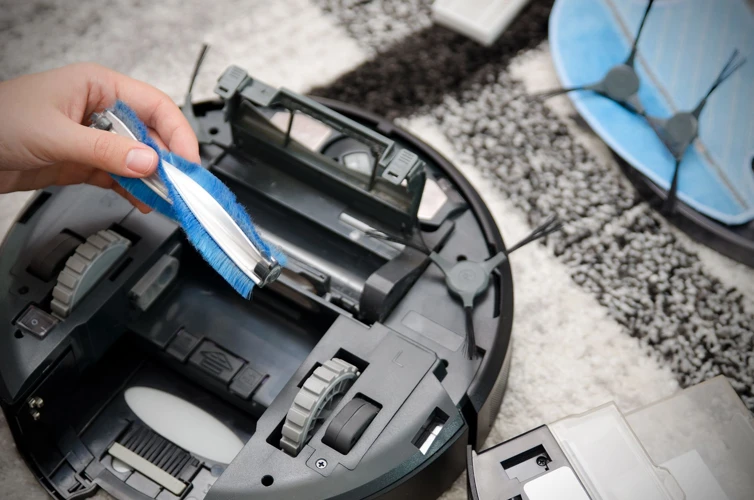
Cleaning the Brushes
Cleaning the brushes is another crucial aspect of maintaining your smart vacuum cleaner. The brushes are responsible for picking up dirt and debris from your floors, and if they are clogged or damaged, your vacuum will not perform as well as it should.
Here are some steps to follow for cleaning the brushes:
First, turn off your smart vacuum cleaner and unplug it from the power source.
Flip it over and locate the brush roll.
Remove any hair, dust, or debris that has accumulated on the brush roll using a pair of scissors, a cleaning tool, or your hands.
If there are any tangled threads that are hard to remove, use a seam ripper or a needle to cut them loose.
Using a damp cloth, wipe the brush roll clean. Be sure to remove any remaining debris.
Next, locate the brush guard and remove it from the base of the vacuum cleaner.
Clean the brush guard using a damp cloth or by rinsing it under running water.
Reattach the brush guard to the base of the vacuum cleaner.
Turn the vacuum cleaner back on to make sure the brush roll is spinning properly.
Why is it important to clean the brushes regularly?
If the brushes are clogged with hair or debris, they won’t be able to pick up dirt effectively. This can lead to poor suction and lower cleaning performance. Additionally, if the brushes are clogged for a long period of time, they can become damaged and need to be replaced. By cleaning the brushes regularly, you can prevent damage and keep your smart vacuum cleaner working at optimal performance.
Regular maintenance of your smart vacuum cleaner, including cleaning the brushes, is crucial for the performance and longevity of the product. Be sure to follow the steps outlined above to clean the brushes effectively and prevent any damage to your vacuum cleaner.
Emptying the Dustbin
Keeping the dustbin of your smart vacuum cleaner clean is an essential part of maintaining its overall performance. When the dustbin is full, the suction power of the vacuum cleaner can decrease, and you won’t be able to pick up as much debris on your floors. It’s important to regularly empty the dustbin and give it a thorough clean.
Why is it important to empty the dustbin?
When the dustbin is full, it can lead to several performance issues with your smart vacuum cleaner. Firstly, the suction power can decrease, which means that it won’t be able to pick up as much dirt and debris as it normally would. This can lead to the floors not being cleaned as thoroughly as they should be, which can be frustrating for anyone trying to keep their home clean.
Secondly, a full dustbin can cause blockages in the vacuum cleaner’s filtration system, which can cause it to overheat. Overheating could lead to malfunctioning of the vacuum cleaner and even permanent damage. Emptying the dustbin is crucial for the longevity and performance of your smart vacuum cleaner.
How often should you empty the dustbin?
The frequency of dustbin cleaning will depend on how often you use your smart vacuum cleaner and the size of your home. As a general rule, it’s recommended to empty the dustbin after every use, especially if there’s a lot of debris on the floors. If you have pets or people who frequently go in and out of the house, you may need to empty the dustbin more frequently.
How to empty the dustbin?
Emptying the dustbin is a simple process, which requires just a few easy steps. Here’s a step-by-step guide:
Steps
Instructions
Step 1
Look for the dustbin located on your vacuum cleaner.
Step 2
Remove the dustbin from your vacuum cleaner.
Step 3
Hold the dustbin over a trash can or bin.
Step 4
Press the release button or lever to open the dustbin
Step 5
Empty the contents into the trash can or bin.
Step 6
Close the dustbin and replace it in your vacuum cleaner.
Step 7
Wash the dustbin with water and soap, if necessary.
Tips for emptying the dustbin:
– Always empty the dustbin after each use
– Use a trash can or bin with a bag to minimize the amount of dust that escapes back into the air
– Wear gloves or a face mask when emptying the dustbin to avoid inhaling dust
– Wash the dustbin with soap and water at least once a month to keep it clean
By following these tips, you’ll be able to keep your smart vacuum cleaner in top condition and ensure it’s performing at its best for longer.
Conclusion
In conclusion, we can see that cleaning the charging components for smart vacuum cleaners is not only important but also a necessary step to maintain the longevity of your device. By following the step-by-step cleaning guide we have provided, you can ensure that your charging components are well-maintained and free of debris.
Regular maintenance of your smart vacuum cleaner can not only improve its performance but also extend its lifespan, saving you money on expensive repairs or replacements. Remember to not only clean the charging components but also regularly clean the filters, brushes, and dustbin to keep your device running smoothly.
Furthermore, by keeping your smart vacuum cleaner in good condition, you can ensure that it continues to perform optimally, providing you and your family with a cleaner and healthier home environment. So, take the time to clean your charging components and follow the maintenance tips provided to make the most out of your smart vacuum cleaner.
In summary, the importance of cleaning charging components is not something to be overlooked. By taking care of your device, you can prolong its lifespan and make the most out of its technology. A little bit of maintenance can go a long way in keeping your home clean, healthy, and free of dust and debris. So start cleaning those charging components and see the difference it can make in the performance of your smart vacuum cleaner.
Frequently Asked Questions
What is the lifespan of a smart vacuum cleaner?
The lifespan of a smart vacuum cleaner can vary depending on the brand and type, but typically they can last anywhere from three to five years with proper maintenance.
Can I use water to clean the charging components of my smart vacuum cleaner?
No, water should not be used to clean the charging components of a smart vacuum cleaner as it can damage the electrical parts. Instead, use a dry cloth or a soft-bristled brush.
How often should I clean the charging components of my smart vacuum cleaner?
The charging components of a smart vacuum cleaner should be cleaned at least once a month to maintain optimal performance and prevent damage from dust buildup.
Do I need to replace the battery for my smart vacuum cleaner?
It depends on the type and brand of smart vacuum cleaner you have. Some models have rechargeable batteries that can last for years while others may need to be replaced every few years.
Why does my smart vacuum cleaner keep losing charge quickly?
This may be due to a fault with the charging components or the battery of the vacuum cleaner. It is best to consult the manufacturer or a professional technician to diagnose and fix the issue.
What can I do if my smart vacuum cleaner stops charging?
You can try cleaning the charging components and verifying that they are properly connected. If the issue persists, there may be a fault with the battery or the charger and it is best to seek professional help.
Is it safe to leave my smart vacuum cleaner charging overnight?
Most smart vacuum cleaners are designed to automatically stop charging once they reach full capacity, making it safe to leave them charging overnight.
Can I use any type of filter for my smart vacuum cleaner?
No, it is important to use filters that are specifically designed for your smart vacuum cleaner. Using incompatible filters can damage the vacuum cleaner and reduce its effectiveness.
Why is it important to empty the dustbin of my smart vacuum cleaner regularly?
Emptying the dustbin regularly prevents dust and debris from building up and affecting the suction performance of the smart vacuum cleaner. It also helps prevent mold and bacteria growth.
What should I do if my smart vacuum cleaner brushes stop rotating?
You can start by cleaning the brushes and checking for any blockages that may be preventing them from rotating. If the issue persists, there may be a fault with the motor or the wiring, and it is best to seek professional help.