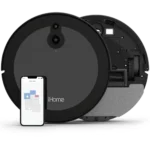
Have you ever wished you could control your vacuum cleaner with your smartphone? Well, the good news is that you can! With the right app and a compatible smart vacuum cleaner, you can now clean your floors with just a few taps on your phone. But how exactly do you connect your smart vacuum cleaner to a smartphone app? In this step-by-step guide, we’ll take you through everything you need to know to make it happen. So, let’s get started!
Step 1: Check your Vacuum Cleaner Compatibility
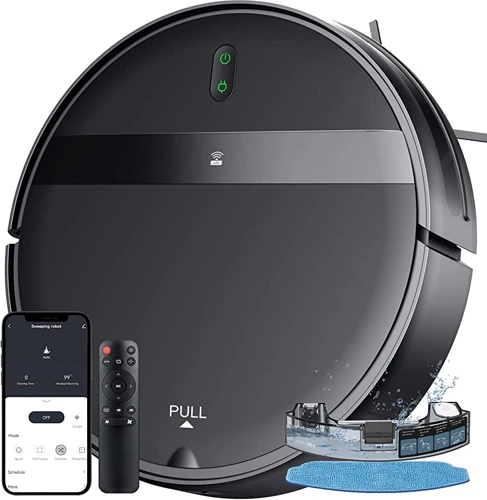
Are you considering connecting your smart vacuum cleaner to a smartphone app? Before getting started, it is important to check your vacuum cleaner’s compatibility. This step is crucial to ensure that your vacuum cleaner can be connected to a smartphone app and all features will work properly. In this section, we will walk you through the process of checking your vacuum cleaner’s compatibility, including model and app compatibility, as well as the necessary requirements. If you want to learn more about the advantages of using a vacuum app or the future of smartphone app-controlled vacuum cleaners, check out our related articles.
1.1 Check Model Compatibility
Before downloading any apps, it’s important to check if your vacuum cleaner is compatible with a smartphone app. Not all vacuum cleaners can be connected to a smartphone app, so it’s best to check first to avoid any frustration.
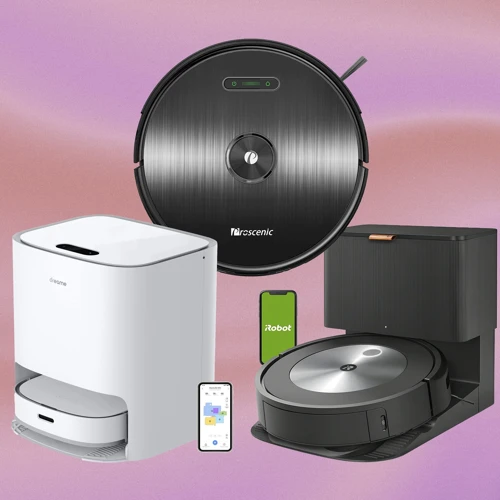
To check if your vacuum cleaner model is compatible with a smartphone app, check the manufacturer’s manual or website. You can also refer to the table below for some popular models and their compatibility with their respective apps.
| Brand | Model | Compatible App |
|---|---|---|
| Shark | ION R85 | SharkClean |
| iRobot | Roomba 980 | iRobot HOME |
| Ecovacs | Deebot N79S | EcovacsHome |
| Eufy | RoboVac 11S MAX | EufyHome |
It’s important to note that even if your vacuum cleaner is compatible with an app, not all apps are created equal. Some apps may have more features and customization options than others. You can also check out our article on smart vacuum app features to get an idea of what to look for in a good app.
In addition to checking model compatibility, you should also check the compatibility of the app with your smartphone device. Most apps require a certain operating system version or device type, so make sure to check the app store or manufacturer’s website for compatibility requirements as well. By taking the time to ensure compatibility, you can have a smoother and more reliable smart cleaning experience.
1.2 Check App Compatibility
Compatibility is key when it comes to connecting your smart vacuum cleaner to a smartphone app. Before you download any app, it is necessary to check if it is compatible with your vacuum cleaner model. The app you download must be compatible with your device’s operating system as well.
To check app compatibility, visit the manufacturer’s website or the app store to ensure the app supports the make and model of your smart vacuum cleaner. If you are unsure which app to download, there are several resources available online that can assist you in finding the right one, such as vacuum app advantages articles or smart vacuum app tips and tricks.
Be mindful of which virtual assistant you have because there’s a chance that the app that comes with your vacuum may not have successful integration with Alexa, Google, or other popular virtual assistants. If you have a virtual assistant, it’s important to check if the app works with it to have more flexibility when managing your cleaning schedule. You can check how to integrate your smart vacuum with Alexa or Google.
Make sure to check the app compatibility with your vacuum cleaner model, operating system, and virtual assistants before downloading any app. Exploring the capabilities of your smart vacuum cleaner with the right app and its features like revolutionizing your cleaning routine can increase your home’s cleanliness and save valuable time.
1.3 Requirements
Before connecting your smart vacuum cleaner to a smartphone app, make sure you have met all the necessary requirements. Here are the things you should prepare before proceeding:
- Smart Vacuum Cleaner: You need to own a smart vacuum cleaner to be able to connect it to a smartphone app. It should have Wi-Fi capabilities as well as compatibility with a corresponding app.
- Smartphone or Tablet: You need a smartphone or tablet that can download and install the app that corresponds to your smart vacuum cleaner.
- Wi-Fi Network: A stable Wi-Fi network is necessary for the vacuum cleaner to connect to the app on your device.
- App: Make sure you have downloaded the right app for your smart vacuum cleaner from either App Store or Google Play Store. Check the app compatibility with your device as well.
It is important that you identify the compatibility of your vacuum cleaner with its corresponding app and your smartphone or tablet. Be cautious about downloading the right app to ensure the correct pairing of your devices.
If you’re not yet familiar with the capabilities of a smart vacuum cleaner, check out our article on exploring smart vacuum capabilities. Alternatively, if you’re looking to integrate other smart home devices with your smartphone app, you can also read our article on smart home app vacuum integration.
Step 2: Download Your Vacuum Cleaner App
So, you’ve checked your vacuum cleaner’s compatibility and requirements, and now you’re ready for the next step – downloading the app that will connect your smart vacuum cleaner to your smartphone! This is an essential step in the process, as it will allow you to control your vacuum cleaner from your phone and customize your cleaning preferences. In this section of the guide, we’ll walk you through the steps of downloading and accessing the app, so you can get started on your way to a cleaner home with just a few taps on your phone. Let’s dive in!
2.1 Download App from App Store or Google Play Store
Step 2.1: Downloading the App from the App Store or Google Play Store
To connect your smart vacuum cleaner to your smartphone, you will need to download the app from either the App Store or the Google Play Store depending on your device. Here are the steps you need to follow:
| Step 1: | Open the App Store or Google Play Store on your mobile device |
| Step 2: | Type the name of the app in the search bar: “smart vacuum cleaner app”. |
| Step 3: | Look for the app logo and tap on it to open the app page. |
| Step 4: | Click on the “Download” or “Get” button present on the app page. |
| Step 5: | Wait for the app to download and install on your device. This may take a few seconds depending on your internet speed. |
| Step 6: | Once the app is installed, click on “Open” to launch the app. |
Make sure to check if the app you are downloading is compatible with your vacuum cleaner model, as different models may require different apps. Once your app is downloaded and launched, you can proceed to the next step of connecting your vacuum cleaner to your smartphone app.
2.2 Sign-up and Log-in to Access the App
Before connecting your smart vacuum cleaner to the app, it’s important to download and install the relevant app for your device. Here are the steps to sign up and log in to the app:
- Step 1: Download the app from either the App Store or Google Play Store on your smartphone. Make sure you download the right app for your vacuum cleaner model.
- Step 2: After the app has finished downloading, open it on your smartphone. You’ll be prompted to sign up for an account or log in if you already have an account.
- Step 3: Click on “Sign Up” if you’re creating a new account. You’ll be asked to input your email address and create a password. Make sure you choose a secure password that’s easy to remember but hard for others to guess. Alternatively, you can sign up with your Facebook or Google account if the app supports it.
- Step 4: After creating an account, the app will ask you to log in. If you’re already registered, click on “Log In” and input your email address and password. If you’ve signed up with Facebook or Google, click on those respective buttons to log in to your account. Once you’re logged in, you should be taken to the app dashboard.
If you have any trouble with signing up or logging in, make sure that you have a stable internet connection and that you’ve inputted the correct email address and password. Additionally, some apps may require you to verify your email address or phone number before you can use them, so keep an eye out for any additional steps that the app might ask you to complete. Once you’ve signed up and logged in, you’re ready to move on to the next step in connecting your smart vacuum cleaner to the app.
Step 3: Connecting Vacuum Cleaner to Wi-Fi
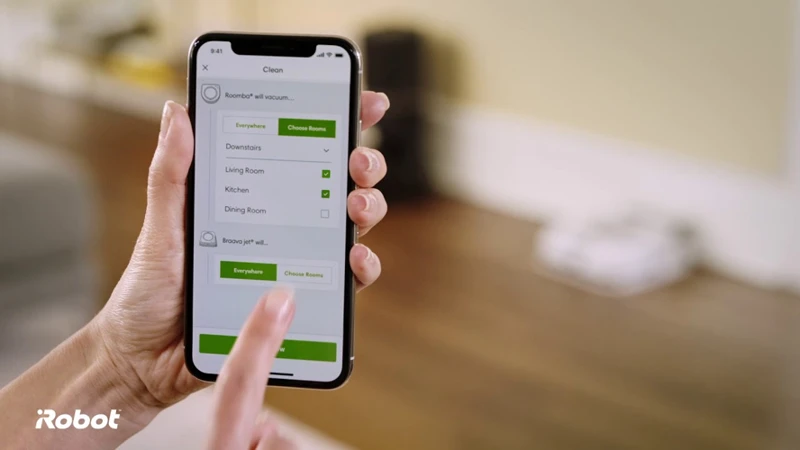
Now that you have downloaded and set up your vacuum cleaner app, the next step is to establish a connection between your vacuum cleaner and your home Wi-Fi network. This may seem like a daunting task at first, but don’t worry! With a few simple steps, you’ll be able to connect with ease and start using all the app’s features. Follow the instructions below to connect your smart vacuum cleaner to Wi-Fi and take advantage of all the benefits it has to offer.
3.1 Connect Vacuum Cleaner to Home Wi-Fi Network
To connect your smart vacuum cleaner to your smartphone app, the first step is to connect your vacuum cleaner to your home Wi-Fi network. Without this, you won’t be able to control your vacuum cleaner via the app. Follow the steps below to connect your vacuum cleaner to your home Wi-Fi network:
Step 1: Turn on your vacuum cleaner and ensure that it is in Wi-Fi pairing mode. Refer to the user manual if you’re not sure how to do this.
Step 2: On your smartphone, go to your Wi-Fi settings and select your home Wi-Fi network. If you’re unsure which network to connect to, check with your internet service provider for assistance.
Step 3: Enter your Wi-Fi password when prompted. Make sure that you enter the correct password to ensure that your vacuum cleaner can connect to your Wi-Fi network.
Step 4: Wait for a few seconds while your vacuum cleaner connects to your home Wi-Fi network. This may take a few moments, so be patient and don’t try to connect to the app just yet.
Step 5: Once your vacuum cleaner is connected to your Wi-Fi network, you’ll see an indicator light on the device. This usually means that the vacuum cleaner is ready to be paired with the app.
Step 6: Now that your vacuum cleaner is connected to your home Wi-Fi network, you can move on to the next step, which is adding it to the app.
Note: If you’re having trouble connecting your vacuum cleaner to your Wi-Fi network, make sure that your Wi-Fi password is correct and that your network is functioning properly. You may also need to reset your vacuum cleaner’s Wi-Fi settings and repeat the set-up process if you continue to have difficulties.
3.2 Add Smart Vacuum Cleaner to the App
Once you have downloaded the app for your smart vacuum cleaner and signed in to access its features, the next step is to add your vacuum cleaner to the app. To do this, follow these simple steps:
- Make sure your vacuum cleaner is turned on: Your vacuum cleaner must be switched on and connected to a power source for it to be discoverable by the app.
- Click the “Add Device” button: In the app dashboard, navigate to the “Add Device” section and click on the button to begin the process of adding your vacuum cleaner.
- Put your vacuum cleaner in pairing mode: To put your vacuum cleaner in pairing mode, press and hold the button on the vacuum cleaner until you hear a beep. At this point, the vacuum cleaner’s Wi-Fi signal should be visible on your smartphone’s Wi-Fi settings.
- Select your vacuum cleaner’s Wi-Fi: On your smartphone, go to your Wi-Fi settings and select your vacuum cleaner’s Wi-Fi signal. This will enable your smartphone to connect to your vacuum cleaner directly.
- Return to the app: Once you have connected to your vacuum cleaner’s Wi-Fi, return to the app to continue with the pairing process.
- Enter your Wi-Fi network’s details: In the app, you will be prompted to enter your home Wi-Fi network’s name and password. This is necessary for your vacuum cleaner to connect to your home Wi-Fi network and be controlled remotely.
- Wait for your vacuum cleaner to connect: After entering your Wi-Fi network details, the app will begin the process of connecting your vacuum cleaner to your home Wi-Fi network. This process may take a few minutes, so be patient and wait until the app confirms that your vacuum cleaner is connected and ready to use.
By following these simple steps, you can easily add your smart vacuum cleaner to the app and begin enjoying the convenience of controlling your cleaning tasks from your smartphone. Remember to keep your vacuum cleaner’s firmware updated and to check for compatibility issues if you experience any problems during set-up.
3.3 Select Your Vacuum Cleaner’s Wi-Fi
After connecting your vacuum cleaner to your home Wi-Fi network, the next step is to select your vacuum cleaner’s Wi-Fi network on your smartphone app. Follow the steps given below to complete this process:
Step 1: Open the app on your smartphone
Once you’ve downloaded and logged in to your vacuum cleaner’s app, open the app on your smartphone.
Step 2: Go to the “Settings” tab
On the app’s dashboard, navigate to the “Settings” tab. This tab is usually located on the bottom of the dashboard.
Step 3: Click on the “Device” option
Under the “Settings” tab, locate and click on the “Device” option. This will take you to a new page where you can modify your vacuum cleaner’s settings.
Step 4: Select your vacuum cleaner’s Wi-Fi
On the “Device” page, you will see an option to select your vacuum cleaner’s Wi-Fi. This option may be labeled differently depending on the brand of your vacuum cleaner, but typically it would say something like “Wi-Fi settings.”
Step 5: Connect to your vacuum cleaner’s Wi-Fi
Once you’ve selected your vacuum cleaner’s Wi-Fi, your smartphone should automatically connect to it. If it doesn’t, you may need to manually connect to the Wi-Fi network via your phone’s Wi-Fi settings.
Step 6: Return to the app
After connecting to your vacuum cleaner’s Wi-Fi, return to the app to complete the setup process.
It’s important to note that if you have multiple vacuum cleaners, you will need to repeat these steps for each device. Additionally, if you encounter any issues during the setup process, you can refer to the troubleshooting section of this article for assistance.
| Steps | Details |
|——-|———|
| Step 1 | Open the app on your smartphone |
| Step 2 | Go to the “Settings” tab |
| Step 3 | Click on the “Device” option |
| Step 4 | Select your vacuum cleaner’s Wi-Fi |
| Step 5 | Connect to your vacuum cleaner’s Wi-Fi |
| Step 6 | Return to the app |
3.4 Enter Wi-fi Password
Once you’ve selected your vacuum cleaner’s Wi-Fi network, you’ll need to enter your Wi-Fi password to establish a connection. Follow these steps:
- When prompted to enter the password, make sure you have the correct password on hand. Double-check for typos or incorrect letters or numbers as this can prevent you from connecting.
- Tap on the password field to bring up the keyboard and carefully type in the password.
- Be cautious: the password is case-sensitive, so make sure you enter it correctly.
- If you’re having trouble remembering the correct password, try speaking the password aloud to yourself, or locating it in your Wi-Fi router’s settings.
- After entering the password, double-check that you have entered it correctly and then tap the “Connect” button.
- Be patient: it may take a few moments for the Wi-Fi connection to be established.
Remember, the connection process may vary depending on the specific model of your vacuum cleaner and smartphone app. But by carefully following each step in the set-up process, you can easily connect your smart vacuum cleaner to a smartphone app and take the first step toward a more convenient and efficient cleaning experience.
3.5 Wait for Connection to Be Established
Once you’ve entered the correct Wi-Fi password for your smart vacuum cleaner, wait for the connection to be established. This may take a few minutes, so be patient. During this time, avoid closing the app or turning off your smartphone’s Wi-Fi or mobile data.
While waiting for the connection to complete, it’s a good idea to double-check your Wi-Fi network’s signal strength. A weak signal may lead to issues like disconnection or decreased performance. Make sure your smart vacuum cleaner is located in an area with a strong Wi-Fi signal.
If the connection fails, don’t worry. There are several steps you can take before giving up:
| Possible Solutions | Description |
|---|---|
| Restart Your Smart Vacuum Cleaner | Press the power button on your vacuum cleaner to turn it off, wait a few seconds, then turn it back on to try to reconnect. |
| Restart Your Smartphone | Try turning off your smartphone, waiting a few seconds, and turning it back on. |
| Reset Your Vacuum Cleaner’s Wi-Fi Settings | Refer to the user manual to reset the Wi-Fi settings on your vacuum cleaner, then go back to Step 3 and try connecting to Wi-Fi again. |
| Double-Check Wi-Fi Settings | Make sure you entered the correct Wi-Fi password and selected the correct network during the set-up process. |
| Check App Compatibility | Make sure that the app and smartphone operating system are compatible with your vacuum cleaner. If not, try updating the app or smartphone operating system. |
By following these steps, you can troubleshoot any issues that may arise while connecting your smart vacuum cleaner to the app. Once you have successfully established the connection, you can move on to customizing your vacuuming settings, such as setting virtual boundaries, scheduling cleaning times, and more, to make your cleaning experience more efficient and convenient.
Step 4: Customizing Vacuuming Settings
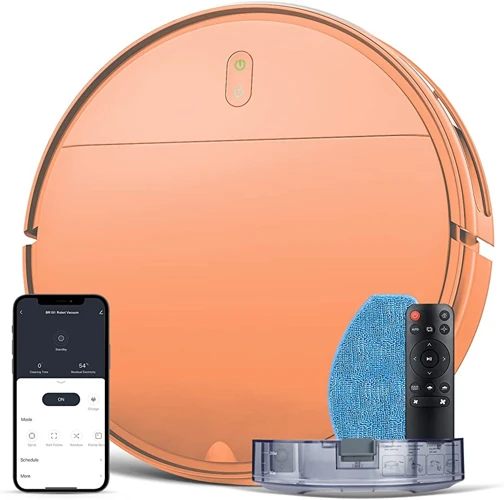
Now that your smart vacuum cleaner is connected to your smartphone app, it’s time to customize your cleaning preferences. With the help of advanced technology, you can now set up virtual boundaries, schedule cleaning times, and even remotely control your vacuum cleaner’s movements. This step is critical to ensure optimal cleaning performance while saving time and energy. In the following sections, we’ll go over the various ways you can customize your vacuuming settings to fit your unique needs and preferences. Let’s dive in!
4.1 App Dashboard Navigation
Navigating the app dashboard is crucial to effectively using your smart vacuum cleaner. The dashboard is the central hub where you can access all the features and settings for your device.
Table 1: App Dashboard Navigation
| Icon | Description |
|---|---|
 |
Dashboard: displays your device’s current status, cleaning history, and virtual boundaries |
 |
Cleaning: allows you to start or stop a cleaning session, adjust cleaning power, and change cleaning mode |
 |
Schedule: lets you set up a cleaning schedule for your device |
 |
Virtual Boundaries: enables you to set up virtual boundaries to restrict your device’s cleaning area |
 |
Settings: allows you to customize your device’s settings such as language, volume, and network information |
The dashboard displays your device’s current status and cleaning history, which can be helpful in determining when your device needs maintenance or if issues arise during cleaning sessions. The virtual boundaries feature is also accessible from the dashboard, giving you the ability to create and adjust boundaries that restrict your device from cleaning certain areas.
Aside from the dashboard, other key features of the app include the cleaning, schedule, and settings tabs. The cleaning tab provides you with full control over your device’s cleaning sessions, allowing you to adjust cleaning power and mode as necessary. The schedule tab is where you can set up a cleaning schedule for your device, making it easy to automate your cleaning routine.
Finally, the settings tab provides you with the ability to customize various aspects of your device, such as language, volume, and network settings. By navigating through these different tabs, you can fully optimize your device and ensure that it performs efficiently and effectively for your cleaning needs.
4.2 Setting up Virtual Boundaries
When it comes to setting up virtual boundaries in your smart vacuum cleaner’s app, the process can be a bit confusing at first. However, with a little patience and persistence, you can easily customize your vacuuming experience to fit your specific needs.
What are Virtual Boundaries?
Virtual boundaries are essentially digital maps or barriers that you can set up within your vacuum cleaner’s app. These limits will tell your vacuum cleaner which areas to avoid when cleaning. For example, if you have a pet food bowl or an area with delicate décor that you don’t want your vacuum cleaner to disturb, you can set up a virtual boundary around it, and the vacuum cleaner will avoid that area during cleaning.
How to Set Up Virtual Boundaries?
To set up virtual boundaries in your smart vacuum cleaner’s app, follow these steps:
| Step | Description |
|---|---|
| 1 | Open your vacuum cleaner’s app |
| 2 | Navigate to the “Virtual Boundaries” section |
| 3 | Select the area you want to block off |
| 4 | Drag the digital barrier to where you want it to be placed |
| 5 | Repeat the process for all areas you want to be blocked off |
Benefits of Setting Up Virtual Boundaries
By setting up virtual boundaries, you can have more control over where your smart vacuum cleaner goes and when. This allows you to prioritize certain areas of your home or office and ensure that they are always clean without having to worry about your vacuum cleaner disturbing important décor or making a mess around pet food bowls. It also makes the vacuuming process more efficient, as your vacuum cleaner will not waste time cleaning areas that don’t need immediate attention.
Setting up virtual boundaries for your smart vacuum cleaner is a great way to customize your vacuuming experience and ensure that it is tailored to meet your specific needs. Although it may take some time to get used to, the benefits of setting up virtual boundaries are well worth the effort.
4.3 Scheduling Cleaning Time
If you lead a busy life and often struggle to keep up with household chores, having a smart vacuum cleaner that can be scheduled to clean at specific times can be a lifesaver. Here’s how to set up a cleaning schedule for your vacuum cleaner through the app:
Step 1: Open the app and navigate to the scheduling section.
Step 2: Select the day(s) you want the vacuum cleaner to clean.
Step 3: Set the start time and end time for the cleaning cycle.
Step 4: Specify the frequency of cleaning; this could be daily, weekly, or on a particular day of the week.
Step 5: Hit save, and your vacuum cleaner will automatically start cleaning at the specified times.
If needed, you can also edit or delete the established cleaning schedule through the app.
It’s important to remember that scheduling a cleaning cycle for your vacuum cleaner does not mean that you should let it run unsupervised. Always ensure that the area to be cleaned is safe and clear of any hazards or obstacles.
Table: Benefits of Scheduling Cleaning Time
| BENEFITS | EXPLANATION |
|---|---|
| Time-saving | You can schedule cleaning when you’re away from home, saving time and effort on cleaning. |
| Consistency | The cleaning schedule ensures that your floors are cleaned regularly, maintaining a clean and healthy living environment. |
| Customisable | With the app, you can set customised schedules that fit your lifestyle and preferences. |
| More Effective | Regular cleaning with a smart vacuum cleaner keeps your floors free from dirt and debris, making it easier to maintain cleanliness in your home. |
By scheduling cleaning time for your smart vacuum cleaner, you save time, maintain cleanliness, and ensure that your home remains healthy and hygienic without any additional effort.
4.4 Remote Control Settings
In addition to scheduling and customizing the cleaning settings, you can also remotely control your smart vacuum cleaner through the app. This feature allows you to have even more control over the cleaning process and ensure that all areas of your home are cleaned thoroughly. The remote control settings can be accessed through the app dashboard and are typically represented by a remote control icon.
Once you click on the remote control icon, you’ll be brought to a new screen where you can operate your smart vacuum cleaner through your smartphone. This feature is especially useful if you need to quickly clean up a spill or a mess without having to manually operate the vacuum cleaner.
Below is a table that summarizes some of the key remote control settings available on most smart vacuum cleaner apps:
| Function | Description |
|---|---|
| Start/Stop | This button allows you to start and stop the vacuum cleaning process remotely. |
| Pause/Resume | If you need to temporarily halt the cleaning process, you can pause and resume your smart vacuum cleaner through this button. |
| Spot Cleaning | This function allows you to specify a particular area in your home that needs extra cleaning attention. Simply click on the spot cleaning button, and the vacuum cleaner will clean the selected area with extra suction power. |
| Manual Navigation | If you need to manually navigate your vacuum cleaner to a specific area of your home, this function allows you to control the vacuum cleaner’s movement through your smartphone. |
| Battery Life | The app also displays the remaining battery life of the vacuum cleaner, so you can keep track of how much time you have left before needing to recharge it. |
By utilizing the remote control settings, you can enjoy even more convenience and flexibility when it comes to keeping your home clean. Whether you’re working from home and need to clean up a mess quickly or just want to make sure that every nook and cranny is free of dust and debris, the remote control settings available through the app will make the cleaning process a breeze.
Troubleshooting If You Have Problems Connecting
It can be frustrating when you’re excited to connect your smart vacuum cleaner to the app, but experience issues during the set-up process. Don’t worry, we’ve got you covered! In case you’re experiencing difficulties connecting your device, we have compiled some troubleshooting tips that will help you fix the problem and have your smart vacuum cleaner running in no time. Keep reading to find out how to overcome common issues and get the most out of your device.
5.1 Check Your Wi-Fi Connection
When you encounter issues connecting your smart vacuum cleaner to the app, one of the first things to check is your Wi-Fi connection. A weak or unstable Wi-Fi signal can interfere with the connection process, leading to incomplete or unsuccessful set-up. Here are some steps to troubleshoot your Wi-Fi connection:
- 1. Check your Wi-Fi signal: Make sure your Wi-Fi signal is strong enough and your smartphone can receive it. Move your phone closer to your Wi-Fi router to improve the signal and try to connect again.
- 2. Restart your Wi-Fi router: If your Wi-Fi signal is weak, try restarting your router. Turn it off, wait for a few seconds, and then turn it back on. Wait for the router to fully restart before reconnecting your phone to Wi-Fi and attempting to set up your smart vacuum cleaner again.
- 3. Check for connection interference: Other devices using your Wi-Fi network may interfere with your connection. Turn off other devices connected to your Wi-Fi network except your smartphone, and try to set up your smart vacuum cleaner again.
- 4. Change Wi-Fi networks: If you are still having trouble, try disconnecting from your Wi-Fi network and connecting to a different one. You can also try moving the smart vacuum cleaner closer to the Wi-Fi router.
- 5. Contact your Internet Service Provider: If none of the above steps solve your Wi-Fi connection issue, there may be a more significant issue with your internet service. Contact your internet service provider and explain the problem to them for further assistance.
Remember that a strong and stable Wi-Fi connection is crucial to ensuring the successful set-up and use of your smart vacuum cleaner app. So, always check your Wi-Fi connection whenever you encounter any issues.
5.2 Reset Your Vacuum Cleaner’s Wi-Fi Settings and Repeat the Set-Up Process
Sometimes, despite following all the steps correctly, you may face connectivity issues while trying to connect the smart vacuum cleaner to the app. In such a scenario, you may want to try resetting the vacuum cleaner’s Wi-Fi settings and repeating the set-up process. Here are the steps to do so:
- Turn Off Your Vacuum Cleaner: Turn off your smart vacuum cleaner and unplug it from the power source.
- Locate Reset Button: Locate the reset button on your vacuum cleaner. The reset button is usually located near the Wi-Fi indicator light on the vacuum cleaner.
- Press and Hold the Reset Button: Press and hold the reset button for about 10-15 seconds. The Wi-Fi indicator light will start flashing to indicate that the reset process has started.
- Release the Reset Button: Release the reset button once you see the Wi-Fi indicator light blink rapidly on your vacuum cleaner.
- Reboot Your Vacuum Cleaner: Reboot your vacuum cleaner by plugging it back into the power source and turning it on.
- Repeat Set-Up Process: Repeat the set-up process by following the steps outlined in the previous sections of this guide.
By resetting your vacuum cleaner’s Wi-Fi settings, you will clear any previous connections and be able to start the set-up process from scratch. This should help in resolving the connectivity issues and allow you to connect your smart vacuum cleaner to the app successfully.
It’s essential to remember that you may need to repeat this process a few times to ensure optimal connectivity. If you still face issues, you may want to reach out to your smart vacuum cleaner’s manufacturer’s customer support team for further assistance.
5.3 Check Compatibility and Reinstall the App
If you are having trouble connecting your smart vacuum cleaner to the app, it’s possible that the app may not be compatible with your smartphone. Compatibility issues can cause a range of problems, from connectivity issues to limited functionality.
To check compatibility, first, make sure that your smartphone meets the app’s system requirements. This information can usually be found on the app’s download page on the App Store or Google Play Store. If your smartphone does not meet these requirements, the app may not function properly or not work at all.
If you have verified that your smartphone meets the app’s system requirements, but you are still having trouble connecting your vacuum cleaner to the app, try reinstalling the app. Sometimes, the app may have glitches or other issues that can prevent it from working correctly.
To reinstall the app, follow these steps:
Step 1: Uninstall the App
Start by uninstalling the app from your smartphone. To do this, simply press and hold the app icon until the “uninstall” option appears, then select it to remove the app from your device.
Step 2: Clear Your Smartphone’s Cache
After uninstalling the app, it’s a good idea to clear your smartphone’s cache. This can help ensure that all residual data associated with the app is fully removed from your device. To clear your smartphone’s cache, go to your phone’s settings menu and select “storage.” From there, scroll down to the app you just uninstalled and select it. Finally, select the “clear cache” option to remove any leftover data associated with the app.
Step 3: Reinstall the App
Now that you have cleared your smartphone’s cache, you are ready to reinstall the app. Look for the app on the App Store or Google Play Store and download it like you did when you first installed it. Once it’s installed, try connecting your vacuum cleaner to the app again.
By checking compatibility and reinstalling the app, you can often fix issues that prevent your smart vacuum cleaner from connecting to the app. However, if you’re still having trouble, there may be other issues that need to be addressed, and you may need to consult the manufacturer’s customer support to get further assistance.
5.4 Restart Your Smartphone and Repeat the Process
If you’ve tried all the troubleshooting options, but your smart vacuum cleaner is still not connecting to the app, it might be time to restart your smartphone. This action can help to flush out any lingering issues that could be causing the problem.
To restart your smartphone, follow the steps in the table below:
| Step | Action |
|---|---|
| Step 1 | Press and hold the power button on your phone until the restart menu appears |
| Step 2 | Select “Restart” or “Reboot” from the menu options |
| Step 3 | Wait for your phone to shut down and start back up again |
| Step 4 | Open the smart vacuum cleaner app and start the set-up process again from the beginning, following the steps outlined in this guide |
It’s important to note that restarting your smartphone won’t delete any of your saved data or apps. Instead, it simply refreshes the system and can help to resolve any temporary issues that might be causing the connection problem between your phone and the vacuum cleaner app.
By following these steps, you’ll be able to troubleshoot any connection problems that you’re experiencing with your smart vacuum cleaner and get it up and running in no time.
Conclusion
In conclusion, connecting your smart vacuum cleaner to a smartphone app can seem like a daunting task, but it is definitely worth the effort. Not only will it save you time and energy, but it will also provide you with a more efficient and personalized cleaning experience.
By following the step-by-step guide outlined in this article, you should be able to successfully connect your vacuum cleaner to the app and enjoy all its functions. From customizing your cleaning preferences, setting up virtual boundaries, to scheduling cleaning times, the app offers great flexibility and convenience.
However, in case you encounter any difficulties during the set-up process, do not worry. There are several troubleshooting steps you can follow to overcome the issues. These include checking the Wi-Fi connection, resetting the vacuum cleaner’s Wi-Fi settings, checking compatibility and reinstalling the app, and restarting your smartphone.
By keeping these troubleshooting steps in mind, you will be able to quickly resolve any issues and connect your smart vacuum cleaner to the app.
Overall, the process of connecting your smart vacuum cleaner to a smartphone app is not as complicated as it may initially seem. With a little patience and attention to detail, you can enjoy the many benefits that come with enhanced cleaning functions, making your life easier and more efficient. Try it out today and experience the difference!
Frequently Asked Questions
What should I do if my vacuum cleaner model is not compatible with the smartphone app?
If your vacuum cleaner model is not compatible with the smartphone app, unfortunately, there isn’t much you can do. You may need to consider upgrading to a newer model that offers compatibility with smartphone apps.
Is it possible to use the app without connecting my vacuum cleaner to wifi?
No, in order to use the app and control your vacuum cleaner remotely, you must connect it to your home wifi network.
Can I download the app on my tablet?
Yes, if your tablet is compatible with the app, you can download it and control your vacuum cleaner through there as well.
Can I schedule cleaning times through the app?
Yes, you can schedule cleaning times and customize various settings through the app.
What should I do if my vacuum cleaner disconnects from wifi?
If your vacuum cleaner disconnects from wifi, you may need to reset the wifi settings and repeat the set-up process. You could also check your home wifi network to make sure the connection is stable.
Is it safe to connect my vacuum cleaner to my home wifi network?
Yes, connecting your vacuum cleaner to your home wifi network is safe as long as you take the necessary precautions such as using a strong, unique password and keeping your network secure.
Can I control my vacuum cleaner from a remote location?
Yes, as long as your wifi network and internet connection are stable, you can control your vacuum cleaner from anywhere using the app.
What types of virtual boundaries can I set up through the app?
You can set up virtual boundaries such as no-go zones, cleaning lines, and specific room cleanings.
Can I use the app if I don’t have a smartphone?
No, unfortunately, you need a smartphone or tablet to use the app and control your vacuum cleaner remotely.
How can I troubleshoot if the app is not working properly?
If the app is not working properly, you can try troubleshooting by checking your wifi connection, resetting the vacuum cleaner’s wifi settings, checking compatibility, and restarting your smartphone or tablet.
