Smart Vacuum Cleaner: Troubleshooting and Fixing Stuck Problems
Warning: A non-numeric value encountered in /var/www/html/wp-content/themes/generatepress/inc/structure/post-meta.php on line 165
by Dwight Gibson
Table of Contents
Introduction
Have you ever experienced the frustration of your smart vacuum cleaner getting stuck while cleaning your home? It’s a common issue among users and can be caused by various factors. In this article, we will provide you with step-by-step troubleshooting tips to help you diagnose and resolve the issue of your smart vacuum cleaner getting stuck. Additionally, we’ll provide preventative measures you can take to avoid this problem from occurring in the future. So, if you want your smart vacuum cleaner to work efficiently and effectively, read on.
What is a Smart Vacuum Cleaner?
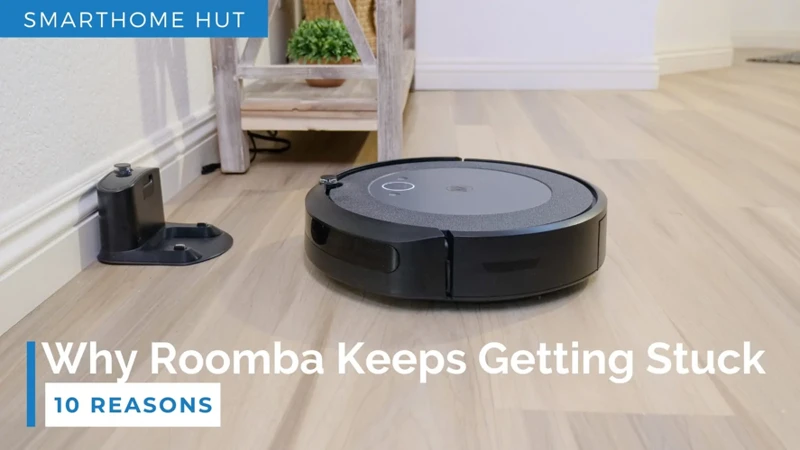
A smart vacuum cleaner is a cleaning device that can navigate around your home autonomously, making cleaning less of a chore. Unlike traditional vacuum cleaners that require manual control, smart vacuum cleaners can navigate obstacles and utilize advanced features including smart mapping.
Smart vacuum cleaners often use sensors to help them navigate around your home and avoid obstacles. These vacuum cleaners are designed to be used on different surfaces, including hardwood floors, carpets, and tiles. They can also detect areas that are particularly dusty, allowing you to prioritize cleaning certain areas.
Despite the many advantages of using a smart vacuum cleaner, they can sometimes get stuck. This typically happens due to factors such as object obstructions, navigational issues, and other technical glitches. To learn more about the top reasons why smart vacuum cleaners get stuck, check out our previous article.
To resolve the issue of a smart vacuum cleaner getting stuck, it’s important to know how to diagnose the problem. This involves checking and cleaning the brushes, emptying the dirt canister, inspecting and cleaning the sensors, and verifying the wheels and navigation system. Our previous article can provide more detailed information on how to troubleshoot and resolve these issues.
Preventative measures can also be taken to avoid smart vacuum cleaner getting stuck. This includes decluttering the area, securing loose cords and wires, placing furniture strategically, and performing regular maintenance and cleaning. To learn more about how to prevent smart vacuum cleaner from getting stuck, take a look at our previous article.
Smart mapping technology is another feature that can help prevent smart vacuum cleaners from getting stuck. This technology allows the vacuum cleaner to create an accurate map of your home, which can be used to avoid obstacles and navigate around the different rooms. To learn more about how smart mapping technology can help prevent smart vacuum cleaners from getting stuck, read our article on the topic.
While smart vacuum cleaners can get stuck for a variety of reasons, a little preventative maintenance and troubleshooting can help keep them running smoothly.
Why do Smart Vacuum Cleaners Get Stuck?
Smart vacuum cleaners are designed to make our lives easier by taking care of the tedious task of cleaning our floors. However, sometimes they encounter problems and get stuck. There are a number of reasons why this can happen and it is important to diagnose the issue to determine the best way to resolve it.
Here are some of the most common reasons why a smart vacuum cleaner may get stuck:
Clogged brushes: If the brushes on the underside of the vacuum become clogged with hair or debris, the vacuum may have trouble moving around and get stuck.
Full dirt canister: If the dirt canister is full, the vacuum will have less suction power and may get stuck trying to pick up more dirt.
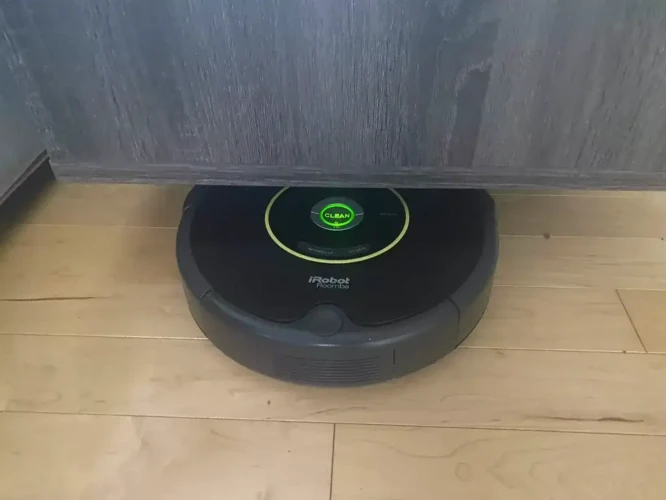
Navigation system issues: If the vacuum has trouble navigating around furniture or other obstacles, it may get stuck or repeatedly travel over the same area.
Sensor problems: If the sensors on the vacuum are dirty or malfunctioning, the vacuum may have trouble detecting objects in its path and get stuck.
These are just a few examples of why a smart vacuum cleaner might get stuck. It is important to diagnose the problem so that you can take the appropriate steps to solve it and prevent it from happening in the future.
Diagnosing Smart Vacuum Cleaner Stuck Issues
When your smart vacuum cleaner gets stuck during cleaning, it can be frustrating and leave you wondering what went wrong. However, diagnosing the issue is the first step towards getting your smart vacuum cleaner back on track. To help you troubleshoot and solve the problem, we have put together a list of steps to diagnose and fix the issue. By following these steps, you can quickly identify and address the source of the problem, whether it be clogged brushes or malfunctioning sensors, and get your smart vacuum cleaner back to efficiently cleaning your home.
Check and Clean the Brushes
To ensure that your smart vacuum cleaner is working optimally, it is crucial to check and clean the brushes regularly. Here are some steps you can follow:
Step 1: Start by turning off your smart vacuum cleaner and unplugging it from the power source.
Step 2: Locate the brushes at the bottom of the vacuum cleaner. You may need to flip the device over to gain access to them.
Step 3: Once you have access to the brushes, use your fingers or a pair of scissors to remove any hair or debris wrapped around them. Be sure to wear gloves to protect your hands from getting pricked or hurt.
Step 4: Use a soft-bristle brush or a toothbrush to gently scrub the brushes and remove any dirt or dust particles that may be stuck to them.
Step 5: After cleaning the brushes, reconnect them to the vacuum cleaner and ensure they are properly secured and locked in place.
Step 6: Turn the vacuum cleaner back on and test to see how well it is working. If the brushes were the issue, your device should now be working smoothly.
By regularly checking and cleaning the brushes, you can prevent hair and debris from getting tangled and causing your smart vacuum cleaner to get stuck. This will also help prolong the life of your device and ensure that it is providing effective cleaning results.
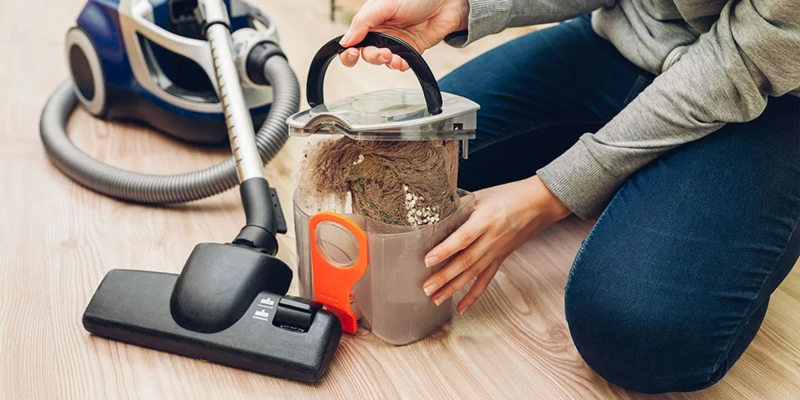
Empty the Dirt Canister
One of the most common reasons smart vacuum cleaners get stuck is because the dirt canister is full. If your robot seems to be struggling to navigate around the room or has difficulty suctioning up debris, it may be time to empty the canister.
What to Do: Follow these steps to empty the dirt canister and get your robot back to work:
Step 1:
Locate the dirt canister on your smart vacuum cleaner. This is usually found on the back or underside of the robot.
Step 2:
Carefully remove the canister from the vacuum cleaner. Be sure to hold it over a trash can or other waste receptacle to prevent making a mess.
Step 3:
Open the canister and dump out the contents. Depending on how long it has been since you last emptied the canister, you may need to dispose of a large amount of dirt and debris.
Step 4:
Use a clean, dry cloth or paper towel to wipe out the inside of the canister. This will help remove any remaining dirt or dust that may have stuck to the sides.
Step 5:
Replace the canister and make sure it is securely in place before starting the vacuum cleaner again.
Regularly emptying and cleaning the dirt canister can help prevent your smart vacuum cleaner from getting stuck due to poor suction or clogging. Make sure to check the canister every few uses to keep your robot running efficiently.
Check the Wheels and Navigation System
When it comes to troubleshooting a smart vacuum cleaner that’s getting stuck, checking the wheels and navigation system is one of the most important steps. The wheels and navigation system are tasked with moving the vacuum cleaner around the room, so if there’s a problem with them, the vacuum cleaner may get stuck or have difficulty navigating around obstacles. Here are some steps to checking the wheels and navigation system:
Step
Action
Step 1:
Flip the vacuum cleaner upside down so you can access the wheels and brushes.
Step 2:
Check that the wheels are rotating smoothly and are not obstructed by debris. Use a soft-bristled brush to gently remove any dirt, hair or debris that may be caught up in the wheels.
Step 3:
Inspect the navigation system (such as sensors, laser or cameras) and check for any blockages or damage. If there is any dirt, clean it by gently wiping with a soft, dry cloth.
Step 4:
Make sure the vacuum cleaner’s bumper is free from any debris or dirt. The bumper acts as a sensor to detect obstacles in its path, and if it’s dirty or damaged, it may not work properly.
If you notice any damage or obstructions in the wheels or navigation system during your check, it is best to contact the manufacturer’s customer service or take your vacuum cleaner to a professional repair technician. Keeping the wheels and navigation system clean and free from debris is essential to ensure your smart vacuum cleaner operates efficiently and avoids getting stuck.
Inspect and Clean the Sensors
When a smart vacuum cleaner gets stuck, one of the troubleshooting steps that you should take is to inspect and clean the sensors. Sensors are critical components that help the vacuum cleaner navigate around your home or office. Over time, dust, debris, and hair can build up on the sensors, leading to inaccurate readings and navigation issues. Cleaning the sensors is crucial to troubleshoot the problem of a smart vacuum cleaner getting stuck.
Inspecting the Sensors
Before you start cleaning the sensors, you need to inspect them for any visible signs of dirt and debris. Most models have several sensors that help them detect walls, furniture, and obstacles. You can use the vacuum cleaner’s manual to locate the sensors and, if possible, remove the cover to have a better look at them. If you notice any dirt or debris on the sensors, it is time to clean them.
Cleaning the Sensors
To clean the sensors, you need a soft lint-free cloth and a cleaning solution. You can use water or a mild solution like 50/50 water and alcohol. Avoid using too much cleaning solution or water, as it can damage the sensors. Gently wipe the sensors with the cloth to remove any dirt, debris, or hair that may have accumulated on them.
Testing the Sensors
After cleaning the sensors, you should test them to ensure that they are working correctly. You can do this by starting the smart vacuum cleaner and placing an obstacle in front of one of the sensors. If the vacuum cleaner avoids the obstacle, it means that the sensor is working fine. Repeat the test for all the sensors to ensure that they are working correctly.
Inspecting the Sensors
Cleaning the Sensors
Testing the Sensors
Before you start cleaning the sensors, you need to inspect them for any visible signs of dirt and debris. Most models have several sensors that help them detect walls, furniture, and obstacles. You can use the vacuum cleaner’s manual to locate the sensors and, if possible, remove the cover to have a better look at them. If you notice any dirt or debris on the sensors, it is time to clean them.
To clean the sensors, you need a soft lint-free cloth and a cleaning solution. You can use water or a mild solution like 50/50 water and alcohol. Avoid using too much cleaning solution or water, as it can damage the sensors. Gently wipe the sensors with the cloth to remove any dirt, debris, or hair that may have accumulated on them.
After cleaning the sensors, you should test them to ensure that they are working correctly. You can do this by starting the smart vacuum cleaner and placing an obstacle in front of one of the sensors. If the vacuum cleaner avoids the obstacle, it means that the sensor is working fine. Repeat the test for all the sensors to ensure that they are working correctly.
By inspecting and cleaning the sensors, you can prevent your smart vacuum cleaner from getting stuck and running into obstacles. If the sensors are damaged or not functioning correctly, you may need to contact the manufacturer for repair or replacement.
Resolving Smart Vacuum Cleaner Stuck Problems
Now that you have diagnosed the issue causing your smart vacuum cleaner to get stuck, it’s time to resolve it! Don’t worry, resolving smart vacuum cleaner stuck problems can be straightforward and easy to do with a few simple steps. Here are some easy and effective solutions that you can try to get your smart vacuum cleaner moving again without any obstacles in its way.
Move Obstacles out of the Way
When troubleshooting a smart vacuum cleaner that keeps getting stuck, one of the easiest solutions is to move any obstacles out of the way. Here are some things to consider when moving obstacles:
Clear any clutter: Before starting the cleaning cycle, take a quick look around the room and remove any clutter that might be in the way of the vacuum cleaner. Picking up things like toys, clothing, and other items can help make the cleaning process smoother.
Secure cords and wires: Anything that is connected to an outlet should be put away safely to avoid tangling the vacuum’s rollers or wheels. Take a few minutes to wind up cords and secure them out of the way so that the vacuum has a clear path to follow.
Strategically place furniture: While moving furniture isn’t always an option, if you have the flexibility to do so, try to arrange your furniture in a way that provides a clear cleaning path for the vacuum cleaner. Move chairs and tables aside, leaving the high-traffic areas as uncluttered as possible.
Take note of smaller obstacles: Even small objects like doormats, rugs, and pet bowls can pose a challenge to your vacuum cleaner. Keeping these things out of the path of the cleaner will ensure that there are no unexpected hiccups during the cleaning process.
By following these simple steps, you can make sure that there are no obstacles in the way of your smart vacuum cleaner, allowing it to clean your home quickly and efficiently without getting stuck.
Adjust Smart Vacuum Cleaner Settings
When your smart vacuum cleaner gets stuck, it may be due to certain settings not being adjusted correctly. Here are some ways to adjust your smart vacuum cleaner settings to avoid getting stuck:
Speed Settings – If your smart vacuum cleaner is moving too quickly, it may not be able to detect obstacles and avoid them in time. Adjust the speed settings to a slower speed to ensure that the vacuum can navigate obstacles with ease.
Suction Power – If your smart vacuum cleaner is getting stuck on carpets or rugs, it may be due to the suction power being too high. Lower the suction power to ensure that the vacuum can easily glide over carpets and rugs.
Cleaning Schedule – If your smart vacuum cleaner is constantly getting stuck in certain areas, it may be due to the cleaning schedule being too frequent or not frequent enough. Adjust the cleaning schedule to ensure that the areas are cleaned adequately without the vacuum getting stuck.
Navigation Settings – If your smart vacuum cleaner is getting stuck in tight spaces or corners, it may be due to the navigation settings not being adjusted correctly. Ensure that the vacuum is programmed to navigate tight spaces and corners with ease.
It’s important to experiment with the settings on your smart vacuum cleaner to find the optimal settings for your home. Adjusting the settings will not only prevent the vacuum from getting stuck, but it will also increase its performance and overall lifespan.
Use Boundary Markers or Virtual Walls
One of the most effective ways to prevent Smart Vacuum Cleaner from getting stuck is by using boundary markers or virtual walls. These helpful tools are designed to create a virtual boundary or wall that the smart vacuum cleaner will not cross. This can be especially helpful in areas where there are many obstacles or where the perimeter needs to be well-defined.
Boundary markers are physical barriers that can be placed around an area to define the cleaning zone for the robot vacuum. They typically come in the form of plastic strips with adhesive backings that can be attached to the floor. When the robot vacuum encounters the boundary marker, it will recognize it as an obstacle and change direction.
Virtual walls, on the other hand, are created using software that comes with the robot vacuum. This technology allows users to set up barriers or walls digitally, which the smart vacuum cleaner will not cross. Virtual walls are typically used in more complex areas, where there are many different rooms or zones that need to be cleaned without the vacuum cleaner getting stuck.
Using boundary markers or virtual walls is an excellent preventative measure to keep your smart vacuum cleaner from getting stuck. Placing a boundary marker around areas with many obstacles or where cables and wires are located can help the vacuum cleaner avoid getting caught. Meanwhile, setting up virtual walls can create a safe and clear cleaning zone for the robot vacuum.
If your smart vacuum cleaner frequently gets stuck, investing in boundary markers or virtual walls may be a perfect solution. These mechanisms can help ensure that your robot vacuum moves efficiently around your home and avoids any obstacles or trouble spots.
Reset Smart Vacuum Cleaner
Sometimes, despite your best efforts, your smart vacuum cleaner might still get stuck. In such situations, resetting the machine can be an effective solution. Here’s how you can reset your smart vacuum cleaner and get it back up and running smoothly:
Step 1: Turn off the power button on the smart vacuum cleaner.
Step 2: Unplug the vacuum cleaner from the power outlet.
Step 3: Wait for at least 30 seconds to a minute before plugging the vacuum cleaner back in. This step allows the machine to reset itself completely.
Step 4: Turn on the power button and let the machine reboot. You can also consult the user manual for specific steps on how to reset your particular smart vacuum cleaner model.
Resetting the smart vacuum cleaner clears any temporary errors, memory glitches, or hang-ups that could be causing it to get stuck. This solution is particularly helpful when your smart vacuum cleaner seems to be stuck in a loop or has difficulty navigating around obstacles.
However, resetting the machine should be the last resort. You should always try out other measures, such as cleaning the brushes, emptying the dirt canister, and checking the sensors, before resetting the smart vacuum cleaner. In addition to preventing unnecessary wear and tear on the machine, taking these measures could also extend the lifespan of the vacuum cleaner.
Preventative Measures to Avoid Smart Vacuum Cleaner Stuck Problems
As they say, prevention is better than cure, and this holds true for smart vacuum cleaners getting stuck as well. Luckily, there are several simple and practical steps you can take to avoid your vacuum cleaner getting stuck in the first place. Let’s take a closer look at some of these measures that you can start implementing today and keep your smart vacuum cleaner running smoothly!
Declutter the Area
One of the main reasons why smart vacuum cleaners get stuck is because of cluttered and messy living spaces. It is important to take the necessary steps to declutter the area before using the device.
Here are some tips on how to declutter the area:
Start by picking up any loose items lying around: Before using the smart vacuum cleaner, make sure to pick up any loose items that may be lying on the floor. This can include toys, clothing items, books, or any other clutter that may be scattered around the room.
Remove any obstacles: Check the room for any obstacles that the smart vacuum cleaner may potentially get stuck on. This could include chairs, tables, or other furniture items that may be blocking the device’s path.
Organize cords and wires: Untangle and organize any cords or wires that may be lying on the floor. Smart vacuum cleaners can get tangled in cords or wires, which can cause them to malfunction or get stuck.
Clear the floor of any small objects: Before using the smart vacuum cleaner, make sure to clear the floor of any small objects such as coins, paper clips or pins. These small objects can get caught in the brushes or wheels of the device and cause it to malfunction or get stuck.
By following these tips, you can help prevent your smart vacuum cleaner from getting stuck and ensure that it operates smoothly and efficiently. Remember, a clutter-free space not only helps your smart vacuum cleaner function properly but also promotes a tidy and organized living environment.
Secure Loose Cords and Wires
Smart vacuum cleaners are designed to move around your home autonomously, but they can face obstacles, such as loose cords and wires, which could put them in precarious situations. To avoid such scenarios, securing loose cords and wires is a preventative measure that can save you a lot of trouble. Here are some tips on how to do it:
Identify the problem areas: Firstly, you should identify areas in your home where there are loose cords and wires. Take a walk around your house and look for places where cords and wires are dangling or hanging down. Common areas usually include around the TV, behind devices, or near electrical sockets.
Cable Ties: One solution to declutter and neatly bundle cords and wires is to use cable ties. You can buy these ties from any hardware store or online. Make sure you select the right size for your cords and wires to avoid breaking them when tightening them. Bundle the cords and wires neatly and tie them with the cable ties, making sure they are not too tight so that they do not put any strain on the cords or wires.
Cord Clips and Cable Covers: Cord clips and cable covers are adhesive holders or covers used to keep cords and wires out of sight. They can be found at most hardware stores or online. Cord clips can be attached to walls or furniture, and the cords can be slid into the clips to keep them neat and tidy. Cable covers can be attached to the wall, and the cords can be run through the cover to keep them out of sight and protected from damage.
Tie up cords: If you’re in a hurry and don’t have any clips or ties, a simple solution is to tie up cords and wires with string, elastic bands, or twist ties. Ensure that whatever you use to tie up the cords is secure enough to hold them without putting any strain on them.
By following these tips, you can ensure that your smart vacuum cleaner doesn’t face any obstacles due to loose cords and wires in your home. Remember, prevention is always better than cure, and securing loose cords and wires is a simple yet effective preventative measure that can save you a lot of trouble.
Place Furniture Strategically
When it comes to optimizing the placement of furniture to avoid smart vacuum cleaner stuck problems, there are several key things to consider. First and foremost, make sure that there is enough space for the robot vacuum to maneuver around and under larger pieces of furniture. This will help prevent it from getting stuck or tangled in tight spaces.
Here are some tips on how to place furniture strategically to avoid robot vacuum stuck problems:
Keep larger pieces of furniture away from walls and corners. This will help create more space for the robot vacuum to navigate around the room.
Avoid placing furniture in areas that are difficult for the robot vacuum to reach, such as under low tables or chairs with multiple legs.
Consider replacing bulky or heavy furniture with more streamlined pieces that don’t take up as much space.
Make sure that there are clear paths between furniture pieces to allow the robot vacuum to move through the room without obstruction.
For rooms with a lot of furniture, consider breaking up the space into smaller sections that the robot vacuum can clean one at a time.
By placing furniture strategically, you can help create a more robot-friendly environment that enables your smart vacuum cleaner to move around with ease and avoid getting stuck. Remember to regularly assess your furniture placement as well as remove any new obstacles to keep your smart vacuum cleaner running smoothly.
Regular Maintenance and Cleaning
To prevent your smart vacuum cleaner from getting stuck, regular maintenance and cleaning are essential. Here are some key steps to keep your smart vacuum cleaner in good working order:
Clean the Brushes: The brushes should be cleaned regularly, especially if you have pets that shed or carpets that trap dirt and dust. The buildup of hair, dirt, and dust on the brushes can cause the vacuum cleaner to get stuck. Use a brush or a comb to remove any hair or debris that has accumulated on the brushes.
Empty the Dirt Canister: The dirt canister should be emptied after each use. An overfilled canister can reduce suction power, making it difficult for the vacuum cleaner to pick up dirt and debris. Emptying the canister will also prevent dirt and dust from clogging the vacuum’s filters.
Clean the Filters: The filters should be cleaned regularly to ensure that air can flow freely through the vacuum cleaner. Clogged filters can reduce suction power and cause the vacuum cleaner to get stuck. Check the manufacturer’s instructions to learn how to remove and clean the filters.
Inspect the Wheels and Navigation System: Over time, dirt and debris can build up around the wheels and impede the vacuum cleaner’s movement. Regularly check the wheels and navigation system to ensure that they are clean and free of debris.
Check the Sensors: If your vacuum cleaner has sensors, check them regularly to ensure that they are clean and functioning properly. Dirty or faulty sensors can cause the vacuum cleaner to get stuck or fail to navigate around obstacles.
Store Properly: When not in use, be sure to store your vacuum cleaner in a dry, cool place. Avoid leaving it in direct sunlight or in a humid location. This can help prevent damage from moisture or temperature changes, which can cause the vacuum cleaner to malfunction or stop working altogether.
By regularly maintaining and cleaning your smart vacuum cleaner, you can help ensure that it stays in good working order and avoid problems like getting stuck.
Conclusion
After following the step-by-step guide for troubleshooting and resolving smart vacuum cleaner stuck problems, you should now be able to enjoy the convenience and efficiency of your device without any interruptions. Remember that prevention is always better than cure, and maintaining a clean and clutter-free environment will significantly reduce the likelihood of your smart vacuum cleaner getting stuck in the future.
In conclusion, the most common causes of smart vacuum cleaner getting stuck are blockages, navigation errors, and obstacles in its path. By checking and cleaning the brushes, wheels, sensors, and dirt canister, you can diagnose and identify the issue. Once you have identified the problem, you can then take appropriate steps to resolve it, such as adjusting the settings, using virtual walls, or resetting the device.
However, it is equally important to take necessary preventative measures to avoid the issue in the first place, such as decluttering the area, securing loose cords and wires, and placing furniture strategically. These measures will ensure that your smart vacuum cleaner operates at its optimal level and lasts for a long time.
In short, by following the steps outlined in this article, you can easily and effectively troubleshoot and solve smart vacuum cleaner stuck problems, and ensure that your device works efficiently and effectively for years to come.
Frequently Asked Questions
How often should I clean the brushes on my smart vacuum cleaner?
You should clean the brushes on your smart vacuum cleaner every 2-3 weeks to prevent buildup of hair, dust, and debris.
Can I use my smart vacuum cleaner on any type of flooring?
Most smart vacuum cleaners can be used on multiple types of flooring, including carpet, hardwood, and tile. However, you should check the manufacturer’s guidelines to be sure.
How do I know if the dirt canister is full on my smart vacuum cleaner?
Many smart vacuum cleaners have a clear dirt canister that allows you to see when it is full. Others may have a light or indicator that alerts you when it’s time to empty the canister.
What should I do if my smart vacuum cleaner is making unusual noises?
If your smart vacuum cleaner is making unusual noises, it may indicate a problem with the motor or the brushes. Try cleaning the brushes and emptying the dirt canister, and if the problem persists, contact the manufacturer or a repair technician.
What is the best way to clean the sensors on my smart vacuum cleaner?
You can use a soft, dry cloth to gently clean the sensors on your smart vacuum cleaner. Avoid using water or cleaning solutions, as this can damage the sensors.
Can I use boundary markers or virtual walls with all smart vacuum cleaners?
Not all smart vacuum cleaners are compatible with boundary markers or virtual walls. Check the manufacturer’s guidelines to see if these features are available with your specific model.
How can I reset my smart vacuum cleaner?
The process for resetting a smart vacuum cleaner may vary by model. Check the manufacturer’s guidelines for specific instructions on how to reset your smart vacuum cleaner.
What is the best way to prevent my smart vacuum cleaner from getting stuck?
To prevent your smart vacuum cleaner from getting stuck, you should declutter the area, secure loose cords and wires, and strategically place furniture to create clear paths.
How often should I perform regular maintenance on my smart vacuum cleaner?
You should perform regular maintenance on your smart vacuum cleaner every 3-6 months to keep it running smoothly. This may include cleaning the brushes and filters, inspecting the wheels and navigation system, and checking the sensors.
What should I do if I am still having problems with my smart vacuum cleaner after trying these troubleshooting tips?
If you are still having problems with your smart vacuum cleaner after trying these troubleshooting tips, you should contact the manufacturer for assistance or consider taking it to a repair technician.