Picture this: you’ve finally invested in a smart vacuum cleaner to help keep your home nice and tidy. The convenience of being able to control it from your phone and not having to physically push it around is unbeatable. However, after a few months, you notice that the battery life is not what it used to be. You find yourself having to charge it more often, or worse – it’s shutting off mid-clean. It’s a common problem that many smart vacuum cleaner owners face, but what do you do when this happens? How do you know if it’s time to replace the battery? In this article, we’ll explore the signs that indicate a smart vacuum cleaner battery replacement is needed, and the steps you can take to effectively replace it.
Table of Contents
Why is it important to replace your smart vacuum cleaner battery?
As with any appliance, the battery in your smart vacuum cleaner may begin to wear out over time. It’s important to know when to replace the battery so that your vacuum cleaner continues to effectively clean your floors. Not replacing a worn-out battery can lead to a decrease in the device’s performance and ultimately shorten the lifespan of your smart vacuum cleaner. In this section, we’ll explore the reasons behind the importance of replacing your smart vacuum cleaner’s battery. Additionally, we’ll touch on how long a typical battery life is expected to last and what can happen when you use a worn-out battery. To learn more about how to extend the lifespan of your smart vacuum cleaner battery and optimize its usage, be sure to check out our 10 Tips to Extend the Battery Life of Your Smart Vacuum guide.
How long should a smart vacuum cleaner battery last?
A smart vacuum cleaner battery is an essential component that powers the robotic cleaning gadget. An average smart vacuum cleaner battery can last from one to four years, depending on various factors such as the brand, model, usage patterns, and whether the battery is removable or not. It means that the battery’s lifespan can fall anywhere between 300 to 1000 charging cycles, and each charge cycle can last between 1-2 hours of usage.
However, it’s crucial to note that the manufacturer’s warranty often covers the battery for only six months to one year. After this period, it’s generally recommended to replace the battery, or the vacuum cleaner’s overall performance may be affected.
The table below shows the estimated lifespan of some well-known smart vacuum cleaner brands and models:
Brand and Model
Average Battery Lifespan (in years)
iRobot Roomba 980
2 – 3
Ecovacs Deebot N79S
1 – 2
Shark ION Robot 750
1.5 – 2
Eufy RoboVac 11S MAX
1 – 1.5
Xiaomi Mi Robot Vacuum
1.5 – 2.5
It’s worth mentioning that the smart vacuum battery lifespan may vary depending on the frequency of use, charging habits, and the cleaning environment’s conditions. For instance, if the vacuum cleaner is frequently used on thick carpets and pet hair, it may consume more power, resulting in a shorter battery lifespan.
Therefore, proper battery care and maintenance are essential to extend the battery’s lifespan, such as avoiding overcharging, storing the battery correctly, and paying attention to the charging cycles. Some high-quality battery brands can offer better performance and durability, helping to minimize the frequency of battery replacement.
What happens when you use a worn-out battery?
When you use a worn-out battery in your smart vacuum cleaner, it can cause a variety of issues that affect its performance. Here are some of the things that can happen:
Decreased suction power: Over time, as the battery wears out, it may no longer be able to provide the power needed to run the vacuum’s motor at full capacity. This can lead to reduced suction power, which means your vacuum won’t pick up as much dirt and debris as it used to.
Shorter battery life: As the battery gets older, its ability to hold a charge diminishes. This means that you’ll need to recharge your vacuum cleaner more often than you used to, and it may not run for as long when you do.
Increased risk of damage: If you continue to use a worn-out battery in your smart vacuum cleaner, it can put extra strain on the motor and other components. This can increase the risk of damage, which in turn can lead to costly repairs.
Reduced lifespan: If you use a worn-out battery for too long, it can reduce the overall lifespan of your smart vacuum cleaner. This is because the battery is an integral part of the vacuum’s system, and if it’s not functioning properly, it can affect the other components as well.
It’s important to keep an eye out for these signs so you can address them promptly. If you do notice any of these issues, it may be a good idea to consider replacing your smart vacuum cleaner battery to restore its performance. You can refer to our guide on how to choose the right battery for your vacuum cleaner, and make sure to store your battery properly to avoid any potential issues.
Signs your smart vacuum cleaner battery needs to be replaced
It can be frustrating when your smart vacuum cleaner doesn’t hold the charge as long as it used to or shuts off in the middle of cleaning. In these situations, it’s essential to determine whether it’s time to replace the battery. Not replacing a worn-out battery may cause damage to your vacuum cleaner and limit its lifespan. In this section, we’ll discuss some signs to look out for when determining whether it’s time to replace your smart vacuum cleaner battery. This will help you make an informed decision and maximize your device’s lifespan.
The battery doesn’t hold a charge as long as it used to
One of the most common signs that your smart vacuum cleaner battery needs to be replaced is that it doesn’t hold a charge as long as it used to. This can be frustrating as it means your vacuum cleaner won’t last as long before needing to be recharged.
There are several possible reasons for a battery not holding a charge for as long as it used to. One reason could be that the battery is simply old and has reached the end of its life. Another reason could be that the battery has been overused or overcharged. Overcharging a smart vacuum battery can be harmful, as it can damage the battery and reduce its lifespan. If you’re not sure whether you’ve been overcharging your battery or not, it’s important to learn more about smart vacuum battery charging.
It’s important to take action if you notice that your smart vacuum cleaner’s battery doesn’t hold a charge for as long as it used to. This is because, if you continue to use a worn-out battery, you could be damaging the vacuum cleaner itself. A worn-out battery may not be the only problem, and if you keep using it, you may miss other signs that your vacuum cleaner needs repairs.
To check if your smart vacuum cleaner’s battery isn’t holding a charge for as long as it should be, monitor how long the battery lasts before it needs recharging. If you notice that the battery life has become significantly shorter, it’s probably time to replace the battery. Other signs might include the battery taking longer to charge, or the vacuum cleaner shutting off during use even when the battery indicator light shows it still has power.
Replacing a smart vacuum cleaner battery isn’t difficult, but it’s important to get the right replacement battery and to follow the correct steps when swapping the batteries out. We’ll discuss how to replace the smart vacuum cleaner battery in detail in the next section. Just remember that if you notice any of the signs that your smart vacuum cleaner battery needs to be replaced, it’s important to take action sooner rather than later. Finally, we’ll discuss the pros and cons of having a spare battery for your smart vacuum cleaner and how to properly store your smart vacuum battery for the long-term use.
The vacuum cleaner shuts off during use
One of the most frustrating signs that your smart vacuum cleaner battery needs to be replaced is when the vacuum cleaner shuts off during use. This can occur even when the battery has recently been charged, leaving you unable to complete your cleaning tasks.
There are several reasons why a smart vacuum cleaner may shut off during use. Firstly, it could be due to a worn-out battery that can no longer hold enough charge to power the vacuum cleaner. Secondly, it could be caused by a faulty motor that is overheating and causing the vacuum cleaner to shut off as a safety measure. Lastly, it could be due to a malfunctioning electronic control module that is causing the vacuum cleaner to turn off.
If you suspect that your battery is the cause of the issue, it’s important to take action and replace it. Continuing to use a worn-out battery can cause further damage to your vacuum cleaner, including damaging the motor or electronic components.
Replacing the battery is a simple process that can be done in a matter of minutes. First, turn off and unplug the vacuum cleaner before proceeding. Then, locate the battery compartment and remove the old battery. Make sure to dispose of the old battery properly – many electronic stores have special recycling programs for such items.
After disposing of the old battery, insert the new battery into the compartment and ensure it is secure. It’s important to find the right replacement battery for your specific smart vacuum cleaner model – consult the manufacturer’s website or manual if necessary. Once the new battery is inserted, charge it fully before using the vacuum cleaner.
If your vacuum cleaner continues to shut off after replacing the battery, there may be another issue at play. Consider consulting a professional technician or contacting the manufacturer for further support.
Remember, taking good care of your smart vacuum cleaner battery is essential to maintain optimal performance. Avoid overcharging, store it properly when not in use, and weigh the pros and cons of having a spare battery on hand for those longer cleaning sessions. For more information on these topics, check out the following links:
The battery indicator light flashes or blinks continuously
One of the signs that your smart vacuum cleaner battery needs to be replaced is that the battery indicator light flashes or blinks continuously. This can be a perplexing issue, as it may not be immediately clear what is causing the light to blink. However, it is important to address this issue as soon as possible, as a continuously blinking battery indicator light typically indicates a problem with the battery’s performance or the battery’s ability to hold a charge.
Here are some possible reasons why the battery indicator light on your smart vacuum cleaner might be blinking, along with possible solutions to address the issue:
Battery is overheating: If the battery is overheating, it can cause the battery indicator light to blink. Turn off the vacuum cleaner and unplug it from the wall. Allow the battery to cool down before trying to use the vacuum cleaner again.
Battery needs to be recalibrated: Some smart vacuum cleaners have a feature that allows you to recalibrate the battery. Check your vacuum cleaner’s user manual to see if this is an option. If it is, follow the instructions to recalibrate the battery.
Battery needs to be replaced: The blinking light may be indicating that it’s time to replace the battery. Follow the steps outlined in the previous section to replace the battery in your smart vacuum cleaner.
Charging issues: If the battery isn’t charging properly, this can also cause the battery indicator light to blink. Make sure that the vacuum cleaner is properly plugged in and that the charging cable is securely connected to the vacuum cleaner and to the wall outlet.
It’s important to note that some smart vacuum cleaners are designed to have the battery indicator light blink at certain times, such as when the battery is charging or when the vacuum cleaner is in standby mode. Check your vacuum cleaner’s user manual to see if this is the case for your model, and what the different blinking patterns might mean.
If you are seeing a continuously blinking battery indicator light on your smart vacuum cleaner, it’s best to address the issue as soon as possible. By identifying the cause of the blinking light and taking steps to resolve the issue, you can ensure that your smart vacuum cleaner is running smoothly and efficiently, while also extending the lifespan of your battery.
The battery takes longer to charge than usual
Another sign that your smart vacuum cleaner battery needs to be replaced is when it takes significantly longer to charge than it used to. This could indicate that the battery is losing its ability to hold a charge or that it has become damaged in some way.
If you notice that your smart vacuum cleaner is taking substantially longer to charge, follow these steps to troubleshoot the issue and determine if it’s time to replace the battery:
Check the charging cables: Make sure that the charging cables are properly plugged in and that there are no visible signs of wear or damage. If the cables are broken or frayed, they may not be able to efficiently charge your vacuum cleaner’s battery, and you may need to replace them or the adapter.
Check the battery contacts: If the charging cables are in good condition, the next step is to check that the battery contacts are clean and free of debris. Use a dry cloth to carefully wipe away any dust or dirt that may have accumulated on the contacts, as this can interfere with the charging process.
Test the battery: If you’re still experiencing slow charging times, you may need to test the battery itself to see if it’s the problem. Use a multimeter to check the battery’s voltage, which should be around the voltage your battery is rated for. If the voltage is lower than that specified, your battery is most likely the culprit.
If you find that your vacuum cleaner’s battery is the problem, you’ll need to replace it. Look for a replacement battery that is compatible with your specific model and brand of vacuum cleaner. Once you have a new battery, follow the steps below to replace it.
Turn off and unplug the vacuum cleaner: Before replacing the battery, make sure your vacuum cleaner is turned off and unplugged from its power source.
Remove the old battery: Locate the battery compartment and remove the old battery, taking care not to damage any surrounding components.
Insert the new battery: Insert the new battery into the compartment, taking care to align it correctly according to the manufacturer’s instructions.
Charge the new battery before use: Once the new battery is in place, plug in the vacuum cleaner and charge the battery fully before using it.
Replacing your smart vacuum cleaner’s battery is an easy fix to ensure that it continues to work at peak performance. Now that you know what to look for and how to replace the battery, you can keep your vacuum cleaner in tip-top shape and maintain its powerful suction capabilities.
How to replace the smart vacuum cleaner battery
Replacing the battery in your smart vacuum cleaner might seem intimidating, but it’s actually a straightforward process that can greatly extend the lifespan of your device. With the right tools and a little bit of know-how, you’ll be able to swap out the old battery for a new one and get back to cleaning with ease. In this section, we’ll walk you through the steps of replacing your smart vacuum cleaner battery from start to finish. So, roll up your sleeves and get ready to give your trusty cleaning assistant a new lease on life!
Find the right replacement battery
When it comes to replacing the battery of your smart vacuum cleaner, it is essential to choose the right replacement battery to ensure that your device works smoothly and efficiently. Here are some factors you need to consider when selecting a replacement battery that suits your vacuum cleaner:
Battery Type
Brand Compatibility
Capacity
The first thing to consider is the battery type.
It is crucial to choose a battery that is compatible with the brand of your vacuum cleaner.
Capacity is an important factor to look at as well. A higher capacity battery can provide longer cleaning time.
Some vacuum cleaners use lithium-ion (Li-ion) batteries, while others use Nickel-Metal Hydride (NiMH) batteries.
For instance, if you own a Shark vacuum cleaner, you might opt for a Shark recommended battery replacement to ensure compatibility.
The capacity of the battery is typically measured in milliampere-hours (mAh).
Li-ion batteries are often pricier but last longer, weigh less and have less memory effect than NiMH batteries.
However, it’s always best to check with the manufacturer to determine the right battery type for replacement.
It is recommendable to purchase a battery with a capacity similar or higher than the original battery.
Now that you know the factors involved in choosing a replacement battery for your smart vacuum cleaner, it will be easier to make an informed decision. Remember to check the brand compatibility, battery type and capacity before making any purchase. In the next section, we will guide you on the steps to follow when replacing the battery of your smart vacuum cleaner.
Turn off and unplug the vacuum cleaner
Before attempting to replace the battery of your smart vacuum cleaner, it is essential to turn the device off and unplug it from the electrical outlet to ensure your safety. Both steps are crucial to prevent electrocution or any other accidents from occurring.\
Here are the steps to turn off and unplug your smart vacuum cleaner:
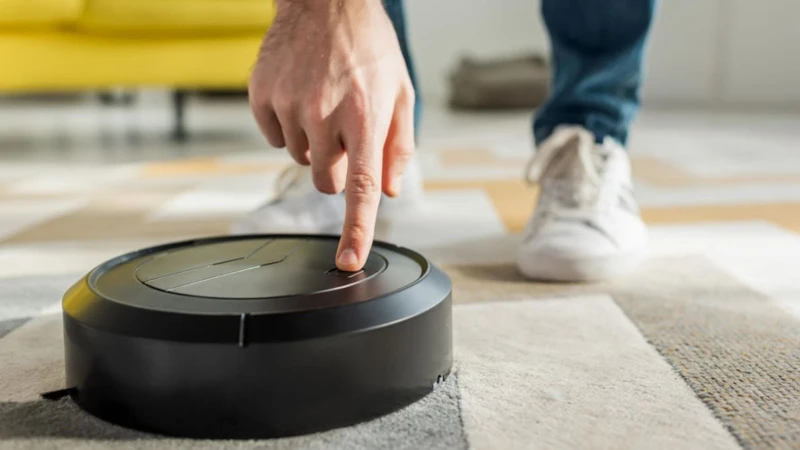
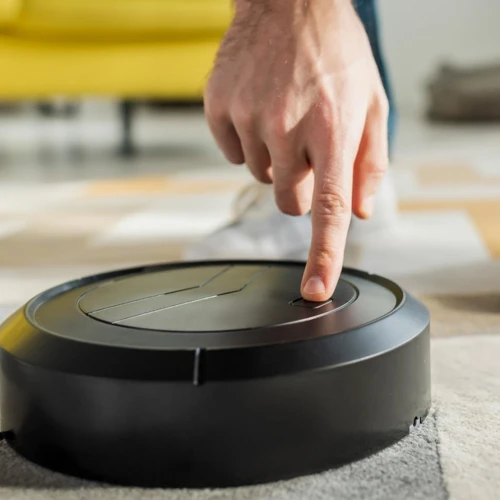
Switch off the vacuum cleaner by pressing the “power” button if it has one.
Unplug the vacuum cleaner from the electrical outlet to prevent the flow of electricity to the device during the replacement process.
If your smart vacuum cleaner has a removable battery, remove it from the unit. This step ensures safe access to the battery, making it easier to replace the old battery with a new one.
In case your vacuum cleaner’s battery does not have a removable feature, skip this step.
Remember, never skip this step and don’t forget to keep the device unplugged until the battery replacement process is complete to prevent any electrical shocks. Once you’ve turned off and unplugged the device, you’re ready to move on to the next step of replacing the battery.
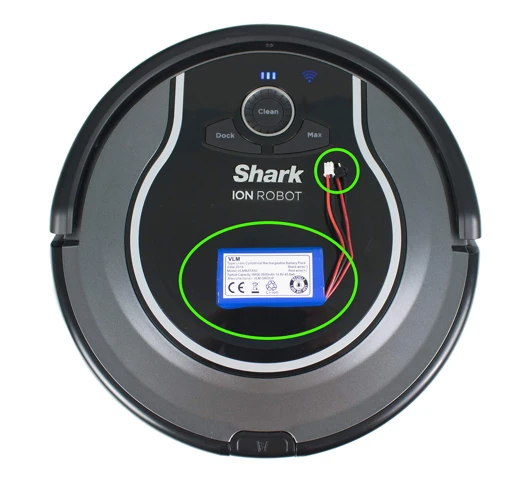
Remove the old battery
When it’s time to replace the battery of your smart vacuum cleaner, removing the old battery is the next step. This part of the process may differ slightly depending on the brand and model of your vacuum cleaner, but here are some general steps that you can follow:
Step
Description
Step 1:
Turn off and unplug the vacuum cleaner
Step 2:
Locate the battery compartment. This is usually on the side or bottom of the vacuum cleaner.
Step 3:
Remove the battery cover by sliding or pulling it off, depending on the design of your vacuum cleaner.
Step 4:
Identify the battery by looking for a rectangular box-shaped object with metal contacts on the top or bottom. Carefully disconnect the wires or cables attaching the battery to the vacuum cleaner.
Step 5:
Remove the battery by sliding, pulling, or lifting it out of the compartment. Be sure to handle the battery with care, as it may still hold a residual charge.
It’s important to note that some vacuum cleaners have batteries that are not user-replaceable, in which case you’ll need to contact the manufacturer or a certified repair center to have the battery replaced. Additionally, if you’re not comfortable working with electronics or unsure of how to remove the battery, it’s always a good idea to seek assistance from a professional or the vacuum cleaner’s customer support team.
Once you have successfully removed the old battery, you’ll be ready to install the replacement battery and get your smart vacuum cleaner back up and running at full power.
Insert the new battery
Once you have obtained the new battery, it’s time to replace the old one. Here are the steps to follow when inserting the new battery:
Locate the battery compartment: Depending on the brand and model of your smart vacuum cleaner, the battery compartment will be located either at the bottom or on the side of the device. Refer to the user manual for the specific location of the battery compartment.
Remove the battery cover: Use a screwdriver or your fingers to remove the battery cover. If it’s held in place with screws, use the appropriate screwdriver size to remove them.
Insert the new battery: Take the new battery and slide it into the battery compartment. Make sure that the contacts on the battery align with the contacts inside the battery compartment.
Secure the battery: If the battery compartment has a locking mechanism or a latch, use it to secure the battery in place. If there are screws, screw them in tightly to secure the battery.
Attach the battery cover: Put the battery cover back in place and secure it with screws or by snapping it into place.
Turn on the vacuum cleaner: Once you have inserted the new battery, turn on the vacuum to make sure it’s functioning properly.
It’s important to follow the manufacturer’s instructions and guidelines when replacing the battery in your smart vacuum cleaner. If you’re unsure of anything, refer to the user manual or seek assistance from a professional. Remember to dispose of the old battery properly and recycle it if possible. With a new battery installed, your smart vacuum cleaner will be back to its efficient cleaning performance.
Charge the new battery before use
Once you have successfully inserted the new battery, it is important to charge it fully before using it. Charging the battery before use ensures that it functions optimally and provides longer run time.
To charge the new battery, follow these steps:
Step
Description
1
Plug the charger into an appropriate power source.
2
Insert the charging cord into the port on the battery.
3
Check that the charger’s LED light is blinking as this indicates charging has started.
4
Leave the battery to charge completely. This can take anywhere from 2-5 hours depending on the brand and model of the vacuum cleaner.
5
Once the battery is fully charged, unplug the charger from the electrical outlet and then disconnect it from the battery.
6
Place the battery back in the vacuum cleaner, ensuring it clicks in place.
By charging the battery before use, you will improve its overall performance and extend its lifespan. It is also important to note that overcharging can cause damage to the battery. Always follow the manufacturer’s instructions on how long to charge the battery and avoid leaving it connected for extended periods.
Conclusion
After considering all the information about how to tell when your smart vacuum cleaner battery needs to be replaced and how to replace it, it is clear that keeping your vacuum cleaner in its optimal condition is crucial for both its performance and lifespan.
Replacing the battery timely is necessary to guarantee a long-lasting performance of the vacuum cleaner while maintaining its efficiency. By observing the indications that the battery is becoming worn-out, you can identify when it’s time to replace it before it stops working altogether.
Not replacing the battery in a timely manner not only affects the performance of the vacuum cleaner, but it can also cause damage to the vacuum cleaner itself. Running your vacuum cleaner on a weak battery can cause the vacuum motor to overheat, which can lead to major issues and expensive repairs.
Therefore, it is important to be proactive when keeping your smart vacuum cleaner in good condition. By understanding when to replace the battery and how to replace it, you can save yourself from potential damage to your vacuum cleaner and the hassle of frequent repairs.
Overall, replacing your smart vacuum cleaner battery is a straightforward process, and it can make a significant difference in its performance and longevity. So, make sure to keep an eye out for the signs that the battery is wearing out, and replace it promptly to enjoy the full benefits of your smart vacuum cleaner.
Frequently Asked Questions
1. How do I know if my smart vacuum cleaner needs a new battery?
If your smart vacuum cleaner doesn’t hold a charge as long as it used to, shuts off during use, or the battery indicator light flashes or blinks continuously, it may be time to replace the battery.
2. Can I use a generic or off-brand battery in my smart vacuum cleaner?
It’s best to use a battery recommended by the manufacturer to ensure compatibility and performance. Using a generic or off-brand battery may damage the vacuum cleaner or reduce its battery life.
3. How long should I charge my new smart vacuum cleaner battery?
Refer to the manufacturer’s instructions for the recommended charging time. Generally, new batteries need to be fully charged before use, which may take several hours.
4. How can I find the right replacement battery for my smart vacuum cleaner?
Check the model number and specifications of your vacuum cleaner and search for compatible replacement batteries online. You can also contact the manufacturer or a professional repair service for assistance.
5. How often should I replace my smart vacuum cleaner battery?
The lifespan of a smart vacuum cleaner battery varies depending on usage and care. Generally, it can last for 1-2 years before needing replacement.
6. Can I replace the smart vacuum cleaner battery myself?
Yes, it’s possible to replace the battery yourself if you have the right tools and follow appropriate safety precautions. However, some vacuum cleaner models may require professional repair or battery replacement services.
7. What should I do with the old battery after replacing it?
Dispose of the old battery properly according to local regulations. Some retailers or manufacturers may offer battery recycling or disposal programs to reduce environmental impact.
8. How can I maintain the battery life of my smart vacuum cleaner?
Avoid overcharging or undercharging the battery, store it in a cool and dry place when not in use, and follow the manufacturer’s instructions for care and maintenance.
9. What are some benefits of using a smart vacuum cleaner?
Smart vacuum cleaners can save time and effort by autonomously cleaning floors and detecting obstacles or dirt. They may also offer advanced features such as Alexa connectivity, scheduling, and remote control via smartphone apps.
10. Are there any disadvantages to using a smart vacuum cleaner?
Smart vacuum cleaners may be more expensive than traditional ones, and may require regular maintenance and cleaning of their sensors and brushes. They may also have limitations in terms of battery life, navigation, and cleaning power compared to manual cleaning.