Are you tired of your smart vacuum cleaner breaking down after only a few months of use? Do you wish there was a way to keep your robotic helper running smoothly for years to come? Look no further, because we have the ultimate guide to maintaining your smart vacuum cleaner for longevity. From general maintenance tips to software and sensor upkeep, this article covers everything you need to know to make sure your smart vacuum cleaner stays in top shape. So, sit back and relax, as we take you through step-by-step instructions for keeping your smart vacuum cleaner running like new.
General Maintenance Tips
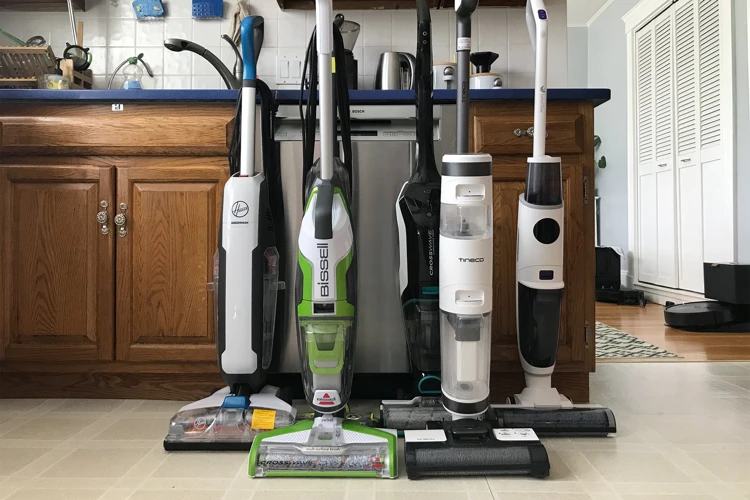
Maintaining your smart vacuum cleaner is essential to ensure its longevity and efficient performance. Implementing general maintenance tips can help prevent damage and reduce the need for repairs. Regular maintenance also ensures that your smart vacuum cleaner operates at its best, keeping your floors spotless with ease. In this section, we’ll explore some of the essential general maintenance tips to keep your smart vacuum cleaner in top shape. Let’s dive in!
One of the most important aspects of general maintenance is cleaning the dustbin and filter. Let’s discuss this in more detail. If you want to learn more about cleaning the dustbin and filter, check out our detailed guide on cleaning your smart vacuum cleaner.
1. Clean the Dustbin and Filter
One of the most important factors in maintaining the longevity of your smart vacuum cleaner is keeping the dustbin and filter clean. Over time, the dustbin collects a lot of debris, hair, and dust, which not only reduces the efficiency of the vacuum cleaner but can also lead to long-term damage if not attended to. A clogged filter can also prevent proper airflow, causing the vacuum to overheat.
To ensure the optimum performance of your smart vacuum cleaner, follow these simple steps to clean the dustbin and filter:
- Step 1: Turn off the smart vacuum cleaner and unplug it from the charging dock or power source to avoid accidents.
- Step 2: Locate the dustbin and open it using the button or latch provided.
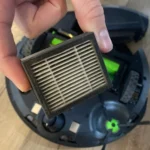
- Step 3: Remove the filter and tap it gently to remove dirt and debris.
- Step 4: Rinse the filter with water and let it air dry for at least one day until it is completely dry.
- Step 5: Use a brush or cloth to clean the dustbin and remove any remaining debris.
- Step 6: Wipe the inside of the dustbin and filter compartment with a damp cloth, then let it air dry completely before reassembling.
- Step 7: Once everything is dry, reattach the filter and insert the dustbin into the smart vacuum cleaner.
Following these steps will ensure that the smart vacuum cleaner operates at its optimum level, giving you the best results and ensuring its longevity.
It is recommended to clean the dustbin and filter at least once a week to prevent any excessive buildup that can cause the vacuum cleaner to malfunction. Neglecting such maintenance can lead to a higher chance of clogging, damage to the system, and a shorter lifespan of the smart vacuum cleaner.
If you want to learn more about the importance of smart vacuum maintenance, you can check out our previous article on the importance of smart vacuum maintenance. Additionally, if you’re new to owning a smart vacuum cleaner, you can also check out our smart vacuum cleaner mistakes to avoid and tips and tricks to help you get the most out of your device.
2. Check the Brushes Regularly
Regularly checking the brushes of your smart vacuum cleaner is one of the most important maintenance routines you can perform. Over time, the brushes on the vacuum cleaner can become tangled with hair or other debris, which can cause them to stop working effectively. This, in turn, can cause your vacuum cleaner to malfunction and leave dirt and debris on your floors instead of cleaning them. To ensure that your smart vacuum cleaner’s brushes are working correctly, here are some maintenance tips to follow:
| Maintenance Tip | Description |
|---|---|
| Inspect the Brushes | Regularly check the brushes for damage, such as broken bristles or debris that might be wrapped around them, which can impair their performance. Use a brush to gently remove any debris you see, or use a pair of scissors to cut away any tangled hair or string. |
| Clean the Brushes | Brushes that are clogged with dirt, dust, or hair can reduce the suction power of your smart vacuum cleaner. To clean them, remove the brushes from the unit and wash them thoroughly in warm, soapy water. Make sure you remove all debris from the brushes, then let them dry completely before reattaching them to the vacuum. |
| Replace the Brushes | If the brushes are showing signs of wear and tear or are no longer working effectively after you have tried cleaning them, it might be time to replace them. Check your user manual to see the type of brushes your smart vacuum cleaner uses, then order the replacement parts from the manufacturer website or an authorized dealer. Always use only original brushes authorized by the manufacturer to ensure the highest quality and longevity of your vacuum cleaner’s performance. |
Checking and maintaining the brushes of your smart vacuum cleaner is easy and essential for ensuring its optimal performance. Follow these tips regularly, and you’ll enjoy a cleaner, healthier, and more comfortable living environment.
3. Remove Tangles
Tangles can be a major issue for smart vacuum cleaners, especially if you have pets with long hair or if you have a lot of carpeting in your home. When the brushes get tangled with hair or debris, it can cause the vacuum to lose suction power, leading to poor cleaning results. In order to maintain the longevity of your smart vacuum cleaner, it’s important to regularly remove any tangles that may form in the brushes. Here are some steps you can take:
1. Turn off your smart vacuum cleaner. Safety first! Before you start removing tangles, make sure your vacuum cleaner is turned off and unplugged.
2. Remove the brushes. Depending on the model of your smart vacuum cleaner, the process for removing the brushes may differ. Check the user manual for specific instructions on how to remove the brushes from your vacuum cleaner.
3. Use scissors or a seam ripper to carefully cut away any tangles. Make sure to remove all tangles from the brushes, as leaving any tangled hair or debris behind can cause further issues down the line.
4. Clean the brushes thoroughly. Once the tangles have been removed, use a cleaning tool or brush to remove any remaining hair or dirt from the brushes.
5. Reattach the brushes to the vacuum cleaner. Follow the instructions in your user manual to properly reattach the brushes. Make sure they are firmly in place before turning on your vacuum cleaner.
By following these steps and regularly removing tangles from your smart vacuum cleaner, you can help ensure that your vacuum performs at its best for years to come.
Software Maintenance Tips
Now that we’ve covered some general maintenance tips, let’s dive into how you can take care of the software aspects of your smart vacuum cleaner. Keeping the software up-to-date and working properly is just as important as maintaining the hardware components, and neglecting it can lead to decreased efficiency and performance. So, grab your laptop and let’s get started with some key software maintenance tips.
1. Keep the App and Firmware Up-To-Date
Updating the app and firmware of your smart vacuum cleaner is crucial for maintaining its optimal performance. Regular updates ensure that the device is bug-free and functions smoothly. It also improves the functionality of the vacuum cleaner while fixing any software-related issues.
To keep the app and firmware up-to-date, follow these tips:
| Tip | Description |
|---|---|
| Check for Updates | Periodically check the app and firmware to see if an update is available. Most smart vacuum cleaners have an option to automatically download and install the latest firmware and app updates. |
| Download and Install Updates | When an update is available, download and install it as soon as possible. Not updating the app and firmware can cause the device to become slow and unresponsive. |
| Key Features Enhancement | Updates provide new and improved features, and enhanced functionality. Updating the app and firmware ensures you have the latest and greatest features, such as voice control or improved mapping capabilities. |
| Bug Fixes | Software updates typically include bug fixes, which can drastically improve the performance of the device. Failure to update the app and firmware can result in system crashes and unexpected stoppages. |
Keeping the app and firmware up-to-date is a simple yet essential step in maintaining the longevity of your smart vacuum cleaner. Take the time to check for and install updates as soon as they become available to enjoy the benefits of a well-functioning device.
2. Reset Your Smart Vacuum Cleaner
Regularly resetting your smart vacuum cleaner is an effective way to maintain its performance and longevity. The process of resetting can vary depending on the model of your cleaner, so it’s important to refer to the user manual for specific instructions. However, the general steps to follow for resetting your smart vacuum cleaner are:
- Turn off the power: Before performing any reset, make sure to turn off and unplug your smart vacuum cleaner from the power source to ensure your safety.
- Press and hold: Locate the reset button on your vacuum cleaner(it’s usually situated at the bottom of the device). Press and hold the button for about 10 seconds or until you see the lights blinking. This will erase any memory or overheating issues the cleaner may have experienced previously, hence it should operate smoothly.
- Reactivate the vacuum cleaner: After completing the reset, plug in the cleaner and restart it. If the device turns on, it means the reset was successful, and the vacuum cleaner is ready to perform efficiently again.
Remember to perform this process occasionally, especially if you notice issues such as decreased suction power, low battery life, or unresponsiveness to commands from the app. Resetting your smart vacuum cleaner can be an effective way to address these issues and restore your device’s performance.
3. Check for Error Codes
Errors can occur on your smart vacuum cleaner for a variety of reasons, such as a malfunctioning motor or a navigation issue. It’s important to promptly identify and troubleshoot any issues to ensure the longevity of your device. One way to identify these issues is by checking for error codes.
Here are some steps to follow:
- Refer to the user manual to identify what each error code means.
- Once you’ve identified the error code, check whether it requires a basic fix by restarting the device or if it requires further troubleshooting.
- If the error code persists after attempting to fix the problem, contact customer support for guidance on how to proceed.
Ignoring error codes and postponing maintenance can result in further damage to your device, which can be costly to repair or even require a replacement. Remember, prevention is better than cure!
In addition to checking for error codes, it’s important to practice regular maintenance to prevent errors from occurring in the first place. This includes cleaning the dustbin and filter, checking the brushes for tangles, and keeping the sensors clean. By following these steps, you can ensure the longevity of your smart vacuum cleaner and enjoy cleaner floors for longer.
Battery Maintenance Tips
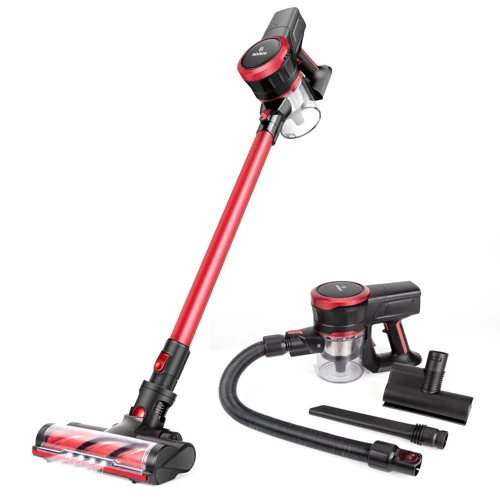
One of the most critical aspects of maintaining your smart vacuum cleaner for longevity is taking proper care of its battery. After all, without a functioning battery, your device will be unable to carry out its job effectively. This is why it is essential to follow these battery maintenance tips closely to ensure that your smart vacuum cleaner stays operational for as long as possible. From charging the battery correctly to replacing it when necessary, let’s explore all the ways you can keep your device’s battery functioning optimally.
1. Charge the Battery Properly
When it comes to maintaining your smart vacuum cleaner, proper battery maintenance is essential for ensuring longevity and optimal performance. Here are some tips for charging your smart vacuum cleaner battery properly:
| Tip | Description |
|---|---|
| 1 | Read the manufacturer’s instructions to determine the appropriate charging method for your specific model. |
| 2 | Avoid overcharging the battery, as this can shorten its lifespan. |
| 3 | Charge the battery after each use to ensure it is always ready for your next cleaning session. |
| 4 | Avoid using the smart vacuum cleaner while it is charging, as this can damage the battery and decrease its overall lifespan. |
| 5 | Use only the charger provided by the manufacturer, as using a third-party charger can damage the battery or the vacuum cleaner itself. |
| 6 | Store the battery and vacuum cleaner in a cool, dry place to prevent damage to the battery and to extend its lifespan. |
By following these battery maintenance tips, you can ensure that your smart vacuum cleaner is always ready to clean, helping to prolong its lifespan and keep it running smoothly for years to come.
2. Store the Battery Correctly
Properly storing the battery of your smart vacuum cleaner is crucial to ensuring its longevity. Here are some tips on how to store it correctly:
- Keep the battery in a cool and dry place: Extreme temperatures can damage the battery, so it’s best to store it in a cool and dry place. Avoid storing it in direct sunlight or near a heat source.
- Avoid leaving the battery fully charged: If you’re not planning to use the vacuum cleaner for a while, it’s best to store the battery with a partial charge. A fully charged battery that’s left unused can lose its capacity over time.
- Do not store the battery for too long: Lithium-ion batteries have a limited lifespan, even when not in use. Storing the battery for too long can cause it to degrade and lose its capacity. It’s best to use the battery regularly and not let it sit for extended periods.
- Keep the battery away from metal objects: Metal objects can short-circuit the battery and cause damage. It’s best to store the battery in a container or bag and away from metal objects.
By following these tips, you can help extend the life of your smart vacuum cleaner’s battery and ensure that it’s always ready for use.
3. Replace the Battery When Necessary
When it comes to prolonging the lifespan of your smart vacuum cleaner, proper battery maintenance is crucial. While most smart vacuum cleaners come with high-quality batteries that can last for years, they can still degrade over time due to excessive use or environmental factors.
Signs that your smart vacuum cleaner battery needs replacement
To ensure your smart vacuum cleaner works optimally and doesn’t lose power and suction over time, it’s essential to replace the battery when necessary. But how do you recognize that the battery needs replacement?
Here are some signs to watch out for:
| Indicator Lights | If your vacuum cleaner’s battery indicator lights falter or don’t light up at all, it indicates a serious problem. This could mean your battery is about to die, and you need a replacement. |
|---|---|
| Decreased Runtime | If your smart vacuum cleaner doesn’t run for as long as it used to, even after a full charge, it could be due to a weaker battery. A new battery would solve the problem and restore the original runtime. |
| Failed Charge | If you find it difficult to charge your smart vacuum cleaner or it doesn’t charge at all, it’s another sign that the battery needs replacement. |
How to replace your smart vacuum cleaner battery
Replacing your smart vacuum cleaner battery is a simple process that shouldn’t take much time. However, before you begin the replacement, ensure you have the right battery replacement that’s compatible with your device.
Here’s a step-by-step guide to help you replace your smart vacuum cleaner battery.
- Turn off and unplug your smart vacuum cleaner. Locate the battery compartment and remove the old battery.
- Gently disconnect the wires attached to the battery terminals and set the old battery aside.
- Insert the new battery into the compartment and connect the wires to the battery terminal. Ensure the connections are secure but not too tight.
- Turn on your smart vacuum cleaner and charge the new battery for at least three hours or until it’s fully charged.
Remember that the exact replacement process may differ depending on your smart vacuum cleaner model. Always refer to the manufacturer’s instructions when replacing your battery to avoid damaging your device.
Conclusion
By properly maintaining your smart vacuum cleaner battery, you can extend its lifespan and keep your device running efficiently. Keep an eye out for the signs that your battery needs replacement, and follow the steps above to replace it when necessary.
Sensors Maintenance Tips
Keeping your smart vacuum cleaner’s sensors in good condition is crucial for ensuring its optimal performance. The sensors are responsible for detecting obstacles and mapping out the cleaning area, making them an essential component of the device. Without proper care and maintenance, the sensors can become dirty or obstructed, leading to inaccurate navigation and potentially causing damage to the vacuum cleaner. In this section, we’ll look at some key tips for maintaining the sensors of your smart vacuum cleaner to ensure it remains efficient and effective.
1. Keep Sensors Clean
Sensors are an essential component of smart vacuum cleaners. They help the device navigate and avoid obstacles while cleaning. However, over time, these sensors can become dirty and affect the device’s performance. Hence, it is vital to keep the sensors clean to ensure that the device operates at maximum efficiency. Here are some tips to keep sensors clean:
- Clean the sensors with a soft cloth: The first step to maintaining clean sensors is to wipe them down gently with a soft cloth. Use a microfiber cloth to avoid scratches. Avoid using harsh chemicals or abrasive materials as it could damage the sensors.
- Blow away loose dirt and debris: There might be some loose dirt particles stuck inside the sensors. Use canned air or a blower to dislodge any debris that might have crept inside.
- Use a specialized cleaning spray: There are many specialized cleaning sprays available in the market that can be used to clean sensors. These sprays are great for removing tough stains and dirt that are difficult to remove. Be sure to follow the instructions on the label before using the spray.
- Don’t forget about the charging port: The sensors located at the charging port of the device can also become dirty. Hence, it is important to keep this area clean as well. Use a soft brush or a cotton swab to clean the charging port.
- Regular cleaning schedule: Finally, it is important to make sensor cleaning a regular part of your smart vacuum cleaner maintenance schedule. Set a reminder to clean your device every three to six months or even more frequently if your device is in heavy use.
By following these simple tips, you can ensure that your smart vacuum cleaner’s sensors remain clean and the device continues to operate at optimal performance. Remember that regular maintenance and cleaning can significantly extend the life of your device.
2. Check for Obstructions
When it comes to maintaining your smart vacuum cleaner, it’s important to make sure that the sensors are working properly. One key issue that can arise is obstructions in the sensors. To prevent this from happening, follow these steps:
- Regularly Check for Obstructions: It’s important to check the sensors for any obstructions that may be blocking their path. This could include items such as furniture, pet toys or other debris. Make sure to clear any obstructions from the area around the sensors so that they can work properly.
- Inspect the Sensors: Take a close look at the sensors and make sure that they are free from any debris or damage. If you notice any issues, consult the user manual for instructions on how to clean or repair the sensors.
- Test the Sensors: To ensure that the sensors are working properly, perform a few test runs around your home. Observe the robot vacuum’s movement and make sure that it doesn’t get stuck or encounter any issues with obstacles.
By checking for obstructions and keeping the sensors free from obstructions, you can extend the life of your smart vacuum cleaner and improve its performance. Remember to always read the user manual and seek professional help if you encounter any issues with your device.
3. Reset the Navigation System
If your smart vacuum cleaner seems to be having trouble navigating your home, it may be necessary to reset the system. This can be done easily, but the steps involved will vary depending on the brand and model of your device. Here are some general tips to keep in mind when resetting the navigation system of your smart vacuum cleaner:
| Step 1: | Refer to the user manual of your device to locate the reset button or combination of buttons needed to reboot the navigation system. |
| Step 2: | Once you have located the reset button or combination of buttons, turn off the device and unplug it from the power source. Wait a few minutes to allow the system to completely shut down. |
| Step 3: | Press and hold the reset button or combination of buttons for at least 10 seconds. Release the button and wait for the device to restart. |
| Step 4: | After the device has restarted, refer to the user manual to reprogram the device for your cleaning preferences and schedule. It may take a few cleaning cycles for the device to adjust to the new settings. |
It’s important to note that resetting the navigation system should be a last resort if your smart vacuum cleaner is not operating correctly. Before resetting, be sure to check for any obstructions or tangled brushes that may be preventing the device from moving correctly. Also, check for any error codes that may indicate a specific problem that needs to be addressed. By following these steps, you can reset the navigation system of your smart vacuum cleaner and get it back to cleaning efficiently.
Conclusion
In conclusion, maintaining your smart vacuum cleaner is crucial if you want it to last long and function at its best capacity. By following the general maintenance tips, such as cleaning the dustbin and filter, checking the brushes regularly, and removing tangles, you can ensure that your smart vacuum cleaner performs effectively.
But maintaining the software of your smart vacuum cleaner is just as important. Always keep the app and firmware up-to-date, reset your smart vacuum cleaner when necessary, and check for error codes to avoid any malfunctions.
Don’t neglect the battery of your smart vacuum cleaner. Charge it properly, store it correctly, and replace it when necessary. This will help to ensure that your smart vacuum cleaner continues to function at its optimum level and that its lifespan is prolonged.
Lastly, the sensors of your smart vacuum cleaner also need to be maintained. Keep them clean, check for obstructions, and reset the navigation system. By maintaining all these aspects, you can enhance the performance of your smart vacuum cleaner and keep it running smoothly for years to come.
In essence, taking care of your smart vacuum cleaner is like taking care of any other home appliance. Don’t overlook its maintenance, and it is sure to serve you well. So make sure to follow these maintenance tips for the ultimate guide to maintaining your smart vacuum cleaner for longevity.
Frequently Asked Questions
1. Can I use any type of filter for my smart vacuum cleaner?
It is recommended to use the specific filter recommended by the manufacturer for optimal performance and longevity.
2. How often do I need to replace the brush roll?
The frequency of brush roll replacement varies depending on the usage and type of flooring. It is recommended to observe the wear and tear of the brush roll and replace it when necessary.
3. Is it necessary to reset my smart vacuum cleaner?
Resetting your smart vacuum cleaner can help resolve any software issues and improve its performance. It is recommended to reset it periodically.
4. Can I replace the battery of my smart vacuum cleaner?
Yes, most smart vacuum cleaners have replaceable batteries. Consult the manufacturer instructions to properly replace the battery.
5. How often should I charge the battery of my smart vacuum cleaner?
It is recommended to charge the battery after each usage to ensure optimal performance and longevity.
6. Can I use my smart vacuum cleaner on thick carpets?
Smart vacuum cleaners have different suction power and brush rolls that are specifically designed to handle different types of flooring. Check if your smart vacuum cleaner is suitable for thick carpets before use.
7. Can I clean the sensors of my smart vacuum cleaner with water?
No, avoid using water on the sensors. Use a soft, dry cloth to gently clean the sensors.
8. How often should I clean the dustbin of my smart vacuum cleaner?
It is recommended to clean the dustbin after each usage to prevent blockage and maintain optimal suction power.
9. Can I use third-party apps to connect to my smart vacuum cleaner?
It is recommended to use the official app provided by the manufacturer to ensure compatibility and avoid any potential security risks.
10. How often should I replace the filter of my smart vacuum cleaner?
The frequency of filter replacement varies depending on the usage and type of flooring. It is recommended to observe the filter’s condition and replace it when necessary.


