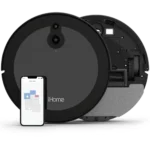
Have you ever experienced your smart vacuum cleaner wandering aimlessly around your house or missing spots during cleaning? It could be due to a poorly maintained navigation system. The navigation system in your smart vacuum cleaner is responsible for mapping out and efficiently cleaning each area of your home. Neglecting it could result in less effective cleaning or even a malfunctioning device. But don’t worry, we’ve got you covered with these tips on how to maintain the navigation system in your smart vacuum cleaner. From cleaning the sensors and cameras to updating firmware, we’ll guide you through the steps to ensure your vacuum cleaner keeps your floors spotless.
Why Maintaining Navigation System is Important
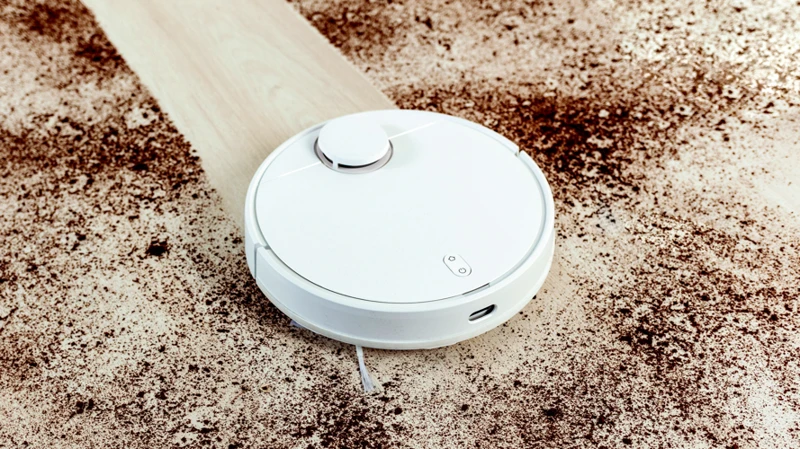
As technology advances, smart vacuum cleaners are revolutionizing home cleaning with their advanced features, including navigation systems. The navigation system is a crucial component of the smart vacuum cleaner that ensures efficient cleaning and keeps the machine on track. Properly maintaining the navigation system is essential to get the most out of your smart vacuum cleaner and avoid any operational issues. In this section, we will explore the reasons why maintaining the navigation system is so important and provide tips to help you maintain it properly. So, let’s dive in!
Keeps Your Vacuum on Track
Properly maintaining the navigation system in your smart vacuum cleaner is crucial if you want to keep it on track and functioning efficiently. Regular maintenance ensures that your vacuum will continue to navigate through your home without getting lost, stuck or confused. Without proper maintenance, the navigation system may start to fail, resulting in a less effective cleaning routine.
To keep your vacuum on track, you need to keep the sensors, cameras and other components clean and clear of obstructions. Regular cleaning of the sensors and cameras is essential to ensure that they are able to detect objects and navigate your home properly. Obstructions such as furniture, toys or cords can cause navigation issues and block the vacuum’s path.
It’s also important to reset the mapping after moving furniture to ensure that the vacuum adjusts its new pathing and doesn’t become confused. Updating the firmware can also help improve the navigation system’s accuracy and reliability. By keeping the navigation system up-to-date, you can reduce the risk of your vacuum getting lost, stuck, or redirected to the wrong room.
In addition, cleaning the brushes and filters can help keep the vacuum’s power consistent and effective. Regularly emptying and cleaning the dustbin will also allow for more efficient suction and prevent dirt and debris from building up and causing further problems.
Properly charging and storing your smart vacuum cleaner is also essential for maintaining its longevity. Ensuring that it is charged correctly and stored in a cool, dry place can help prevent damage to the battery and extend the life of the device.
Proper maintenance of your smart vacuum cleaner’s navigation system is crucial in ensuring an efficient and reliable cleaning routine. By taking the time to clean and check the various components of your vacuum, you can help keep it on track and functioning correctly for years to come. For more information about the importance of smart vacuum mapping, check out our other article “The Importance of Smart Vacuum Mapping”.
Ensures Efficient Cleaning
Maintaining the navigation system in your smart vacuum cleaner ensures efficient cleaning. A properly functioning navigation system allows the vacuum to create an accurate map of the space it needs to clean and saves time by avoiding unnecessary movements. Here are some tips to maintain the navigation system and ensure minimal cleaning time.
- Clean sensors and cameras: Dust, dirt, and debris on the sensors and cameras can cause navigation issues. Give your vacuum’s sensors and cameras a thorough clean periodically to ensure they can detect the environment accurately.
- Check for obstructions: Objects or items out of place can obstruct the cleaning path of the vacuum. Frequently check for any obstructions along the vacuum’s cleaning path and clear them away.
- Reset mapping after moving furniture: Moving furniture around can confuse the map created by the vacuum’s navigation system. Resetting the map after moving furniture can help the vacuum plan its cleaning route more accurately to maximize efficiency.
- Update firmware: Updating the vacuum’s firmware helps it stay up-to-date with the latest technology and software updates. An updated navigation system can help the vacuum clean more efficiently and effectively, particularly in larger or more complicated spaces.
Keeping your smart vacuum’s navigation system in good condition helps it to navigate its cleaning path, thus optimizing its cleaning efficacy. By eliminating distractions and obstructions, your vacuum saves you time and increases its overall cleaning efficiency. In case of any further issues, check out some of our other articles regarding smart vacuum navigation issues or take a look at some of the best smart vacuums with advanced navigation systems that are currently available in the market.
How to Maintain Navigation System
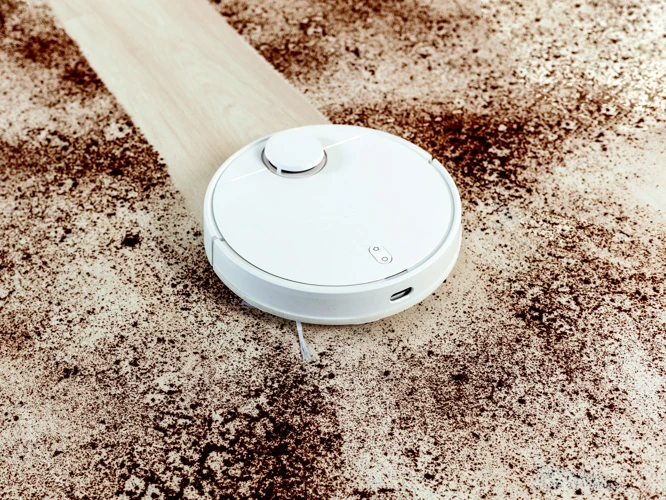
Ensuring that your smart vacuum cleaner’s navigation system is properly maintained is essential to keep it running smoothly and effectively. Neglecting maintenance can result in poor cleaning performance and even damage to your vacuum. Fortunately, maintaining your vacuum’s navigation system is a relatively simple process that can be done in just a few steps. In the following guide to smart vacuum navigation system maintenance, we’ll walk you through everything you need to know to keep your vacuum running at peak performance.
Regularly Clean Sensors and Cameras
Maintaining the navigation system in your smart vacuum cleaner is crucial to ensuring that it can navigate your home and clean floors efficiently. Regularly cleaning the sensors and cameras is one of the most important steps to keeping your smart vacuum in good working condition.
1. Remove Debris from Sensors
The sensors in your smart vacuum can become dirty over time, which can cause the vacuum to navigate incorrectly. To clean the sensors, use a soft cloth or cotton swab to gently remove any dirt or debris that may be stuck on them. This will help the vacuum “see” its surroundings better and avoid obstacles.
2. Wipe Down the Cameras
Having clean cameras is important to ensure that your smart vacuum can map your home accurately. Use a soft, damp cloth to wipe down the cameras after each use. Avoid using harsh chemicals that may scratch or damage them. If you notice any scratches, consider contacting the manufacturer for repairs.
3. Check for Cracks or Damage
Regularly inspect the sensors and cameras for any signs of cracks or damage. If any damage is detected, it can hinder the vacuum’s ability to navigate and clean floors effectively. If you do notice any damage, contact the manufacturer for repairs or replacement parts.
4. Protect the Sensors
Protecting the sensors on your smart vacuum can also help to keep them clean and functioning properly. Consider placing plastic guards over them to prevent damage or debris buildup. Additionally, ensure that the vacuum is not picking up any sharp or hard objects that could damage the sensors.
By regularly cleaning and maintaining the sensors and cameras on your smart vacuum, you can help to ensure that it is able to navigate your home and clean your floors efficiently. For more information on how advanced navigation systems are revolutionizing home cleaning, check out our article on revolutionizing home cleaning with smart vacuum navigation systems.
Check for Obstructions
One of the most important things to do in maintaining your smart vacuum cleaner’s navigation system is to check for obstructions. Obstacles such as furniture legs, toys, or cords can cause the vacuum to get stuck or even damage the machine if not removed in time.
Here are some steps to follow when checking for obstructions:
| Step | Action |
| 1 | Check the vacuum’s path before starting cleaning to avoid any obstacles that might be in its way. |
| 2 | Remove any small objects or obstacles that may prevent the vacuum from moving freely. |
| 3 | Identify any difficult corners or tight spaces that the vacuum might have trouble passing through and rearrange furniture accordingly. |
| 4 | Use boundary markers to create no-go zones for your vacuum, preventing it from getting stuck in a tight spot or accidentally knocking over an object. |
| 5 | If the vacuum gets stuck, turn it off and remove the obstruction to prevent damage to the device’s navigation system. |
By following these steps, you can help ensure that your smart vacuum cleaner’s navigation system stays in good condition, reducing the risk of damage to your device and prolonging its durability. Make sure to check your vacuum’s documentation to see specific recommendations on how to handle obstructions, as different brands may have different instructions.
If you’re in the market for a smart vacuum with advanced navigation capabilities, then consider investing in a model that can efficiently navigate around obstacles. Models like the ones with advanced navigation, such as Advanced Navigation Smart Vacuum, Smart Vacuum Navigation, and Smart Vacuum Nav are designed to have the best navigation capabilities for cleaning your house thoroughly.
Reset Mapping after Moving Furniture
Moving furniture around can disrupt the mapping of your smart vacuum cleaner, which means it might not clean as efficiently as it used to. To avoid this, it’s important to reset the mapping after you move furniture around. Here are the steps you can follow to do that:
| Step | Description |
|---|---|
| Step 1 | Clear the area around the vacuum cleaner so it has an unobstructed path to operate. |
| Step 2 | Power on the vacuum cleaner and make sure it’s fully charged. |
| Step 3 | Press and hold the reset button for a few seconds. |
| Step 4 | The vacuum cleaner will beep and the indicator lights will flash to confirm that the mapping has been reset. |
| Step 5 | Allow the vacuum cleaner to operate for a few minutes so that it can build a new map of the area. |
Resetting the mapping after moving furniture around is essential for ensuring that your smart vacuum cleaner can navigate efficiently and clean effectively. By doing this, you can also ensure that it doesn’t get stuck or miss any spots while cleaning. For more advanced navigation tips for your smart vacuum cleaner, check out our article on Advanced Navigation Tips for Your Smart Vacuum Cleaner.
Update Firmware
Keeping the firmware on your smart vacuum cleaner up-to-date is essential for ensuring optimal performance and reliability. Here are some reasons why updating the firmware is important:
- Improves Navigation Accuracy: Firmware updates often include improved algorithms and bug fixes that can help your vacuum better navigate around your home.
- Enhances Battery Life: Some firmware updates can optimize power usage, helping your vacuum run longer on a single charge.
- Increases Compatibility: Firmware updates can increase compatibility with other devices in your smart home ecosystem, improving overall functionality.
To update the firmware of your smart vacuum cleaner, follow these steps:
- Check for Updates: Go to the manufacturer’s website or app and check if there are any available firmware updates for your specific model.
- Download the Update: If updates are available, download them according to the manufacturer’s instructions, typically through a computer or phone app.
- Install the Update: Install the update onto your vacuum cleaner following the manufacturer’s instructions.
- Test the Vacuum: After installing the update, test your vacuum’s navigation and cleaning capabilities to ensure everything is working correctly.
Regularly checking for firmware updates and installing them promptly can ensure that your smart vacuum cleaner is always running at its best. It’s a simple step that can help you get the most out of your investment and improve your overall cleaning experience.
Additional Tips for Maintaining Your Smart Vacuum Cleaner
Now that you know how to maintain the navigation system in your smart vacuum cleaner, there are a few additional tips to keep your vacuum running smoothly. These tips will help you keep your smart vacuum cleaner in excellent condition, ensuring it stays on track and operates efficiently. It’s important to keep in mind that maintaining your smart vacuum cleaner will not only save you time and money in the future, but it will also improve the performance of the vacuum. So, let’s dive into these additional maintenance tips to help you get the most out of your smart vacuum cleaner.
Clean Brushes and Filters
As a smart vacuum cleaner owner, it is essential to keep up with the maintenance of your device. One important aspect of maintenance is cleaning the brushes and filters. These components work together to pick up dirt and debris from your floors and carpets.
Why cleaning the brushes and filters is important?
Over time, brushes and filters can become clogged with dirt and hair, hindering the vacuum’s cleaning performance. If left uncleaned, the brushes may stop rotating or become damaged, leading to costly replacement or repair. Filters can become clogged, restricting airflow and reducing suction power.
How often should you clean the brushes and filters?
The frequency of cleaning depends on your usage of the device. However, it is recommended to clean the brushes and filters at least once a week or as prescribed by the manufacturer.
How to clean the brushes and filters?
Cleaning the brushes and filters is a straightforward process. Follow the steps below to ensure that your vacuum cleaner continues to operate at its best.
| Step 1: | Turn off the vacuum cleaner and unplug it from the power source. |
| Step 2: | Remove the brush roll from the vacuum cleaner by pressing the release button or unclipping it. |
| Step 3: | Use a pair of scissors or a brush to remove hair and debris from the brush roll carefully. |
| Step 4: | Check for any damage to the brush roll and replace if necessary. |
| Step 5: | Remove the filters from the vacuum cleaner and clean them with water or as recommended by the manufacturer. |
| Step 6: | Make sure the filters are dry before reinserting them in the vacuum cleaner. |
Avoid using harsh chemicals or submerging the filters and brush roll in water. Doing so can damage the filters and render the brush roll ineffective.
By regularly cleaning the brushes and filters, you can maintain your vacuum cleaner’s suction power and ensure optimal cleaning performance. Remember to follow the manufacturer’s guidelines for optimal maintenance.
Empty and Clean Dustbin Regularly
Regularly emptying and cleaning the dustbin of your smart vacuum cleaner is extremely important in maintaining its efficiency and lifespan. Here are some tips to get it done the right way:
| Step | Action |
|---|---|
| Step 1 | Turn off the vacuum cleaner. |
| Step 2 | Locate the dustbin on the vacuum cleaner. |
| Step 3 | Remove the dustbin from the vacuum cleaner. Most models have a release button or latch that unlocks the dustbin. |
| Step 4 | Hold the dustbin over a trash can and use your hands or a brush to remove any visible dirt or debris. Be sure to wear gloves if necessary. |
| Step 5 | Inspect the dustbin for any clogs or buildup. Use a soft cloth or brush to gently remove any remaining dirt or dust. |
| Step 6 | Wash the dustbin with water and mild soap, then rinse thoroughly. Allow the dustbin to air dry completely before reattaching it to the vacuum cleaner. |
| Step 7 | Replace the dustbin back into the vacuum cleaner and ensure that it is securely locked back in place. |
TIP: It’s recommended to clean the dustbin after every use, especially if you have a pet or if you vacuumed up a lot of dirt and debris. This prevents any buildup that can affect the suction power or cause unpleasant odors.
CAUTION: Do not put the dustbin or any accompanying parts into the dishwasher, and do not use harsh chemicals to clean it. This can damage the dustbin and affect its performance.
Charge Battery Properly
One of the most essential parts of maintaining your smart vacuum cleaner’s navigation system is charging the battery properly. Charging the battery correctly can extend its lifespan and ensure your vacuum works at its best. Here are some tips to remember:
| TIP | DESCRIPTION |
|---|---|
| Avoid Overcharging | Overcharging can damage the battery and reduce its lifespan considerably. Once the battery is fully charged, unplug the charger immediately. |
| Charge Fully Before First Use | Before using your smart vacuum cleaner for the first time, it’s essential to charge the battery fully for an extended period. This charges the battery to maximum capacity and improves its lifespan. |
| Use the Right Charger | Always use the charger that comes with your smart vacuum cleaner. Third-party chargers might not be compatible, which can damage the battery. |
| Store Fully Charged | If you’re not going to use your smart vacuum cleaner for an extended period, ensure that you store it fully charged. This prevents the battery from draining completely, which can damage it. |
| Avoid Deep Discharge | Try not to discharge the battery completely. This can reduce its lifespan significantly. Instead, recharge it whenever the battery level drops to a considerable extent. |
Remembering these tips and charging your smart vacuum cleaner’s battery correctly can ensure that you get the most out of your vacuum cleaner. A well-maintained smart vacuum cleaner will not only last longer but also perform at its optimal level.
Store in a Cool, Dry Place
When it comes to maintaining your smart vacuum cleaner, it’s important to consider where you store it. Storing your vacuum cleaner in the wrong environment can result in damage to its sensitive parts and components. That’s why it’s essential to store your smart vacuum cleaner in a cool, dry place.
Here are some tips and guidelines:
| Tip #1 | Store your smart vacuum cleaner in a location where the temperature stays between 32°F and 95°F. |
| Tip #2 | Avoid storing your vacuum cleaner in direct sunlight or near heat sources, such as fireplaces or radiators. |
| Tip #3 | Make sure the storage area is dry, as moisture can cause damage to electronic components. |
| Tip #4 | Do not store your vacuum cleaner in areas prone to extreme temperature changes or high humidity, such as basements or garages. |
| Tip #5 | If you need to store your vacuum cleaner for an extended period of time, remove the battery to prevent degradation. |
By following these simple guidelines, you can ensure that your smart vacuum cleaner stays in good working condition for many years. Remember, proper storage is just as important as regular maintenance, so don’t neglect this crucial aspect of keeping your smart vacuum cleaner running properly.
Conclusion
In conclusion, maintaining the navigation system of your smart vacuum cleaner is crucial for its optimal performance and longevity. By following the tips mentioned above, you can ensure that your vacuum stays on track and efficiently cleans your home. Regularly cleaning the sensors and cameras will prevent any buildup that may interfere with the navigation system’s accuracy. Similarly, checking for obstructions regularly will avoid any damage to the vacuum’s delicate parts. Resetting the mapping after moving furniture and updating firmware will also help your vacuum stay up to date and well synced with your home.
Along with navigation, other components of your smart vacuum cleaner require regular maintenance, including cleaning brushes and filters, emptying and cleaning the dustbin, and properly charging the battery. These additional steps will keep the vacuum running smoothly and free from clogs and other problems.
Remember to also store your vacuum in a cool, dry place when not in use. This will help prevent any damage to the vacuum’s sensitive components and ensure that it is ready for action the next time you need it.
Taking care of your smart vacuum cleaner doesn’t have to be a chore. With regular maintenance, you’ll enjoy optimal performance and a long-lasting cleaning companion. So, keep these tips in mind and enjoy a perfectly clean home every day, hassle-free.
Frequently Asked Questions
What are the benefits of maintaining the navigation system in my smart vacuum cleaner?
Maintaining the navigation system helps keep your vacuum on track and ensures efficient cleaning results.
How often should I clean the sensors and cameras in my smart vacuum cleaner?
Sensors and cameras should be cleaned once a week to ensure proper functionality.
What should I do if my smart vacuum cleaner hits an obstruction during cleaning?
Stop the cleaning cycle and remove the obstruction before restarting the cleaning process.
How do I reset the mapping in my smart vacuum cleaner after moving furniture?
Check the user manual for specific instructions on how to reset the mapping in your smart vacuum cleaner.
Why is it important to update the firmware in my smart vacuum cleaner?
Updating the firmware can improve the performance of your vacuum and fix any bugs or issues with the navigation system.
How often should I clean the brushes and filters in my smart vacuum cleaner?
Brushes and filters should be cleaned once a month, or more often if you have pets or high traffic areas.
What is the best way to empty and clean the dustbin in my smart vacuum cleaner?
Remove the dustbin from the vacuum, empty the contents into a trash can, and use a damp cloth to clean the interior before reattaching the dustbin.
Can I overcharge the battery in my smart vacuum cleaner?
No, most smart vacuum cleaners are designed to stop charging once the battery is fully charged to prevent overcharging.
Where should I store my smart vacuum cleaner?
Store your vacuum in a cool, dry place, away from direct sunlight and heat sources.
What should I do if my smart vacuum cleaner is not working properly?
Check the user manual for troubleshooting tips, or contact customer support for assistance.

