Maximize Your Smart Vacuum Cleaner’s Navigation System
Warning: A non-numeric value encountered in /var/www/html/wp-content/themes/generatepress/inc/structure/post-meta.php on line 165
by Dwight Gibson
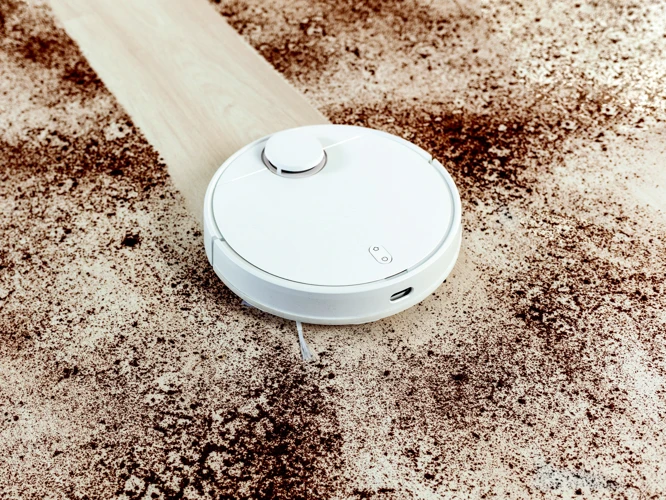
Imagine coming home to a clean home with floors free of dust and dirt, without lifting a finger. Sounds like a dream come true, right? Well, with the rise of smart vacuums, this is becoming a reality for millions of homeowners worldwide. However, owning a smart vacuum cleaner isn’t enough to have a perfectly clean home. You also need to understand how to maximize its use. The navigation system in a smart vacuum cleaner plays an essential role in ensuring maximum performance. In this article, we’ll explore everything you need to know about your smart vacuum’s navigation system to keep your floors spotless. So, let’s dive in!
Table of Contents
Understanding Your Smart Vacuum’s Navigation System
As homeowners increasingly seek ways to make their lives easier, smart home technology has been revolutionizing the way people clean their homes. One of the key innovations in this field is the smart vacuum, which uses advanced navigation systems to efficiently navigate around a home and clean floors without any human intervention. However, before you can effectively utilize your smart vacuum’s navigation system to achieve maximum cleaning potential, it’s important to have a good understanding of how these systems work. In this section, we will explore the basics of smart vacuum navigation, including the types of navigation systems available, the advantages they offer, and tips for maximizing their effectiveness. For more information on advanced navigation systems, check out our article on top smart vacuums nav systems.
What is a Navigation System in a Smart Vacuum Cleaner?
A navigation system in a smart vacuum cleaner is what sets it apart from traditional vacuum cleaners. It is what differentiates a smart vacuum cleaner from its predecessors because it understands and adapts to the layout of your home. It uses various sensors and technologies to scan and map the environment, and then uses that map to effectively clean your floors.
There are different types of navigation systems that smart vacuums use, each with its advantages and disadvantages. To better understand them, we’ve created a table outlining the different types of navigation systems:
Type of Navigation System
How it Works
Laser-guided mapping system
Uses lasers to create a map of the environment, providing accurate mapping of the floor plan and identifying obstacles.
Camera-based mapping system
Uses a camera to create a map of the environment, providing a detailed mapping of the floor plan and identifying obstacles.
Inertial Navigation System
Uses accelerometers to detect changes in the direction and speed allowing to map itself as it moves around the house.
Bumper-based navigation system
Has physical bump sensors that allow it to detect obstacles and change direction appropriately but can be less efficient in mapping floor plans.
It’s important to note that the quality of your smart vacuum cleaner’s navigation system will affect its cleaning performance. A high-quality navigation system will allow your smart vacuum cleaner to clean your floors more effectively and efficiently. You can read more about the top smart vacuum navigation systems on the market.
Understanding the importance of smart vacuum mapping and navigation is essential to fully maximize your smart vacuum’s potential. With its advanced navigation system, your smart vacuum can efficiently navigate around obstacles and through tight spaces. It can also memorize the layout of your home and create a map that it uses to plan its cleaning routes.
Having a smart vacuum cleaner with a reliable navigation system can save you time and effort, giving you a seamlessly clean home. So make sure you choose the right one and master the smart vacuum navigation tips for keeping your smart vacuum running smoothly.
Types of Navigation Systems
When it comes to navigation systems in smart vacuum cleaners, there are two primary types: Random Navigation Systems and Advanced Navigation Systems.
Random Navigation Systems are typically found in older or more basic models. These systems simply move around the room in a random pattern, bouncing off walls and furniture until they cover the whole area. While they may eventually clean the entire space, it can be a time-consuming process and they may miss some spots. To learn about more issues with random navigation, read about smart vacuum navigation issues.
On the other hand, Advanced Navigation Systems are much more efficient and can make cleaning your home a breeze. These systems use advanced mapping and sensors to navigate the space in a logical pattern, covering every inch of the floor. They are efficient, time-saving, and high-performing. Advanced Navigation Systems give you the option of virtual boundaries and multiple cleaning modes, which greatly increase the efficiency of cleaning process. To learn more about advanced navigation systems, check out our article on advanced navigation systems in smart vacuums.
It is important to choose a smart vacuum with a good navigation system, so you can be sure that your floors are cleaned thoroughly and efficiently. When purchasing a smart vacuum cleaner, always pay attention to the type of navigation system it uses. The importance of smart vacuum mapping is often underestimated, but it is a key component of an efficient cleaning process. By investing in a smart vacuum with an advanced navigation system, such as a smart vacuum with reliable navigation, you can save time and energy while keeping your floors clean. Advanced navigation systems are revolutionizing home cleaning and improving the way we live.
Advantages of a Navigation System in a Smart Vacuum Cleaner
A navigation system in a smart vacuum cleaner has numerous advantages that allows it to stand out from traditional vacuum cleaners. Here are some of the benefits provided by this technology:
Advantages of a Navigation System in a Smart Vacuum Cleaner
Efficiency: A smart vacuum cleaner is more efficient due to its navigation system, which allows it to map out the entire room and clean it in an organized manner. It eliminates the possibility of the vacuum cleaner going over the same spot multiple times or missing any spots, which saves both time and energy.
Convenience: With a navigation system, a smart vacuum cleaner can clean your home even when you’re away. The scheduling feature allows you to set specific times for cleaning, which means you can leave your home and return to a clean house. Additionally, the ability to connect your smart vacuum cleaner to your mobile device makes it easy to control the cleaning process from anywhere.
Customizability: Smart vacuum cleaners with navigation systems can be customized to suit your cleaning needs. Some models have the option to set up virtual walls and no-go zones, which makes cleaning much easier. You can also adjust the cleaning modes and choose specific areas of the house that require more attention.
Precision: Navigation systems in smart vacuum cleaners provide better precision when cleaning. The sensors allow the vacuum cleaners to detect and avoid obstacles, such as furniture and decor. Additionally, some models have high-precision sensors that enable them to clean hard-to-reach areas with ease.
Durability: Smart vacuum cleaners with navigation systems are more durable since their sensors prevent them from bumping into objects and walls while cleaning. This technology also ensures that the vacuum cleaner avoids stairs, which reduces the risk of damage or accidents.
A navigation system is an essential feature that every smart vacuum cleaner should have. It makes cleaning more efficient, convenient, customizable, precise, and durable. While traditional vacuum cleaners may require manual intervention to cover all areas of a room or home, smart vacuum cleaners with navigation systems do the job automatically, giving you more time and energy to focus on other important tasks.
Maximizing the Use of Your Smart Vacuum’s Navigation System
As a proud owner of a smart vacuum with top-of-the-line navigation system, you want to make sure you’re getting the most out of your investment. Fortunately, there are several ways to maximize the use of your smart vacuum’s navigation system that can help keep your floors looking clean and spotless. By following these simple tips and tricks, you can take advantage of all the features your smart vacuum has to offer and have it working like a charm in no time. So, let’s dive in and explore the best practices for getting the most out of your smart vacuum’s navigation system.
Keep Your Floors Clear of Clutter
Maximizing the use of your smart vacuum cleaner’s navigation system requires some effort on your part to ensure that the device performs optimally. One of the most important things you can do to help your smart vacuum navigate efficiently is to keep your floors clear of clutter. This can be achieved by following these simple steps:
Create a designated storage space – If your home has many items that often clutter your floors, consider creating a designated storage space. This could be anything from a small closet to a large storage room. Having everything in its proper place will make it easier for your smart vacuum to do its job effectively.
Teach family members to tidy up – Getting everyone in the family involved in keeping the floors clutter-free can be very beneficial. Make cleaning up a game or a competition among family members. This way, everyone will help to make the job easier for your smart vacuum.
Eliminate obstacles and hazards – Identify potential hazards and obstacles that can impede your vacuum, such as cords or loose clothing, and eliminate them from the floors.
Avoid leaving small items on the floor – Before starting a cleaning cycle, clear the floors of any small items that can be accidentally sucked up by your smart vacuum. Items such as coins, keys, or small toys can damage the device and cause it to malfunction.
Give your vacuum a clear path – Arrange your furniture in a way that gives your smart vacuum a clear path to follow. Move chairs, tables, and other furniture out of the way, to give your vacuum easy access to all areas and corners of the room.
By keeping your floors clear of clutter, you will give your smart vacuum cleaner a better chance to clean your floors efficiently and effectively. Remember that your smart vacuum cleaner’s navigation system relies on sensors and cameras to map your home and guide the device as it moves. Reducing clutter on your floors will help the device to move faster, avoid obstacles, and save energy.
Set Up Virtual Walls and No-Go Zones
One of the best features of a smart vacuum cleaner with a navigation system is the ability to set up virtual walls and no-go zones to keep the vacuum from going places you don’t want it to go. You can use this feature to protect everything from fragile items to pet feeding areas.
Virtual walls are created by using a boundary strip that comes with the vacuum. You simply place the strip across the floor, and the vacuum’s sensors recognize it as a virtual wall. The vacuum will not cross the boundary strip, effectively creating a barrier that will prevent it from moving beyond the area you have designated.
No-go zones can be set up to protect certain areas of your home from your smart vacuum cleaner. These zones are designated on the app or controls of your vacuum, where you can create a map of the areas you want to be off-limits. This feature is helpful in areas like a pet’s feeding zone or around delicate items that are prone to damage.
Setting up virtual walls and no-go zones is an easy process that can be done through your vacuum’s app or control panel. Below is a table outlining the steps for setting up these features on some popular smart vacuum cleaner models:
Vacuum Cleaner Model
Virtual Wall Setup
No-Go Zone Setup
iRobot Roomba
Place boundary strip in desired area
Create map and designate no-go zones
Xiaomi Mi Robot Vacuum
Use app to create virtual wall
Use app to set no-go zones
Ecovacs Deebot
Use remote control to designate virtual wall
Use app to set no-go zones
Setting up virtual walls and no-go zones may take a little bit of time, but it is well worth it to be able to protect your home and belongings. By utilizing these features, you can rest assured that your smart vacuum cleaner will constantly keep your home looking clean and beautiful.
Schedule Regular Cleaning Times
Regular cleaning is important to maintain a clean and healthy home, and scheduling regular cleaning times for your smart vacuum is a convenient way to ensure this. With your smart vacuum’s navigation system, scheduling regular cleaning times is easier than ever before.
Step 1: Determine the frequency of cleaning required for your home. For homes with pets or high traffic areas, a daily cleaning routine may be required, while for less frequently used areas, weekly or bi-weekly cleaning may be sufficient.
Step 2: Set the cleaning times in your smart vacuum’s schedule. This can be easily done through the accompanying mobile app. Some smart vacuums can even be scheduled using voice commands through virtual assistants like Amazon Echo or Google Home.
Step 3: Ensure that your smart vacuum’s battery is fully charged before the scheduled cleaning time. This will guarantee that the cleaning process is uninterrupted.
Step 4: Clear any potential obstacles or clutter from the area to be cleaned. This will allow the smart vacuum to efficiently navigate and clean your home without getting stuck.
Step
Action
Step 1
Determine the frequency of cleaning required for your home
Step 2
Set the cleaning times in your smart vacuum’s schedule
Step 3
Ensure that your smart vacuum’s battery is fully charged before the scheduled cleaning time
Step 4
Clear any potential obstacles or clutter from the area to be cleaned
Note: It is important to remember to clean and maintain your smart vacuum regularly to ensure that it is working efficiently. This will help prolong the life of your smart vacuum and ensure that it continues to deliver optimal cleaning performance for your home.
So, scheduling regular cleaning times for your smart vacuum not only saves you time and effort, but it also ensures that your home remains clean and healthy at all times. Follow these simple steps to maximize the use of your smart vacuum’s navigation system and make cleaning a hassle-free experience.
Allow Sufficient Charge Time
Allowing your smart vacuum cleaner enough time to charge is crucial to maximizing its navigation system’s efficiency. A common mistake among owners of smart vacuum cleaners is not giving their devices enough time to charge properly.
To avoid this mistake, let’s take a look at the recommended charge times of some popular smart vacuum cleaners:
Vacuum Cleaner Model
Recommended Charge Time
iRobot Roomba 980
3 hours
Xiaomi Roborock S6
4 hours
Neato Botvac D7 Connected
2-3 hours
As you can see, there is a range of recommended charge times, depending on the model of your vacuum cleaner. It is essential to check your vacuum cleaner’s manual for specific charging times.
Not allowing your vacuum cleaner to charge sufficiently can harm the battery in the long run, and could affect the device’s performance. Short charging times might also cause the device to stop cleaning and return to its dock before completing a cleaning cycle.
Once you have noted the recommended charge time, ensure that you have the proper docking station and placement for your device. Set up the docking station in a conveniently accessible location with enough clearance for the vacuum cleaner to autonomously dock and recharge.
If you want your smart vacuum cleaner to work efficiently, make sure to allow sufficient charge time. By doing so, you will maximize its navigation system and extend the life of its battery.
Perform Regular Maintenance
Maintaining your smart vacuum is crucial to ensuring its navigation system continues to function properly. By performing regular maintenance, you can extend the life of your vacuum and avoid unnecessary repairs. Below are some tips for keeping your smart vacuum in top condition:
Clean the filters: Depending on the model, your smart vacuum may have one or more filters that need to be cleaned or replaced regularly. Check the manufacturer’s instructions for guidance on how often to clean the filters, as well as how to do so.
Check for blockages: Over time, debris can build up inside your smart vacuum, potentially causing blockages that could affect its navigation system. Routinely inspect the dustbin and brushroll for any clogs or tangles, and clear them out as needed.
Keep sensors clean: Sensors play a critical role in your smart vacuum’s navigation, helping it to detect obstacles and navigate around your home. To ensure accurate readings, clean the sensors on a regular basis.
Inspect the wheels: Your smart vacuum’s wheels can get clogged with dirt and hair, which can inhibit movement and affect navigation. Regularly check and clean the wheels to keep them functioning properly.
Replace worn parts: Over time, parts of your smart vacuum can wear out or break, affecting its navigation system. Check the manufacturer’s instructions for any parts that might need to be replaced periodically, such as brushrolls or batteries.
Performing regular maintenance doesn’t have to be complicated, but it is an essential part of maximizing the use of your smart vacuum’s navigation system. By taking a little bit of time each month to tend to these tasks, you can keep your vacuum in great shape for years to come.
Upgrade Your Smart Vacuum’s Navigation System
Your smart vacuum cleaner’s navigation system can make all the difference in keeping your floors clean with ease. However, if you find that your current navigation system isn’t up to par, it might be time to consider upgrading. Here are some possible upgrades that could take your cleaning routine to the next level:
Laser-guided navigation: Unlike basic infrared navigation, laser-guided navigation is more precise and can create an accurate map of your home. This can lead to better cleaning patterns and a decrease in missed spots. Consider investing in a smart vacuum with this feature to see a major improvement in your cleaning.
Mapping technology: Some smart vacuums come with mapping technology that allows them to remember the layout of your home. With this feature, you can set up no-go zones and virtual walls more easily, and your vacuum will be less likely to get stuck navigating to different rooms.
Improved sensor technology: Sensors are an important part of a smart vacuum’s navigation system, and improving their sensitivity can lead to better performance. Look for models with upgraded sensors that can detect obstacles and navigate around them with ease.
Smart home integration: Upgrading your smart vacuum’s navigation system to one that integrates with your existing smart home system can provide you with even more control over your cleaning routine. You can set schedules and cleaning zones remotely and even control your vacuum with voice commands.
Of course, upgrading your smart vacuum’s navigation system could come with a higher price tag, so it’s important to determine which features are most important to you and your cleaning needs. But, if you’re serious about maximizing the use of your smart vacuum, an upgrade might just be worth it.
Troubleshooting Your Smart Vacuum’s Navigation System
As much as we rely on our smart vacuum cleaners to keep our floors clean and spotless, sometimes even the most advanced navigation systems can encounter problems. If your vacuum cleaner is not functioning as it should, don’t fret! There are several simple troubleshooting tips you can try before resorting to sending it in for repairs. Read on to learn some effective solutions that will help get your smart vacuum cleaner back to its optimal performance.
Restarting Your Vacuum
If you encounter any issues with your smart vacuum’s navigation system, the first step is to try restarting the machine. Restarting your vacuum can sometimes fix common problems and glitches. Here are the steps to follow when restarting your vacuum:
Turn off the power: Start by turning off the power to your smart vacuum by pressing the power button or unplugging the device from the wall.
Wait a few minutes: Wait for a few minutes before turning the power back on. This will help clear the cache and refresh the system.
Turn the power back on: Once you have waited for a few minutes, turn the power back on by pressing the power button or plugging the device back in.
Reset the device: Depending on the model of your smart vacuum, you may need to reset the device by pressing a combination of buttons on the machine or through the app.
Reconnect the device: If you are using the app to control your vacuum, make sure that you reconnect to the device once it has restarted.
It is important to note that restarting your vacuum may not solve all issues with the navigation system. If the problems persist, try updating the software or checking for stuck sensors. In some cases, you may need to contact customer support for further assistance.
Updating the Software
Keeping your smart vacuum’s navigation system up to date is an essential task that ensures your vacuum cleaner is operating at its optimum level. Regular software updates improve the performance of your vacuum and add new features that maximize its effectiveness. Here’s how to update your smart vacuum’s software:
Step 1: Check the manufacturer’s website for software updates. Manufacturers frequently post updates to their websites that are specifically designed to enhance the performance of their devices. Look for a “Support” or “Downloads” tab on the manufacturer’s website to check for software updates.
Step 2: Download the latest software update. Once you find the latest software update, download it to your computer. Make sure to save the file in a location that you can easily access later.
Step 3: Connect your smart vacuum to your computer. Using the USB cable that came with your vacuum, connect it to your computer.
NOTE:
Make sure your vacuum’s battery is fully charged before plugging it into your computer.
Step 4: Install the software update. Once your vacuum is connected to your computer, open the software update file and follow the installation instructions. The update process may take several minutes, so be patient and do not disconnect your vacuum until the process is complete.
Step 5: Restart your smart vacuum. After the software update is complete, disconnect your vacuum from your computer and turn it back on. The update should take effect immediately, and you should notice improved performance and features.
Updating your smart vacuum’s software is a simple process that maximizes the use of your smart vacuum cleaner’s navigation system. Regular updates ensure that your vacuum is always operating at its full potential, so make sure to check for updates frequently.
Checking for Stuck Sensors
One of the most important aspects of maximizing the use of your smart vacuum’s navigation system is ensuring that its sensors are working properly. Stuck sensors can lead to your vacuum getting stuck, missing spots or not cleaning as thoroughly as it should be. It’s important to regularly check for stuck sensors.
To check for stuck sensors, you’ll need to do a bit of troubleshooting. Below is a table that outlines what to do in case you suspect any sensors are stuck:
Sensor Type
Checking for Stuck Sensors
Cliff Sensors
Try wiping the sensors with a clean, damp cloth. Check if the sensors are dirty and if cleaning them solves the issue. If not, inspect the sensors for any physical damage or obstruction.
Bumper Sensors
Inspect the bumper sensors for any physical damage or obstruction. Test if the bumper sensors are functional by gently pushing the vacuum against a wall or corner. If the bumper sensors do not respond, they may need to be replaced.
Virtual Wall Sensors
Replace the batteries in the virtual wall sensors. Make sure the sensors are pointed in the right direction and are not obstructed by any objects. If the signals are not reaching the vacuum, move the virtual wall sensors closer to the vacuum.
Regularly checking for stuck sensors will help ensure that your smart vacuum’s navigation system is working effectively and that your floors are receiving the thorough clean they require.
Adjusting Maps and Sensors
After using your smart vacuum’s navigation system for a while, you may notice that its mapping and sensor capabilities are not performing as well as they used to. In these cases, it may be time to adjust the maps and sensors to get the most out of your device. Here are some steps you can take:
Step 1: Check Your Smart Vacuum’s Manual
Before adjusting any settings, make sure to refer to your smart vacuum’s manual for instructions on how to access and adjust its maps and sensors. Each device has its own process, and it’s important to follow the manufacturer’s guidelines carefully.
Step 2: Reset Your Smart Vacuum’s Maps
If you notice that your smart vacuum is consistently having trouble navigating certain areas or missing spots, it may be time to reset its mapping system. This can usually be done by clearing out any existing maps and allowing the vacuum to create a new one from scratch. This will ensure that the device has up-to-date information on your home’s layout.
Step 3: Adjust Sensor Sensitivity
Your smart vacuum’s sensors are crucial for detecting obstacles and avoiding collisions. However, if their sensitivity is too high or too low, they may not be performing optimally. Consult your manual for instructions on how to adjust sensor sensitivity to achieve the optimal balance between detection and avoidance.
Step 4: Test and Fine-Tune
After adjusting your smart vacuum’s maps and sensors, it’s important to test the device’s performance and fine-tune any remaining issues. Try running a full cleaning cycle and make note of any areas where the device is still struggling. This will give you a better understanding of what specific adjustments still need to be made.
Step 5: Repeat as Needed
Adjusting your smart vacuum’s maps and sensors is not a one-time fix. As your home’s layout changes and your device continues to age, you may need to make further adjustments to maintain peak performance. Regularly checking and fine-tuning your device will ensure that you are getting the most out of your smart vacuum’s navigation system.
Adjusting your smart vacuum’s maps and sensors may seem daunting, but by following these steps and consulting your manual, you can maintain your device’s optimal performance and get the most out of your investment.
Conclusion
After exploring the navigation system of your smart vacuum cleaner and discovering the ways to maximize its use, you can now enjoy a cleaner and more organized home. With the right knowledge and techniques, you can transform your smart vacuum cleaner into a powerful tool that can efficiently clean your floors and carpets without much intervention.
By keeping your floors clear of clutter, setting up virtual walls and no-go zones, and scheduling regular cleaning times, you can make your smart vacuum cleaner work for you instead of the other way around. Furthermore, by allowing sufficient time for charging and performing regular maintenance, you can ensure that your vacuum cleaner continues to function optimally over time.
If you want to take your cleaning to the next level, consider upgrading your smart vacuum’s navigation system. This will give you access to even more features and functionalities that can help you keep your home cleaner and more organized than ever before.
However, sometimes issues with your smart vacuum cleaner’s navigation system can arise. If this happens, don’t panic. Try restarting your vacuum, updating the software, checking for stuck sensors, and adjusting maps and sensors as needed. By troubleshooting these issues, you can get your smart vacuum cleaner back up and running in no time.
In conclusion, a smart vacuum cleaner with a reliable navigation system can do wonders for your home’s cleanliness and organization. By understanding and maximizing the use of your vacuum’s navigation system, you can keep your floors clean and tidy with ease. And, with some troubleshooting skills in your back pocket, you can quickly overcome any obstacles that may arise along the way.
Frequently Asked Questions
1. How does a navigation system in a smart vacuum cleaner work?
The navigation system in a smart vacuum cleaner uses various sensors such as lasers, cameras, or infrared technology to map the room and detect obstacles.
2. Can I set up virtual walls to prevent my smart vacuum cleaner from entering certain areas?
Yes! Most smart vacuum cleaners have the option to set up virtual walls or no-go zones using the manufacturer’s app.
3. How often should I schedule cleaning times for my smart vacuum cleaner?
It depends on how often your floors need cleaning. For busy households, scheduling a daily cleaning time may be necessary.
4. How long does it take for a smart vacuum cleaner to fully charge?
Typically, it takes anywhere from 2 to 4 hours for a smart vacuum cleaner to fully charge.
5. How often do I need to perform maintenance on my smart vacuum cleaner?
You should perform maintenance on your smart vacuum cleaner at least once a month to ensure it is working correctly and efficiently.
6. Can I upgrade the navigation system in my smart vacuum cleaner?
Yes! Some manufacturers offer upgrades to the navigation system that can improve the accuracy and efficiency of the smart vacuum cleaner.
7. How do I troubleshoot my smart vacuum cleaner if it stops working?
You can try restarting the vacuum, updating the software, checking for stuck sensors, and adjusting the maps and sensors to troubleshoot the issue.
8. What are the advantages of a navigation system in a smart vacuum cleaner?
A navigation system in a smart vacuum cleaner allows for efficient cleaning and prevents the vacuum cleaner from repeatedly cleaning the same area.
9. Can pets or children interfere with the navigation system in a smart vacuum cleaner?
Yes, pets and children may obstruct the sensors or cause the vacuum cleaner to move unexpectedly. It’s important to keep your floors clear of clutter and set up no-go zones to prevent the vacuum cleaner from entering areas where it may be disrupted.
10. Can a smart vacuum cleaner be used on multiple floor types?
Yes, most smart vacuum cleaners can be used on multiple types of floors such as carpet, hardwood, or tile.