Setting Up and Using Your Smart Vacuum Cleaner with Voice Control
Warning: A non-numeric value encountered in /var/www/html/wp-content/themes/generatepress/inc/structure/post-meta.php on line 165
by Dwight Gibson
Are you tired of spending hours vacuuming your floors? Do you wish there was an easier way to keep your home clean? Well, you’re in luck! Smart vacuum cleaners with voice control are here to make your life easier. With just a few simple steps, you can set up your new smart vacuum cleaner and control it with your voice. No more bending over and pushing a heavy vacuum around your home. In this article, we’ll guide you through the process of setting up and using your new smart vacuum cleaner with voice control. Let’s get started!
Table of Contents
Prerequisites
Before diving into the steps of setting up and using your new smart vacuum cleaner with voice control, it’s important to make sure you have all the necessary prerequisites. To get started, you’ll need a compatible device that can connect to your vacuum cleaner, such as a smartphone or tablet. Additionally, you’ll need a stable Wi-Fi connection and access to a voice assistant such as Amazon Alexa or Google Assistant.
If you’re not sure which smart vacuum cleaner to choose, check out our article on the best smart vacuums with voice control for some great options. And if you’re curious about the technology powering these devices, read up on how artificial intelligence is making smart vacuums even smarter while also making your home safer.
Items needed
It is important to have all the necessary items when setting up a smart vacuum cleaner with voice control. Without these items, the setup process may be more challenging. Here are the items you will need to get started:
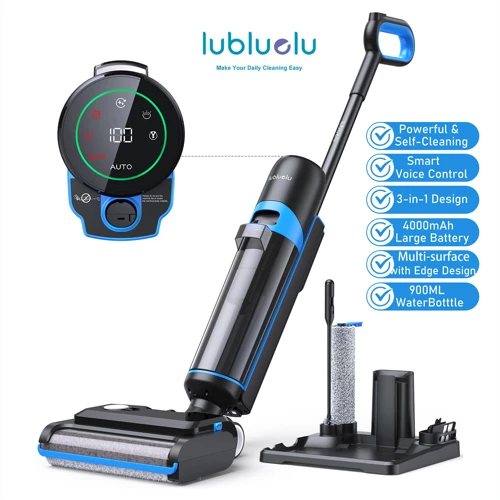
A Smart Vacuum Cleaner with Voice Control:
You can choose from a variety of models available in the market. For a safer home, you can consider buying a smart vacuum cleaner with voice control. (source)
Smartphone or Tablet:
You will need a smartphone or tablet to download the specific app for the vacuum cleaner.
Wi-Fi Network:
Your smart vacuum cleaner needs to be connected to your Wi-Fi network to function properly.
Voice Assistant Device:
The vacuum cleaner needs to be compatible with a voice assistant device like Amazon Alexa or Google Assistant. (source)
Having all these items in place before starting the setup process will ensure a smoother experience. Additionally, it is important to follow the manufacturer’s instructions step-by-step to ensure a successful setup. In the future, we can expect even more advanced features and technology in smart vacuum cleaners with voice control. To learn more about this, read our article on what to expect from future smart vacuums.
Voice assistants compatible with your vacuum cleaner
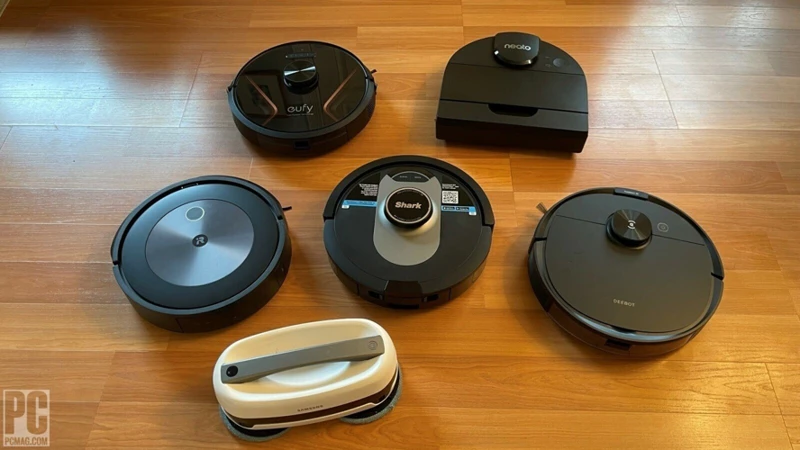
When it comes to setting up your new smart vacuum cleaner with voice control, you need to make sure that it is compatible with your preferred voice assistant. Not all vacuum cleaners work with all voice assistants, which is why it’s important to check compatibility before making a purchase.
Here’s a table that provides compatibility information of popular voice assistants with smart vacuum cleaners:
Voice Assistant
Compatible Smart Vacuum Cleaners
Amazon Alexa
ecovacs Deebot 500, Shark IQ Robot, iRobot Roomba i7+
As you can see, there are a number of smart vacuum cleaners that are compatible with different voice assistants. Make sure to choose a vacuum cleaner that supports your preferred voice assistant so that you can take advantage of the benefits of voice control.
It’s important to note that voice assistant compatibility can vary depending on the model and version of your smart vacuum cleaner and the voice assistant software. Make sure to check the manufacturer’s website for specific compatibility information.
Now that you’ve checked compatibility with your preferred voice assistant, it’s time to move on to setting up your smart vacuum cleaner.
Setting up the Smart Vacuum Cleaner
Preparing your new smart vacuum cleaner for use is an exciting step towards a cleaner and more comfortable home. However, setting it up may seem daunting at first. Don’t worry, we’ve got you covered! By following the simple steps outlined below, you will quickly and easily set up your smart vacuum cleaner and get it ready for use. So let’s dive in and get started!
Step 1: Assemble the Vacuum Cleaner
Assembling your new smart vacuum cleaner is the first step to using it with voice control. Follow the instructions carefully to ensure that the vacuum cleaner is put together correctly. Here are the assembly steps:
Unbox all the parts of the vacuum cleaner and lay them out on a clear surface.
Read the instruction manual before proceeding to assemble the vacuum cleaner pieces.
Attach the main body of the vacuum cleaner to the charging dock by firmly pressing the two pieces together.
Attach the side brushes to each side of the vacuum cleaner. Check the manual for the proper position of the brushes.
Next, choose the correct brush tool for your floor type (hardwood floors, tiles, or carpets) and attach it to the vacuum cleaner’s bottom.
Connect the vacuum’s dirt compartment to the main body, ensuring a tight fit.
Finally, charge the battery of the vacuum cleaner overnight using the charging dock.
Pay attention to each step and make sure each piece is properly aligned and snapped in place before moving on to the next step. If you have difficulty with any assembly step, refer to the manual or contact customer support for assistance. Once you have assembled the vacuum cleaner, you can move on to the next steps of setting it up for voice control.
Step 2: Download the App
After assembling your smart vacuum cleaner, the next step is to download the app that is compatible with your device. This app will allow you to control and monitor your vacuum cleaner from your smartphone or tablet. Here’s how to download the app:
Step 1: Check the user manual
Before starting the download process, refer to the user manual that came with your vacuum cleaner. This will provide you with clear instructions on which app to download and how to navigate through the setup process.
Step 2: Visit the app store
Go to the app store on your mobile device and search for the app that is compatible with your vacuum cleaner. For example, if you have a Roomba vacuum, search for the Roomba app. Make sure to download the app that matches your device model to ensure full compatibility.
Step 3: Install the app
Once you have found the correct app, tap “Install” or “Get” to download and install the app to your device. This process may take some time, depending on your internet speed and app size.
Step 4: Open the app and create an account
After installing the app, open it on your device and create an account. Most vacuum cleaner apps require you to create an account to access all the features of the app. Follow the instructions in the app to set up your account.
Step 5: Connect the app to your vacuum cleaner
Once you have created an account, follow the instructions in the app to connect it to your vacuum cleaner. This process may involve putting your vacuum cleaner in pairing mode and connecting it to your Wi-Fi network. Refer to the user manual for detailed instructions specific to your device.
Note: Make sure to keep the app updated to ensure optimal functionality of your smart vacuum cleaner.
By downloading the app and connecting it to your device, you can now access a range of features that make cleaning your home more convenient and efficient. From scheduling cleans to controlling your vacuum cleaner with your voice, the possibilities are endless. So make sure to download and install the app, and take full advantage of your smart vacuum cleaner!
Step 3: Connect the Vacuum Cleaner to your Wi-Fi Network
Connecting your new smart vacuum cleaner to your Wi-Fi network is an essential step in setting up the device. It requires a stable and reliable internet connection to control the vacuum cleaner with voice commands and to receive software updates. Here are the steps to connect the vacuum cleaner to your Wi-Fi network:
Step 1: Start by downloading the mobile app for your smart vacuum cleaner onto your smartphone or tablet. The app is available on both the App Store and Google Play Store, and it is compatible with both iOS and Android devices.
Step 2: Open the app and sign up for an account. Create an account using your email address or sign in to an existing account if you already have one.
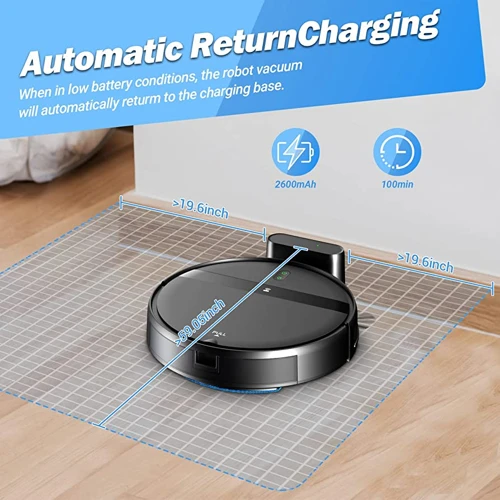
Step 3: Turn on your vacuum cleaner and ensure it is connected to its charging dock. The device should have its Wi-Fi indicator flashing, indicating that it is ready to connect to a network.
Step 4: In the app, select the option to add a new device. The app will prompt you to select your Wi-Fi network from a list of available networks. Select your Wi-Fi network and input your network password to connect the vacuum cleaner to your Wi-Fi network.
Step 5: Wait for the device to connect to your Wi-Fi network. The vacuum cleaner’s Wi-Fi indicator will stop flashing and become a solid light once it is connected to the network.
Step 6: Test the connection by sending a command from the app. Start with a simple command like “start cleaning” and watch as the vacuum cleaner starts to work its magic.
Make sure to keep the vacuum cleaner close to the Wi-Fi router during the setup process to establish a strong and stable connection. If you encounter issues with the Wi-Fi connection, try resetting the Wi-Fi settings on the vacuum cleaner and repeating the setup process. With these steps, you’ll be able to connect your smart vacuum cleaner to your Wi-Fi network and control it with your voice commands in no time.
Step 4: Voice Assistant Setup
Once you have assembled and connected your smart vacuum cleaner to your Wi-Fi network, the next step is setting up your voice assistant. This will allow you to control your vacuum cleaner with voice commands.
Here are the steps for setting up your voice assistant with your smart vacuum cleaner:
Step
Action
1
Open the app on your phone
2
Select the “Voice Assistant” option from the menu
3
Choose your preferred voice assistant
4
Follow the prompts to link your voice assistant account to your smart vacuum cleaner
5
Test the connection by using a voice command to start or stop the vacuum cleaner
Note: Make sure the voice assistant you choose is compatible with your smart vacuum cleaner. Some popular voice assistants that work with smart home devices include Amazon Alexa and Google Assistant.
Once you have successfully set up your voice assistant, you can use voice commands to control your smart vacuum cleaner. This makes cleaning your house more convenient and hands-free. Just make sure to speak clearly and give the correct command to avoid any confusion.
Using the Smart Vacuum Cleaner with Voice Control
Imagine having the ability to control your smart vacuum cleaner with nothing more than your voice. With voice assistant technology, this is now a possibility. You can easily command your vacuum cleaner to start cleaning, pause mid-cleaning, or even schedule a cleaning session at specific times. The convenience of using your smart vacuum cleaner with voice control is unmatched. In this section, we’ll guide you through the steps you need to follow to get started and control your vacuum cleaner with ease.
Step 1: Preparing your home before using the vacuum cleaner
Before using your smart vacuum cleaner with voice control, it’s important to properly prepare your home to ensure optimal cleaning performance. Here are some steps you should take before using your smart vacuum cleaner:
Clear the floor: Remove any obstacles or debris from the floor, such as toys, shoes or other objects that may get in the way of the vacuum cleaner. This will help the vacuum cleaner navigate around the room more easily and effectively.
Secure loose cables: Make sure any loose cables or power cords are secured and out of the way to prevent the vacuum cleaner from getting tangled up or pulling them out of the wall.
Close doors and windows: Close all doors and windows to prevent the vacuum cleaner from exiting or entering areas you don’t want it to clean.
Set up boundaries: If your smart vacuum cleaner with voice control comes with boundary strips or virtual walls, place them in the areas you don’t want the vacuum cleaner to enter. This will prevent the vacuum cleaner from accidentally cleaning areas that are off-limits.
Remove small objects: Pick up any small objects, such as coins or paperclips, from the floor to prevent them from being sucked up by the vacuum cleaner and potentially causing damage.
Unplug charging dock: If your vacuum cleaner is currently charging on its dock, unplug it and move it out of the way to prevent the vacuum cleaner from accidentally crashing into it during cleaning.
By following these simple steps, you can ensure that your smart vacuum cleaner with voice control will have clear and unobstructed paths for effective cleaning, while also preventing any potential damage or mishaps.
Step 2: Starting the Smart Vacuum Cleaner with Voice Control
To start your smart vacuum cleaner with voice control, follow these steps:
Check your surroundings – Before commanding your vacuum cleaner with your voice, make sure that there are no obstacles or hazardous objects around. This includes loose wires, toys, or other objects that may impede the vacuum cleaner’s cleaning process.
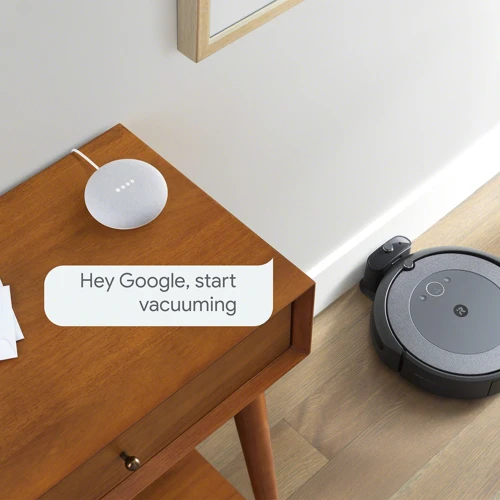
Activate your voice assistant – Activate your voice assistant by saying its trigger word, such as “Alexa” or “Hey Google”.
Speak the command – Speak the appropriate command to start your vacuum cleaner. This can be a simple command like “Start cleaning” or “Begin cleaning”. If you’ve set up different cleaning modes, you can specify that as well. For example, you can say “Start cleaning in spot mode”.
Confirm the command – Wait for the voice assistant to confirm your command before proceeding. This is to make sure that the vacuum cleaner doesn’t start cleaning on its own if it misheard your command.
Monitor the vacuum cleaner’s progress – You can see the progress of the cleaning on the app or by checking on the vacuum cleaner itself. Keep an eye on the vacuum cleaner to make sure that it’s cleaning as intended and not encountering any problems.
Starting your smart vacuum cleaner with voice control can be a seamless and efficient way to clean your home. By following these steps, you can sit back and relax while your vacuum cleaner takes care of the cleaning. It’s important to remember to always monitor the cleaning process to ensure that everything is going smoothly.
Step 3: Controlling the Smart Vacuum Cleaner with Voice Commands
Controlling the Smart Vacuum Cleaner with Voice Commands
Once you have set up your smart vacuum cleaner, it’s easy to control it with just your voice. However, before using voice commands, make sure that your vacuum cleaner is compatible with your voice assistant.
Supported Voice Assistants:
Voice Assistant
Smart Vacuum Cleaner Models
Amazon Alexa
iRobot Roomba i7+, Shark IQ Robot Self-Empty, Neato Botvac Connected Series, Samsung POWERbot R9350, etc.
Google Assistant
Eufy RoboVac G30, iRobot Roomba 980, Shark IQ Robot Self-Empty, Neato Botvac D7, etc.
Using Voice Commands:
To control your smart vacuum cleaner with your voice, use the wake word followed by your command. Here are some examples of voice commands you can use:
Voice Command
Action
“Hey Google, start the vacuum”
Starts the cleaning process
“Alexa, stop the vacuum”
Stops the cleaning process
“Hey Google, ask the vacuum to go home”
Sends the vacuum cleaner back to its dock
“Alexa, ask the vacuum about its status”
Returns the current status of the vacuum cleaner
“Hey Google, set a timer for the vacuum”
Sets a timer for the vacuum cleaner to start cleaning in the future
Customizing Voice Commands:
If you want to use custom voice commands for your smart vacuum cleaner, you can do so by setting up routines. Routines allow you to create customized voice commands that trigger a series of actions. For example, you can create a routine that turns on the lights, starts the vacuum, and plays some music when you say “Hey Google, clean the house.”
Controlling your smart vacuum cleaner with your voice is not only convenient, but it also adds a touch of futuristic sophistication to your home cleaning routine.
Step 4: Scheduling the Cleaning
Setting up a cleaning schedule with your Smart Vacuum Cleaner is a smart way to keep your home tidy and clean without any effort. Here are the steps you need to follow to schedule the cleaning:
Open the app on your smartphone or tablet and log in to your account.
Click on the “schedule” option on the main menu.
Select the days you want the vacuum cleaner to clean your home.
Choose the time you want the cleaning to begin, using the 24-hour format.
Choose the cleaning mode you want to use – quiet, normal, or max.
If your smart vacuum cleaner has mapping capability, you can select specific rooms to be cleaned on specific days and times.
Save the cleaning schedule once you have completed setting it up.
Note: It is important to ensure that the Smart Vacuum Cleaner has enough battery life and that the dustbin is empty before the scheduled cleaning.
Once the schedule is saved, your Smart Vacuum Cleaner will automatically start cleaning your home on the days and times you have selected. You can sit back and relax, while the vacuum takes care of the cleaning for you.
By scheduling regular cleanings, you can keep your home tidy and reduce the stress of daily cleaning. It is an efficient and hassle-free way to maintain cleanliness in your home.
Step 5: Cleaning the Vacuum Cleaner
Cleaning your smart vacuum cleaner is an essential part of maintaining its efficiency and longevity. Follow these easy steps to keep your vacuum cleaner in good working condition:
Step
Action
1
Turn off and unplug the vacuum cleaner.
2
Remove the dustbin or dirtbag according to your vacuum cleaner model.
3
Empty the collected dust and debris into a trash can.
4
Wash the dustbin or dirtbag with water and mild soap. Allow it to air dry completely before returning it to the vacuum cleaner.
5
Remove the filter(s) from the vacuum cleaner. Depending on the model, the filter may need to be replaced after a certain number of uses.
6
Clean the filter(s) thoroughly with water and let it dry completely before replacing it into the vacuum cleaner.
7
Inspect the brush roll and remove any hair or debris tangled around it. You can do this with a pair of scissors, a seam ripper, or any other tool that can cut or loosen the debris.
8
Clean the brush roll with a damp cloth and let it dry completely before reinstalling it into the vacuum cleaner.
9
Inspect the wheels and the sensors of the vacuum cleaner. Clean them with a dry cloth to remove any dust or debris.
10
Plug in and turn on the vacuum cleaner to make sure everything is working properly.
Keep in mind that the cleaning frequency of your vacuum cleaner will depend on the usage and the size of your living space. For a general guideline, it’s recommended to clean the dustbin and filter(s) after every use, and to thoroughly clean the brush roll and wheels every 2-3 uses or as needed.
By taking the time to properly clean your smart vacuum cleaner, you’ll be able to enjoy its benefits for a longer period of time, and ensure that it remains an efficient and effective tool for keeping your home clean and tidy.
Tips and Tricks
With your new smart vacuum cleaner with voice control up and running, you might be wondering how to optimize and improve its performance. Whether you’re dealing with tough to reach spots or managing the schedule, there are several tips and tricks that can help you make the most out of this technology. In this section, we’ll highlight some useful advice to get the most out of your new smart vacuum cleaner. Let’s dive in!
Troubleshooting Tips
Sometimes, there may be some issues that arise when using your new smart vacuum cleaner with voice control. But don’t worry, here are some troubleshooting tips to help you resolve those issues and get back to cleaning with ease.
Issue
Possible Solutions
The vacuum cleaner is not connecting to Wi-Fi.
1. Make sure the Wi-Fi password is correct and entered accurately.
2. Move the vacuum cleaner closer to the Wi-Fi router.
3. Restart the Wi-Fi router and then try connecting again.
4. Reset the vacuum cleaner and start the connection process again.
The vacuum cleaner is not responding to voice commands.
1. Check if the voice assistant is connected to the same Wi-Fi network as the vacuum cleaner.
2. Make sure the voice assistant can recognize your voice properly.
3. Check if the voice command is correct and matches the correct syntax required by the vacuum cleaner.
4. Restart the voice assistant and try again.
The vacuum cleaner is not cleaning properly.
1. Check if the vacuum cleaner is properly assembled and all parts are connected.
2. Make sure the dustbin is clean and empty before using the vacuum cleaner.
3. Check if the vacuum cleaner filter needs to be cleaned.
4. Ensure that the vacuum cleaner can navigate around the room without any obstructions.
5. Check if the vacuum cleaner’s sensors are working properly before using it.
By following these troubleshooting tips, you can quickly and easily resolve any issues with your smart vacuum cleaner with voice control. However, if the issue still persists, refer to the manufacturer’s guide or contact their customer support for further assistance.
How to Optimize your Cleaning with your Smart Vacuum Cleaner with Voice Control
To optimize the cleaning of your Smart Vacuum Cleaner with Voice Control, you can use the following tips:
Tip
Description
1
Use voice commands to create or modify cleaning schedules at your convenience.
2
Set up zones to target specific areas of your home that require more frequent cleaning, such as high traffic areas or places where pets spend most of their time.
3
Activate the spot cleaning function to clean up small messes immediately without having to clean the entire room.
4
Adjust the suction and cleaning speed of the vacuum based on the type of floor or carpet you need to clean. This feature is especially useful for homes with a mix of carpets and hardwood floors.
5
Regularly clean the brush rolls and air filters to ensure maximum efficiency and prevent clogs. Refer to the user manual for instructions on how to clean these parts.
By following these tips, you can optimize the cleaning of your Smart Vacuum Cleaner with Voice Control and ensure that your home remains clean and tidy at all times. Remember to always refer to the user manual for detailed instructions and troubleshooting tips in case you encounter any issues.
How to Set Boundaries for your Vacuum Cleaner
One of the most useful features of a smart vacuum cleaner with voice control is the ability to set boundaries for it to clean within. This means you can tell your vacuum cleaner to only clean specific rooms or areas of your house, and it will do so without wandering into spaces you don’t want it in. Here’s how you can set boundaries for your smart vacuum cleaner:
Step 1: Make sure you have the latest version of the app associated with your smart vacuum cleaner. If you don’t, you may need to update it before getting started.
Step 2: Open the app and navigate to the “Boundaries” section.
Step 3: Choose the area you want to set the boundaries for. You can create boundaries for individual rooms, hallways, or other areas by selecting them on a map of your home.
Step 4: Draw the boundaries. Using your finger or a stylus, draw the boundaries around the area you want your vacuum cleaner to clean. Be as precise as possible to ensure your vacuum cleaner only cleans the area you want it to.
Step 5: Set up the cleaning schedule. Once you’ve set your boundaries, you can set up a cleaning schedule for your smart vacuum cleaner. This means you can tell it to clean different areas of your home on different days, so you never have to worry about it cleaning the wrong space.
Step 6: Test the boundaries. Once you’ve set up your boundaries and schedule, it’s time to test it out. Make sure your smart vacuum cleaner starts and finishes cleaning within the defined boundaries. If it doesn’t, you may need to adjust the boundaries or troubleshoot any issues that arise.
Setting boundaries for your smart vacuum cleaner can take a bit of time and effort, but it’s well worth it in the end. With well-defined boundaries, you can ensure your vacuum cleaner only cleans the areas you want it to, saving time and hassle in the process.
Conclusion
In conclusion, using a smart vacuum cleaner with voice control can greatly simplify your cleaning routine while providing a more efficient and thorough cleaning experience. You can easily set it up by following the steps outlined in this article, which include assembling the vacuum cleaner, downloading the app, and connecting it to your Wi-Fi network.
Once set up, you can start using your new smart vacuum cleaner by preparing your home, starting the cleaner with your voice commands, and controlling it with your voice. You can also schedule your cleaning and optimize your cleaning routine with the tips and tricks shared in this article.
However, in the event that you experience any difficulty, do not hesitate to consult the troubleshooting tips provided. Additionally, setting boundaries for your vacuum cleaner can help prevent it from cleaning in unwanted areas.
Overall, a smart vacuum cleaner with voice control is a great investment for anyone looking to simplify their cleaning routine and save time. With its ability to clean thoroughly and efficiently, you can rest easy knowing that your home is being taken care of, even when you’re not there. So why wait? Invest in a smart vacuum cleaner with voice control today and start experiencing the convenience and efficiency it has to offer!
Frequently Asked Questions
1. Can I control my smart vacuum cleaner with Alexa?
Yes, most of the smart vacuum cleaners are compatible with Alexa, allowing you to control it using voice commands.
2. Is it necessary to have a Wi-Fi network to use a smart vacuum cleaner with voice control?
Yes, you need to have a Wi-Fi network to connect your smart vacuum cleaner to your phone and voice assistants.
3. Can I control my smart vacuum cleaner with Google Home?
Yes, you can use Google Home to control your smart vacuum cleaner, as long as it’s compatible with it.
4. How often should I clean my smart vacuum cleaner?
You should clean your smart vacuum cleaner after every use, and also check and clean the brushes and filters regularly.
5. Can I use my smart vacuum cleaner on carpets and hard floors?
Yes, most of the smart vacuum cleaners are designed to work on carpets and hard floors.
6. How long does a typical cleaning cycle last on a smart vacuum cleaner?
The length of time it takes to clean a room depends on the size of the room and the cleaning mode you choose. A typical cycle can last from 30 minutes to 2 hours.
7. Can I set boundaries for my smart vacuum cleaner?
Yes, some smart vacuum cleaners offer boundary-setting features, allowing you to restrict the areas where the vacuum cleaner can go.
8. What kind of maintenance does a smart vacuum cleaner require?
You need to clean the brushes and filters frequently, empty the dustbin after each use, and replace the filter and brushes as needed.
9. Can I schedule my smart vacuum cleaner to clean automatically?
Yes, you can set a schedule for your smart vacuum cleaner to clean automatically at a specific time and day of the week.
10. Do I need to purchase any additional accessories to use my smart vacuum cleaner with voice control?
No, you don’t necessarily need to purchase any additional accessories to use your smart vacuum cleaner with voice control. However, a compatible voice assistant, a Wi-Fi network, and a smartphone or tablet may be required.