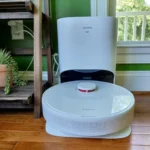
Are you tired of manually vacuuming your home? Smart vacuum cleaners are an innovative solution to traditional vacuuming that are becoming increasingly popular. With their Wi-Fi capabilities, you can control them remotely via an app on your smartphone or smart home device. But how do you connect your smart vacuum cleaner to your Wi-Fi network? It may seem complicated, but with these simple steps, you can have your smart vacuum cleaner up and running in no time.
Step 1: Prepare Your Smart Vacuum Cleaner
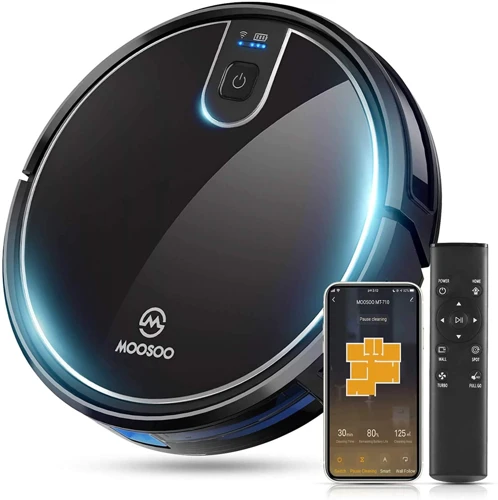
Before you connect your smart vacuum cleaner to your Wi-Fi network, you need to prepare it for the setup process. This step is crucial to ensure that the connection is established correctly and to avoid any issues that might arise during the setup process. In this section, we’ll guide you through the preparation process step-by-step. We’ll show you how to check for compatibility with your Wi-Fi network, charge your vacuum cleaner, reset its Wi-Fi network settings, and download the app. So, let’s get started! If you want to know more about setting up Wi-Fi on your smart vacuum cleaner, check out our Smart Vacuum App Wifi Setup Guide for more information.
Check for Compatibility with Your Wi-Fi Network
Before attempting to connect your smart vacuum cleaner to your Wi-Fi network, it is important to check for compatibility. Not all smart vacuum cleaners are compatible with all Wi-Fi networks, and attempting to connect an incompatible device can lead to frustration and wasted time.
To check for compatibility, consult the documentation that came with your smart vacuum cleaner or visit the manufacturer’s website. Look for information about which Wi-Fi networks the device is compatible with, as well as any specific requirements for the network or router. Some smart vacuum cleaners, for example, may require a 2.4GHz network, while others can connect to 5GHz networks as well.
If you are unsure whether your smart vacuum cleaner is compatible with your Wi-Fi network, you can also try contacting the manufacturer’s customer support team. They may be able to provide additional information and help you determine whether your network is compatible.
Checking for compatibility is an important first step that can save you a lot of time and frustration in the long run. Once you have confirmed that your smart vacuum cleaner is compatible with your Wi-Fi network, you can move on to the next steps of the setup process. If you encounter any issues during the setup process, don’t hesitate to consult our troubleshooting guide or seek assistance from the manufacturer’s support team.
Check out our troubleshooting guide for common issues that may arise when setting up a smart vacuum cleaner on a Wi-Fi network. Alternatively, if you are weighing the pros and cons of purchasing a Wi-Fi enabled smart vacuum cleaner, check out our article on the advantages and drawbacks of such devices.
Charge Your Smart Vacuum Cleaner
Before attempting to connect your smart vacuum cleaner to your Wi-Fi network, the first thing you should do is ensure that the device is fully charged. Charging your smart vacuum cleaner before you start the process is essential as it provides enough battery life for the setup process that may take some time.
To charge your smart vacuum cleaner, follow the steps below:
| Step | Description |
|---|---|
| 1 | Locate the charging dock – First, locate the charging dock for your smart vacuum cleaner. The charging dock usually comes with the device and is easy to identify. |
| 2 | Position the vacuum cleaner properly – Position the smart vacuum cleaner on the charging dock correctly. Most smart vacuums come with guides that help you connect the device to the dock. Make sure the connection is secure to prevent interruptions during the charging process. |
| 3 | Plug it in – After properly positioning the vacuum cleaner on the charging dock, plug it into a power source. |
| 4 | Wait for it to charge – Allow your vacuum cleaner to charge fully. Most devices indicate the charging status through LED lights. You can check your device’s manual for instructions on how to check the charging status. |
| 5 | Remove the device from the charging dock – Once the device has charged fully, remove it from the charging dock and proceed to the next step. |
It is essential to note that charging times can vary depending on the smart vacuum cleaner model and the state of the battery. Some smart vacuums can take several hours to charge fully, while others take less time. Also, the amount of time a fully charged battery lasts depends on various factors, including how frequently you use the device.
Now that you have charged your smart vacuum cleaner, you can proceed to the next step of connecting it to your Wi-Fi network. Be sure to check your vacuum cleaner’s manual for more instructions on charging and battery life.
If you want to check out the different types of Wi-Fi smart vacuums on the market, check out our top 10 picks for 2021. Additionally, you can learn more about the benefits and features of using a smart vacuum cleaner app to schedule cleaning times by clicking on this informative article here.
Reset the Wi-Fi Network Settings of Your Smart Vacuum Cleaner
Resetting the Wi-Fi network settings of your smart vacuum cleaner is an important step in connecting it to your Wi-Fi network. With this process, you can start the set-up process from scratch, ensuring that there are no issues with the network configuration.
To reset the Wi-Fi network settings of your smart vacuum cleaner, follow the steps outlined in the table below:
| Step 1: | Ensure that your smart vacuum cleaner is turned on and within range of your Wi-Fi network. |
| Step 2: | Locate the physical reset button on your smart vacuum cleaner. This is usually a small button located on the bottom or side of the device. |
| Step 3: | Press and hold the reset button for 10 to 15 seconds until the Wi-Fi light on your smart vacuum cleaner starts flashing rapidly. |
| Step 4: | Release the reset button and wait for the Wi-Fi light to stop flashing. This may take up to a minute. |
| Step 5: | Your smart vacuum cleaner has now been reset to its default Wi-Fi network settings. You can now proceed with the set-up process as outlined in the previous section. |
Before resetting the Wi-Fi settings, make sure you have checked the compatibility of your smart vacuum cleaner with your Wi-Fi network, charged it fully, and downloaded the accompanying app. This will ensure the set-up process goes smoothly.
If you are still having trouble connecting your smart vacuum cleaner to your Wi-Fi network, try troubleshooting by ensuring your Wi-Fi network is stable and strong. You can also check for firmware updates and reset both your smart vacuum cleaner and Wi-Fi network settings.
Connecting your smart vacuum cleaner to Wi-Fi network allows you to control it remotely, which adds to its convenience and functionality. In the next step, we will discuss how you can set up remote control for your smart vacuum cleaner.
If you want to know more about the costs associated with connecting your smart vacuum to Wi-Fi, check out our article on Smart Vacuum Cleaner Wi-Fi Costs. If you’re interested in controlling your smart vacuum cleaner with Alexa or Google Assistant, read our article on How to Connect Your Smart Vacuum Cleaner to Alexa and Google Assistant.
Download the App for Your Smart Vacuum Cleaner
When it comes to connecting your smart vacuum cleaner to your Wi-Fi network, the first step is to download the app for your particular device. The app is essential for controlling and monitoring your smart vacuum cleaner remotely.
Here are the steps to download the app:
| Step | Action |
|---|---|
| 1 | Go to the App Store or Google Play Store on your smartphone or tablet. |
| 2 | Search for the app by either the name of your smart vacuum cleaner brand or model number. |
| 3 | Once you find the app, click on the download button and wait for the app to install on your device. |
| 4 | Launch the app from your smartphone or tablet. |
It’s important to note that some smart vacuum cleaners might have their own proprietary app, whereas others may work with a third-party automation app such as Google Assistant or Amazon Alexa. Make sure to double-check which app is compatible with your particular device before downloading.
It’s recommended to only download the app from the official app store and not from any third-party sites, as this could pose a security risk to your device.
Once you have downloaded and installed the app, you’re on your way to connecting your smart vacuum cleaner to your Wi-Fi network and enjoying the convenience of remote control.
Step 2: Connect Your Smart Vacuum Cleaner to Wi-Fi Network
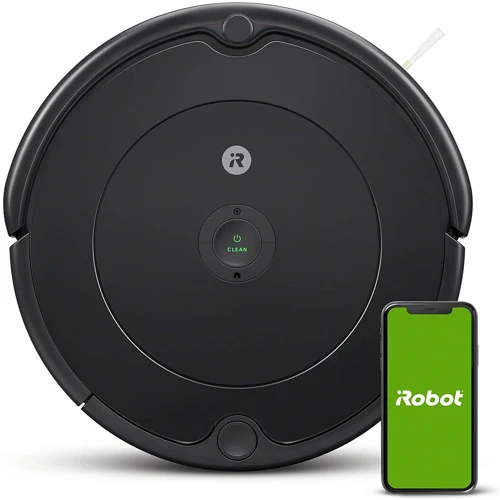
Now that you have prepared your smart vacuum cleaner for the Wi-Fi network, it’s time to connect it to your home network. With just a few simple steps, you can have your smart vacuum cleaner up and running on your Wi-Fi network in no time. This step is crucial for enabling remote control and accessing additional features of your smart vacuum cleaner. So, let’s dive in!
Open the App and Follow the On-Screen Instructions
Before we get started, it’s important to note that the specific steps to connect your smart vacuum cleaner to Wi-Fi can vary depending on the brand and model you have. However, most smart vacuum cleaners use a similar process for connecting to Wi-Fi networks.
Step 2.1: Open the App
To connect your smart vacuum cleaner to your Wi-Fi network, the first thing you need to do is download and open the app that goes with your smart vacuum cleaner. You can download this app from either the App Store or Google Play Store depending on your smartphone.
Step 2.2: Follow the On-Screen Instructions
Once the app is downloaded, open it and follow the on-screen instructions to connect your smart vacuum cleaner to your Wi-Fi network.
When you open the app, you should be prompted to connect your vacuum cleaner to Wi-Fi. If not, navigate to the settings section of the app and select the option to connect to Wi-Fi.
The app will then walk you through a series of steps to connect your smart vacuum cleaner to your Wi-Fi network. This typically involves selecting your Wi-Fi network from a list of available networks and entering the password associated with the network.
Step 2.3: Wait for Confirmation
After you have entered your Wi-Fi network’s credentials, wait for your smart vacuum cleaner to confirm that it is connected to the network. You may need to wait for a few minutes before the connection is fully established.
Step 2.4: Test Your Connection
Once you have confirmed that your smart vacuum cleaner is connected to Wi-Fi, it’s important to test the connection to ensure that it’s stable and reliable. You can do this by using the app to control your smart vacuum cleaner and check if it’s responding accordingly.
Congratulations! You have successfully connected your smart vacuum cleaner to your Wi-Fi network. The next step is to set up remote control so you can control your smart vacuum cleaner from anywhere.
Connect Your Smartphone or Smart Home Device to the Same Wi-Fi Network
Once you have downloaded the app for your smart vacuum cleaner, the next step is to connect it to your Wi-Fi network. To do this, you need to connect your smartphone or smart home device to the same Wi-Fi network as your vacuum cleaner. This step is essential for ensuring that your device can communicate with the vacuum cleaner over the network.
Here is how you can connect your smartphone or smart home device to the same Wi-Fi network:
- Go to the Wi-Fi settings on your device (smartphone, tablet or smart home device)
- Make sure that Wi-Fi is enabled and that your device is connected to the same Wi-Fi network as your smart vacuum cleaner.
- If your device is not connected to the right Wi-Fi network, select the correct network and enter the password if required.
- Once your device is connected to the same Wi-Fi network as your vacuum cleaner, open the app.
- Follow the on-screen instructions to connect your vacuum cleaner to the Wi-Fi network.
It is important to note that if your Wi-Fi network connection drops in the middle of the connection process, you will need to start over. Ensure that your Wi-Fi connection is stable and strong before you begin the process. This will help prevent any disruptions during the connection process.
By following the steps outlined above, you can successfully connect your smart vacuum cleaner to your Wi-Fi network. Once connected, you can control and manage your smart vacuum cleaner remotely through the app on your smartphone or other connected smart home devices.
Step 3: Set Up Remote Control
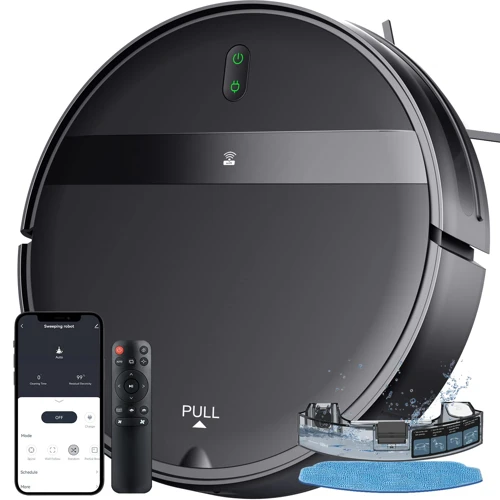
Now that you have successfully connected your smart vacuum cleaner to your Wi-Fi network, it’s time to take it one step further and set up remote control capabilities. With remote control, you can operate your smart vacuum cleaner from your phone or other smart devices, giving you greater flexibility and convenience in keeping your home clean. This step may seem daunting, but with our easy-to-follow guide, you’ll have remote control set up in no time. So let’s dive in and get started!
Create a User Account on the App
Creating a user account on the app is an important step to set up remote control for your smart vacuum cleaner. Follow these simple steps to create an account and link your smart device to it:
| Step | Description |
|---|---|
| Step 1 | Open the app on your smartphone or tablet. |
| Step 2 | Click on the “Sign Up” or “Create an Account” button. |
| Step 3 | Enter your email address or mobile number and create a strong password. |
| Step 4 | Confirm your account by clicking on the verification link or code which will be sent to you. |
| Step 5 | Log in to your account and click on the “Add Device” button. |
| Step 6 | Follow the on-screen instructions to add your smart vacuum cleaner to your account. |
Remember to use a strong password and keep it safe. It is also advisable to use two-factor authentication for added security. Once your device is linked to your account, you can enjoy remote control and other features provided by the app.
Don’t forget to enable remote control on the app as described in the previous steps, and troubleshoot any issues that may arise as explained in the following section.
Link Your Smart Vacuum Cleaner to the User Account
Now that you’ve created your user account on the app, it’s time to link your smart vacuum cleaner to the account. This process is a crucial step in allowing you to remotely control your smart vacuum cleaner from your smartphone or smart home device. Follow the steps below to link your device to your user account.
| Step 1: | Open the app and ensure you are signed in to your user account. |
| Step 2: | Locate the settings or configuration menu within the app. |
| Step 3: | Select the option to add a new device. |
| Step 4: | Choose your specific smart vacuum cleaner model from the list of compatible devices. |
| Step 5: | Follow the on-screen instructions to connect your smart vacuum cleaner to the app. |
| Step 6: | Once your smart vacuum cleaner is successfully linked to your user account, you should see it appear in the list of devices linked to your account within the app. |
By linking your smart vacuum cleaner to your user account, you’re enabling remote control access to your device. This means you can control your smart vacuum cleaner and customize cleaning schedules from anywhere at any time, as long as you have an active internet connection.
Remember to keep your login credentials secure, and only share them with trusted individuals. Safeguarding your user account information is crucial to protecting your privacy and the security of your smart vacuum cleaner.
Enable Remote Control on the App
To enable remote control on the app, follow these simple steps:
- Open the app and login to your account.
- Navigate to the settings section.
- Look for the option that says “Enable Remote Control” and toggle it on.
- You may need to grant the app permission to access your smart vacuum cleaner.
Remote control allows you to control your smart vacuum cleaner from anywhere in the world as long as you have an internet connection. This means that you can start or stop cleaning cycles, change the cleaning mode, or schedule cleaning times even when you are not at home. It comes in handy especially when you need to make sure that your home is clean and tidy before you get back from work or vacation.
However, it is important to note that enabling remote control may also pose certain security risks. This is why it is a good practice to make sure that you have a strong and secure Wi-Fi network and to keep your app and device firmware up-to-date. Another way to keep your smart vacuum cleaner secure is to limit the permissions you grant to the app and to make sure that your app is coming from a reputable source. By taking these precautions, you can enjoy the convenience of controlling your smart vacuum cleaner from a distance without jeopardizing your privacy and security.
Troubleshooting
Encountering issues while setting up and connecting your smart vacuum cleaner to your Wi-Fi network can be frustrating. You may face problems like a weak Wi-Fi signal, outdated firmware, or incorrect app settings. Don’t worry, there are solutions to these issues! Let’s dive into some helpful troubleshooting tips that will aid you in connecting your smart vacuum cleaner to your Wi-Fi network successfully.
Ensure Your Wi-Fi Network is Stable and Strong
Having a stable and strong Wi-Fi network is crucial for connecting your smart vacuum cleaner to the internet. If the Wi-Fi network is not reliable, your smart vacuum cleaner won’t be able to connect to the app, and you won’t be able to control it remotely. In this section, we’ll give you some tips and tricks to ensure your Wi-Fi network is stable and strong.
1. Check Your Wi-Fi Signal Strength
The first step to having a stable Wi-Fi network is to check your signal strength. You can do this by using your smartphone or laptop to check the Wi-Fi signal strength in the area where your smart vacuum cleaner is located. If the signal strength is weak, consider moving your Wi-Fi router closer to the smart vacuum cleaner or purchasing a Wi-Fi extender to boost the signal.
2. Use a Dedicated Wi-Fi Network
Another way to ensure a stable Wi-Fi network is to use a dedicated network for your smart home devices, including your smart vacuum cleaner. This can help reduce network congestion and minimize the chances of interference from other devices. Some routers even have a separate guest network which can be used for this purpose.
3. Update Your Router’s Firmware
One of the most common causes of weak Wi-Fi signals is outdated firmware on your router. Make sure you keep your router’s firmware up to date by regularly checking for updates on the manufacturer’s website or from the router’s web-based interface.
4. Try a Wi-Fi Analyzer App
There are several free Wi-Fi analyzer apps available for smartphones and laptops that can help you identify interference from other devices in your home or surrounding area. These apps can also help you identify the best channel for your Wi-Fi connection to minimize interference.
5. Consider Using a Wired Connection
If all else fails, consider using a wired connection instead of Wi-Fi. While this may not be as convenient, it can provide a more stable and secure connection for your smart vacuum cleaner.
By ensuring your Wi-Fi network is stable and strong, you can enjoy the benefits of remote control for your smart vacuum cleaner without any hiccups. Remember to check your Wi-Fi signal strength, use a dedicated network, update your router’s firmware, try a Wi-Fi analyzer app, and consider using a wired connection if necessary.
Check for Firmware Updates
Checking for firmware updates is an important step in ensuring the smooth functioning of your smart vacuum cleaner. Firmware updates are vital as they improve the reliability of your device by fixing bugs and other issues. This is why you should always check for firmware updates regularly.
To check for firmware updates, follow the below steps:
| Step 1: | Open the app for your smart vacuum cleaner. |
| Step 2: | Navigate to the settings section of the app. |
| Step 3: | Look for the firmware update tab and click on it. |
| Step 4: | If an update is available, download and install it. |
It is important to ensure that your smart vacuum cleaner has the latest firmware updates installed as it helps to keep your device functioning optimally. Firmware updates offer new features, improvements in performance, and enhance your device’s overall user experience.
Additionally, updating your device’s firmware can also fix bugs and vulnerabilities that could lead to security breaches. Thus, always ensure that your device has the latest firmware updates installed and regularly check for updates to maintain the device’s lifespan.
Firmware updates are crucial for the smooth running of your smart vacuum cleaner. They improve the reliability of your device by fixing bugs and other issues. Always ensure that you are running the latest firmware update to enhance overall performance and security.
Reset Your Smart Vacuum Cleaner and Wi-Fi Network Settings
Resetting your Smart Vacuum Cleaner and Wi-Fi Network Settings can be a solution to connectivity issues. This process can be done by following these steps:
| Step 1: | Turn off your Smart Vacuum Cleaner by unplugging the charging dock. |
| Step 2: | Press and hold the reset button on your Smart Vacuum Cleaner for at least 5 seconds. |
| Step 3: | Your Smart Vacuum Cleaner will now emit a sound and the LED lights will blink, indicating that the reset was successful and all Wi-Fi network settings have been erased. |
| Step 4: | Now, reset your Wi-Fi network settings by unplugging the router for 30 seconds and plugging it back in. |
| Step 5: | Once your Wi-Fi network is up and running again, turn on your Smart Vacuum Cleaner. |
| Step 6: | Open the app and follow the on-screen instructions to set up your Smart Vacuum Cleaner on your Wi-Fi network. |
By resetting your Smart Vacuum Cleaner and Wi-Fi Network settings, you’ll be able to start fresh and hopefully resolve any connection issues you were previously experiencing. However, it’s important to note that this should be a last resort option and you should first try troubleshooting steps such as checking for firmware updates and ensuring that your Wi-Fi network is stable and strong.
Conclusion
In conclusion, connecting your smart vacuum cleaner to your Wi-Fi network is a simple process that can greatly enhance your cleaning experience. With the ability to remotely control and monitor your smart vacuum cleaner from your smartphone or smart home device, you can easily manage your cleaning tasks from the palm of your hand.
However, as with any technology, there may be some troubleshooting required. If you encounter any issues during the setup process or while using your smart vacuum cleaner, be sure to refer to the troubleshooting section of this article for guidance on how to resolve them.
It is important to note that not all smart vacuum cleaners are compatible with all Wi-Fi networks. Prior to purchasing a smart vacuum cleaner, it is essential to ensure compatibility with your specific Wi-Fi network to avoid any connectivity issues.
Overall, the convenience and efficiency of a smart vacuum cleaner make it a valuable addition to any household. By following the step-by-step instructions outlined in this article, you can easily connect your smart vacuum cleaner to your Wi-Fi network and enjoy the benefits of remote control and monitoring.
Frequently Asked Questions
1. How do I know if my smart vacuum cleaner is compatible with my Wi-Fi network?
You can check the packaging or manual of your smart vacuum cleaner for information on Wi-Fi compatibility. Additionally, most smart vacuum cleaners will have a list of compatible Wi-Fi networks on their app or website.
2. Can I connect my smart vacuum cleaner to multiple Wi-Fi networks?
Yes, most smart vacuum cleaners allow you to connect to multiple Wi-Fi networks. Simply follow the same steps as connecting to your first Wi-Fi network.
3. What should I do if my smart vacuum cleaner is not connecting to my Wi-Fi network?
First, ensure that your Wi-Fi network is stable and strong. Check for firmware updates on your smart vacuum cleaner and reset both your vacuum and Wi-Fi network settings. If the issue persists, contact customer support for further assistance.
4. Can I control my smart vacuum cleaner remotely?
Yes, you can set up remote control on your app by creating a user account and linking your vacuum cleaner to the account.
5. Can I use voice commands to control my smart vacuum cleaner?
Most smart vacuum cleaners are compatible with voice assistants like Alexa or Google Assistant, allowing you to use voice commands to control your device.
6. How often should I reset my smart vacuum cleaner’s Wi-Fi network settings?
You should only need to reset your smart vacuum cleaner’s Wi-Fi network settings if you are experiencing connectivity issues or if you change Wi-Fi networks.
7. What is the range of my smart vacuum cleaner’s Wi-Fi connectivity?
The range of your smart vacuum cleaner’s Wi-Fi connectivity will depend on the strength of your Wi-Fi signal and the distance between your vacuum and your router. For the best results, ensure that your Wi-Fi signal is strong in the area where your vacuum will be operating.
8. Does my smart vacuum cleaner require a specific type of Wi-Fi network to connect?
Your smart vacuum cleaner should be compatible with most standard Wi-Fi networks. However, if you have a unique Wi-Fi network setup, you should refer to your vacuum’s manual for specific requirements.
9. Can I set up a cleaning schedule on my smart vacuum cleaner?
Yes, most smart vacuum cleaners allow you to set up a cleaning schedule on the app, which will automatically run your vacuum cleaner at a designated time and day.
10. What should I do if I forget my smart vacuum cleaner’s user account password?
You can use the “forgot password” feature on the app to reset your password. Alternatively, you can contact customer support for further assistance.
