Smart vacuum cleaners have revolutionized the way we clean our homes. They are efficient, time-saving, and convenient. However, we have all experienced the frustration of encountering error messages while using these futuristic devices. It can be perplexing to understand what the error means and how to fix it. In this article, we will address the most common error messages that smart vacuum cleaners display and provide step-by-step solutions to help you solve them. Whether you’re encountering Wi-Fi connectivity issues, error codes, or general FAQs, we’ve got you covered. So sit back, relax, and let us guide you through the process of solving smart vacuum cleaner error messages.
General FAQs
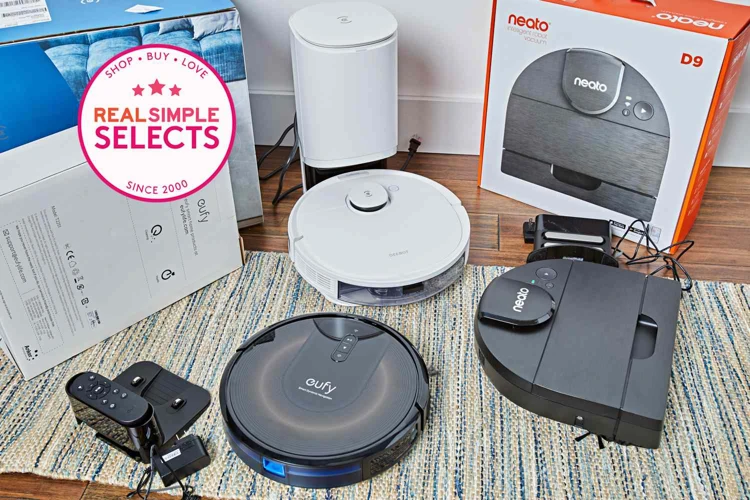
Have you ever encountered an error message on your smart vacuum cleaner and wondered what it means? Don’t worry, you’re not alone. Smart vacuum cleaners are advanced machines that can sometimes run into issues, and it’s important to understand what these error messages mean and how to fix them. In this section, we’ll answer some general FAQs about smart vacuum cleaner error messages, including what to do if your device detects obstacles, why it’s not charging or turning on, and how to reset it. If you’re looking for more information on smart vacuum cleaner error messages, check out our article on troubleshooting error messages for step-by-step guidance. We’ll also cover some tips on error prevention to keep your smart vacuum running smoothly.
What does it mean when my smart vacuum cleaner says “obstacle detected”?
When your smart vacuum cleaner says “obstacle detected”, it means that there is an object or objects blocking the vacuum’s path, and it can’t continue vacuuming. This error message is a common one for smart vacuum cleaners, and it can be frustrating to deal with. However, there are some steps you can take to resolve the issue.
The first step is to remove the obstacle or obstacles from the vacuum’s path. This could be anything from a piece of furniture to a stray toy on the floor. Once the obstacle is removed, your vacuum should be able to continue its cleaning cycle.
If the obstacle is not easily visible, it’s possible that the vacuum’s sensors are not working correctly. Check the sensors to ensure that they are clean and functioning properly. If the sensors are dirty, clean them with a soft, dry cloth. If they are damaged, you may need to replace them.
Another potential cause of the “obstacle detected” error message is that the vacuum’s wheels or brushes are jammed or dirty. Check the wheels and brushes to make sure they are free of debris and can move smoothly. Make sure that there isn’t any hair or string trapped around the brushes, as this can prevent them from rotating properly.
If you’ve tried all of these steps and you’re still getting the “obstacle detected” error message, it may be time to contact the manufacturer for further assistance. They may be able to troubleshoot the issue with you or send a technician to repair the vacuum.
To prevent this error message from occurring in the future, be sure to keep your floors free of clutter and obstacles that could get in the way of your smart vacuum cleaner. You can also consult our smart vacuum error prevention guide to learn more about common issues and how to avoid them. In case you encounter more error messages, our troubleshooting error messages article will give you more advice.
While the “obstacle detected” error message can be frustrating, there are several steps you can take to resolve the issue and get your smart vacuum cleaner back to work.
Why is my smart vacuum cleaner not charging?
One of the most common issues that smart vacuum cleaner owners face is that their device isn’t charging properly. This can be incredibly frustrating, but fortunately, there are several things that you can do to troubleshoot this problem. Before you throw your hands up in despair and start looking for a new vacuum cleaner, consider these potential causes and solutions:
| Possible Causes | Solutions |
|---|---|
| The battery is dead or dying | First, make sure that your vacuum cleaner is properly plugged in and that the outlet you’re using is functioning correctly. If everything seems to be in order and your vacuum cleaner still isn’t charging, it’s possible that the battery is no longer holding a charge. In this case, you may need to replace the battery or the entire vacuum cleaner. |
| The charging contacts are dirty or damaged | Check the charging contacts on both the vacuum cleaner and the charging dock to make sure that they’re clean and free of debris. If you see any dirt or debris, use a soft, dry cloth to gently clean the contacts. Additionally, make sure that the contacts aren’t bent or otherwise damaged; if they are, they may need to be replaced. |
| The charging dock is not working correctly | If your vacuum cleaner isn’t charging, it’s possible that the charging dock isn’t working properly. Try plugging your vacuum cleaner in to a different outlet or using a different charging dock (if available) to see if this resolves the issue. |
| The vacuum cleaner’s software needs to be updated | In some cases, a smart vacuum cleaner may not charge properly if its software is out of date. Check to see if there are any available firmware updates for your model, and install them if necessary. This can often resolve charging issues. |
| The vacuum cleaner is overheated | If your vacuum cleaner gets too hot, it may shut off and stop charging. Give it some time to cool down and try again later. You may also want to check to make sure that the vacuum cleaner is not located near a heat source (such as a radiator or vent). |
Remember, if you’re still having issues after trying these solutions, don’t hesitate to reach out to the manufacturer or consult the user manual for further assistance. Additionally, be sure to check out our article on solving smart vacuum cleaner error messages to learn more about other potential issues and how to fix them.
Why is my smart vacuum cleaner not turning on?
It can be frustrating when your smart vacuum cleaner is not turning on. Several reasons could cause this problem, as highlighted in the table below.
| Possible Causes | Possible Solutions |
|---|---|
| The vacuum cleaner is not plugged in correctly. | Ensure that the plug is correctly inserted into the socket and that the socket is switched on. |
| The power cord is damaged. | Inspect the power cord for any visible damage or cuts. If found, replace the power cord with a new one of the same specification. |
| The vacuum cleaner’s battery is dead. | Charge the battery for the recommended time before trying to turn on the device again. Ensure that the vacuum cleaner is connected to a power source. |
| The vacuum cleaner is overheated. | Turn off the vacuum cleaner and let it cool down before trying to turn it on again. Clean the filter and other parts of the vacuum cleaner to improve airflow and prevent overheating. |
| The vacuum cleaner is faulty. | If the above solutions do not work, the vacuum cleaner may be faulty. Contact the manufacturer or a certified technician for further assistance. |
It is essential to troubleshoot the possible causes systematically to identify and solve the problem. If your smart vacuum cleaner still does not turn on after trying the solutions above, consider seeking professional assistance.
How do I reset my smart vacuum cleaner?
At times, resetting your smart vacuum cleaner may be necessary to fix some error messages. The process of resetting smart vacuum cleaners varies depending on the brand and model. Below is a table outlining the steps to reset some of the popular smart vacuum cleaners on the market.
| Brand and Model | Reset Method |
|---|---|
| Roomba s9+ | Press and hold the CLEAN button and HOME button down together for 20 seconds. |
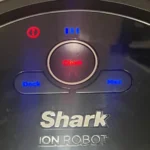
| Shark IQ Robot | Press and hold the Dock and Max buttons at the same time until the robot goes upright and has a flashing blue light. |
| Eufy Robovac | Press and hold the AUTO button on the robot for 10 seconds until the Wi-Fi light flashes white. |
| iLife V8s | Press and hold the AUTO and SPOT buttons simultaneously for 5 seconds. |
| Xiaomi Roborock S5 | Press and hold the power button down for 5 seconds until you hear a sound indicating that the robot has reset and powered off. |
Remember to refer to your vacuum cleaner’s manual for specific instructions on how to reset your device. If resetting your smart vacuum cleaner does not resolve the issue, it may be time to contact customer support or seek the help of a professional technician.
Why is my smart vacuum cleaner not cleaning the entire area?
It can be frustrating when your smart vacuum cleaner fails to clean the entire area. There are a few reasons why this could be happening. Here are some possible explanations and solutions to this problem:
- Low Battery: One of the most common reasons why smart vacuum cleaners may not clean the entire area is due to low battery. The vacuum cleaner may not have enough power to complete the cleaning cycle. If this is the reason, you need to charge your vacuum cleaner.
- Dirty Sensors: Sometimes, the sensors on the vacuum cleaner may get dirty and cause it to fail to clean the entire area. Clean the sensors on your vacuum cleaner using a clean, dry cloth. Ensure that there is no dust or dirt on the sensors.
- Overused Filters: If the filters are overused and clogged with dirt or hair, your vacuum cleaner will struggle to clean the entire area. Clean or replace the filters on your vacuum cleaner from time to time.
- Obstacles: If there are obstacles in the room, the vacuum cleaner may not be able to clean the entire area correctly. Remove any obstacles such as toys, furniture, or clutter from the room before you start cleaning.
- Incorrect Settings: Sometimes, the vacuum cleaner settings may not be correct, and as a result, it may miss some areas. Ensure that your vacuum cleaner settings are appropriate for the surface you are cleaning.
- Mechanical Faults: If everything else fails, there could be mechanical faults with your vacuum cleaner. Consider taking it to an authorized repair center or contacting customer support for assistance.
By following these tips, you can prevent your smart vacuum cleaner from failing to clean the entire area.
What does it mean when my smart vacuum cleaner says “bin full”?
If your smart vacuum cleaner says “bin full”, it means that its dustbin is full and needs to be emptied. The dustbin is the container inside the vacuum cleaner where the dirt and debris accumulates during cleaning. When it reaches its maximum capacity, the vacuum cleaner will detect it and display a “bin full” message on its screen. Here are some steps you can take to address this issue:
- Step 1: Turn off your vacuum cleaner
- Step 2: Locate the dustbin on your vacuum cleaner
- Step 3: Remove the dustbin from the vacuum cleaner
- Step 4: Empty the contents of the dustbin into a trash bag or bin
- Step 5: Clean the dustbin with a damp cloth or rinse it with water if it’s washable
- Step 6: Reattach the dustbin to your vacuum cleaner
- Step 7: Turn on your vacuum cleaner and resume cleaning
It’s important to empty the dustbin regularly to ensure optimal performance of your vacuum cleaner. A full dustbin can prevent the vacuum cleaner from picking up dirt and debris efficiently and may even cause it to malfunction. It’s recommended to empty the dustbin after every cleaning session or when it’s about 2/3 full.
If you continue to receive a “bin full” message even though you have emptied the dustbin, it’s possible that the dustbin sensor is malfunctioning. In this case, you may need to contact the manufacturer or a professional technician for assistance.
Remember, keeping your vacuum cleaner’s dustbin clean and empty will not only ensure better performance but also prolong its lifespan.
How do I clean my smart vacuum cleaner’s sensors?
Smart vacuum cleaners are equipped with sensors to help them navigate around obstacles and clean more efficiently. However, if these sensors get dirty, they may not function properly, resulting in errors or incomplete cleaning. Here is a step-by-step guide on how to clean your smart vacuum cleaner’s sensors:
| Step | Instructions |
|---|---|
| 1 | Remove the dustbin or dirt compartment from your smart vacuum cleaner. |
| 2 | Locate the sensors on the bottom of the device. |
| 3 | Use a soft, dry cloth or cotton swab to gently wipe the sensors clean. Be careful not to press too hard or use any liquids as this may damage the sensors. |
| 4 | Inspect the sensors for any debris or obstructions. If there is any debris, carefully remove it with a small brush or tweezers. |
| 5 | Replace the dustbin or dirt compartment back into your smart vacuum cleaner and turn it on to see if the cleaning performance has improved. |
Regularly cleaning your smart vacuum cleaner’s sensors will ensure that it continues to operate at peak performance and minimize the likelihood of error messages such as “obstacle detected”. If you encounter any issues or error messages even after cleaning the sensors, refer to the relevant FAQ section in this article for troubleshooting tips.
Why is my smart vacuum cleaner getting stuck frequently?
Does your smart vacuum cleaner frequently get stuck in one spot? This can be frustrating and disrupt your cleaning schedule. Below are some reasons why your smart vacuum cleaner may be getting stuck and possible solutions.
| Possible reasons | Possible solutions |
|---|---|
| Dirt and debris obstructing the wheels and brushes | Turn the vacuum off and inspect the wheels and brushes. Remove any debris or tangled hair that may be obstructing them. Regularly cleaning these parts can prevent future obstructions. |
| Furniture and cords in the way | Ensure that the cleaning area is clear of any cords, rugs and other obstacles. If the smart vacuum cleaner gets stuck frequently under furniture, consider adjusting the height settings or creating a barrier to block off this area. |
| Poor lighting conditions | In low light conditions, the smart vacuum cleaner may have difficulty navigating. Turn on lights or open curtains to brighten the room so the vacuum can more easily detect obstacles. |
| Outdated firmware | Check if your smart vacuum cleaner requires an update. Go to the manufacturer’s website and download the latest firmware. Updating the firmware can improve navigation and decrease the frequency of getting stuck. |
| Worn-out parts | If none of the above solutions work, it may be time to inspect the vacuum cleaner’s parts for wear and tear. Replace any worn-out parts such as the brushes or wheels to prevent getting stuck frequently. |
By identifying the cause of the problem, you can take the necessary steps to prevent your smart vacuum cleaner from getting stuck frequently. Regular maintenance and updates can help improve the overall performance of your smart vacuum cleaner, making it more efficient and effective in cleaning your home.
How do I fix my smart vacuum cleaner’s brushes?
If your smart vacuum cleaner’s brushes are not working properly, don’t worry, this is a common problem. Here are the steps you can take to fix them:
- Check for tangled hair or debris: The first thing you should do is check the brushes for any tangled hair or debris that may be causing them to stop working. Use a pair of scissors or your fingers to gently remove any tangled hair or debris that you find.
- Clean the brushes: If the brushes are dirty, they may not work properly. Use a soft cloth or brush to clean the brushes. Be sure to remove any hair or debris that you find.
- Replace the brushes: If the brushes are damaged, you may need to replace them. Check your vacuum cleaner’s manual for instructions on how to do this. You could also contact the manufacturer to enquire about replacement brushes that are compatible with your specific model.
- Check the drive belt: The drive belt connects the vacuum cleaner’s motor to the brushes. If the drive belt is loose or broken, the brushes will not work properly. Check the drive belt and replace it if necessary.
- Restart the vacuum cleaner: After you have taken all the necessary steps to fix the brushes, restart your smart vacuum cleaner and check if the brushes are working properly. If they are still not functioning correctly, it may be best to contact the manufacturer or a professional for assistance.
By following these steps, you can fix your smart vacuum cleaner’s brushes in no time. Remember to always consult your vacuum cleaner’s manual before attempting any repairs, and never attempt to fix any electrical or mechanical issues that are beyond your expertise.
Wi-Fi Connection FAQs
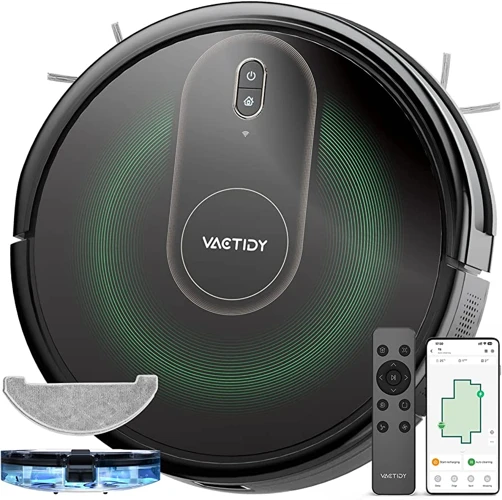
Have you been struggling to connect your smart vacuum cleaner to your Wi-Fi network? Are you facing unexpected disconnections? Fear not, as we’ve got you covered with some frequently asked questions that will help troubleshoot your Wi-Fi connection issues. With the ever-increasing demand for smart home devices, it’s important to understand how to connect them to your network and avoid any complications. So, let’s dive in and explore some solutions to common Wi-Fi connection problems with your smart vacuum cleaner.
Why can’t I connect my smart vacuum cleaner to Wi-Fi?
Are you having trouble connecting your smart vacuum cleaner to Wi-Fi? Here are some reasons why your device might not be connecting and what you can do to troubleshoot:
| Possible Reason | Recommended Solution |
|---|---|
| The device is out of range. | Try moving the device closer to the router to establish a stronger signal. If your Wi-Fi signal is weak, you may also consider investing in a Wi-Fi extender. |
| The Wi-Fi network has changed. | If your Wi-Fi network name or password has changed, you will need to update the information on your vacuum cleaner. Check the device manual for instructions on updating the Wi-Fi information. |
| There is a software issue. | Check for software updates on the device and install them if necessary. If you are still having issues, try resetting the device and attempting to connect again. |
| The router is not compatible. | Ensure that your router is compatible with your smart vacuum cleaner. Some devices only work with certain types of routers or require specific settings to connect. Check the device manual for compatibility requirements. |
| The Wi-Fi network is down. | Check your other devices to see if they are able to connect to the Wi-Fi network. If not, contact your Internet Service Provider to find out if there are any known network issues or outages in your area. |
By troubleshooting these common issues, you can likely get your smart vacuum cleaner connected to Wi-Fi and back to cleaning your home autonomously. If none of these solutions work, contact the manufacturer for additional support.
How do I troubleshoot Wi-Fi connectivity issues with my smart vacuum cleaner?
If you’re having trouble connecting your smart vacuum cleaner to Wi-Fi, there are several steps you can take to troubleshoot the issue. Here are some things to try:
- Check your Wi-Fi network: The first thing you should do is make sure your Wi-Fi network is working properly. Check to see if other devices are able to connect to the network without any issues. If there is a problem with your Wi-Fi, try resetting your router or contacting your Internet service provider for assistance.
- Check your device settings: Make sure your smart vacuum cleaner is within range of your Wi-Fi network and that the Wi-Fi signal is strong. You can also try resetting the device to its default settings and then attempting to reconnect it to your Wi-Fi network.
- Restart your device: Sometimes all you need to do is restart your smart vacuum cleaner to fix Wi-Fi connectivity issues. Turn off the device and then turn it back on after a few seconds.
- Update your device’s software: Ensure that your smart vacuum cleaner is running on the latest software to avoid any compatibility issues that may hinder Wi-Fi connectivity.
- Reconnect to Wi-Fi network: try forgetting your Wi-Fi network from the settings menu and then connect your smart vacuum cleaner again to your Wi-Fi network.
If the problems persists, your smart vacuum cleaner’s hardware may be creating an obstacle in it connecting to the Wi-Fi network. In that case, it’s best to reach out to the product’s support team for any possible repairs or replacements of the faulty parts.
What do I do if my smart vacuum cleaner disconnects frequently from Wi-Fi?
It can be frustrating when your smart vacuum cleaner keeps disconnecting from Wi-Fi, especially when you’ve scheduled a cleaning session. Fortunately, there are a few things you can do to resolve this issue.
1. Check the Wi-Fi signal strength: Your smart vacuum cleaner needs a stable and strong Wi-Fi signal to function effectively. If the signal is weak or interrupted, the device may disconnect. Check the signal strength by moving your Wi-Fi router closer to the vacuum cleaner or using a Wi-Fi extender.
2. Reset the Wi-Fi connection: Sometimes, resetting the Wi-Fi connection of your smart vacuum cleaner can resolve the issue. To do this, go to the vacuum cleaner’s app settings and select the Wi-Fi network it’s connected to. Then, tap on “forget network” and reconnect the device to the Wi-Fi.
3. Reboot the vacuum cleaner: A quick reboot can often resolve Wi-Fi connectivity issues. Turn off the smart vacuum cleaner and unplug it from the power source. Wait for a few minutes before turning it on again.
4. Check for firmware updates: Manufacturers release firmware updates periodically to fix bugs and improve the performance of the device. Check the app or the manufacturer’s website for any available updates and install them.
5. Contact the manufacturer: If the issue persists, contact the manufacturer’s customer support team. They may have additional troubleshooting steps or send a replacement device if the issue is with the hardware.
By following these steps, you can resolve the issue of frequent disconnection of your smart vacuum cleaner from Wi-Fi. Remember to keep the device updated and check for a stable Wi-Fi signal to ensure its optimal performance.
Error Code FAQs
Encountering error codes on your smart vacuum cleaner can be frustrating, especially if you’re unsure of what they mean or how to fix them. But don’t worry, we’re here to help! In this section, we’ll go through some common error codes and provide solutions to help you troubleshoot any issues you may encounter. So, let’s dive in and tackle those pesky error codes together.
What does the error code “E01” on my smart vacuum cleaner mean?
Error code “E01” on a smart vacuum cleaner indicates a problem with the robot’s motor. This error could occur if there is a blockage preventing the motor from functioning, or if the motor has failed completely. Before attempting to fix the motor yourself, check if it is still under warranty or contact the manufacturer for further assistance.
If you do wish to troubleshoot the problem, here are some steps you can take:
| Action | Details |
|---|---|
| Clean or remove any obstructions | Check the brushes and any areas where debris may have accumulated, and remove anything that could be interfering with the motor’s functionality. |
| Restart the vacuum | Try turning off the vacuum and unplugging it for a few minutes before restarting it. |
| Check the power supply | Make sure the power supply to the vacuum is working properly and providing adequate voltage. |
| Replace the motor | If none of the above steps work, you may need to replace the motor entirely. |
Remember, attempting to fix the motor yourself may void any warranties or support from the manufacturer, and may also be dangerous if not done properly. If you are uncertain about what to do or if these steps do not resolve the issue, contact the manufacturer or a professional technician for further assistance.
What should I do if my smart vacuum cleaner shows error code “E02”?
Error code “E02” on your smart vacuum cleaner usually indicates a problem with the suction fan or motor. Here are a few things you can do to troubleshoot the issue:
- Turn off your smart vacuum cleaner and unplug it from the power source.
- Remove the dustbin and empty it. Check the filter for any signs of damage or clogging. If the filter is clogged, clean it or replace it.
- Remove any hair or debris that may be tangled around the brushroll or the suction fan. Check the brushroll for any signs of damage, such as worn-out bristles or broken parts.
- Inspect the suction fan for any signs of damage or blockage. If there is any debris stuck in the suction fan, remove it carefully.
- Check the air inlet and outlet for any signs of blockage. Use a soft-bristled brush to clear any dirt or debris that may be blocking the air flow.
- If none of the above steps solve the problem, there may be a more serious issue with the motor or circuit board. In this case, it is best to contact the manufacturer or a professional technician for assistance.
Remember to always follow the manufacturer’s instructions for cleaning and maintenance to prevent common issues like clogs and damage to parts. Regular cleaning and maintenance can also help prevent the occurrence of error codes like “E02” on your smart vacuum cleaner.
What does it mean when my smart vacuum cleaner displays error code “E03”?
When your smart vacuum cleaner displays error code “E03”, it usually indicates an issue with its brush motor. This error can occur due to a range of factors, including a blockage in the motor or a malfunction in the vacuum’s hardware or software. Here are some troubleshooting steps to help you address this error:
- Check the brush: The first step is to check if there are any obstructions or blockages in the brush area. Turn off the vacuum, remove the brush and check if there are any tangled hair or debris. If you find any, clean the brush thoroughly and reattach it.
- Restart the vacuum: If cleaning the brush doesn’t solve the issue, try turning off the vacuum and restart it. Sometimes, a simple restart can fix the problem.
- Check the vacuum’s software: If the issue persists, check for any updates to the vacuum’s software. Sometimes, an outdated software can cause the brush motor to malfunction. Update the software to the latest version to fix the issue.
- Inspect the brush motor: If none of the above solutions work, it may be time to inspect the brush motor. There could be an issue with the motor’s wiring or hardware. If you’re not familiar with repairing electrical appliances, it may be best to contact a professional for assistance.
It’s important to address this error as soon as possible to prevent further damage to your vacuum cleaner. A malfunctioning brush motor can cause the vacuum to stop working altogether and can be quite costly to repair. By following these troubleshooting steps, you can resolve the error code “E03” and ensure that your smart vacuum cleaner continues to function optimally.
How do I fix the “E04” error code on my smart vacuum cleaner?
The “E04” error code on a smart vacuum cleaner typically indicates a problem with the brush motor. Here are some steps you can take to try and fix the issue:
- Step 1: Turn off the vacuum cleaner and unplug it from the power source.
- Step 2: Check the brush area for any obstructions or tangled hair that may be preventing the brush from turning. Use scissors or tweezers to carefully remove any debris.
- Step 3: Remove the brush from the vacuum cleaner and check for any damage or wear on the bristles. Replace the brush if necessary.
- Step 4: Check the brush motor for any visible damage. If the motor appears to be damaged, it may need to be replaced.
- Step 5: Allow the vacuum cleaner to cool down for at least 30 minutes before plugging it back in and turning it on.
- Step 6: If the “E04” error code still appears after following these steps, contact the manufacturer or a professional technician for further assistance.
It’s important to take care of any issues with your smart vacuum cleaner as soon as they arise to ensure it continues to clean effectively. By following these steps, you can attempt to fix the “E04” error code on your own before seeking outside help.
What should I do if my smart vacuum cleaner displays error code “E05”?
One of the most frustrating experiences for smart vacuum cleaner owners is encountering an error code. One such error code is “E05” which can leave you wondering what to do next.
What does the “E05” error code mean?
When your smart vacuum cleaner shows “E05” on its display panel, it means that there is something wrong with the robot’s cliff sensors. These sensors detect drops or stairs to prevent the vacuum from falling off an edge.
How can I fix the “E05” error code?
There are a few things you can try to fix the “E05” error code on your smart vacuum cleaner:
| Solution | Steps to follow |
|---|---|
| Check the sensors | Manually inspect the sensors located at the bottom of the vacuum cleaner to ensure they are clean and free of any debris. If there is dirt, dust, or hair on them, clean them with a soft cloth or brush. If they are damaged, contact the manufacturer for a replacement. |
| Check for obstacles | Check if there is something obstructing the sensors’ line of sight. Move your smart vacuum cleaner to an open area and ensure that there are no objects blocking the sensors. |
| Restart your vacuum cleaner | Turn off your smart vacuum cleaner, unplug it from the power source, and wait for a few minutes before plugging it back in and restarting it. |
| Reset the vacuum cleaner | If all else fails, try resetting your smart vacuum cleaner to its default settings. Refer to the manufacturer’s manual for instructions on how to do this. |
Final Thoughts
Encountering an error code like “E05” can be stressful, but it’s important not to panic. Most issues can be resolved with a bit of troubleshooting, and your smart vacuum cleaner should be up and running smoothly soon. If you’ve tried all the solutions listed above and the problem persists, don’t hesitate to contact your manufacturer’s customer service for further assistance.
How do I fix error code “E06” on my smart vacuum cleaner?
One common error code that smart vacuum cleaners display is “E06”. This error usually indicates a problem with the brush roll. If you encounter this error code, try the following solutions to fix it:
| Solution | Description |
|---|---|
| Clean the brush roll |
Remove the brush roll from the smart vacuum cleaner and clean it thoroughly. Use a pair of scissors to cut off any tangled hair or debris that may be wrapped around the brush roll. Then, reinstall the brush roll and turn on the smart vacuum cleaner to check if the error has been resolved. |
| Replace the brush roll |
If cleaning the brush roll doesn’t solve the issue, you may need to replace it. Contact the manufacturer of your smart vacuum cleaner to purchase a replacement brush roll that is compatible with your model. Once you have the replacement, follow the instructions provided by the manufacturer to install it. |
| Check the brush roll motor |
If the brush roll is not working due to a faulty motor, you can try fixing it by replacing the motor. Contact the manufacturer or a professional technician to get assistance with replacing the motor. Alternatively, you can look for a video tutorial online that shows how to replace the brush roll motor, but note that this may void your warranty. |
By trying these solutions, you should be able to fix the “E06” error code on your smart vacuum cleaner. If none of these solutions work, you may need to contact the manufacturer or take your vacuum cleaner to a professional technician for repair.
What does it mean when my smart vacuum cleaner shows error code “E07”?
If your smart vacuum cleaner displays error code “E07,” it generally means there is an issue with the fan. This issue may be caused by a clog or malfunction within the fan system. Here are some steps to help you troubleshoot this error code:
- Check the suction power: If the suction power of your smart vacuum cleaner has decreased, it may be a sign of a fan issue. Check the suction power to see if it is at the level it should be.
- Inspect the fan: If the suction power is low, the next step is to inspect the fan for any clogs or malfunctions. Make sure to turn off and unplug the vacuum cleaner before inspecting the fan. Carefully remove any debris or blockages you find.
- Restart the vacuum cleaner: Once you have cleared any debris from the fan, restart the vacuum cleaner and see if the error code persists. If it does, you may need to contact the manufacturer or a professional to assist you further.
It’s essential to address error code “E07” promptly to ensure your smart vacuum cleaner can clean your home efficiently. Troubleshooting the issue may be relatively simple, but always ensure you take the necessary safety precautions before inspecting or attempting any repair work on your smart vacuum cleaner.
How do I troubleshoot error code “E08” on my smart vacuum cleaner?
Error code “E08” on your smart vacuum cleaner can indicate a variety of issues with your device. If you encounter this error, follow these troubleshooting steps to diagnose and resolve the issue.
| Issue | Possible Solution |
|---|---|
| Brush motor malfunction | Check if the brushes are tangled or blocked with debris. Clear any obstructions and clean the brushes. If the issue persists, contact customer support for further assistance. |
| Disconnection between brush motor and circuit board | Inspect the connection between the brush motor wires and the circuit board. Ensure that the connection is secure and properly connected. If the connection appears loose, adjust it and test the device. If the issue persists, contact customer support for further assistance. |
| Malfunction in the main motor | Check the main motor for any signs of blockages or damage. If you find any issues, remove the obstacles or replace the motor. If the problem persists, contact customer support for further assistance. |
| Loose or damaged wiring | Check all wiring connections in your smart vacuum cleaner. If you find any loose connections or damaged wiring, repair or replace the wiring as needed. If the problem persists, contact customer support for further assistance. |
By following these troubleshooting steps, you should be able to identify the cause of the “E08” error on your smart vacuum cleaner and take steps to resolve the issue. If you are unable to diagnose or resolve the problem, don’t hesitate to contact customer support for further assistance.
What does the error code “E09” on my smart vacuum cleaner mean?
When you see the error code “E09” on your smart vacuum cleaner, it means there’s an issue with the device’s bumper. This happens when the bumper sensor is either dirty or damaged, or when there’s an obstruction preventing it from functioning properly.
What should I do if I see this error code?
1. First, check your vacuum’s bumper sensor to see if there’s any dirt or debris on it. Clean it carefully with a soft, damp cloth.
2. If the sensor appears to be clean, inspect it for any possible damage. If it is broken, it may need to be replaced. Contact the manufacturer for assistance.
3. Check if there are any obstacles or debris that are blocking the bumper sensor’s movements. Clear out any objects that may be causing the issue.
4. Restart the vacuum cleaner by turning it off, unplugging it from the electrical socket and waiting for a few minutes before turning it back on.
5. If all else fails, check your smart vacuum cleaner’s warranty and contact the manufacturer for further assistance.
How can I prevent this error from happening again?
1. Regularly clean your vacuum cleaner’s bumper sensor with a damp cloth to prevent dirt buildup.
2. Keep your living space clean and free of clutter and debris to avoid potential obstructions that may cause the bumper sensor to malfunction.
3. Be sure to follow the manufacturer’s instructions for proper care and maintenance of your smart vacuum cleaner to ensure its long-term effectiveness.
Remember, seeing an error code on your smart vacuum cleaner can be frustrating, but don’t worry – most issues can be easily resolved with a little troubleshooting.
Conclusion
In conclusion, knowing how to troubleshoot your smart vacuum cleaner error messages can save you time and money. By following the FAQs provided, you can quickly identify and resolve common issues like “obstacle detected,” “not charging,” “not turning on,” “bin full,” “Wi-Fi connection problems,” and various error codes like “E01,” “E02,” “E03,” “E04,” “E05,” “E06,” “E07,” “E08,” and “E09.”
Remember to check and clean the sensors periodically, as this can prevent your smart vacuum cleaner from getting stuck frequently. Additionally, if your smart vacuum cleaner’s brushes are not functioning correctly, follow the manufacturer’s instructions for cleaning or replacing them.
If you encounter Wi-Fi connectivity issues, try troubleshooting by restarting your modem or router or moving the device closer to the vacuum cleaner. Also, ensure that your smart vacuum cleaner and your device connecting to Wi-Fi are using the same network.
Lastly, if you can’t resolve error codes or other issues, reach out to the manufacturer’s customer support team for further assistance. With the right approach, you can quickly solve your smart vacuum cleaner’s error messages and keep your machine running smoothly for years to come.
Frequently Asked Questions
This means that the smart vacuum cleaner has detected an obstacle in its path that it cannot avoid. Check the area to see what may be blocking its path and move the obstacle if necessary.
Check that the charging dock is properly plugged in and that the vacuum cleaner is properly aligned with the charging dock. Make sure that both the charging dock and the vacuum cleaner are clean and free of debris.
Make sure that the vacuum cleaner is properly charged and that the power switch is turned on. If the vacuum cleaner is still not turning on, try resetting it or contacting customer support.
The reset process varies by model, so consult your user manual or contact customer support for specific instructions. In general, the reset process involves holding down a combination of buttons or resetting the vacuum cleaner through the app.
Make sure that the vacuum cleaner is programmed to clean the entire area and not just a certain section. Check that the vacuum cleaner’s brushes and sensors are clean and properly functioning.
This means that the vacuum cleaner’s dustbin is full and needs to be emptied. Empty the dustbin and replace it before resuming cleaning.
Use a soft, damp cloth to wipe the sensors on the bottom of the vacuum cleaner. Make sure that there is no debris or dust on the sensors that may interfere with their proper functioning.
Check that there are no obstacles in its path that it cannot avoid. Make sure that the vacuum cleaner’s brushes and wheels are clean and properly functioning.
Check that the brushes are clean and free of debris. Remove any hair or tangled fibers that may be caught in the brushes. If the brushes are damaged, contact customer support for replacement parts.
Make sure that your Wi-Fi network is properly configured and your password is correct. Check that your vacuum cleaner is within range of your Wi-Fi network and that it is properly connected to the app.
Reset your Wi-Fi network and restart your vacuum cleaner. Check that the vacuum cleaner’s firmware is up to date, and that it is properly aligned with the charging dock when connecting to Wi-Fi. Contact customer support if the issue persists.
Check that your Wi-Fi network is stable and that there is no interference. Make sure that your vacuum cleaner’s firmware is up to date and its sensors are clean. Restart your vacuum cleaner and check that it is within range of your Wi-Fi network.
