As our lives become increasingly busy, we all need appliances that can help make our daily tasks easier and more efficient. One such appliance that has become quite popular in recent years is the smart vacuum cleaner. These devices are designed to make cleaning up dirt and dust in your home faster and more hands-off. However, as many users have discovered, battery life can be a problem with these cleaners. To help you get the most out of your smart vacuum cleaner, we’ve put together 10 tips to extend your device’s battery life. So, whether you’re a new owner or a long-time user, read on to learn how to keep your device running smoothly and efficiently.
What is a Smart Vacuum Cleaner?
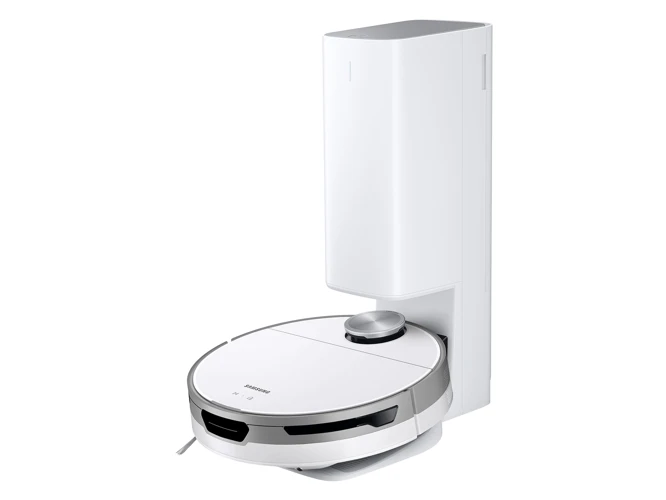
A smart vacuum cleaner is a high-tech device that has revolutionized the way we clean our homes. Unlike traditional vacuum cleaners, smart vacuums can be controlled using a smartphone app, and can even be programmed to clean your home at specific times.
These vacuums are equipped with advanced sensors that allow them to navigate around obstacles and clean under furniture. They also have a variety of attachments that can be used for cleaning different surfaces and types of dirt.
One of the most important components of a smart vacuum is the battery. The battery powers the vacuum and allows it to operate for an extended period without needing to be plugged in. However, if not properly cared for or overused, the battery may lose its capacity and the vacuum may not be able to run for a full cleaning cycle.
To ensure that your smart vacuum keeps performing optimally, it’s important to take care of the battery. This includes regular charging, using the right settings to conserve battery life, and knowing when to replace the battery. By taking good care of your smart vacuum’s battery, you’ll be able to keep your home clean without any worries.
Keeping your smart vacuum cleaner’s battery charged is essential for optimal performance. Without a charged battery, your vacuum won’t be able to clean effectively, leaving dirt and dust on your floors. However, it’s important to understand how to charge your vacuum’s battery properly to ensure its longevity. Overcharging can actually harm your battery, which can lead to a shorter lifespan. In this article, we’ll examine the best practices for smart vacuum battery charging and offer tips for extending your battery’s life. For more information on smart vacuum batteries, check out our guide to smart vacuum battery maintenance.
How to Charge Your Vacuum’s Battery
To ensure your smart vacuum cleaner’s battery lasts as long as possible, charging it correctly is key. Here are some tips on how to charge your vacuum’s battery:
Tip
Description
Tip #1
Only charge your vacuum when the battery is low. Avoid charging it from half or full capacity, as this can damage the battery in the long run.
Tip #2
Avoid overcharging your vacuum’s battery. Leaving it plugged in for too long can reduce its overall lifespan. Check the manufacturer’s instructions for recommended charging times.
Tip #3
Choose a safe and secure location to charge your vacuum’s battery. Avoid damp or humid areas as well as direct sunlight.
Tip #4
Use the recommended charging cable for your smart vacuum. Using the wrong one may cause damage to the battery or even the device itself.
Tip #5
Make sure the battery is cool before charging it. Charging it while it’s still hot can cause damage and reduce its overall performance.
By following these tips, you can extend the lifespan of your smart vacuum cleaner’s battery and avoid unnecessary costs for repairs or replacement. For more information on smart vacuum battery charging, check out our article on smart vacuum battery charging.
Tip #2: Adjust the Power Settings
Are you tired of your smart vacuum cleaner running out of battery mid-clean? One of the easiest ways to extend the battery life of your smart vacuum cleaner is to adjust the power settings. By tweaking the power settings, you can optimize the cleaning performance while also conserving battery life. In this section, we will explore the best power settings for optimal battery life, so you can get the most cleaning time out of your smart vacuum cleaner. But, adjusting the power settings is not the only way to extend the battery life of your vacuum. You should also check out our tips for saving your smart vacuum battery, so you can keep your home clean for longer without needing to recharge.
Best Power Settings for Optimal Battery Life
When it comes to using your smart vacuum cleaner, choosing the right power settings can make a big difference in preserving your battery life. Optimizing your vacuum’s power settings based on the task at hand can help you conserve energy and extend cleaning time.
Here are some best power settings for optimal battery life:
Cleaning Task
Power Setting
Bare Floors
Low
Low-Pile Carpets
Medium
High-Pile Carpets
High
Spot Cleaning
Turbo Boost
Using the right power setting for the job at hand can help you save battery life without sacrificing cleaning performance. If your vacuum has an adjustable power setting option, make sure to use it to customize your cleaning experience.
It’s also important to note that overcharging your smart vacuum’s battery can be harmful and reduce its overall lifespan. To avoid this, make sure to follow manufacturer instructions when charging your vacuum’s battery, and consider proper storage to help ensure its longevity.
If you’re considering purchasing a spare battery, there are pros and cons to take into account, including cost and convenience. It’s important to know when it’s time to replace your vacuum’s battery altogether to ensure optimal performance.
Tip #3: Clean the Filter Regularly
It’s frustrating to start cleaning with your smart vacuum cleaner, only to have it stop working halfway through due to a dead battery. One of the reasons this happens is because the vacuum’s filter gets clogged over time, which can cause the battery to drain faster. This is why it’s crucial to clean the filter regularly. If you neglect this step, your smart vacuum cleaner’s performance will suffer and you’ll be left with a partially cleaned home. Not only that, but a dirty filter can also harm your vacuum’s battery life, which we’ll explore in more detail below.
How Often to Clean Your Vacuum’s Filter
Proper maintenance of your smart vacuum cleaner’s filter is crucial in extending its battery life. A clogged filter reduces the vacuum’s suction power and causes the motor to work harder to compensate. This, in turn, drains the battery faster. You should clean your vacuum’s filter at least once every two weeks, depending on how frequently you use it and the type of material it picks up.
To check if your vacuum’s filter needs cleaning, remove it from the vacuum and hold it up to a light source. If you can’t see light passing through, it’s time for a cleaning. The table below shows a simple guide on how often you should clean your vacuum’s filter based on your usage and the type of debris it collects.
Type of Debris
Frequency of Use
Cleaning Frequency
Pet Hair and Dander
Daily
Every 3-4 uses
Dust and Pollen
1-2 times a week
Every 5-6 uses
Sand and Dirt
1-2 times a week
Every 5-6 uses
Large Debris (Food, etc.)
Occasional
After each use
Keep in mind that over time, filters will wear out and lose their effectiveness, even with regular cleaning. Eventually, you will need to replace the filter to maintain the vacuum’s suction power and preserve the battery life. If you have any doubts about how often to clean or replace your vacuum filter, consult the manufacturer’s guidelines or contact their customer support. It’s worth taking the time to maintain your vacuum’s filter, as it will help extend the life of your smart vacuum cleaner’s battery, save you money, and make your cleaning routine more efficient. If you want to know more, you can read about the dangers of overcharging your smart vacuum battery.
Tip #4: Check for Blockages
Have you noticed that your smart vacuum cleaner is not performing as well as it used to? Perhaps it’s taking longer to complete a cleaning cycle or running out of battery faster than normal. Before assuming that it’s time to replace the battery or buy a new unit, you may want to check for blockages in the vacuum. Large debris or dirt buildup can obstruct the airflow and put extra strain on your vacuum’s motor, which can lead to decreased battery life and poor performance. Let’s take a closer look at how to locate and remove any potential blockages in your smart vacuum cleaner.
How to Locate and Remove Blockages
Blockages can significantly shorten the battery life of your smart vacuum cleaner. To locate and remove blockages, follow these steps:
Step 1: Unplug the Vacuum
Before you start searching for blockages, ensure that the vacuum cleaner is unplugged. This guarantees your safety while conducting the process.
Step 2: Check the Brush Roll
The roller brush can quickly accumulate hair and debris, leading to blockages. Inspect the brush roll for any tangled hair and remove it using a comb or scissors. Once cleaned, you can proceed to other parts to check for blockages.
Step 3: Inspect the Hose
The hose is among the most likely places to find blockages in smart vacuums. Detach the hose from the vacuum and visually inspect it for any dirt or debris. Use a long, thin tool like a coat hanger or a straightened paper clip to dislodge the blockage, then use your hand to remove it. Be careful not to damage the hose while removing the blockage.
Step 4: Check the Canister
A full canister can also cause blockages. If the canister is full, dispose of the debris in a trash bag, then clean the canister under running water.
Step 5: Inspect the Filters
Filters are another spot where blockages can gather. Remove the filters and check for any accumulated dirt or clogs. If you notice a blockage, wash the filter under running water or replace it.
Here is a table summarizing these easy steps for locating and removing blockages from your smart vacuum cleaner:
Steps
Action
Step 1
Unplug the vacuum
Step 2
Check the brush roll for hair and debris, then remove using a comb or scissors
Step 3
Inspect and detach the hose, use a long thin tool to remove blockages, then remove it by hand
Step 4
Check and empty the canister, clean it under running water
Step 5
Remove and check the filters for dirt and clogs, wash using running water or replace if needed
By following these simple steps, you can ensure your smart vacuum cleaner is free from blockages and operating at maximum efficiency, extending the battery life and ensuring your floors are always clean.
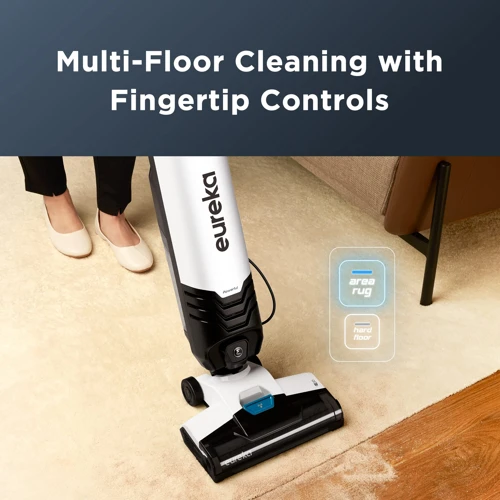
Tip #5: Use the Right Attachments
When it comes to cleaning with a smart vacuum cleaner, using the right attachments can make all the difference in both the quality of the cleaning and the battery life of your device. But with so many different attachments available, it can be confusing to determine which one to use for each specific task. Fortunately, we’ve got you covered with some helpful tips for choosing the right attachment for the job. By following these suggestions, you can help ensure that your vacuum operates as efficiently as possible, giving you maximum cleaning power and extending your battery life.
How Using the Wrong Attachment Can Affect Battery Life
Using the right attachments for your smart vacuum cleaner can make a big difference in the battery life. Using the wrong attachment can cause your vacuum to work harder than it needs to, which can quickly drain the battery. To extend the battery life, consider the following tips:
Choose the right attachment for the job: Each attachment is designed to clean different types of surfaces. Using the wrong attachment can cause the vacuum to use more power than necessary.
Use the motorized brush only when needed: While the motorized brush is great for removing pet hair and dirt from carpets, it uses a lot of power. If you’re cleaning hard floors, consider using an attachment that doesn’t have a motorized brush.
Avoid using the high-power setting: Using the high-power setting with the wrong attachment can cause the vacuum to use more power than it should. Use a lower power setting for lighter cleaning tasks.
By using the right attachment and avoiding the high-power setting, you can help your smart vacuum cleaner conserve battery life and ensure that it lasts as long as possible. Remember, the right attachment for the job will not only help conserve battery life, but it will also improve the overall cleaning performance, leaving your floors cleaner and free from any dirt or debris.
Tip #6: Vacuum Efficiently
When it comes to vacuuming, efficiency is key. Not only can it save you time and energy, but it can also help extend the battery life of your smart vacuum cleaner. By following these best practices for efficient cleaning, you can ensure that your vacuum is using its battery power wisely and getting the job done effectively. So let’s dive in and discover how you can make the most out of each cleaning session.
Best Practices for Efficient Cleaning
When it comes to extending the battery life of your smart vacuum cleaner, one of the most important things you can do is to vacuum efficiently. Here are some best practices to follow for efficient cleaning:
Plan Your Route: Before you start vacuuming, plan out the most efficient route to avoid going over the same areas twice. This will not only help conserve your vacuum’s battery life but also save you time.
Start from the Farthest Place: Begin cleaning from the farthest area of your room and work your way towards the exit. This will prevent you from stepping on areas you just clean and leaving footprints on your freshly cleaned floor.
Use Short Strokes: Use short, quick strokes when vacuuming instead of long, slow movements. This will use less energy and save on battery life. Also, it will be easier to handle and maneuver the vacuum around the furniture without bumping into them.
Vary Your Direction: Varying the direction in which you vacuum will help you capture debris from different angles and decrease the chances of missing spots.
Focus on High-Traffic Areas: High-traffic areas in your home may have more dirt and debris, so focus on those areas first. This will help keep your vacuum’s battery from draining too quickly, and these areas will be cleaner for a longer period of time.
By following these best practices for efficient cleaning, you can ensure that your smart vacuum cleaner uses less energy and lasts longer on a single charge. While these tips may seem simple, they can make a big difference in the longevity of your vacuum’s battery life.
Tip #7: Turn Off Extra Features
If you’re looking to extend the battery life of your smart vacuum cleaner, it’s important to consider the features you’re using during cleaning. While some features may enhance the cleaning experience, others may drain the battery unnecessarily. By turning off certain features, you can optimize your vacuum’s battery life and get more cleaning time out of each charge. But which features should you turn off? Let’s explore some possibilities.
Features That Can Drain Your Vacuum’s Battery
When it comes to keeping your smart vacuum cleaner’s battery from draining quickly, it’s important to pay attention to the features that you use while cleaning. Here are some features that can drain your vacuum’s battery:
Features
Description
Max power mode
This mode is great for cleaning stubborn dirt and debris, but it uses a lot more power than normal cleaning modes.
LCD screen
The LCD screen provides useful information about your vacuum’s status, but it can also use a significant amount of battery power.
LED lights
The LED lights on your vacuum can help you see in low-light conditions, but they can also drain the battery more quickly.
Auto-recharge feature
If your vacuum automatically returns to its charging dock when the battery is low, this feature can use additional battery power.
App connectivity
If your vacuum is connected to your smartphone or other devices, this feature can use additional battery power as your vacuum communicates with your other devices.
To extend your vacuum’s battery life, consider turning off some of these features or using them sparingly. For example, you might only use the max power mode when you need to clean particularly stubborn dirt, and turn off the LED lights when you don’t need them. By managing these features, you can get more cleaning time out of your smart vacuum cleaner.
Tip #8: Give Your Vacuum a Break
We all need a break from time to time, and your smart vacuum cleaner is no exception. Giving your vacuum a chance to rest during cleaning sessions can actually help extend its battery life. But how often should you take a break? And for how long? Let’s dive into some tips and tricks for optimizing your vacuum’s battery life by giving it some much-needed rest.
When to Take Breaks During Cleaning
While using your smart vacuum cleaner, it is important to take breaks to avoid overworking the device and draining its battery. Here are some instances when you should take a break:
After an Hour of Continuous Use: Most smart vacuum cleaners can clean for up to an hour before needing a recharge. To extend your battery life, take a break after 60 minutes of continuous use. It is also a good practice to allow your device to cool for 15 minutes before restarting.
When the Battery is Low: If your device signals a low battery, take a break and recharge it. Avoid using the device while it’s charging as this can cause the battery to run out faster.
After Cleaning Dirty or Large Spaces: If you are cleaning a large space or one with a lot of debris, take a break to dump the dustbin and clean the filter. This ensures that your device is functioning optimally and increases its lifespan.
When Your Device Runs into Obstacles: If your device encounters obstacles like furniture, it may consume more battery life trying to navigate around them. Take a break and reposition the device to make cleaning easier.
By taking breaks during cleaning, you can extend the battery life of your smart vacuum cleaner and ensure that it remains in good condition for a longer period of time.
Tip #9: Store Your Vacuum Properly
After investing in a smart vacuum cleaner to make your cleaning routine a breeze, it’s important to make sure it remains in good condition in order to maximize its lifespan and keep it running efficiently. Proper storage is a crucial aspect of this, as it can prevent damage to both the vacuum and its battery. To ensure that your vacuum is ready to go whenever you need it, follow these tips for storing your smart vacuum cleaner properly. By taking the time to store your vacuum correctly, you can help to extend its battery life and keep your cleaning routines running smoothly.
How Proper Storage Can Benefit Battery Life
Proper storage of your smart vacuum cleaner can have significant benefits for its battery life. Here are some tips to help you store your vacuum properly:
Keep it in a cool, dry place: Avoid storing your smart vacuum cleaner in a hot or humid area, as this can have negative effects on the battery.
Disconnect the battery: If you won’t be using your smart vacuum cleaner for an extended period, disconnect the battery to prevent it from draining.
Store it fully charged: When storing your vacuum cleaner for an extended period, make sure it is fully charged. This will help the battery remain healthy and prevent it from degrading.
Use a clean and dry storage area: Dirt and debris can get into the vacuum and affect its battery life. Make sure to store it in a clean and dry location.
Avoid extreme temperatures: Cold temperatures can also affect the battery life of your vacuum. Make sure to store it in a location that isn’t too cold or hot.
By properly storing your smart vacuum cleaner, you can help extend the life of its battery and keep it running smoothly for years to come.
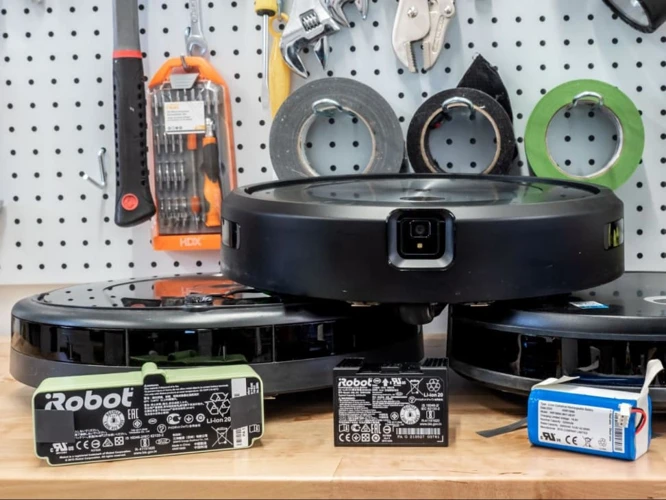
Tip #10: Replace the Battery When Needed
Over time, even the best batteries can start to lose their charge, and the battery in your smart vacuum cleaner is no exception. When the battery starts to lose its ability to hold a charge, it can greatly shorten the run time of your vacuum. This can be frustrating when you’re in the middle of cleaning and your vacuum suddenly stops working. However, it’s important to recognize when it’s time to replace the battery to avoid further frustration and optimize the performance of your smart vacuum. In this section, we’ll discuss how to know when it’s time to replace your vacuum’s battery and what to consider when making a replacement.
When to Replace Your Vacuum’s Battery
One of the most important considerations when it comes to extending the life of your smart vacuum cleaner is knowing when it’s time to replace the battery. Over time, even the best batteries can lose their charge capacity, which means that your vacuum cleaner won’t be able to run as long or as effectively as it used to. To avoid this issue, be on the lookout for these signs that it may be time for a new battery:
Shorter battery life: If you find that your smart vacuum cleaner isn’t able to run as long as it used to, even after charging the battery fully, it’s a sign that your battery is starting to wear down.
Poor performance: If you notice that your vacuum cleaner isn’t picking up as much dirt and dust as it used to, or it seems to be struggling to move across the floor, it may be a sign that the battery is losing power.
Difficulty charging: If you’re having trouble getting your vacuum cleaner’s battery to charge properly, or if it seems to take much longer to reach full charge, it’s another sign that the battery is losing its effectiveness.
Age: Finally, if your smart vacuum cleaner is several years old and you’ve noticed any of the other signs mentioned above, it’s likely that the battery is reaching the end of its life span.
If you’re experiencing any of these problems with your smart vacuum cleaner, it may be time to start shopping for a replacement battery. By investing in a new battery, you’ll be able to enjoy longer cleaning times and better performance from your vacuum cleaner.
Conclusion
As we come to the end of our article, it’s important to remember that extending the battery life of your smart vacuum cleaner is a simple yet effective way to ensure it operates optimally for the long haul. By implementing the tips we’ve discussed, you can keep your vacuum running smoothly and get the most out of each cleaning session. So give your smart vacuum the care and attention it deserves, and enjoy a cleaner home with less hassle and more time to spare.
Get More Cleaning Time From Your Smart Vacuum Cleaner
One of the best benefits of a smart vacuum cleaner is the ability to clean your floors without you having to lift a finger. However, as with any battery-powered device, the battery life of your smart vacuum can impact how much cleaning it can get done in a single charge.
Thankfully, there are several tips and tricks you can use to extend the battery life of your smart vacuum, ultimately allowing you to get more cleaning time from its battery. This can save you time and frustration in the long run, as well as prolong the overall lifespan of your vacuum.
Here are some of the best ways to maximize the cleaning time you get from your smart vacuum cleaner:
Tip
Description
Tip #1: Keep the Battery Charged
Charge your vacuum’s battery when it is low or use scheduled cleanings to avoid totally draining the battery.
Tip #2: Adjust the Power Settings
Use the lowest power setting necessary to get the job done. This reduces the amount of power needed and in turn, extends battery life.
Tip #3: Clean the Filter Regularly
A dirty filter can restrict airflow and cause your vacuum to work harder, which drains the battery faster. Clean or replace the filter as necessary to optimize battery life.
Tip #4: Check for Blockages
Blockages in the vacuum’s hose, brush roll or airway can cause motor overload and lead to decreased battery life. Check and remove any blockages as necessary.
Tip #5: Use the Right Attachments
Using the wrong attachment can cause the vacuum to work harder than it needs to, which ultimately results in decreased battery life. Make sure to use proper attachments for each cleaning task.
Tip #6: Vacuum Efficiently
Be mindful of the areas you need to clean and stick to them, following efficient patterns of movement. This will help you clean your floors in a shorter time, using less power, which ultimately extends the battery life.
Tip #7: Turn Off Extra Features
Extra features like LED lights or higher suction settings can be convenient but they can also drain the vacuum’s battery faster. Turn off such features when not necessary to save power.
Tip #8: Give Your Vacuum a Break
If cleaning a large space, give your vacuum a break by pausing it for a few minutes after extended periods of use. This can help the battery’s temperature stabilize, ultimately extending its overall lifespan.
Tip #9: Store Your Vacuum Properly
When not in use, store your vacuum and charger in a cool and dry place out of direct sunlight. This can help protect the battery from overheating or damage, which can reduce its lifespan.
Tip #10: Replace the Battery When Needed
If your vacuum’s battery is approaching the end of its lifespan and is no longer holding a charge, consider replacing it with a new battery to extend the life of your vacuum.
By following all of these tips and tricks, you can help ensure that your smart vacuum cleaner always has enough power to get the job done without running out of battery mid-task.
Frequently Asked Questions
How long does the battery of a smart vacuum cleaner last?
The battery life of a smart vacuum cleaner depends on its model, settings, and usage. On average, the battery can last from 1 to 2 hours before needing a recharge.
Can I replace the battery of my smart vacuum cleaner?
Yes, the battery of your smart vacuum cleaner can be replaced. It’s recommended to replace it every few years, depending on usage.
What happens if I overcharge my smart vacuum cleaner battery?
Overcharging the battery of your smart vacuum cleaner can cause damage and reduce its overall lifespan. Make sure to unplug the charger after the battery is fully charged.
How often should I clean the filter of my smart vacuum cleaner?
The filter of your smart vacuum cleaner should be cleaned at least once a month, depending on usage. A clogged filter can reduce the suction power of your vacuum and drain its battery faster.
What type of attachment should I use to prolong the battery life of my smart vacuum cleaner?
Using the right attachment for the job can help extend the battery life of your smart vacuum cleaner. Use the attachments that are specifically designed for the surface you are cleaning to optimize suction and prevent overuse of the battery.
How can I store my smart vacuum cleaner to prolong the battery life?
Store your smart vacuum cleaner in a cool, dry place away from direct sunlight. Make sure to fully charge the battery before storing it for an extended period, and avoid leaving the battery completely drained.
Can frequent breaks during cleaning prolong the battery life of my smart vacuum cleaner?
Taking breaks during cleaning can help prevent the battery of your smart vacuum cleaner from overheating and prolong its overall lifespan. Make sure to turn off the unit during breaks to conserve battery power.
What settings should I use to optimize the battery life of my smart vacuum cleaner?
Using lower power settings and scheduling cleaning sessions at longer intervals can help extend the battery life of your smart vacuum cleaner.
Do extra features of my smart vacuum cleaner drain the battery faster?
Yes, extra features such as Wi-Fi connectivity and voice control can drain the battery of your smart vacuum cleaner faster. Use these features sparingly to prolong the battery life.
When should I replace the battery of my smart vacuum cleaner?
You should consider replacing the battery of your smart vacuum cleaner if it cannot hold a charge or if the suction power has significantly decreased. It is recommended to replace the battery every few years depending on usage.