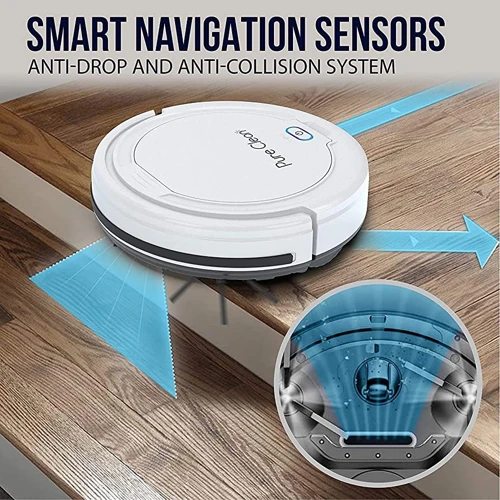
We’ve all been there – eagerly unboxing a brand new smart vacuum cleaner with anti-collision and drop sensors, only to find that it’s not performing up to our expectations. Before you throw your arms up in frustration, it’s important to realize that there are common mistakes that many people make when using these high-tech gadgets. In this article, we’ll take a closer look at 5 of the most common mistakes to avoid when using a smart vacuum cleaner with anti-collision and drop sensors. By the end of this article, you’ll be equipped with the knowledge to maximize the efficiency and longevity of your device. Let’s get started!
Mistake #1: Not Emptying the Dustbin
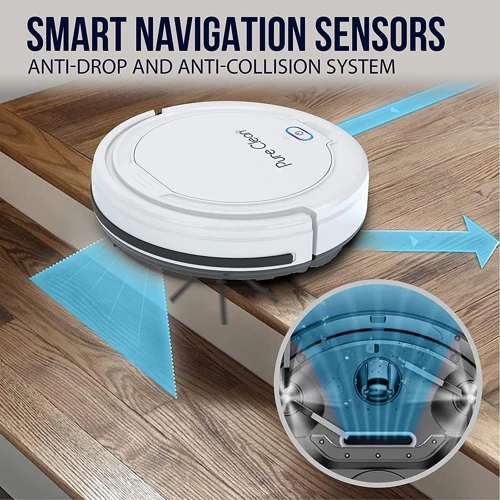
Have you ever used your smart vacuum cleaner with anti-collision and drop sensors and noticed that it’s not cleaning properly? It may be time to check if you are making the common mistake of not emptying the dustbin. The dustbin of your smart vacuum cleaner fills up quickly, especially if you have pets or if you vacuum a lot. Not emptying the dustbin may result in a shortened life of the vacuum cleaner, as well as decreased efficiency. It’s essential to empty the dustbin regularly to prevent malfunctioning of the sensors and ensure a hygienic cleaning experience. In this article, we’ll discuss how not emptying the dustbin can affect your smart vacuum cleaner and what steps you can take to avoid this issue. To learn more about other common mistakes to avoid when using a smart vacuum cleaner with anti-collision and drop sensors, check out our article on smart vacuum troubleshooting sensors.
1.1 Shortens the Life of the Vacuum Cleaner
One common mistake people make when using their smart vacuum cleaners with anti-collision and drop sensors is not emptying the dustbin regularly enough. Allowing the dustbin to become too full can shorten the life of the vacuum cleaner, causing it to malfunction and eventually breakdown.
To understand how this happens, imagine you’re vacuuming your floor, and you notice the dustbin is full. Ignoring this fact, you keep vacuuming, putting the internal components under excessive strain. As a result, the motor has to work much harder to compensate for the decreased suction power, and the extra dust and dirt entering the dustbin.
Over time, this can wear out the motor and put more strain on the other moving parts inside the vacuum cleaner. Not emptying the dustbin regularly enough can also decrease the efficiency of the vacuum cleaner, requiring more time and energy to clean than would otherwise be necessary.
To ensure the longevity and efficiency of your smart vacuum cleaner, it is crucial to empty the dustbin regularly. Aim to do so after every use to keep it functioning at its best. By doing this, you can help keep your smart vacuum cleaner in good working condition, allowing it to continue cleaning your home effectively.
If you want to learn more about maintaining your smart vacuum cleaner, check out our article on how to clean anti-collision sensors on your smart vacuum, or read our guide on the importance of checking and calibrating drop sensors to keep your vacuum cleaner operating at peak performance.
1.2 Decreases Efficiency of the Vacuum Cleaner
When it comes to using a smart vacuum cleaner with anti-collision and drop sensors, one of the most common mistakes people make is not emptying the dustbin regularly. This can lead to a build-up of dust and dirt that not only shortens the lifespan of the vacuum cleaner but also decreases its efficiency.
How does not emptying the dustbin affect the efficiency of the vacuum cleaner?
When the dustbin is full, the vacuum cleaner has less space to store the dirt it picks up. This means it will have to stop and empty the bin more frequently, which interrupts its cleaning cycle and wastes time. When the dustbin is full, it can no longer pick up more dirt or debris, which means it will miss spots on the floor even after running for the usual amount of time.
To illustrate this, take a look at the table below:
| Scenario | Emptying Dustbin Regularly (Efficient) | Not Emptying Dustbin Regularly (Inefficient) |
|---|---|---|
| Vacuuming time | 1 hour | 1 hour |
| Dustbin emptied | 3 times | 0 times |
| Efficiency | Excellent | Poor |
As you can see, when the dustbin is emptied regularly, the vacuum cleaner can run for the same amount of time but with more efficiency. On the other hand, not emptying the dustbin can result in a decrease in efficiency.
In order to maintain the efficiency of your smart vacuum cleaner with anti-collision and drop sensors, it’s important to empty the dustbin after every use or when it’s half full at least. This will not only help prolong the lifespan of the vacuum cleaner but also ensure that it can pick up as much dirt and debris as possible.
Mistake #2: Forgetting to Clean the Sensors
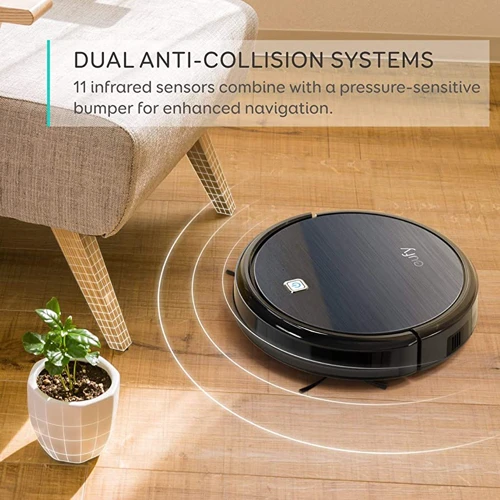
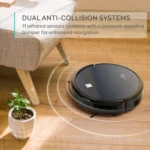
As you set up your smart vacuum cleaner, it’s important not to forget that sensors play a vital role in its efficient functioning. These sensors enable the vacuum cleaner to identify obstructions such as furniture and walls to avoid collisions while cleaning. Neglecting to clean these sensors can significantly reduce the vacuum cleaner’s performance and lifespan. In this section, we’ll discuss the consequences of forgetting to clean your smart vacuum cleaner’s sensors and what can be done to avoid these issues.
To learn more about how AI plays a role in smart vacuum cleaning, see our article on the AI-controlled vacuum cleaners that can take your cleaning to the next level!
2.1 Sensors Can’t Function Properly
When using a smart vacuum cleaner with anti-collision and drop sensors, it is crucial to keep the sensors clean to ensure they function properly. The sensors are the eyes of the vacuum cleaner, allowing it to navigate around obstacles and avoid falling off stairs or ledges. If the sensors are obstructed or dirty, the vacuum cleaner will not be able to accurately detect its surroundings, potentially causing damage to furniture or objects around the house.
To better illustrate this issue, let’s take a closer look at some of the specific ways dirty sensors can affect the functionality of a smart vacuum cleaner:
| Issue | Description |
|---|---|
| Sensor obstruction | If the sensors are blocked by dust, hair, or other debris, they will not function properly, causing the vacuum cleaner to collide into objects or miss important areas that need cleaning. This can result in a less efficient cleaning process and may even cause damage to the vacuum cleaner over time. |
| Disabled auto-recharge | Dirty sensors can also prevent the vacuum cleaner from automatically returning to its charging dock when its battery is running low. This may result in the vacuum cleaner running out of power mid-cycle, which can be frustrating and can lead to an incomplete cleaning job. |
| Reduced lifespan | Finally, dirty sensors can contribute to a shorter lifespan of the vacuum cleaner overall. Over time, debris build-up can cause wear and tear on the sensors and other components of the vacuum cleaner, potentially leading to costly repairs or the need for a replacement vacuum cleaner. |
To avoid these issues and ensure that a smart vacuum cleaner with anti-collision and drop sensors continues to function properly, it is important to regularly clean the sensors according to the manufacturer’s instructions. Some vacuum cleaners may have a self-cleaning function or come with specific tools for sensor cleaning, while others may require manual cleaning with a cloth or brush. Regardless of the cleaning method, regular maintenance can help keep the sensors in good working order and ensure the vacuum cleaner continues to perform as expected.
2.2 The Vacuum Cleaner Doesn’t Identify Obstacles
When the sensors on a smart vacuum cleaner with anti-collision and drop sensors are not cleaned regularly, they can’t function properly. One of the consequences of failing to clean the sensors is that the vacuum cleaner will not be able to identify obstacles in its path, and this is a common mistake that many users make.
Obstacles can be anything from furniture to toys and anything else that is left on the floor. If the vacuum cleaner doesn’t identify these obstacles, it will either push them around the room or collide with them. Both of these scenarios can lead to damage to the furniture or other items and cause the vacuum cleaner to become stuck or damaged.
To avoid this mistake, make sure to clean the sensors regularly with a soft cloth or brush. This will help the vacuum cleaner to identify obstacles in its path and avoid them, preventing any damage or getting stuck.
Here is a table summarizing the consequences of not cleaning the sensors:
| Consequences of Not Cleaning the Sensors |
|---|
| The vacuum cleaner cannot identify obstacles in its path |
| The vacuum cleaner will push obstacles around or collide with them, leading to potential damage |
| May cause the vacuum cleaner to become stuck or damaged |
It is essential to clean the sensors regularly to ensure the vacuum cleaner works efficiently and avoids any obstacles that may cause damage or disruption.
Mistake #3: Not Removing Clutter From the Floor
Keeping your house clean and tidy is quite a challenge, and that’s why we have smart vacuum cleaners with anti-collision and drop sensors to make life easier. However, relying solely on these cleaners without preparing the floor first can result in poor performance and even damage to the device. This brings us to another common mistake to avoid – not taking the time to clear the floor of clutter. Let’s explore why this mistake can be costly in terms of both time and money if not resolved.
3.1 The Vacuum Cleaner Can’t Reach Certain Places
It may seem like common sense to remove clutter from the floor before running a smart vacuum cleaner, but some people still forget to do so. This can lead to areas being left uncleaned because the vacuum cleaner simply can’t reach them. To avoid this mistake, make sure to clear the floor of any loose items such as toys, shoes, or books before starting your vacuum cleaner. This will allow it to reach all areas of the room and properly clean every inch of your floors.
Additionally, it’s important to keep in mind that some items, such as large furniture or heavy rugs, may also block the path of the vacuum cleaner. In these cases, consider moving the furniture or temporarily removing the rug to allow the vacuum cleaner to clean under or around it. By taking these simple steps, you can ensure that your smart vacuum cleaner is able to clean every corner of your home and leave no spot untouched.
3.2 More time and energy is used to clean the floor manually
When clutter is not removed from the floor before using a smart vacuum cleaner with anti-collision and drop sensors, it can cause inefficiency in the cleaning process. This is because the vacuum cleaner may not be able to reach certain places, leaving behind dirt, dust and debris that need to be cleaned manually.
Cleaning the floor manually takes more time and energy in comparison to using a smart vacuum cleaner. Not only do you have to physically move around the space with cleaning supplies, but you also have to spend time searching for and picking up debris that the vacuum cleaner could have easily picked up. This can be especially frustrating if you lead a busy lifestyle or have a large space that needs cleaning.
When you clean manually, there is a chance that you may not clean the space as thoroughly as the smart vacuum cleaner can. With its advanced suction and brush systems, a smart vacuum cleaner can pick up even the smallest particles of debris, leaving your floor spotless in no time.
It is important to remove clutter from the floor before using a smart vacuum cleaner with anti-collision and drop sensors. This will ensure that the vacuum cleaner can clean the area more efficiently, saving you time and energy that can be spent on other important tasks.
Mistake #4: Scheduling the Vacuum Cleaner at Inconvenient Times
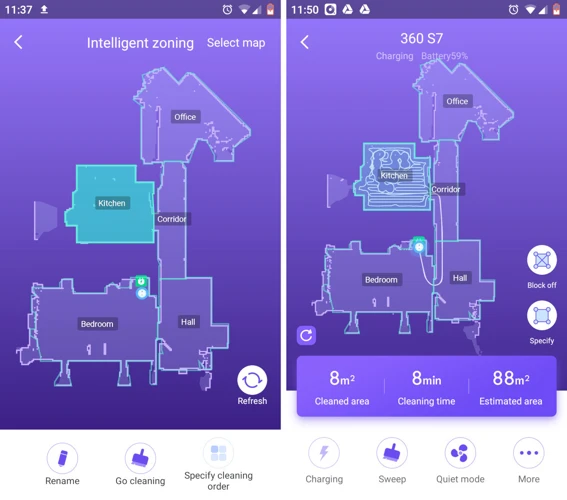
Are you someone who has made the investment in a smart vacuum cleaner with anti-collision and drop sensors to ease the burden of daily floor cleaning? If so, you may have found yourself scheduling the vacuum cleaner for a time that ends up being inconvenient. It can be frustrating to have your vacuum cleaner interrupt your daily routine or waste energy when it isn’t required. However, avoiding this common mistake is crucial to getting the most out of your smart vacuum cleaner. Let’s explore the reasons why scheduling your smart vacuum cleaner at inconvenient times is a mistake and how it can be avoided.
4.1 Interrupts Your Daily Routine
Have you ever scheduled your smart vacuum cleaner to start cleaning in the middle of the day, only to have it disrupt your daily routine? Not only can this be frustrating, but it can also be a major inconvenience. Let’s take a closer look at how this mistake can impact your everyday life.
| Issue | Impact |
| Unexpected noise and movement | Can disrupt work meetings, studying, or other important tasks |
| Inefficient cleaning | If the cleaner starts at an inconvenient time, you may be forced to turn it off before it finishes. This can lead to a partially cleaned room, or even cause you to miss cleaning altogether if you forget to start it later |
| Higher energy costs | Having your vacuum cleaner running during peak energy usage times can increase your electricity bill, and scheduling it to start at an inconvenient time can waste energy as well |
It’s important to consider your daily routine when scheduling your vacuum cleaner’s cleaning times. If you work from home, make sure it’s not running during important virtual meetings, and if you have children who are napping during the day, make sure it’s not too loud to wake them up. Take advantage of features that let you know when the dustbin is full, or when the battery is low, to help you schedule cleaning times that aren’t interruptive. By doing so, you can avoid wasting energy, while still having a clean house.
4.2 Wastes Energy if Not Required at that Time
As a smart vacuum cleaner user, it’s important to schedule your device to work at the most suitable times. If you don’t, you may end up wasting energy unnecessarily, which can be a strain on both your wallet and the environment.
To avoid this mistake, make sure to check the scheduling on your vacuum cleaner frequently. Most smart vacuum cleaners come with a dedicated app that allows you to set specific cleaning times. Take advantage of this feature and schedule your device’s cleaning activities to correspond with your routine.
Table of inconvenient scheduling times and wasted energy:
| Inconvenient Time | Energy Wasted |
|---|---|
| During peak electricity rates | Higher energy bills |
| During a power outage | Device will stop working and restart once power is restored, using additional energy |
| While you’re at home | Device won’t work as efficiently with people or objects in the way, therefore using more energy |
It’s also important to keep in mind that smart vacuum cleaners have various cleaning modes, including spot cleaning and edge cleaning. Ensure that you choose the right cleaning mode at the right time. For example, if you have just had a big meal and anticipate crumbs being scattered across your kitchen floor, choose spot cleaning mode so that your vacuum cleaner can focus solely on that area, as opposed to cleaning the entire house.
By avoiding scheduling your smart vacuum cleaner to run during inconvenient times, you can save energy and reduce your carbon footprint.
Mistake #5: Not Restarting the Smart Vacuum Cleaner After Moving It to a New Location
One common yet overlooked mistake when using a smart vacuum cleaner with anti-collision and drop sensors is failing to restart the device after moving it to a new location. This might seem like a trivial issue, but it can severely impact the efficacy of your vacuum cleaner in keeping your floors clean. Many people assume that they don’t need to restart the vacuum cleaner after moving it, assuming that it will automatically continue from where it left off. However, this assumption can lead to significant problems that can render the sensors useless and cause the vacuum cleaner to miss entire areas of flooring. In this section, we will delve into the reasons why restarting your smart vacuum cleaner after relocating it to a new position is critical for optimal performance.
5.1 The Vacuum Cleaner Doesn’t Recognize Boundaries In New Locations
5.1 One common mistake that people make when using a smart vacuum cleaner with anti-collision and drop sensors is not restarting the vacuum cleaner after moving it to a new location. When you move your vacuum cleaner to a new room or area, it is important to restart it so that it can recognize and adjust to its new surroundings.
If you do not restart your smart vacuum cleaner after moving it to a new location, it may not recognize the boundaries of the new space. This can lead to the vacuum cleaner potentially getting stuck or hitting obstacles that it did not recognize were there. It may also cause the vacuum cleaner to miss certain areas that it would have otherwise cleaned if it had been restarted in its new location.
To avoid this mistake, make sure to restart your smart vacuum cleaner every time you move it to a new location. This will help ensure that the vacuum cleaner is able to properly recognize its surroundings and clean your space as efficiently as possible.
To further help prevent your vacuum cleaner from getting stuck, it’s also recommended to remove any cords or clutter from the floor before cleaning. This can help the vacuum cleaner move around more freely and prevent any potential accidents.
Table:
| Mistake | Effect | Solution |
| — | — | — |
| Not restarting the vacuum cleaner after moving it to a new location | Vacuum cleaner doesn’t recognize boundaries in new locations | Restart the vacuum cleaner every time you move it to a new location |
| Not removing cords or clutter from the floor | Vacuum cleaner may get stuck or damage items | Remove any cords or clutter from the floor before cleaning |
Conclusion
In conclusion, owning a smart vacuum cleaner with anti-collision and drop sensors can be a game-changer in keeping your home clean and tidy. However, it is important to avoid common mistakes that can hinder the performance of the device. Remember to regularly empty the dustbin to increase the lifespan of the vacuum cleaner and maintain its efficiency. Don’t forget to clean the sensors as well, as they play a crucial role in detecting obstacles and preventing collisions.
Removing clutter from the floor before running the vacuum cleaner will ensure that it can effectively reach all areas and reduce the need for manual cleaning. Scheduling the device at appropriate times will prevent interruptions during your daily routine and save energy. Lastly, remember to restart the vacuum cleaner after moving it to a new location to ensure that it can recognize and respect the boundaries of the area.
By avoiding these common mistakes, your smart vacuum cleaner will work flawlessly, giving you the freedom to focus on other important aspects of your life. So if you’re looking for hassle-free cleaning, make sure to take note of these tips and tricks. Happy cleaning!
Frequently Asked Questions
1. How often should I empty the dustbin of my smart vacuum cleaner?
It is recommended to empty the dustbin after every cleaning session to prolong the life of your vacuum cleaner and maintain its efficiency.
2. What is the importance of cleaning the sensors of a smart vacuum cleaner?
Cleaning the sensors is essential to ensure they function properly and enable the vacuum cleaner to detect obstacles and navigate your space efficiently.
3. Can clutter on the floor affect the performance of a smart vacuum cleaner?
Yes, clutter can limit the movement of the vacuum cleaner, prevent it from reaching certain areas, and consume more energy, resulting in a less efficient cleaning process.
4. Should I schedule my smart vacuum cleaner cleaning sessions according to my daily routine?
Absolutely. Scheduling cleaning sessions when you are not at home and setting the vacuum cleaner to clean at an inconvenient time can interrupt your daily routine and waste energy unnecessarily.
5. Can I move a smart vacuum cleaner to a new location without restarting it?
It is not recommended to move a smart vacuum cleaner to a new location without restarting it. Doing so can result in the vacuum cleaner not recognizing new boundaries, and it may not function efficiently.
6. What is the ideal frequency for cleaning the sensors of a smart vacuum cleaner?
The ideal frequency for cleaning the sensors of a smart vacuum cleaner generally depends on the frequency of use or how dirty the sensors get. But, it is recommended to clean the sensors once every few weeks or after every 3-4 uses.
7. Can the battery of a smart vacuum cleaner be replaced?
Yes, most smart vacuum cleaners have replaceable batteries. However, it is essential to check your device’s type and model and refer to the user manual before replacing the battery.
8. Can I use a smart vacuum cleaner for outdoor cleaning?
No, smart vacuum cleaners are designed for indoor use only and can get damaged if used outdoors.
9. How long does it take to charge a smart vacuum cleaner’s battery?
The time taken to charge a smart vacuum cleaner varies depending on the type and model. The average time is 2-4 hours, but some devices can take longer.
10. Can I use a smart vacuum cleaner on a shaggy carpet?
Yes, but you must ensure that the device has the proper settings for that type of carpet. Most smart vacuum cleaners come with different settings to suit various floor types, including shaggy carpets.
