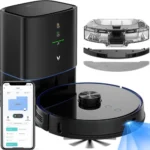
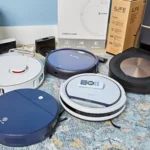
As our lives become increasingly busy, the need for time-saving devices continues to grow. Smart vacuum cleaners have revolutionized the way we clean our homes by offering unparalleled convenience and functionality. With an array of features at your disposal, the possibilities for customizing your cleaning experience are endless. However, maximizing the potential of your smart vacuum cleaner requires a certain level of understanding and preparation. In this article, we will provide you with the tips and tricks you need to optimize your smart vacuum cleaner’s performance, so you can spend less time cleaning and more time doing the things you love.
Understanding Your Smart Vacuum Cleaner
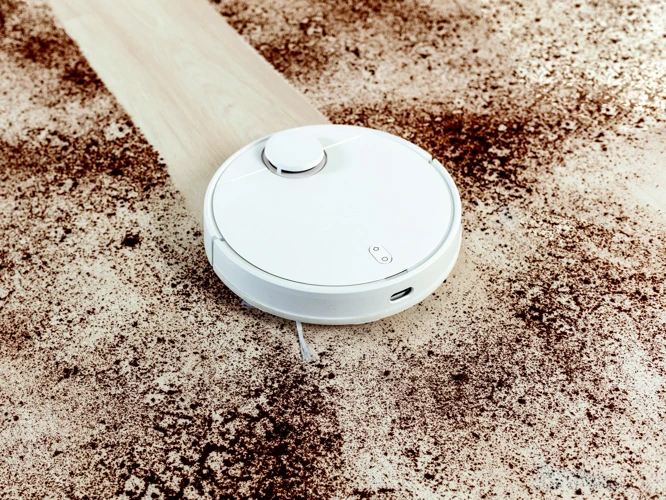
As you gaze at your new smart vacuum cleaner, you may be wondering just how much time and effort it can save you. Smart vacuums have revolutionized the cleaning process, making it more streamlined and efficient. However, there is still much to learn about these miraculous devices. In this section, we’ll take a deep dive into the features and capabilities of your smart vacuum cleaner to help you understand how it can provide the greatest time savings possible. By the end of this section, you’ll be ready to take full advantage of your smart vacuum’s potential. Remember, a little bit of knowledge goes a long way towards getting the most out of your device. Let’s get started! Don’t forget to check out our smart vacuum cleaning tips for more information.
Know Your Features
To get the most out of your smart vacuum cleaner, it’s important to explore and understand all of its features. Here are some of the key features that you should know:
- Auto Carpet Boost: This feature automatically ramps up suction power when the vacuum cleaner detects that it’s on a carpet. This ensures that your carpets are thoroughly cleaned and free of dirt and dust particles.
- Remote Control: Some smart vacuums come with a remote control, which allows you to direct the vacuum and change settings from a distance. This can be incredibly convenient if you need to make adjustments while you’re cleaning or if you prefer not to use your voice assistant.
- Robot Mop Attachment: Some smart vacuums come with a robot mop attachment, which enables the vacuum to mop hard floors as well as vacuum them. This can be a real time-saver if you have a lot of hard floors in your home.
- Boundary Strips: These are small magnetic strips that you can place on the floor to create “no-go” zones for your vacuum cleaner. This can be helpful if you have certain areas in your home that you want your vacuum to avoid, such as rooms with delicate items or cords.
- Virtual Mapping: Many smart vacuums come with mapping capabilities that allow them to “learn” the layout of your home. With this feature, you can mark off areas that you want your vacuum to avoid or set up customized cleaning schedules for each room.
By familiarizing yourself with these features and figuring out which ones are most important for your cleaning needs, you can maximize the efficiency of your vacuuming and save time in the process. To learn more about smart vacuums and how they can save you time, check out our article on 5 Smart Vacuum Time Savers or our guide to Smart Vacuum Cleaners for Busy Households.
Create a Map
Creating a map of your home is one of the most important features of a smart vacuum cleaner. By mapping out the area beforehand, you can ensure that the cleaning process is more efficient and less time-consuming.
How does mapping work?
When you first use your smart vacuum cleaner, it will likely have a “mapping mode.” This mode allows the robot to learn the layout of your home and make a digital map for future reference. By using sensors and cameras, the robot vacuum can navigate around furniture, obstacles, and even map out different levels of your home.
Why should you create a map?
Creating a map of your home allows your smart vacuum cleaner to clean more efficiently. The robot vacuum will know where the furniture and obstacles are, which will help it avoid collisions and navigate around obstacles. It will also allow the robot to clean in straighter lines, making the cleaning process faster and more effective. Additionally, you can create and program virtual boundaries, telling the vacuum where it is or isn’t allowed access.
How to create a map?
The process for creating a map is relatively simple. First, ensure the robot is fully charged and that the sensors and cameras are clean. Next, initiate the mapping mode, and let the robot run throughout your home, covering all areas that will be cleaned. Be careful not to interrupt the robot during the mapping process; otherwise, it will likely have to start over. Once the mapping process is finished, the robot will display a digital map of your home. You can use this map to set up virtual boundaries, schedule cleaning times, and more.
Creating a map is an essential step in maximizing the effectiveness and time-saving benefits of your smart vacuum cleaner. By taking advantage of this feature, you can ensure that your robot vacuum cleans your home more efficiently and saves you valuable time.
Learn about other time-saving tips for your smart vacuum cleaner in our article on 5 Smart Vacuum Time Savers.
Set up Scheduling
Setting up scheduling for your smart vacuum cleaner is a crucial step to maximizing your time savings. With scheduling, you can ensure that your smart vacuum cleaner will clean your home at specific times, so you don’t have to remember to turn it on manually. Here are some tips for setting up scheduling on your smart vacuum cleaner:
1. Determine the best cleaning times: Consider your daily routine and lifestyle when choosing the best cleaning times for your smart vacuum cleaner. For example, if you tend to be out of the house during the day, scheduling a cleaning during that time might be ideal.
2. Set up a recurring schedule: Most smart vacuum cleaners allow you to set up recurring schedules, such as cleaning every day at a specific time. This ensures that your home is regularly cleaned without you having to think about it.
3. Keep track of the schedule: Make sure to keep track of your smart vacuum cleaner’s schedule so you can make any adjustments or cancel a scheduled cleaning if needed.
4. Adjust the cleaning frequency: Depending on your home’s level of foot traffic and the presence of pets or children, you may need to adjust the cleaning frequency. For example, you may need to increase the frequency of cleanings during the winter months when there is more dirt and debris in the house.
5. Utilize additional scheduling features: Some smart vacuum cleaners also offer additional scheduling features, such as the ability to set different cleaning modes for different times of the day or to schedule additional deep cleanings at specific intervals.
By following these tips and setting up scheduling on your smart vacuum cleaner, you can save time and ensure that your home is always clean and tidy.
Prepping Your Home for Efficient Cleaning
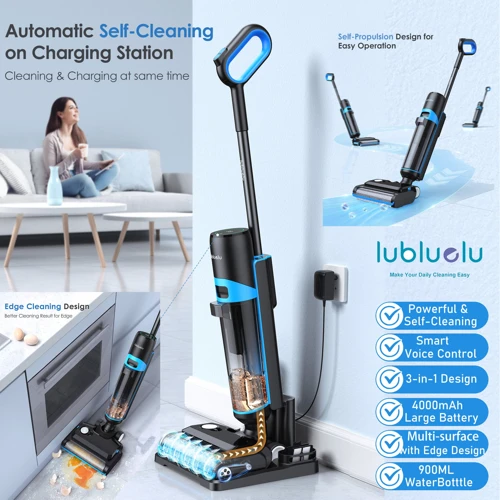
Getting your home ready for your smart vacuum cleaner to do its job efficiently can make all the difference in how much time you save. Before you set your robot vacuum loose, take some time to consider a few key factors that can enhance its performance. Properly preparing your home for cleaning can make the process more efficient and effective, saving you time and energy. In this section, we’ll explore some smart tips and tricks to help you get your home in tip-top shape for maximum cleaning efficiency.
Clear the Clutter
Before sending your smart vacuum cleaner on a cleaning mission, it is essential to clear the clutter from the spaces to be cleaned. A cluttered space can lead to complications for your robotic assistant and may even result in damage to your belongings.
Here are some tips to declutter your space before running the smart vacuum cleaner:
- Organize items: Keep all the scattered items organized in a place. This not only helps the robot clean better but also saves you time finding items you’re looking for later.
- Put away small items: Small items such as chairs, toys, etc., should be put away to prevent the robot from getting stuck or knocking them over.
- Remove any large objects: Large objects such as chairs or stools may block the access of your smart vacuum cleaner to certain areas, so it’s best to remove them from the space to be cleaned.
- Pet toys: Ensure all pet toys are kept in a safe place. This will ensure the robot has a clear path to clean and also prevents the robot from ingesting any small toys.
- Declutter floors: Make sure that floors are free from clutter such as books, magazines, and clothes, as these can damage the robot or get stuck in the brushes.
By clearing the clutter, you can help your smart vacuum cleaner work more efficiently and effectively. Remember to repeat this process before each cleaning session to ensure a smooth cleaning experience.
Tidy Up Cords and Rugs
When it comes to maximizing time savings with your smart vacuum cleaner, tidying up cords and rugs is an important step that shouldn’t be overlooked. Not only can cords and rugs get in the way of your vacuum cleaner’s cleaning path, but they can also pose a tripping hazard for you and your family. To help you ensure that your vacuum cleaner is able to clean your floors as efficiently as possible, here are some tips for tidying up cords and rugs:
| Tip: | Description: |
| Avoid tucking cords under rugs | It may seem like a quick fix, but tucking cords under rugs can cause the rug to bulge and become a tripping hazard. Instead, try to run cords along the wall or baseboard. |
| Use cord clips or cable ties | These simple tools can help keep cords organized and out of the way. Cord clips can be attached to the wall to hold cords in place, while cable ties can be used to group cords together. |
| Invest in a cord cover | If you have a lot of cords running along your floor, a cord cover can help keep them tidy and out of the way. These covers can be found at most home improvement stores. |
| Choose rugs with a low profile | Thick, shaggy rugs may look cozy, but they can also be a nightmare for your vacuum cleaner. Opt for rugs with a low profile – they’re easier to clean and won’t get in the way of your vacuum cleaner’s path. |
By following these tips, you can help ensure that your smart vacuum cleaner is able to clean your floors quickly and efficiently. With tidy cords and rugs, you’ll have a clearer path for your vacuum cleaner to do its job.
Optimize Furniture Placement
When it comes to maximizing the efficiency of your smart vacuum cleaner, optimizing your furniture placement can make a huge difference. Here are some tips for ensuring that your furniture setup is optimized for quick and effective cleaning:
- Minimize Clutter: Start by removing any unnecessary furniture or objects from your floors. This will not only make it easier for your vacuum cleaner to navigate through your space, but it will also make your home look tidier and more organized.
- Clear the Pathway: Bigger pieces of furniture like couches, chairs, and tables should be placed in a way that facilitates movement. Ensure that there is enough space for the vacuum to maneuver around them easily without running into anything.
- Maintain Walking Space: Arrange your seating in a fashion that creates a clear walking path around your room. This will allow the smart vacuum cleaner to move around without any interruptions.
- Keep Low-Profile Furniture: Low-profile furniture like coffee tables, ottomans or low-seated chairs can be an added benefit, as they enable your smart vacuum cleaner to navigate under them easily, reaching more areas of your space.
- Get Creative: Don’t be afraid to get creative with your furniture placement. Consider swapping out large pieces for smaller ones, or using furniture that can be easily moved or stacked when you need extra space for cleaning.
By optimizing your furniture placement, you can reduce obstacles that may prolong the cleaning process or prevent your smart vacuum from reaching certain areas of your home.
Optimizing Your Cleaning
Now that you have set up your smart vacuum cleaner and prepped your home, it’s time to focus on optimizing your cleaning routine. This is where the true value of a smart vacuum cleaner shines through – it’s not just about automating your cleaning, but about improving the efficiency and effectiveness of your cleaning efforts. In this section, we will explore some advanced techniques and features that will help you get the most out of your smart vacuum cleaner. So sit tight and get ready to discover some powerful tips and tricks that will maximize your time savings and leave your floors spotless.
Use Spot Cleaning
Have you ever experienced a sudden spill or mess on your floor and just wished your smart vacuum cleaner could clean that up quickly? Well, with spot cleaning, it can! This function allows your vacuum to target a specific area for a deep, thorough clean. Here are some tips for using spot cleaning effectively:
- Identify the target area: Before activating spot cleaning, make sure you know the exact location that needs cleaning.
- Activate spot cleaning: Depending on your model, spot cleaning can typically be activated through the mobile app or by pressing a button on the vacuum.
- Let it do its work: Once you’ve activated the function, let the vacuum do the work. It will spend more time in the target area, thoroughly cleaning it.
- Empty the dustbin: After spot cleaning is complete, don’t forget to empty the dustbin as it’s likely to be fuller than usual.
Using spot cleaning is perfect for spills, stains or high-traffic areas in your home. By making use of this function, you can ensure that even the toughest of messes are taken care of. So next time you have a sudden spill, don’t panic, just activate spot cleaning and let your smart vacuum cleaner do the rest!
Enable No-Go Areas
If you have certain areas in your home that you do not want your smart vacuum cleaner to access, it is important to enable the “No-Go Areas” feature. This feature creates a virtual boundary that the smart vacuum cleaner will not cross, allowing you to keep fragile or potentially dangerous items safe. Here are some steps to enable this feature:
- Identify No-Go Areas: Start by identifying the areas that you want to block off. These can be anything from areas with delicate items, children’s play areas, or rooms with pet food and water bowls.
- Set-up through the App: Once you have identified the areas that you want to set as No-Go zones, you can enable the feature through the smart vacuum cleaner’s app. Simply select the No-Go zone feature and use the app’s map to draw out the areas you want to exclude.
- Use Boundary Markers: If your smart vacuum cleaner does not have a mapping feature, you can still block off areas from cleaning by using boundary markers. These markers create a physical barrier that the vacuum cleaner will not cross.
- Remember to Update: If you move furniture or change the layout of a room, it is important to update the No-Go zones on the app or move the boundary markers as necessary. This allows the smart vacuum cleaner to keep up with changes in your home.
Enabling No-Go Areas is an important step in ensuring the safety of your home and belongings while also maximizing the efficiency of your smart vacuum cleaner. Take the time to identify and set up these areas to get the most out of your cleaning experience.
Customize Your Cleaning Pattern
One of the biggest advantages of having a smart vacuum cleaner is that it allows you to customize your cleaning pattern according to your specific needs. Here are some tips on how to take advantage of this feature and maximize your time savings:
- Identify High-Traffic Areas: If you have certain areas of your home that get more foot traffic than others, such as the living room or kitchen, you may want to customize your cleaning pattern to focus on those areas. By doing so, you’ll ensure that those areas are cleaned more frequently and stay cleaner for longer.
- Select Specific Rooms: If you only want your smart vacuum cleaner to clean specific rooms or areas of your home, make sure to customize your cleaning pattern accordingly. This can be particularly useful if you have guests coming over or if you simply want to clean one room while leaving others untouched.
- Adjust Cleaning Frequency: Depending on your personal preferences and lifestyle, you may want to adjust the frequency of your cleaning pattern. For example, if you have pets or allergies, you may want to increase the frequency of cleaning in certain areas. Similarly, if you live alone and don’t often have guests, you may be able to reduce the frequency of cleaning.
- Choose Cleaning Mode: Most smart vacuum cleaners come with different cleaning modes, such as “quiet” or “turbo.” Depending on your needs, you may want to switch between these modes to optimize your cleaning pattern. For example, if you’re watching TV in the living room while your smart vacuum cleaner is cleaning, you may want to switch to the “quiet” mode to reduce noise levels.
By customizing your cleaning pattern, you can optimize your smart vacuum cleaner to fit your specific needs and lifestyle. Whether you’re looking to clean specific areas more frequently, reduce noise levels, or adjust cleaning frequency, make sure to take advantage of this feature to maximize your time savings.
Make Use of Voice Control
Smart home technology is continuing to evolve and make our lives easier. One of the most exciting developments in recent years is the integration of voice control. And the inclusion of voice control in smart vacuum cleaners has become a game changer. Here are some tips for using voice control to optimize your cleaning:
- Get the Right Assistant: Before you can take advantage of voice control, you need to ensure you have the right system integrated with your vacuum cleaner. Amazon Alexa, Google Assistant, and Apple Siri are the most popular voice assistants available today. Check if your vacuum cleaner is compatible with any of these systems or if it requires a separate hub.
- Learn the Commands: Once you have the right assistant integrated, it’s important to know the right commands to give. For example, you might say, “Hey Google, ask my vacuum to start cleaning,” or “Alexa, tell my vacuum to stop.” Understanding how to phrase your requests can make your cleaning experience smoother.
- Create Routines: Voice assistants are perfect for helping you create routines. For example, you could set up a routine that starts your vacuum cleaning as soon as you leave for work. Alternatively, you might set a routine that starts a deeper clean on specific days of the week.
- Control Multiple Devices: If you have multiple smart home devices, then voice control becomes even more useful. By combining different devices, you could trigger your vacuum cleaner to start when you turn off your smart lights. This can be done either by creating routines within each device’s app, or by using a separate app such as IFTTT.
Using voice control with your vacuum cleaner is not only convenient, but it can also be fun. It allows you to easily control your cleaner while performing other tasks, making it the perfect way to multi-task. With the right assistant, commands, routines, and combinations, voice control can help you optimize your cleaning routines and save you valuable time.
Cleaning Maintenance
Taking care of your smart vacuum cleaner properly is crucial to ensure optimal performance and longevity. However, with so many different components and settings, cleaning maintenance can be overwhelming and confusing. It’s important to regularly perform basic maintenance tasks and address any issues promptly to avoid costly repairs or replacements. Let’s dive into some tips and tricks for proper cleaning maintenance that will keep your smart vacuum cleaner running smoothly for years to come.
Emptying the Dustbin Regularly
Regularly emptying the dustbin of your smart vacuum cleaner is one of the most important maintenance tasks you need to do. Leaving debris and dirt in the dustbin can damage the vacuum cleaner or hinder its performance, leading to improper cleaning, and making it less efficient in the long run.
Here are some of the things you need to keep in mind to ensure that you are effectively emptying the dustbin of your smart vacuum cleaner:
| Step | Explanation |
|---|---|
| Step 1: Check the Dustbin | Before starting the cleaning process, make sure that you check the dustbin of your smart vacuum cleaner. The dustbin has a maximum capacity, and it should be emptied once it reaches the limit. |
| Step 2: Turn Off the Vacuum | Before emptying the dustbin, turn off the smart vacuum cleaner to prevent any accidents or damage to the device. |
| Step 3: Remove the Dustbin | Remove the dustbin from the device by following the instructions provided in the user manual. |
| Step 4: Empty the Dustbin | Empty the dustbin into a trash can or a bin. Make sure to remove all the debris and dirt from the dustbin. |
| Step 5: Clean the Dustbin | Clean the dustbin with a soft cloth or a brush to remove any remaining dirt or debris. |
| Step 6: Insert the Dustbin | Insert the dustbin back into the smart vacuum cleaner, following the instructions provided in the user manual. |
Remember, emptying the dustbin regularly will keep your smart vacuum cleaner functioning correctly and ensure optimal cleaning performance. Make sure to follow the steps mentioned above to keep your device working for a long time.
Change Filters, Brushes, and Parts on Time
Keeping your smart vacuum cleaner in top working condition requires regular maintenance, and changing filters, brushes, and parts on time is a crucial step in ensuring maximum cleaning efficiency. Dirty filters and worn-out brushes can compromise the performance of your device, resulting in poor suction and reduced cleaning power.
To help you keep track of when to change these essential components, use the table below as a guide:
| Component | When to Change |
|---|---|
| Filters | Every 1-3 months, depending on usage and manufacturer recommendations. Some smart vacuums have a filter replacement indicator. |
| Main Brush | Every 6-12 months, or when bristles are worn down. Check manufacturer’s recommendations for exact timing. |
| Side Brushes | Every 2-4 months, or when bristles are worn down. Check manufacturer’s recommendations for exact timing. |
| Battery | When the device’s battery life begins to noticeably decline or if unable to hold a charge. |
Additionally, it’s important to use only manufacturer-approved replacement parts to avoid damaging your device and voiding any warranties. Keeping spare filters and brushes on hand can also help you avoid downtime and ensure that your machine is always ready for cleaning.
Regularly changing filters, brushes, and parts not only allows your smart vacuum cleaner to clean more efficiently, but also extends the life of your device. Don’t neglect this important maintenance task, and your smart vacuum will continue to provide time-saving cleaning solutions for years to come.
Keep Sensors and Camera Clean
One of the key components of a smart vacuum cleaner that makes it efficient is its sensors and camera. They allow the cleaner to detect obstacles, map out the area to be cleaned, and navigate around the room. Keeping these sensors and camera clean is essential to ensure that your smart vacuum cleaner continues to work optimally.
Dirt, debris, and pet hair can accumulate on the sensors and camera, which can affect their performance. To prevent such issues, you should regularly check and clean the sensors and camera of your smart vacuum cleaner. Here are some tips on how to do it effectively:
| Cleaning Task | How to Do it |
|---|---|
| Remove Debris Build-up on Sensors |
|
| Clean the Camera Lens |
|
| Check the Sensing Range |
|
By regularly cleaning the sensors and camera of your smart vacuum cleaner, you’ll ensure that it works optimally, saving you time and effort in the long run.
Address Issues Promptly
Once you own a smart vacuum cleaner, it is important to address any issues that arise promptly. This will ensure that your vacuum cleaner continues to function efficiently and effectively. Here are a few common issues and the actions you can take to fix them:
| Issue | Action |
|---|---|
| The vacuum cleaner is not picking up dirt and debris as well as it used to | Check the filters and brushes to make sure they are clean and in good condition. If they need to be replaced, order new parts and install them as soon as they arrive. |
| The vacuum cleaner is getting stuck or trapped in certain areas of the home | Check the map of your home to see if any no-go zones or boundary markers need to be adjusted. You can also try moving furniture or other objects that may be blocking the vacuum’s path. |
| The vacuum cleaner is making strange noises or not turning on at all | Make sure the dustbin is empty and that the vacuum is properly charged. If it still doesn’t turn on, check the manual for troubleshooting steps. If all else fails, reach out to customer support for assistance. |
| The vacuum cleaner is leaving streaks or marks on the floors | Check the brushes to make sure they are clean and not worn out. You can also try adjusting the suction or cleaning pattern settings to see if that helps improve the cleaning performance. |
It is important to note that different smart vacuum cleaners may have different issues or require different actions to fix them. The key is to be aware of any changes in the vacuum’s performance and to address those issues as soon as possible. Don’t wait until the vacuum stops working entirely before taking action. With regular maintenance and quick action, your smart vacuum cleaner can provide efficient and effective cleaning for years to come.
Conclusion
After all is said and done, embracing the use of a smart vacuum cleaner is a smart move to save time and effort in cleaning your space. With the tips and tricks outlined above, you can make the most out of your smart vacuum cleaner and keep your home clean without breaking a sweat.
Remember to take the time to understand your device and optimize its features, create a map, set up scheduling, and clean maintenance. These steps will guarantee an efficient cleaning experience that aligns with your daily routine, saves time and energy and helps achieve a cleaner home.
It’s also worth noting that prepping your home is key to optimizing your cleaning experience with a smart vacuum cleaner. Clear the clutter, tidy up cords and rugs, and optimize furniture placement to ensure nothing stands in the way of a thorough cleaning session.
Optimizing your cleaning is essential when it comes to maximizing time savings with your smart vacuum cleaner. Utilize spot cleaning, enable no-go areas, customize your cleaning pattern, and make use of voice control. You don’t have to keep standing close to your smart vacuum cleaner during the cleaning process, set up the device, and let it do its job while you focus on other tasks.
Lastly, maintaining your smart vacuum cleaner guarantees that it will function efficiently for longer. Emptying the dustbin regularly, changing filters, brushes, and other essential parts on time, keeping sensors and cameras clean, and addressing issues promptly are all crucial maintenance practices.
All said and done, utilizing your smart vacuum cleaner efficiently, and maintaining it properly will not only make your life easier in cleaning but also improve the general air quality inside your home. So go ahead, give it a try, and experience the magic of hassle-free cleaning with a smart vacuum cleaner.
Frequently Asked Questions
Can I use my smart vacuum cleaner on all types of floors?
Yes, most smart vacuum cleaners are designed to work on all types of floors, including hardwood, carpet, tile, and laminate.
Do I need to create a map of my home before using my smart vacuum cleaner?
It’s not necessary, but creating a map will help your smart vacuum cleaner work more efficiently by focusing on areas that need more cleaning.
Can I schedule my smart vacuum cleaner to clean when I’m not at home?
Yes, you can set up a cleaning schedule that works for you, even if you’re not at home. Just make sure your smart vacuum cleaner is connected to Wi-Fi.
What should I do to prepare my home for efficient cleaning?
Clear the clutter, tidy up cords and rugs, and optimize furniture placement to ensure your smart vacuum cleaner can easily navigate your home.
How does spot cleaning work?
Spot cleaning allows your smart vacuum cleaner to focus on a specific area of your home, such as a spill or stain. It will clean in a spiral pattern until the area is clean.
What are no-go areas?
No-go areas are areas that you don’t want your smart vacuum cleaner to clean. This can be set up in the app by creating virtual barriers or using physical barriers.
Can I customize my cleaning pattern?
Yes, most smart vacuum cleaners offer various cleaning patterns, including zigzag, spiral, and back-and-forth. You can customize the pattern that works best for your home.
How does voice control work?
You can connect your smart vacuum cleaner to a voice assistant, such as Amazon Alexa or Google Assistant, and use voice commands to start, stop, or schedule cleaning.
Why is it important to empty the dustbin regularly?
Emptying the dustbin regularly ensures that your smart vacuum cleaner is working at its best and doesn’t get clogged, which can affect its performance.
How do I keep the sensors and camera clean?
Use a microfiber cloth to clean the sensors and camera on your smart vacuum cleaner. Avoid using harsh chemicals or abrasive cleaners that can damage the sensors.

