Have you ever wished you could come home to a clean house without lifting a finger? Well, with smart vacuum cleaners, this dream is now a reality! With a few simple steps and the help of advanced technology, you can reduce cleaning time and effort. But how exactly can you utilize your smart vacuum cleaner for maximum efficiency and time savings? In this article, we will provide a step-by-step guide on how to set up and use your smart vacuum cleaner to clean your home thoroughly and with ease. From creating cleaning zones to maximizing time savings, we’ve got you covered. So, sit back and let’s dive into the world of smart vacuum cleaners!
Setting up Your Smart Vacuum Cleaner
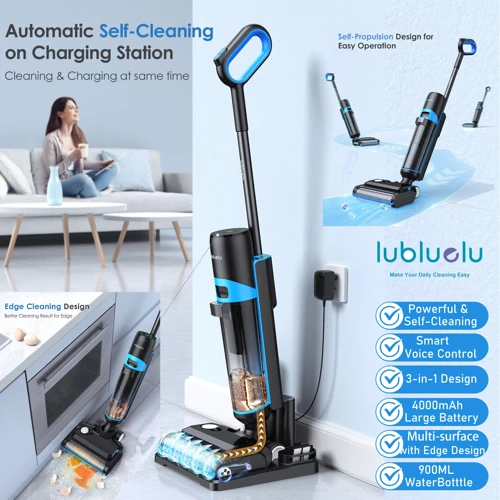
Are you tired of wasting your precious time on mundane household chores like vacuuming? Smart vacuum cleaners are the solution you’ve been waiting for! These high-tech devices can help you clean more efficiently and save time for the things that truly matter. If you’re wondering how to set up your smart vacuum cleaner for maximum performance, look no further. In this section, we’ll guide you through the essential steps of getting your device up and running. By the end of this guide, you’ll be ready to experience the full benefits of your smart vacuum cleaner. For more tips on how to save time with your smart vacuum, check out our smart vacuum time savings tips.
1. Charge Your Device
Before you can start using your smart vacuum cleaner, it is vital to charge it fully. It will ensure that the device can efficiently work without running out of charge during cleaning. Plus, it will extend the battery life in the long run.
To charge your vacuum cleaner, follow these steps:
- Locate the charging dock that comes with your device. It is usually in the box, along with the vacuum cleaner.
- Place the charging dock in an open area, making sure that there are no obstacles surrounding it. It is best to keep it near a power outlet.
- Plug the charging dock cord into an electrical outlet.
- Connect the charging dock to your vacuum cleaner. Ensure that the connections are secure and tight.
- Wait for the battery to charge fully. This may take a few hours, depending on the model.
- Once charged fully, unplug the vacuum cleaner from the dock and place it in an open area, ready for use.
It is essential to remember that charging your smart vacuum cleaner is an integral part of its maintenance. A fully charged device will clean your house more effectively and save you valuable time.
If you’re interested in saving time, check out our article on 5 Smart Vacuum Time Savers. Smart vacuums are a perfect fit for busy households who don’t have time to clean, so take advantage of all the features they offer.
2. Connect to WiFi and Download the App
Once you have your smart vacuum cleaner out of the box, the next step is to connect it to your Wi-Fi network and download the corresponding app. This will help you to control and automate your device with greater ease. Before proceeding to connect the device, make sure that the device and your phone are fully charged.
Step 1: To connect your smart vacuum cleaner to Wi-Fi, you first need to identify the Wi-Fi button on the device. For most models, this button is placed on the top or the side of the device. Press and hold the Wi-Fi button for a few seconds, until it blinks rapidly.
Step 2: Open the Wi-Fi settings on your phone or tablet and look for the Wi-Fi network that matches the name of your smart vacuum cleaner. Once you have located the network, click on it to connect.
Step 3: Once your device is connected to the smart vacuum cleaner, open the corresponding app that you downloaded earlier. The app will most likely prompt you to create an account, so be sure to follow the instructions given.
Step 4: After logging in to the app, follow the on-screen instructions to connect your device. In most cases, you’ll be asked to input your Wi-Fi password or scan a barcode that’s displayed on the device screen.
Step 5: Once your smart vacuum cleaner is connected, you can start to take advantage of all the features available via the app. From setting cleaning schedules to creating cleaning zones, to programming voice commands and accessing turbo mode, the app is the central tool for taking full advantage of your smart vacuum cleaner.
It’s worth noting that different manufacturers may have slightly different instructions for connecting their smart vacuum cleaners to Wi-Fi and an app. Always refer to the instruction manual that came with your device before getting started.
For more tips on how to get the most out of your smart vacuum cleaner, be sure to check out “Smart Vacuum Cleaners for Busy Households” and “5 Smart Vacuum Time Savers”.
Create Cleaning Zones
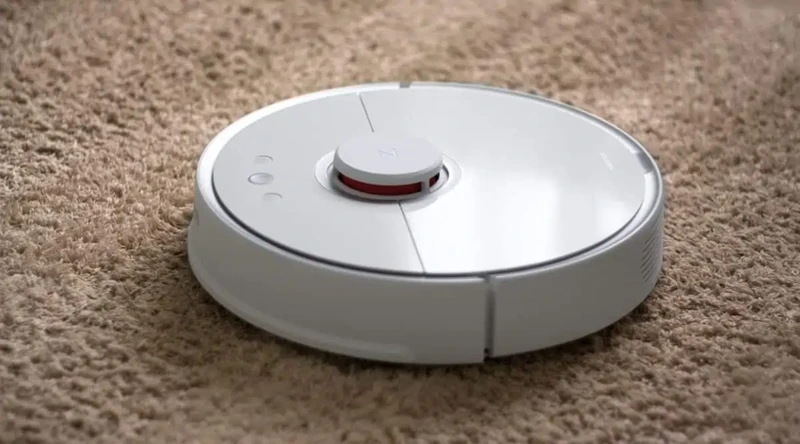
When it comes to cleaning your home efficiently, having a smart vacuum cleaner can be a game-changer. Not only can it save you time and effort, but with the ability to create cleaning zones, you can ensure that your vacuum is targeting the areas that need the most attention. But how exactly do you go about creating these zones? Let’s dive into the steps you need to take to make the most of your smart vacuum cleaner’s capabilities.
1. Map Your Home
Mapping your home is an important step to make sure your smart vacuum cleaner knows exactly where to clean. It helps to save time and ensures that all the areas of your home are covered. Here are some tips to help you map your home effectively:
| Tip | Description |
| 1. | Clear the floors: Before you start mapping, ensure that all objects, such as toys, shoes, and clothes, are removed from the floor to avoid any difficulties in mapping or cleaning. |
| 2. | Close the doors: Keep all doors closed to create boundaries for your smart vacuum cleaner. This will help it to learn the layout of your home more easily and prevent it from getting lost. |
| 3. | Charge your device: Make sure your smart vacuum cleaner is fully charged before mapping. This will ensure it has enough battery life to complete the mapping process. |
| 4. | Select the mapping mode: Most smart vacuum cleaners have different mapping modes, such as zig-zag, automatic, or custom mapping. Choose the mode that suits your needs. |
| 5. | Start the mapping: Begin the mapping process by pressing the mapping button on the app. Follow the instructions provided by the app to ensure an accurate map of your home. |
| 6. | Check the map: Once the mapping is complete, review the map to ensure all areas have been covered. You can add or adjust zones if necessary. |
By following these tips, you can create an accurate map of your home that your smart vacuum cleaner can use to clean efficiently. Remember to regularly update the map if you add or remove furniture or if there are changes to the layout of your home.
2. Create Zones
Creating zones for your smart vacuum cleaner is a crucial step in achieving efficient cleaning and time savings. Here are the steps to follow to create zones for your device:
- Identify high-traffic areas: These are the areas of your home that receive the most foot traffic, like the living room, kitchen, hallway, and entrance. By creating zones in these areas, you can ensure that they are cleaned more frequently, keeping your home looking tidy at all times.
- Create custom zones: Most smart vacuum cleaners come with a mapping feature that allows you to create custom zones in your home. Using the app, you can draw a virtual map of your house and create different zones that you want your smart vacuum cleaner to clean. For example, you can create a zone for the living room, kitchen, and bedrooms.
- Name your zones: Once you have created the zones, give them unique names that you can easily identify. For example, you can name the living room zone “Zone 1” and the kitchen zone “Zone 2”. This will make it easier for you to set cleaning schedules for each zone, depending on your cleaning needs.
- Assign cleaning schedules: Now that you have identified and created custom zones for your smart vacuum cleaner, it’s time to assign cleaning schedules. You can set different schedules for each zone depending on how frequently you want them to be cleaned. For example, you can set a daily schedule for the high-traffic areas, like the living room and kitchen, and a weekly schedule for the bedrooms.
By following these steps, you can create customized cleaning zones that reflect your cleaning needs and preferences. This not only ensures that your home is always clean, but also saves you time and energy.
3. Schedule Cleaning Times
When it comes to scheduling cleaning times for your smart vacuum cleaner, there are a few things to consider. Firstly, think about when you and your family are likely to be out of the house or in a different area of the house, so the vacuum can do its job without causing any interruptions. You can create a cleaning schedule within the app, which allows you to select specific days and times for your vacuum to begin cleaning.
To schedule a cleaning time, follow these steps:
- Open the app and select the cleaning schedule option.
- Select the days on which you want the vacuum to clean; for example, you might select Monday, Wednesday and Friday.
- Select the time that you want the cleaning to begin, for example, 9 am.
- Set the duration of the cleaning cycle. Most smart vacuums have a runtime of around 90 minutes, but this may vary depending on the model.
- Save your cleaning schedule and let your vacuum do the rest!
Remember to adjust your cleaning schedule as needed, depending on changes in your routine or scheduling conflicts. With the ability to adjust and customize your cleaning schedule, you can ensure that your smart vacuum cleaner is running at optimal times for maximum efficiency and time savings.
Tips for Efficient Cleaning
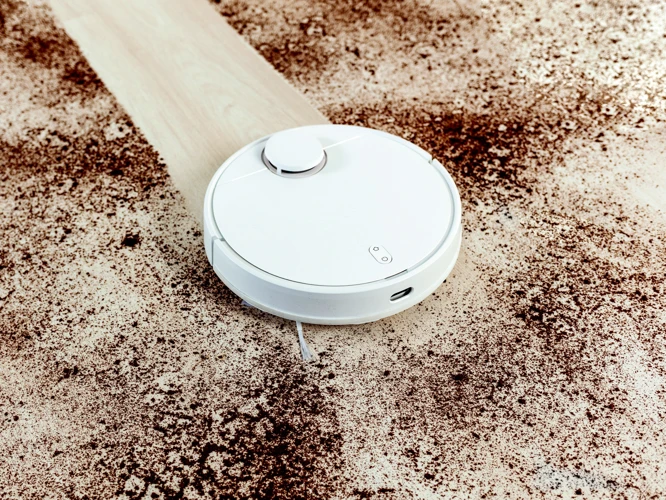
When it comes to using a smart vacuum cleaner, efficiency is key for getting the most out of your device. With so many different features and capabilities, it can be overwhelming to figure out how to use your vacuum effectively. Luckily, there are a few tips and tricks that can help you maximize performance and efficiency. By following these proven methods for optimal cleaning, you’ll be able to get the most out of your smart vacuum cleaner and make cleaning a breeze. So, let’s dive in!
1. Clear the Clutter
To ensure efficient cleaning with your smart vacuum cleaner, it is essential to clear the clutter before running the machine. This step is crucial as it allows the device to run without interference and helps prevent it from getting stuck or damaging valuable items.
Here are some useful tips on how to clear the clutter:
- Remove small items: Before cleaning, pick up any small items such as toys, shoes, or coins that may be scattered across your floors. These items can get stuck in your vacuum cleaner, causing blockages and malfunctioning. Putting them away also saves time since the vacuum cleaner will not have to work around them.
- Pick up cords and wires: Cords and wires pose a significant risk to your vacuum cleaner, especially if they are not visible. Make sure to pick up any cords or wires and secure them safely out of the way to avoid the risk of tangling or tripping on them.
- Organize furniture: Moving furniture around every time you clean your floors can be time-consuming. Instead, try reorganizing furniture at the beginning of the week, so your smart vacuum cleaner can navigate your space with ease. Avoid having large objects that could act as obstacles in the way of the machine, and make sure the paths are clear.
- Clear the floor: Before running the vacuum cleaner, ensure that the floors are free of any obstructions, such as pillows, throw rugs, and clothes, that could get in the way of the device. This step is essential as it ensures maximum coverage and allows the vacuum to reach every corner of your space.
By following these tips, you can clear the clutter before starting your smart vacuum cleaner, ensuring efficient cleaning and time savings. Remember, a clear area is a happy vacuum.
2. Use Spot Cleaning for Quick Fixes
Let’s face it, accidents happen and sometimes you need to give certain areas in your home a quick clean. This is where spot cleaning with your smart vacuum cleaner becomes incredibly useful. Spot cleaning allows you to target small messes in specific areas without having to clean the entire room. Here are a few tips to make the most out of your spot cleaning sessions:
- Identify the Mess: Before you begin cleaning, try to identify the specific area that needs attention. Whether it is pet hair on the couch or crumbs on the kitchen floor, pinpointing the mess will help you save time and energy.
- Activate Spot Cleaning: Most smart vacuum cleaners come with a spot cleaning feature that allows you to direct the device to a specific location. Make sure to activate this mode before you begin.
- Use Your App: If your smart vacuum cleaner has an accompanying app, use it to guide the device to the exact spot that needs cleaning.
- Check the Results: Once the spot cleaning is complete, check the area to make sure that the mess has been picked up. If needed, you can repeat the process to ensure that the spot is completely clean.
Spot cleaning with your smart vacuum cleaner not only saves time but also ensures that messes are taken care of quickly and efficiently. So, the next time you spot a mess, let your smart vacuum cleaner do the work for you!
3. Set Boundaries
Setting boundaries is another essential part of using your smart vacuum cleaner efficiently. By establishing boundaries, you can tell your device where it should and shouldn’t clean. This step can save you a lot of time and effort in the long run. Here are some tips for setting boundaries:
- Determine the Cleaning Area: Before setting boundaries, establish the areas that you want to be cleaned. Make a list of rooms or zones that you want the vacuum to handle.
- Use Magnetic Strips: Some smart vacuum cleaners come with magnetic strips that can be placed around the cleaning area. These strips create a magnetic boundary that the vacuum cannot cross.
- Set No-Go Zones: Many smart vacuums can exclude certain areas from cleaning. For example, you may not want it to clean near your pet’s food bowls or water dish. Using the app, you can set up “no-go zones” to avoid these areas.
- Use Virtual Walls: Some smart vacuums use lasers to create virtual walls. These walls create an invisible boundary that the vacuum cannot cross. Making use of this feature can help keep the cleaning zone well-defined.
By setting boundaries, you are controlling where your device should and shouldn’t go. This can help to prevent the vacuum from bumping into furniture or getting trapped in confined spaces. Plus, it can save you valuable time, allowing you to focus your cleaning efforts where they are needed the most.
4. Use Multi-Level Mapping
One of the most impressive features of smart vacuum cleaners is multi-level mapping. With this feature, you can map out your entire house, even if it has multiple floors, and create a specific cleaning plan for each level. Additionally, multi-level mapping allows the vacuum cleaner to remember the previous cleaning sessions and adjust its cleaning pattern for more efficient cleaning.
To utilize the multi-level mapping feature, start by creating a map of each floor of your home. Use the app or control panel to set up the zones for each floor, with a different zone for each room. Take note of any obstacles or areas that your vacuum cleaner may struggle with or cannot reach and manually clean those areas yourself.
Multi-level mapping saves time by allowing you to customize the cleaning process for each floor. For example, if you use the basement primarily for storage, the vacuum cleaner may not need to clean as often as the main floor or upstairs. With multi-level mapping, you can set up a different cleaning schedule for each floor, ensuring your smart vacuum cleaner cleans efficiently.
One of the most useful aspects of multi-level mapping is that it allows you to create “no-go zones” for each floor. This feature is incredibly helpful if you have fragile items or areas that you don’t want the vacuum cleaner to clean. The no-go zones feature prevents the vacuum cleaner from cleaning in certain areas, giving you peace of mind that your belongings are safe and won’t get damaged during the cleaning process.
Lastly, remember to update the map on the app or control panel whenever there are changes in your home’s layout. If you move furniture or add new obstacles, the vacuum cleaner may have trouble detecting them, and it’s important to make sure the map stays accurate.
Multi-level mapping is a powerful tool for efficient cleaning and time savings. By creating zones for each floor, setting up different cleaning schedules, and utilizing the no-go zones feature, you can customize the cleaning process for each level of your home. Remember to update the map as needed and enjoy a hassle-free cleaning experience with your smart vacuum cleaner.
Maximizing Time Savings
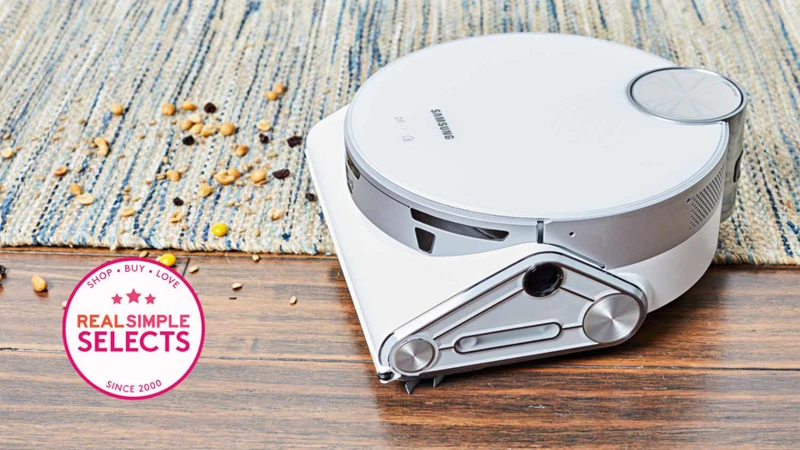
When it comes to house chores, time is always of the essence. You want to keep your home clean and tidy, but you don’t want to spend all your free time doing it. This is where a smart vacuum cleaner comes in handy. With its advanced features and cutting-edge technology, you can efficiently clean your space and save a significant amount of time. In this section, we will share some tips on how to make the most of your smart vacuum cleaner and maximize your time savings.
1. Automate Your Cleaning Schedule
Automating your cleaning schedule is one of the key features of a smart vacuum cleaner. With scheduling, you can set designated cleaning times for your device, which means you can have fresh vacuumed floors every day without lifting a finger.
How to schedule your smart vacuum cleaner
To automate your cleaning schedule, simply follow these easy steps:
| Step 1: | Open your smart vacuum cleaner app and select the ‘Schedule’ option. |
| Step 2: | Choose the days and times you want your device to clean. |
| Step 3: | Save your schedule. |
With automation, you’ll never have to worry about scheduling a cleaning session again. Your smart vacuum cleaner will take care of everything and ensure your floors are always clean and tidy whenever you want.
Benefits of automating your cleaning schedule
There are several benefits to automating your cleaning schedule with a smart vacuum cleaner, including:
- Convenient: You can schedule cleaning around your lifestyle, so your floors are clean when it suits you.
- Efficient: You’ll never forget to vacuum again, so your floors will always be clean and fresh.
- Time-saving: Automating your cleaning schedule means you can dedicate more time to other important things in your life.
- Energy-saving: The ability to schedule your cleaning means your device will only run when necessary, saving energy and reducing your electricity bill.
Automating your cleaning schedule with a smart vacuum cleaner is an excellent way to keep your floors clean and save time and effort. Just set it up, forget about it and enjoy the benefits of clean floors every day!
2. Take Advantage of Voice Commands
Voice command technology has advanced significantly in recent years and smart vacuum cleaners have caught up with the trend. With voice commands, you can now control your vacuum cleaner without lifting a finger. Here’s how you can take advantage of this feature:
| Step | Action |
|---|---|
| 1 | Sync your smart vacuum cleaner with your smart speaker. Most smart vacuums use popular voice assistants such as Amazon Alexa or Google Assistant. |
| 2 | Activate your smart speaker by using the activation command, for example, “Hey Google” or “Alexa”. |
| 3 | Give your vacuum cleaner a command, for example, “Clean the kitchen.” |
| 4 | Watch as your smart vacuum cleaner goes to work and cleans up the kitchen without you having to lift a finger. |
By taking advantage of voice commands, you can make the whole process of cleaning faster and easier. Voice commands are especially useful when your hands are full and you don’t have the time to use the app. The convenience of voice commands allows you to control your smart vacuum cleaner from anywhere in the house.
It’s important to note that some commands might not work as well as others. Simple commands such as “clean the living room” or “start cleaning” are more likely to work compared to complex commands. Additionally, make sure that your smart vacuum cleaner is within range of your smart speaker and that the speaker is connected to the internet.
Voice commands are a great feature to use with your smart vacuum cleaner. They offer a convenient and hands-free way to clean your home. By following our simple steps, you can make cleaning more efficient and fun.
3. Use Turbo Mode for Deep Cleaning
When you need a deeper clean, turbo mode is your best friend. This mode amps up the cleaning power to ensure that even the smallest dust particles are picked up. Here’s how to use turbo mode for deep cleaning:
| Step | Action |
|---|---|
| 1 | Open the app and go to the settings menu. |
| 2 | Select “turbo mode” and turn it on. |
| 3 | Place the vacuum in the area that needs a deeper clean. |
| 4 | Start the vacuum and let it do its job. |
One thing to keep in mind is that turbo mode will drain the battery faster, so make sure that your vacuum is fully charged before using it. Additionally, turbo mode is not recommended for use on delicate surfaces as it may cause damage. Use it only on surfaces that can handle its power.
With turbo mode, your smart vacuum cleaner will be able to tackle even the toughest cleaning jobs in no time. Use it sparingly and be amazed at the deep cleaning it can achieve.
Clean Your Vacuum Regularly
When it comes to keeping our homes clean, a smart vacuum cleaner can be a lifesaver. But did you know that your vacuum needs cleaning too? Without regular maintenance, your vacuum’s performance can suffer, and it may even become a breeding ground for bacteria and allergens. That’s why it’s crucial to clean your vacuum regularly. In this section, we’ll cover the steps you need to follow to keep your smart vacuum in top condition. So grab your cleaning supplies and let’s get started!
1. Empty the Bin and Change the Filter
Maintaining your smart vacuum cleaner is essential for ensuring its best performance. One of the regular cleaning tasks you should carry out is emptying the bin and changing its filter. The bin is where your vacuum stores all the debris it picks up as it cleans. When it is full, it can compromise the suction power of your device, which leads to inefficient cleaning.
Steps to Empty the Bin and Change the Filter
Here are the steps to follow when you want to empty your vacuum’s bin and change its filter:
| Step | Action |
|---|---|
| Step 1 | Switch off your device and unplug it from the power outlet to avoid electrical hazards. |
| Step 2 | Locate the bin on your vacuum cleaner. |
| Step 3 | Remove the bin from the device by pressing the release button or unlocking the clip. |
| Step 4 | Dispose of the debris inside the bin into the trash can. |
| Step 5 | Clean the bin with a soft cloth or brush to remove any dirt or dust. |
| Step 6 | Replace the filter on your device. |
| Step 7 | Attach the bin back into the device until it clicks into place. |
| Step 8 | Turn on your vacuum cleaner and test its suction power to ensure it is working correctly. |
Cleaning your device regularly, including emptying the bin and changing its filter, ensures efficient cleaning while prolonging the vacuum’s lifespan. How often you conduct the task depends on how much debris your vacuum picks up over time. Some devices are equipped with sensors that notify you when the bin is full and needs emptying.
It’s essential to follow the manufacturer’s instructions when changing the filter. Some filters are washable and reusable, while others require replacement. Changing the filter influences the quality of air in your home as it prevents allergens and dust particles from escaping the vacuum. When a filter is clogged, it leads to a decrease in suction power, which results in an inefficient cleaning process.
Emptying your smart vacuum’s bin and changing its filter regularly is a simple maintenance task that improves your device’s performance, prolongs its lifespan, and helps minimize indoor air pollution.
2. Check for Blockages
To ensure that your smart vacuum cleaner is running efficiently, it’s important to regularly check for blockages. Blockages in the device can impede its performance, leading to less effective cleaning and even potential damage to the machine. Here are some steps to take when checking for blockages:
- Turn off the machine: Before checking for blockages, it’s important to make sure that the device is turned off to prevent any accidents.
- Check the brushroll: The brushroll is an important part of the vacuum cleaner that can easily become entangled with hair, string, and other debris. Use scissors or a brush to remove any blockages.
- Inspect the dustbin: The dustbin can become clogged with dirt and debris, preventing the vacuum from picking up new dirt. Empty the dustbin and use a brush or finger to remove any stubborn debris.
- Check the suction tube: The suction tube is responsible for picking up dirt and debris. Check to make sure it’s clear of any obstructions that may have become lodged in it during cleaning.
- Inspect the filters: Filters can become clogged with dirt and dust after prolonged use. Check the filters and replace or clean as needed.
Regularly checking for blockages is an important part of maintaining your smart vacuum cleaner and ensuring that it runs at its best. By taking the time to inspect and clean the device, you can extend its lifespan and enjoy cleaner floors throughout your home.
3. Clean the Brushes
As part of regular maintenance, it’s important to clean the brushes on your smart vacuum cleaner. Over time, hair, dust, and debris can accumulate around the brushes, hindering their ability to pick up dirt and reducing the efficiency of your device. Cleaning the brushes is a simple process that can be done in just a few steps.
Step 1: Remove the Brushes
First, you’ll need to remove the brushes from your vacuum cleaner. The process may vary slightly depending on your specific model, but typically involves pressing a button or lever to release the brushes. Consult your user manual if you’re unsure how to do this.
Step 2: Remove Debris
With the brushes removed, use a brush or comb to gently remove any hair or debris that has accumulated around them. It’s important to be gentle during this process, as you don’t want to damage the brushes or the motor that powers them. If there is a lot of debris, you can use a pair of scissors to carefully cut it away.
Step 3: Wash the Brushes
After removing any visible debris, it’s important to clean the brushes using soap and water. Gently wash the brushes with warm soapy water, being sure to remove any remaining debris. Rinse thoroughly with clean water and allow the brushes to air dry completely before reinserting them into your vacuum cleaner.
Step 4: Replace the Brushes
Once the brushes are clean and dry, you can reinsert them into your smart vacuum cleaner. Be sure to properly secure them in place so they don’t become dislodged during use.
By taking the time to regularly clean the brushes on your smart vacuum cleaner, you can ensure that it continues to run efficiently and pick up dirt and debris effectively. This will not only improve the performance of your device, but also increase its lifespan.
Conclusion
In conclusion, smart vacuum cleaners are revolutionizing the way we clean our homes. With their advanced technology and user-friendly interfaces, they offer a wide range of benefits that traditional vacuum cleaners simply can’t match.
Efficiency is one of the biggest advantages of using a smart vacuum cleaner. With their ability to map your home and create cleaning zones, they can clean your floors quickly and thoroughly. This means you can spend less time cleaning and more time doing the things you love.
Another major benefit is time savings. By automating your cleaning schedule and taking advantage of voice commands, you can literally set it and forget it. This not only saves you time but also reduces the stress of having to remember to clean your floors regularly.
Moreover, ease of use is another key advantage of smart vacuum cleaners. With the ability to connect to WiFi and download the app, you can control your device from anywhere, at any time. And with features like spot cleaning and multi-level mapping, you can customize your cleaning experience to fit your specific needs.
However, it’s important to remember that a smart vacuum cleaner is only as good as its maintenance. Regularly cleaning your device, including emptying the bin, changing the filter, and cleaning the brushes, will help prolong its lifespan and ensure that it continues to operate efficiently.
Overall, investing in a smart vacuum cleaner can be a wise decision for anyone looking to simplify their cleaning routine and increase efficiency in their daily lives. With the right maintenance and cleaning strategies in place, you can enjoy the many benefits of these innovative devices for years to come.
Frequently Asked Questions
1. Can smart vacuum cleaners work on all types of floors?
Most smart vacuums can work on hardwood, tile, and carpeted floors. However, it’s important to check the specifications of the device before purchasing to ensure it is suitable for your specific flooring type.
2. How long do smart vacuum cleaners usually last?
The lifespan of a smart vacuum cleaner can vary depending on usage and maintenance. With proper care, they can last up to five or more years.
3. Do smart vacuums collect pet hair effectively?
Yes, many smart vacuums have specialized brushes and suction power to effectively collect pet hair.
4. Are smart vacuums able to clean carpets as well as traditional vacuums?
Yes, many smart vacuums are designed to effectively clean carpets with advanced features like a strong suction power and specialized brushes.
5. Can smart vacuums clean corners and hard-to-reach areas?
Yes, many smart vacuums are designed to navigate through tight spaces and clean corners effectively.
6. What is the average battery life of a smart vacuum cleaner?
The average battery life of a smart vacuum cleaner is around 90 minutes.
7. Can smart vacuums be controlled by a smartphone app?
Yes, most smart vacuums can be controlled by a dedicated smartphone app, allowing you to schedule cleanings and adjust settings remotely.
8. How often should I clean my smart vacuum cleaner?
It’s recommended to clean your smart vacuum cleaner after every use, including emptying the dustbin and checking for blockages.
9. Do smart vacuums make a lot of noise?
Smart vacuums can generate some noise while in use, but many models have been designed to operate on a low decibel level.
10. Can smart vacuums be programmed to avoid specific areas of my home?
Yes, many smart vacuums allow you to set up virtual boundaries to prevent them from entering specific areas or rooms of your home.


