Are you tired of constantly cleaning your floors manually? Investing in a smart vacuum cleaner can be a game-changer for those who want to save time and effort on their cleaning routine. However, maintaining and cleaning your smart vacuum cleaner is just as important as using it. Without proper maintenance, your vacuum cleaner can quickly lose its effectiveness and even break down. In this article, we will guide you through the essential steps for consistent maintenance and provide you with common mistakes to avoid when caring for your smart vacuum cleaner. Plus, we’ll give you troubleshooting tips so that you can quickly solve problems if they arise. With our help, you’ll keep your smart vacuum cleaner in excellent condition and make the most out of your investment. Get ready to make your cleaning routine more efficient and effortless.
Consistent Maintenance
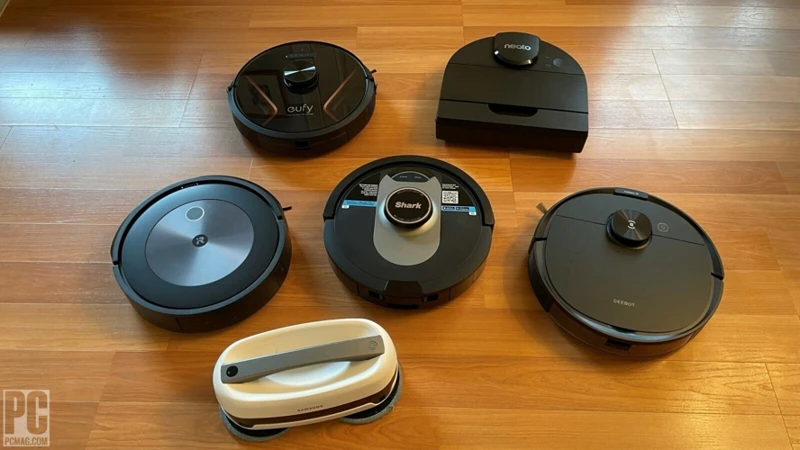
Maintaining and cleaning your smart vacuum cleaner regularly is crucial for its durability and performance. Failure to do so can lead to clogging, decreased suction power, and damage to essential components. Consistent maintenance will not only prolong the life of your smart vacuum cleaner but will also ensure optimal functionality every time you use it. It’s essential to keep your device in good shape by following simple cleaning instructions and regular check-ups. In this section, we will explore some fundamental maintenance routines that you should keep in mind. For a more comprehensive guide, check out our smart vacuum maintenance guide.
Empty the Dustbin Regularly
Regularly emptying the dustbin of your smart vacuum cleaner is an important maintenance task that should not be overlooked. A full dustbin can obstruct the vacuum’s performance, which leads to decreased suction power and makes it difficult to clean. To ensure that your smart vacuum is running efficiently, it is recommended to empty the dustbin after every use or once a week, depending on usage.
The process of emptying the dustbin is relatively simple and easy to do. First, locate the dustbin on your smart vacuum. It is usually located on the side or back of the vacuum. Once you have located the dustbin, remove it from the vacuum by pressing the release button or pulling it out.
Next, take the dustbin to a trash can and carefully empty its contents into the trash, making sure not to spill any debris. Depending on how full the dustbin is, you may need to use your hands or a brush to remove any excess debris that may be stuck to the sides or bottom of the bin.
After emptying the dustbin, it is important to clean it thoroughly. Use a damp cloth or sponge to wipe down the inside of the dustbin, removing any remaining dirt, dust or debris. Be careful not to get water inside the dustbin, as this can damage its components.
If you notice that the dustbin is worn, cracked or damaged, it is recommended to replace it to ensure that the vacuum continues working efficiently. By emptying and cleaning the dustbin regularly, you can help extend the life of your smart vacuum and ensure that it operates at peak performance.
Remember, consistent maintenance is vital to keep your smart vacuum cleaner working effectively over the long-term. For more tips on smart vacuum maintenance and cleaning, check out our article on the importance of smart vacuum maintenance.
Replace the Filter When Needed
Regularly replacing the filter of your smart vacuum cleaner is an important aspect of maintaining its efficiency. The filter’s role is to stop dust and debris from passing through the vacuum’s motor, which would otherwise lead to the device’s breakdown.
To keep your smart vacuum cleaner working correctly, check the filter as regularly as the manufacturer recommends- usually every three to four months. If you or someone in your home has allergies or pets, it might require more frequent replacement. Always refer to the owner’s manual; different units have unique attributes and will have different maintenance needs.
When replacing the filter:
- Remember to always turn off the device, and better if unplugged, before changing the filter.
- Locate the filter by referring to the vacuum’s user manual; typically, the filter is located on the side of the dustbin or under the cover of the device.
- Take out the filter carefully and clean the filter compartment using a soft-bristled brush or a microfiber cloth. Carefully remove any dirt, dust, and debris so that new filters can work correctly.
- Then, dispose of the old filter safely and insert the new one. Make sure the filter is installed correctly and securely.
- After installation, check the manufacturer’s instructions for how to reset the filter change indicator to ensure the vacuum cleaner accurately measures the lifespan of the installed filter.
Why is replacing the filter important?
A clean filter improves your device’s suction power, which means better cleaning performance. If you do not replace the filter regularly, the vacuum’s motor and other parts may face damage, and your device may not function properly. It can also lead to overworking of the motor, causing it to heat up and reduces the device’s lifespan.
Don’t forget! Your smart vacuum cleaner maintenance is crucial to its optimal performance. Refer to the owner’s manual for specific cleaning and replacing instructions. Regular cleaning and replacing the filter can help you avoid unnecessary repairs and ensure your smart vacuum cleaner serves you for a long time. For more general maintenance tips, refer to our article on the /importance-smart-vacuum-maintenance/. If you have not learned how to empty your vacuum cleaner dustbin, it is advisable to check out our article on /clean-smart-vacuum-dustbin/ to make sure you are discarding the garbage correctly.
Clean Brushes and Rollers
When it comes to maintaining and cleaning your smart vacuum cleaner, it is essential to clean the brushes and rollers regularly. Over time, dirt, dust, and other debris can get stuck and build up on the brushes, causing them to become less effective in cleaning your floors. This can result in a reduction in suction power and a lower level of cleaning performance. To avoid this, it’s important to clean the brushes and rollers often.
Steps to Cleaning the Brushes and Rollers
| Step | Description |
|---|---|
| Step 1 | Remove the brush or roller from the vacuum cleaner. |
| Step 2 | Use a pair of scissors or a cleaning tool to remove any hair or thread that may have wrapped around the brush or roller. |
| Step 3 | Wash the brush or roller with warm water and soap. Use a soft-bristled brush to scrub away any stubborn dirt or debris. |
| Step 4 | Rinse the brush or roller thoroughly with water and let it air dry completely before reattaching it to the vacuum cleaner. |
Mistakes to Avoid
While cleaning the brushes and rollers is important, there are also some common mistakes you should avoid. One mistake is using harsh chemicals or abrasive cleaners, which can damage the bristles and rollers over time. Another mistake is not drying the brush or roller completely before reattaching it to the vacuum cleaner. This can result in mold growth, which can be harmful to your health.
Benefits of Regular Cleaning
By regularly cleaning the brushes and rollers of your smart vacuum cleaner, you can maintain its performance and ensure that it continues to clean your floors effectively. Plus, it can help extend the lifespan of the vacuum cleaner, saving you money in the long run.
Cleaning the brushes and rollers of your smart vacuum cleaner is an important step to maintaining its performance and prolonging its lifespan. By following the steps outlined above and avoiding common mistakes, you can ensure that your vacuum cleaner is always ready to clean your floors effectively.
Check the Wheels and Sensors Often
As part of consistent maintenance, it’s important to check the wheels and sensors of your smart vacuum cleaner often to ensure that it’s functioning properly. Here are some key things to keep in mind:
- Check the wheels for debris: Over time, debris such as pet hair, dust, and dirt can accumulate on the wheels of your vacuum, which can cause it to move less smoothly or even become stuck. Regularly check the wheels for debris and clean them as needed to keep them rolling smoothly.
- Inspect the sensors: Smart vacuum cleaners rely on sensors to navigate around your home, avoiding obstacles and mapping out their route. If the sensors become dirty or damaged, the vacuum may not be able to clean properly or could even become stuck. Be sure to inspect the sensors regularly and use a soft, dry cloth to clean them as needed.
- Check for wear and tear: As with any appliance, your smart vacuum cleaner will experience wear and tear over time. Check the wheels and sensors regularly for signs of damage such as cracks or broken parts. It’s important to address any issues promptly to keep your vacuum functioning properly.
- Test the vacuum’s movement: To make sure your smart vacuum cleaner is moving smoothly and effectively, test its movement periodically. If you notice that it’s not moving as it should or is getting stuck frequently, it may be a sign that something is wrong with the wheels or sensors.
By checking the wheels and sensors of your smart vacuum cleaner often and addressing any issues promptly, you can help keep it functioning at its best and extend its lifespan. Remember that consistent maintenance is key to getting the most out of your investment in a smart home appliance like a vacuum cleaner.
Mistakes to Avoid
As a smart vacuum cleaner owner, it’s essential to keep in mind the common mistakes that you should avoid while maintaining and cleaning it. Neglecting minor maintenance can result in significant issues such as reduced suction power, decreased cleaning efficiency, and even damage to the device. In this section, we’ll explore some of the most common mistakes that smart vacuum cleaner owners tend to make, and ways to avoid them to ensure that your device performs at its best. So, let’s dive right in!
Using Water to Clean the Filter
One of the common mistakes people make when maintaining and cleaning their smart vacuum cleaner is using water to clean the filter. It’s important to not use water to clean the filter as it can damage it, rendering it ineffective. Here are some things to keep in mind when cleaning your filter:
- Avoid Water: As mentioned, never use water to clean the filter. Water can cause the filter to become clogged, which can reduce suction power and effectiveness of the vacuum cleaner.
- Use a Soft Brush: Instead of water, use a soft brush to clean the filter. By gently brushing the filter with a soft brush, you can remove any dirt and debris that has accumulated on the filter without causing any damage.
- Follow Manufacturer’s Instructions: It’s important to follow the manufacturer’s instructions when it comes to maintaining and cleaning your smart vacuum cleaner. The instructions may include specific guidelines for cleaning the filter, which could be different from general tips.
- Replace the Filter: If the filter is dirty and cannot be cleaned, it’s time to replace it. Avoid using the vacuum cleaner with a dirty filter as it could reduce the suction power of the vacuum cleaner, making it less effective in picking up dirt and debris.
Remember, the filter is an important part of the smart vacuum cleaner, and keeping it clean is crucial for its proper functioning. Avoid using water to clean the filter and follow the manufacturer’s instructions for maintaining and cleaning your smart vacuum cleaner.
Disregarding Manufacturer’s Instructions
When it comes to maintaining and cleaning your smart vacuum cleaner, there are certain instructions from the manufacturer that you need to follow to the letter. ***Ignoring these instructions may cause damage to the device or even invalidate your warranty.*** It’s crucial to take these instructions seriously and follow them.
One of the manufacturer’s instructions that’s commonly ignored is the use of cleaning solutions. Some people assume that any cleaning solution can be used on their smart vacuum cleaner, but that’s not always the case. Different vacuum cleaners have different specifications, and using the wrong cleaning solution can cause damage to the device, affecting its efficiency and lifespan.
Another common mistake is ignoring the recommended frequency of maintenance. The manufacturer’s instruction manual will clearly outline the recommended maintenance schedule, which typically includes cleaning filters, brushes, and washing detachable parts. By neglecting the recommended maintenance schedule or doing it intermittently, the vacuum cleaner’s performance may be affected, and it may fail to function entirely.
Moreover, ***using incompatible replacement parts is another mistake that many people make, which can significantly impact the performance of the vacuum cleaner.*** Always ensure that you use genuine replacement parts from the manufacturer to prevent compatibility issues and ensure that the device works efficiently.
Lastly, taking the manufacturer’s instructions for granted may lead to the wrong use of your smart vacuum cleaner. This could lead to injury or other unforeseen risks.
To sum it up, the instruction manual that comes with your smart vacuum cleaner plays an essential role in ensuring that the device functions optimally for a long time. By following every instruction correctly and knowing what should and shouldn’t be done, you can avoid costly mistakes that could affect the device’s lifespan or functionality. It is advisable to ***keep referring to the manual if you aren’t sure about any maintenance instructions rather than assuming or guessing.***
| Mistakes to Avoid | What to do Instead |
| Ignoring the recommended frequency of maintenance | Follow the recommended maintenance schedule provided in the instruction manual |
| Using incompatible replacement parts | Always use genuine replacement parts from the same manufacturer |
| Using the wrong cleaning solution | Use the cleaning solution recommended by the manufacturer |
| Taking manufacturer’s instructions for granted | Always read and follow the instructions manual provided. |
Not Emptying the Dustbin on Time
Keeping the dustbin of your smart vacuum cleaner empty is crucial for its proper functioning. Not emptying the dustbin on a timely basis can lead to numerous problems like decreased suction power, clogged filters, and brushes. It can even cause the vacuum to stop working altogether. Here are some of the possible consequences of not emptying the dustbin on time:
| Consequences | Description |
|---|---|
| Decreased suction power | When the dustbin is full, the suction power of the vacuum decreases. This is because the dust and debris obstruct the airflow, which leads to a less efficient cleaning. |
| Clogged filters | The dustbin contains a filter that keeps the dirt and debris from entering the motor. When the dustbin is full, the filter gets clogged, and the vacuum cleaner can’t function properly. This can even result in overheating of the motor, causing permanent damage to the vacuum cleaner. |
| Brushes get tangled | When the dustbin is not emptied regularly, the brushes on the vacuum cleaner can get tangled with the hair, dirt, and other debris. This leads to decreased performance of the vacuum cleaner. |
| Vacuum stops working | If the dustbin is not emptied for too long, the vacuum cleaner can stop working altogether. This can happen due to overheating or other internal damages. |
To avoid these consequences, it’s important to empty the dustbin regularly. The frequency of cleaning the dustbin may vary depending on the capacity of your vacuum cleaner’s dustbin and the amount of dirt it picks up. Ideally, the dustbin should be emptied after every use. If you have a large house and your vacuum cleaner picks up a lot of dirt and debris, you may need to empty it more frequently.
Not emptying the dustbin on time can have various negative consequences on the performance of your smart vacuum cleaner. It’s crucial to empty the dustbin regularly to ensure that the vacuum cleaner functions optimally and has a long lifespan.
Skipping Regular Maintenance
Regular maintenance is key when it comes to keeping your smart vacuum cleaner running smoothly for years to come. Skipping maintenance can lead to all sorts of problems later on, including decreased suction power, clogged filters and brushes, and even damage to the motor itself. Here are some consequences you may face if you skip regular maintenance for your smart vacuum cleaner:
- Decreased suction power: When you don’t clean the dustbin or filters, dust and debris can accumulate and clog the system, leading to decreased suction power. This means that your smart vacuum cleaner won’t be able to pick up as much dirt and debris.
- Clogged filters and brushes: Filters and brushes need regular cleaning to remain functional. Skipping this maintenance can lead to clogged filters and brushes. As a result, your smart vacuum cleaner will have a harder time picking up dirt and debris, leading to poor cleaning performance.
- Damage to the motor: A dirty motor is more prone to overheating, and when it overheats, it can easily be damaged. This means that skipping maintenance can result in expensive repairs or even the need to replace the entire vacuum cleaner.
- Inability to detect obstacles: Smart vacuum cleaners rely on sensors to detect obstacles and navigate around them. If these sensors are dirty or malfunctioning due to lack of maintenance, your vacuum cleaner may collide with furniture or other objects in your home.
It’s crucial to perform regular maintenance on your smart vacuum cleaner to avoid these consequences and ensure that it runs efficiently for years to come.
Troubleshooting Tips
We’ve all been there – you’ve been diligently maintaining and cleaning your smart vacuum cleaner, but suddenly, something goes wrong. Perhaps the vacuum isn’t cleaning as effectively as it used to, or the brushes aren’t rotating as they should. Don’t worry, though – with these useful tips for troubleshooting common issues, you’ll be able to get your vacuum back on track in no time at all. So, let’s take a look at some solutions to the most common problems you’re likely to encounter when using your smart vacuum cleaner.
The Vacuum is Not Cleaning Properly
If your smart vacuum cleaner is not cleaning properly, there could be a few reasons for this issue. Here are some troubleshooting tips that can help:
- Check the dustbin: Make sure the dustbin is emptied and cleaned regularly. If the bin is full, the vacuum cleaner may not be able to pick up more debris.
- Clean the filter: A dirty filter can reduce the suction power of the vacuum cleaner. So, clean or replace the filter, as per manufacturer’s instructions.
- Clean or replace the brushes: If the brushes are clogged with hair or other debris, they may not be able to pick up more dirt. So, clean or replace the brushes regularly.
- Check if the sensors are working: If the vacuum cleaner has sensors for navigation and obstacle detection, check if they are working properly. If not, it might be causing cleaning issues. Clean the sensors and wheels to see if it fixes the problem.
- Restart the device: Sometimes, simply restarting the vacuum cleaner can solve the problem. So, try to restart the device and see if it resumes cleaning properly.
- Check for software updates: If the vacuum cleaner has a mobile app or is connected to the internet, check for software updates. Sometimes, software updates can improve the performance of the vacuum cleaner.
Keep in mind that these troubleshooting tips are just general guidelines. Refer to the manufacturer’s instructions for specific troubleshooting steps. If the problem persists, consider contacting the manufacturer for further assistance.
The Vacuum is Not Charging
It can be frustrating when your smart vacuum cleaner doesn’t charge properly. Here are some troubleshooting tips to help you identify and fix the issue:
| Possible Causes | Solutions |
| The power cord is not connected properly to the charging base or the vacuum cleaner | Check that the power cord is inserted securely into the charging base and the vacuum cleaner. Make sure the base is plugged in and the outlet is live. |
| The battery is not fully seated | Check that the battery is inserted properly and fully seated in the vacuum cleaner. If it’s loose, remove it and re-insert it firmly. |
| The battery is not charged enough to start cleaning | Make sure the vacuum cleaner is fully charged before using it. If it has been a while since its last use, give it some time to charge. |
| The battery has reached the end of its life | If your vacuum cleaner battery is not holding a charge, it may be time to replace it. Consult the manufacturer’s instructions for information on how to do this. |
| The charging base is not functioning properly | If the charging base is not working, try resetting it or replacing it with a new one. Consult the manufacturer’s instructions for troubleshooting and replacement options. |
By following these troubleshooting tips, you should be able to identify and resolve any issues that are preventing your smart vacuum cleaner from charging properly. Remember to always refer to the manufacturer’s instructions for further assistance and guidance.
The Brushes are Not Rotating
If the brushes of your smart vacuum cleaner are not rotating properly, it can impact the overall cleaning performance. There are a few common reasons why this may be happening, but don’t worry, there are some troubleshooting tips that may help you fix the issue.
Possible Causes of Brushes Not Rotating
| Cause | Solution |
|---|---|
| The brushes are jammed with hair, debris or dirt. | Turn off your vacuum cleaner and unplug it. Use a pair of scissors or a brush to remove any hair, debris or dirt that may be stuck in the brushes. Once done, plug it in and turn it on to see if the brushes rotate smoothly. |
| The brushes are worn out or damaged. | Inspect the brushes to see if they are worn out or damaged. If so, you may need to replace the brushes. Refer to the manufacturer’s instructions to find the right replacement brushes for your model. |
| The belt that connects the motor to the brushes is broken. | Turn off your vacuum cleaner and unplug it. Remove the brush bar and inspect the belt to see if it is broken or damaged. If so, you will need to replace the belt. Refer to the manufacturer’s instructions to find the right replacement belt for your model. |
Tips to Avoid Brush Rotation Issues
To avoid brushes not rotating issues in the future, make sure you clean the brushes regularly and remove any hair, debris or dirt that may be stuck in them. Also, replace worn or damaged brushes promptly, and be sure to clean your vacuum cleaner regularly to keep it in good working condition.
By following these tips and troubleshooting steps, you should be able to fix the issue of brushes not rotating in your smart vacuum cleaner.
Conclusion
In conclusion, maintaining and cleaning your smart vacuum cleaner is essential for its optimal performance and longevity. Regular maintenance, such as emptying the dustbin, replacing the filter, and cleaning the brushes and rollers, can help prevent issues and ensure deep cleaning. It is also important to check the wheels and sensors often to prevent damage and malfunction.
However, there are common mistakes to avoid when cleaning and maintaining your smart vacuum cleaner. Using water to clean the filter can cause irreparable damage, while disregarding the manufacturer’s instructions can lead to malfunction and even void the warranty. Not emptying the dustbin on time and skipping regular maintenance can also lead to reduced performance and shortened lifespan of the vacuum cleaner.
If you encounter any issues with your smart vacuum cleaner, some troubleshooting tips can help. Whether the vacuum is not cleaning properly, not charging, or the brushes are not rotating, there are steps you can take to address the problem.
In essence, smart vacuum cleaners are not just another appliance; they are an investment in your home’s cleanliness and convenience. Proper maintenance, avoiding common mistakes, and troubleshooting when necessary can help you get the most out of your smart vacuum cleaner for years to come.
Frequently Asked Questions
How often should I replace the filter in my smart vacuum cleaner?
You should replace the filter in your smart vacuum cleaner every 3-6 months, depending on usage.
Can I use water to clean the filter?
No, you should not use water to clean the filter. Instead, use a soft brush to gently remove any debris.
How often should I empty the dustbin on my smart vacuum cleaner?
You should empty the dustbin after each use, or at least once a week if you use your smart vacuum cleaner frequently.
Why is it important to clean the brushes and rollers on my smart vacuum cleaner?
Cleaning the brushes and rollers helps prevent clogs and keeps your smart vacuum cleaner running smoothly.
What should I do if my smart vacuum cleaner is not cleaning properly?
Check for any clogs or blockages, empty the dustbin, and ensure that the filter and brushes are clean and functioning properly.
Can I use any cleaning solution on the brushes and rollers?
No, you should only use manufacturer-recommended cleaning solutions to avoid damaging the brushes and rollers.
Why is it important to check the wheels and sensors on my smart vacuum cleaner?
Checking the wheels and sensors helps identify any potential problems and prevents damage to the vacuum cleaner.
What should I do if my smart vacuum cleaner is not charging?
Make sure the charging dock is plugged in and that the vacuum cleaner is properly aligned on the dock. If the issue persists, consult the manufacturer’s instructions.
Can I skip regular maintenance on my smart vacuum cleaner?
No, skipping regular maintenance can lead to decreased performance and damage to the vacuum cleaner.
What should I do if the brushes on my smart vacuum cleaner are not rotating?
Check for any blockages or debris, and ensure that the brushes are clean and functioning properly. If the issue persists, contact the manufacturer.


