Picture this: You’ve just invested in a brand new smart vacuum that boasts automatic height adjustment – a feature that promises effortless cleaning across various surfaces. You eagerly turn it on and set it to work, but soon realize that something is amiss. The height adjustment isn’t behaving as it should, leaving you with a half-cleaned floor and a sense of frustration. What’s gone wrong? In this article, we’ll delve into the nitty-gritty of why automatic height adjustment is important, how it works, and most importantly, what to do when it malfunctions. From troubleshooting common issues to sharing expert tips and tricks, we’ll help you get the most out of your smart vacuum and ensure a beautifully cleaned home.
Understanding Automatic Height Adjustment
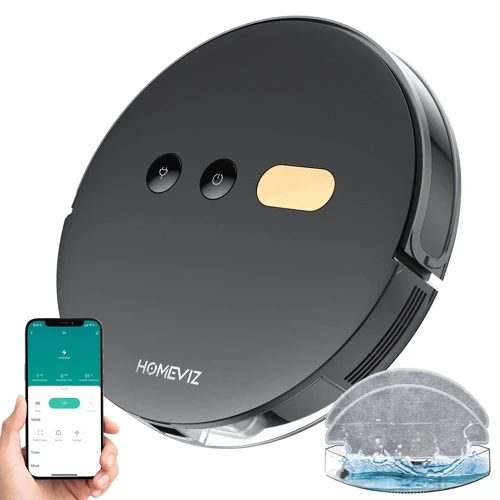
Have you ever wondered how your smart vacuum seems to magically adjust its height as it glides seamlessly from one surface to another, effortlessly cleaning every inch of your floors? The answer lies in the advanced technology of automatic height adjustment. This feature allows your smart vacuum to detect changes in floor surfaces and automatically adjusts its height accordingly. Understanding how this feature works can help you troubleshoot any issues you may encounter with your smart vacuum’s performance. In this section, we’ll delve into the key aspects of automatic height adjustment, including what it is, how it works, and why it’s so essential to your smart vacuum’s cleaning prowess. So, let’s get started!
What is automatic height adjustment?
Automatic height adjustment is a feature found in modern smart vacuums that allows the vacuum cleaner to automatically adjust its height as it navigates over different surfaces. This innovative feature is designed to help the vacuum cleaner maintain a consistent level of cleaning across different floor types, such as carpets, hardwood, and tile.
How does it work?
Smart vacuums that feature automatic height adjustment are equipped with advanced sensors that detect changes in floor type and adjust the height of the vacuum accordingly. These sensors use infrared signals or lasers to detect changes in surface height and adjust the vacuum’s height accordingly. For example, when a smart vacuum detects a carpeted surface, it may increase its suction power and brush roll speed to tackle dirt and debris buried deep within the carpet fibers.
Why is it important?
Automatic height adjustment is an essential feature for smart vacuums, as it helps to ensure the vacuum thoroughly cleans different surfaces throughout your home. This feature is also helpful in preventing damage to delicate surfaces, as the vacuum adjusts its height to avoid scratching or damaging delicate flooring, such as hardwood or tile.
Here are some common issues you might experience when using a smart vacuum with automatic height adjustment, along with steps to fix them:
– Issue #1: Smart vacuum not adjusting height
– Step 1: Check the sensors
– Step 2: Check the wheels
– Issue #2: Smart vacuum adjusting height too frequently
– Step 1: Check the sensors
– Step 2: Check the surface
– Issue #3: Smart vacuum not adjusting to different surfaces
– Step 1: Check the sensor readings
– Step 2: Check the brush roll
– Issue #4: Smart vacuum getting stuck while adjusting height
– Step 1: Check for obstacles
– Step 2: Check the wheels
If you are in the market to buy a smart vacuum with automatic height adjustment, check out our top 5 smart vacuums with automatic height features article, or consider researching the advantages of smart vacuums with this feature. You can also learn how to optimize your smart vacuum’s performance with the tips and tricks we provide in the article’s additional tips section.
How does it work?
Automatic height adjustment on smart vacuums is a unique feature that helps optimize your vacuuming experience. This technology allows the vacuum cleaner to adjust its brush roll height, based on the type of surface it is cleaning. This feature is essential for deep cleaning carpets and hardwood floors without any manual intervention. How does it work? Let’s take a closer look.
1. Sensors
Smart vacuums use sensors to detect the type of surface that it is cleaning. These sensors can detect if the surface is hardwood or carpet and can adjust the brush roll height accordingly. The sensors also detect any obstacles in their path and adjust the height, so they don’t get stuck.
2. Brush Roll
The brush roll height is automatically adjusted based on the type of surface it is cleaning. When the vacuum detects a carpet, it raises the brush roll to clean deep into the fibers of the carpet. On the other hand, when it detects a hardwood floor, it lowers the brush roll to clean the surface effectively without scratching it.
3. Wheels
The wheels on the vacuum also play a role in its automatic height adjustment. The wheels are designed to adjust the height of the brush roll by moving up or down based on the surface it is cleaning. For example, when the vacuum cleaner is cleaning a low pile carpet, the wheels move up, causing the brush roll to move closer to the surface, thus deep cleaning the carpet.
4. Motor Power
The motor power of the smart vacuum also influences its automatic height adjustment feature. When the vacuum detects a carpet, it needs more power to deep clean the fibers, so it increases the motor’s power output. On the other hand, when it detects a hardwood floor, it requires less power, so it adjusts the motor’s power output accordingly.
Automatic height adjustment is an excellent feature that enables you to clean your home better and faster. It improves the vacuum’s cleaning efficiency and ensures that every surface is cleaned thoroughly without damaging it. Smart vacuums with automatic height adjustment are highly recommended for anyone looking to make their cleaning experience more effortless and convenient.
If you want to learn more about smart vacuums with automatic height adjustment or are interested in buying one, check out our top 5 smart vacuums with auto height list or our guide on the advantages of smart vacuums with automatic height adjustment.
Why is it important?
Automatic height adjustment is an important feature that can greatly enhance the performance of a smart vacuum. Below are some reasons why it is important:
- Efficient cleaning: Automatic height adjustment ensures that the smart vacuum is cleaning effectively and efficiently. It adjusts the brush roll height depending on the surface it is cleaning, allowing it to pick up debris and dirt from both carpets and hard floors without damaging them.
- Prevents damage: Using a smart vacuum with automatic height adjustment can prevent damage to the brush roll and floors. When the brush roll is adjusted to the proper height, it prevents the brush from scratching or damaging the floors while cleaning, prolonging the lifespan of both the vacuum and the flooring.
- Time-saving: Smart vacuums with automatic height adjustment offer a more convenient way of cleaning. It eliminates the need for manual adjustments, which means less time spent on set up and cleaning.
- Suitable for all floor types: With automatic height adjustment, the smart vacuum can clean all floor types, from hardwood floors to carpets, without any problem. It is beneficial for households with different types of flooring.
- Better cleaning performance: A smart vacuum with automatic height adjustment can provide better cleaning performance. It consistently adjusts the brush roll height according to the floor type and adjusts the suction power, which ensures thorough cleaning of all surfaces.
If you are in the market for a new smart vacuum, it is highly recommended to buy one with automatic height adjustment. This feature will make your cleaning routine more efficient, saving you time and effort. Check out some of the best smart vacuums with automatic height adjustment on the market, and choose the one that best suits your needs.
Common Issues and How to Fix Them
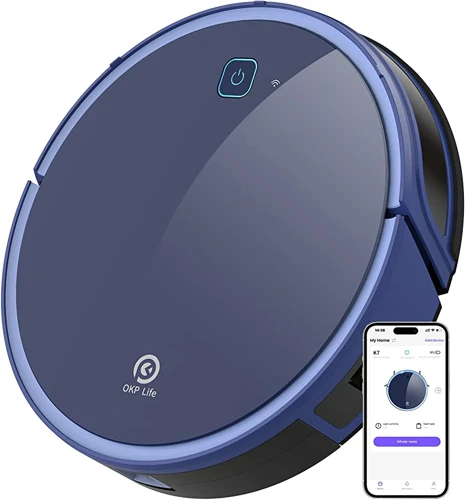
As convenient as automatic height adjustment on smart vacuums can be, there are still some common issues that can arise with this feature. It can be perplexing when your vacuum doesn’t seem to be functioning as it should. Fortunately, most issues can be resolved with a few simple steps. In this section, we will explore these issues and provide step-by-step solutions to fix them. By the end of this article, you’ll be better equipped to troubleshoot any issues you may encounter with your smart vacuum’s auto-height adjustment feature.
Issue #1: Smart vacuum not adjusting height
If your smart vacuum is not adjusting its height, there could be a couple of reasons why this is happening. Below are some possible issues and steps you can take to fix them:
| Possible Issue | Solution |
|---|---|
| The sensors are dirty or obstructed | Clean the sensors with a soft and dry cloth. If there is an obstruction, clear it using a toothbrush or a similar small tool. |
| The wheels are not moving freely | Check the wheels to make sure there isn’t any debris or hair that could be blocking them. If there is, clean it using a pair of scissors or a similar tool. |
It’s essential to keep your smart vacuum’s sensors and wheels free from any dirt or debris that could interfere with its functionality. By maintaining your smart vacuum, you can ensure that it works efficiently and effectively.
If you’re looking for a smart vacuum that features automatic height adjustment, consider purchasing one that comes with this technology. For more information on models with this feature, check out our article on buying a smart vacuum with auto-height adjustment.
Step 1: Check the sensors
One of the first things to do when troubleshooting issues with the automatic height adjustment on your smart vacuum is to check the sensors. The sensors are responsible for detecting the height of the surface and sending that information to the vacuum so it can adjust accordingly. Here are some steps you can take to check the sensors:
- Step 1: Make sure the sensors are clean and free of debris. Debris can interfere with the sensors’ readings and cause the vacuum to malfunction. Use a soft, dry cloth to clean the sensors.
- Step 2: Check for any physical damage to the sensors. If the sensors are scratched, cracked, or otherwise damaged, they may not be able to accurately detect the surface height. If you notice any damage, contact the manufacturer for repair or replacement.
- Step 3: Check the connection between the sensors and the vacuum. Make sure the sensors are properly connected and there are no loose wires or connections. A faulty connection can cause the sensors to malfunction and prevent the vacuum from adjusting its height correctly.
By following these steps and ensuring your sensors are working properly, you can help prevent issues with your smart vacuum’s automatic height adjustment. For further information on automatic height adjustment on smart vacuums, check out our detailed guide.
Step 2: Check the wheels
When troubleshooting a smart vacuum that’s having issues with automatic height adjustment, checking the wheels is an important step in pinpointing the problem. Here are some things to look for:
- Obstructions: The first thing to check is whether there are any obstructions on or around the wheels. Sometimes strings, hair, or other debris can wrap around the axle or wheel and prevent it from turning smoothly. Remove any obstructions and try again.
- Debris: If the wheels are clogged with dust or dirt, this can also affect their ability to turn properly. Use a soft brush or cloth to clean any debris off the wheels and try again.
- Worn Wheels: If the wheels are worn or damaged, this could affect their ability to turn smoothly and consistently. Inspect the wheels for signs of wear or damage, such as cracks, nicks, or flat spots. If the wheels are worn out, they may need to be replaced.
- Blocked Sensors: Sometimes, the sensors that detect changes in surface height can become blocked by debris or dust. This can prevent the vacuum from adjusting the height properly. Check the sensors and clean them if necessary.
- Alignment: In some cases, the wheels may not be aligned properly, which can cause them to drag or turn unevenly. Check that all wheels are aligned and turning smoothly.
By following these steps and checking the wheels of your smart vacuum, you’ll be able to identify and potentially fix any issues that are preventing the automatic height adjustment from working properly.
Issue #2: Smart vacuum adjusting height too frequently
It’s frustrating when your smart vacuum is constantly adjusting its height, making cleaning feel like a never-ending chore. Here are some steps you can take to troubleshoot this common issue:
- Step 1: Check the sensors – The sensors on your smart vacuum are what allow it to detect changes in surface height. If these sensors are dirty or malfunctioning, they may be sending inaccurate readings, causing the vacuum to adjust its height too frequently. Make sure to clean your sensors regularly and check for any damage.
- Step 2: Check the surface – If your smart vacuum is adjusting its height frequently on a single surface, there may be an issue with the surface itself. Some surfaces, like shag carpeting, can be difficult for smart vacuums to navigate. Make sure the surface is clean and free of any obstructions or debris that may be causing the vacuum to read false measurements.
By following these steps, you can help troubleshoot why your smart vacuum may be adjusting its height too frequently. Remember, keeping your vacuum’s sensors clean and making adjustments for difficult surfaces can go a long way in optimizing its performance.
Step 1: Check the sensors
Step 1: Checking the sensors is the first thing you should do if your smart vacuum is having trouble with automatic height adjustment. Sensors play a crucial role in detecting the floor type and adjusting the height accordingly. Here’s how you can check the sensors:
| Sensor | Issue | Possible Solution |
|---|---|---|
| Optical Sensor | Dirty or obstructed | Clean the optical sensor with a microfiber cloth or remove any obstructions that may be blocking it. |
| Ultrasonic Sensor | Not working properly | Restart the vacuum and reset the ultrasonic sensor. If the problem persists, contact the manufacturer for assistance. |
| Gyroscope Sensor | Calibration error | Recalibrate the gyroscope sensor according to the manufacturer’s instructions. |
It’s important to keep the sensors clean and free from obstructions, as they directly affect the performance of the automatic height adjustment feature. If cleaning the sensors does not solve the problem, you may need to consult the manufacturer’s user manual or customer service for further assistance.
Step 2: Check the surface
When it comes to troubleshooting smart vacuums that are constantly adjusting their height, one of the possible culprits is the surface on which they are being used. Here are some steps to take to ensure that the surface isn’t the issue:
- Check for texture and height differences: Smart vacuums use sensors to detect changes in surface height, so if your floors have a lot of texture or varying heights, this could be confusing the sensors. Try vacuuming an area with a more uniform surface, like a laminate floor.
- Make sure the surface is clean: If your smart vacuum is struggling to adjust its height, it may be because the sensors are detecting debris on the floor. Make sure the area you’re vacuuming is free of dirt, pet hair, and any other debris that might be interfering with the sensor readings.
- Check for reflective surfaces: If you’re using your smart vacuum on a surface that emits a lot of light, like a highly polished floor, this could be affecting the sensor readings. Try using your smart vacuum in a room with lower lighting or using drapes to darken the room, and see if this helps the vacuum to adjust its height more accurately.
- Try changing the smart vacuum’s settings: Some smart vacuums allow you to adjust the height settings manually. If your vacuum is constantly adjusting its height and you think it’s due to the surface, try adjusting the settings to a lower or higher setting and see if this helps. Make sure to consult your vacuum’s manual for instructions on how to do this.
Remember, if the surface is the issue, it’s important to take steps to ensure it’s as clean and free of debris as possible to help your smart vacuum operate at peak performance. In addition to checking the surface, there are other tips and tricks to keep your smart vacuum running smoothly.
Issue #3: Smart vacuum not adjusting to different surfaces
One of the most frustrating issues that smart vacuum owners encounter is when their device doesn’t adjust its height according to the different surfaces it’s cleaning. You may notice that the vacuum is leaving behind dirt and debris or that it’s struggling to move over certain areas.
If you’re facing this issue, don’t worry; there are a few things you can try to fix it:
- Step 1: Check the sensor readings
- Step 2: Check the brush roll
One possible cause of your smart vacuum not adjusting to different surfaces is malfunctioning sensors. The vacuum may not be receiving accurate readings from its sensors, and as a result, it doesn’t adjust to the surface it’s cleaning.
To fix this, you can perform a sensor diagnostic test. Follow the instructions in your smart vacuum’s user manual to perform this test. If the test doesn’t identify any issues, try resetting your smart vacuum to its default settings.
Another reason your smart vacuum may not be adjusting to different surfaces is because of issues with its brush roll. Dirt, hair, and other debris can get tangled in the brush and prevent it from working correctly.
To prevent this issue, clean the brush roll regularly. Check for any debris tangled in the brush and remove it. You can also use a comb or brush to loosen dirt and debris from the bristles.
If cleaning the brush roll doesn’t solve the issue, you may need to replace it entirely.
By following these steps, you can fix your smart vacuum’s automatic height adjustment and ensure that it performs at its best on any surface.
Step 1: Check the sensor readings
When troubleshooting a smart vacuum that is not adjusting to different surfaces, the first step is to check the sensor readings. These sensors play a crucial role in determining the surface type and adjusting the height accordingly. A sensor is a device that detects and responds to some type of input from the physical environment.
To check the sensor readings, follow these steps:
| Step | Action |
|---|---|
| Step 1 | Turn off the smart vacuum |
| Step 2 | Remove the dustbin and filter to expose the sensors |
| Step 3 | Inspect the sensors for dust, debris, or any physical damage |
| Step 4 | Clean the sensors using a soft cloth or brush to remove any obstructions |
| Step 5 | Check the sensor connections to make sure they are secure |
| Step 6 | Turn on the smart vacuum and test its performance on different surfaces |
By following these steps, you can ensure that the sensor readings are accurate and the smart vacuum will adjust its height to different surfaces as intended. If the sensors are damaged, it may be necessary to replace them to restore proper operation. Keeping the sensors clean and well-maintained can also help prevent issues with the smart vacuum’s automatic height adjustment feature in the future.
Step 2: Check the brush roll
When the automatic height adjustment feature on your smart vacuum isn’t working properly, one of the reasons could be a malfunctioning brush roll. A malfunctioning brush roll can cause the vacuum to not make proper contact with the surface it’s cleaning, resulting in incorrect height adjustments.
To check the brush roll, follow these steps:
- Step 1: Make sure the vacuum is turned off and unplugged.
- Step 2: Locate the brush roll on the underside of the vacuum.
- Step 3: Gently pull the brush roll out of the vacuum and inspect it for any signs of damage or wear and tear.
- Step 4: Clean the brush roll by removing any hair, debris, or tangled fibers that might be wrapped around it. You can use a pair of scissors or a brush to carefully remove any dirt, dust, or hair that might be stuck in the brush roll.
- Step 5: Once the brush roll is clean, re-insert it back into the vacuum and turn the vacuum back on to see if the automatic height adjustment feature is working properly.
If the brush roll is damaged, worn-out, or requires replacement, contact your vacuum manufacturer or authorized service provider to get it replaced as soon as possible. A malfunctioning brush roll not only impacts the automatic height adjustment feature but can also harm the overall performance of your smart vacuum. So, don’t ignore this vital component when troubleshooting issues related to automatic height adjustment on your vacuum.
Issue #4: Smart vacuum getting stuck while adjusting height
When your smart vacuum repeatedly gets stuck while adjusting height, it can be frustrating and time-consuming to constantly free it from obstacles. Here are some steps you can follow to troubleshoot this common issue:
- Step 1: Check for obstacles
The first thing you should do is check for any objects or debris that might be hindering your smart vacuum’s movement. Inspect the area where your vacuum is operating and remove any objects that might cause it to get stuck. Pay attention to furniture pieces, area rugs, and any cords or cables on the floor. - Step 2: Check the wheels
The wheels of your smart vacuum play a vital role in its movement and height adjustment. Check if the wheels are dirty or damaged, and clean them if necessary. Also, ensure that the wheels are properly attached and intact. You can also test the wheels manually by lifting the vacuum and rotating the wheels to see if they move freely.
By completing these steps, you can troubleshoot and address the issue of your smart vacuum getting stuck while adjusting height. By regularly checking and maintaining your smart vacuum’s wheels and surroundings, you can reduce the chances of this issue recurring in the future, and prolong the life of your smart vacuum.
Step 1: Check for obstacles
When dealing with the issue of the smart vacuum getting stuck while adjusting height, the first thing you need to do is identify any obstacles that might be hindering its movement. Here are some steps to follow:
- Step 1: Take a look around the room where the vacuum is operating and identify any obstacles in its path. These can include furniture, rugs, cords, toys, and any other item that might obstruct the vacuum’s movement.
- Step 2: Once you’ve identified the obstacles, remove them from the vacuum’s path. If there are furniture items that can’t be moved, try to create a clear path for the vacuum to navigate through by shifting them slightly. Always ensure that the vacuum’s path is clear and there’s nothing impeding its movement.
- Step 3: Check the wheels of the vacuum and ensure that they’re not clogged with dirt, debris or any other material. You can use a clean, dry cloth to remove any debris around the wheels.
- Step 4: Check the bumper sensors. If they’re dirty, they can cause the vacuum to get stuck. Use a clean, dry cloth to wipe them clean.
Remember that the smart vacuum has sensors that allow it to avoid obstacles and navigate smoothly. When these sensors are obstructed, the vacuum can get stuck or fail to adjust its height correctly. Checking for obstacles and cleaning the sensors is an essential step toward fixing any height adjustment issue.
Step 2: Check the wheels
When it comes to troubleshooting issues with automatic height adjustment on smart vacuums, checking the wheels is a crucial step. If the wheels are not functioning properly, your smart vacuum may not be able to adjust its height correctly and may encounter various problems while cleaning. Here are some ways you can check the wheels to ensure they are operating correctly.
Step 2: Check the wheels
One of the first things you can do is to inspect the wheels of your smart vacuum for any signs of wear and tear. If the wheels are damaged, they may not be able to move smoothly or roll properly, which can affect the smart vacuum’s ability to adjust height. Checking the wheels for any wear and tear can help you identify if this is the cause of the problem.
Another thing you can do is to clean the wheels thoroughly. Sometimes, dirt, dust, and debris can accumulate on the wheels, making them difficult to move. This can interfere with the smart vacuum’s height adjustment function. To clean the wheels, you can use a soft cloth or brush to remove any dirt or debris that may be stuck.
It’s also essential to check if the wheels are securely attached to the smart vacuum. Loose wheels can result in vibrations, which can impact a smart vacuum’s height adjustment system. You can check the wheels’ tightness by giving them a gentle push to see if they move or wobble. Additionally, make sure that there are no objects stuck between the wheels and the body of the smart vacuum, as this can also affect height adjustment.
After checking and correcting any issues with the wheels, it’s always a good idea to test the smart vacuum to ensure that the height adjustment issue has been resolved. If the issue persists, you may need to contact a professional technician or the manufacturer for assistance.
Table: Checklist for Checking the Wheels
Here’s a checklist you can use to help you check the wheels of your smart vacuum:
| Checklist: | Action: |
| Inspect the wheels for wear and tear | Replace damaged wheels |
| Clean the wheels thoroughly | Use a soft cloth or brush to remove dirt and debris |
| Check the wheels’ tightness | Tighten any loose wheels |
| Remove any objects stuck between the wheels and the smart vacuum’s body | Clear any obstructions |
By following these steps and using the checklist provided, you can help ensure that the wheels of your smart vacuum are working correctly, and the height adjustment system is functioning as it should.
Additional Tips and Tricks
Now that we’ve gone over troubleshooting common issues with automatic height adjustment on smart vacuums, it’s time to talk about some additional tips and tricks to help you make the most out of your device. Maintaining and optimizing your smart vacuum’s performance can be the key to ensuring that it operates efficiently and effectively, leaving your floors spotless. By following these tips, you can extend the life of your smart vacuum and keep your home looking its best. Let’s dive in!
Maintaining your smart vacuum
Maintaining your smart vacuum is crucial for ensuring its long-term performance. Here are some tips you should follow to keep your vacuum in good condition:
- Clean the sensors regularly: Dust and debris can accumulate on the sensors, which can affect their accuracy. Make sure to clean them regularly with a soft cloth or a brush.
- Empty the dustbin frequently: A full dustbin can affect the suction power of your vacuum. So, make sure to empty the dustbin frequently and clean it with soap and water.
- Clean the brush roll: The brush roll can accumulate hair, dust, and debris over time, which can affect its performance. Make sure to clean it regularly with a brush or a pair of scissors.
- Check the wheels: The wheels can accumulate debris, which can affect their mobility. Make sure to clean them regularly and check for any damages.
- Replace the filters: The filters can get clogged with dirt and dust, which can affect the efficiency of your vacuum. Make sure to replace them as per the manufacturer’s instructions.
- Store your vacuum properly: Make sure to store your vacuum in a clean and dry place, away from direct sunlight and moisture. This will help prolong its lifespan.
Following these maintenance tips will help keep your smart vacuum running at peak performance for years to come.
Optimizing your smart vacuum’s performance
To optimize your smart vacuum’s performance, there are a few steps you can take to ensure it operates at its best. Here are some tips:
| Tip | Description |
|---|---|
| Clean the brush roll regularly | The brush roll can easily pick up hair and debris, which can wrap around it and prevent it from turning. This can reduce the vacuum’s effectiveness. Make sure to clean the brush roll regularly to avoid this problem. |
| Empty the dustbin frequently | A full dustbin can cause suction loss and reduce the vacuum’s ability to clean. Make sure to empty the dustbin after every use or when it is full. |
| Use high-quality filters | Filters can easily clog and reduce the vacuum’s suction power. Make sure to use high-quality filters and replace them as needed. |
| Maintain the sensors | The sensors of your smart vacuum are crucial for detecting surface changes and adjusting the height accordingly. Make sure to clean the sensors regularly to avoid any malfunctions. |
| Run the vacuum regularly | To prevent buildup of dirt, dust, and debris on your floors or carpets, it’s best to run your smart vacuum at least once a week. This can also help prolong the life of your vacuum. |
| Use it in a well-lit room | Your smart vacuum’s sensors depend on good lighting to detect surface changes. Make sure to use it in a well-lit room to optimize its performance. |
By following these tips, you can ensure that your smart vacuum is operating at its best and cleaning your home effectively. It’s important to take care of your vacuum to ensure it lasts for years to come.
Conclusion
After troubleshooting common issues with automatic height adjustment on smart vacuums, it is important to keep in mind that regular maintenance is key to ensuring optimal performance. Cleaning the brush roll and sensors regularly can prevent build-up and potential malfunction.
Moreover, optimizing the smart vacuum’s performance can be achieved by manually adjusting its height on particularly dirty or high-pile surfaces, and by regularly replacing filters and brushes to improve suction power.
In conclusion, smart vacuums with automatic height adjustment technology can provide a convenient and efficient way of cleaning various surfaces with minimal effort. However, like any technological device, it can encounter common issues. By following the aforementioned steps and tips, users can troubleshoot and fix issues that arise, as well as optimize their smart vacuum’s performance.
Frequently Asked Questions
1. Why is my smart vacuum not adjusting to different surfaces?
There may be an issue with the sensor readings or the brush roll. Check both to ensure they are functioning properly.
2. How often should I maintain my smart vacuum?
To ensure optimal performance, it is recommended to maintain your smart vacuum at least once every 1-2 months.
3. Can I manually adjust the height of my smart vacuum?
Most smart vacuums come equipped with a manual adjustment option. Refer to the user manual for specific instructions.
4. How do I optimize my smart vacuum’s performance?
Regular maintenance, such as cleaning the brush roll and replacing filters, can help to optimize your smart vacuum’s performance. Additionally, ensuring the sensors are functioning properly and the wheels are not obstructed can also improve performance.
5. Why is my smart vacuum adjusting height too frequently?
This could be due to an issue with the sensors or the surface that the vacuum is cleaning. Check both to ensure they are working as they should.
6. Can I use my smart vacuum on carpets?
Most smart vacuums are equipped to clean carpets, but it is important to ensure the sensors are properly adjusted and functioning for the carpet type.
7. Why is my smart vacuum getting stuck while adjusting height?
Obstacles in the vacuum’s path can cause it to get stuck while adjusting height. Checking for and removing any obstacles can help to prevent this issue.
8. Can I replace the sensors on my smart vacuum?
While it is possible to replace sensors, it is recommended to have the vacuum serviced by a professional to ensure proper installation and functionality.
9. How do I clean the brush roll on my smart vacuum?
Refer to the user manual for specific instructions on how to remove and clean the brush roll. Generally, it involves using scissors or a brush to remove any tangled hair or debris.
10. Can I schedule my smart vacuum to clean automatically?
Most smart vacuums come equipped with a scheduling feature, allowing you to set it to clean automatically at specific times and days.
