Have you ever encountered issues with the anti-collision sensors on your smart vacuum cleaner? These sensors, which are designed to prevent the vacuum from bumping into walls and furniture, can occasionally malfunction and cause frustration. Perhaps the sensor isn’t responding at all, or it’s constantly triggered even when there’s no obstacle in sight. Whatever the issue may be, troubleshooting the anti-collision sensors can be a perplexing task. But fear not, because in this article we will outline step-by-step methods to help you identify and fix any issues with your smart vacuum’s anti-collision sensors. So, let’s dive in and discover how to get your vacuum back to its optimal functioning state.
Common Issues with Anti-Collision Sensors
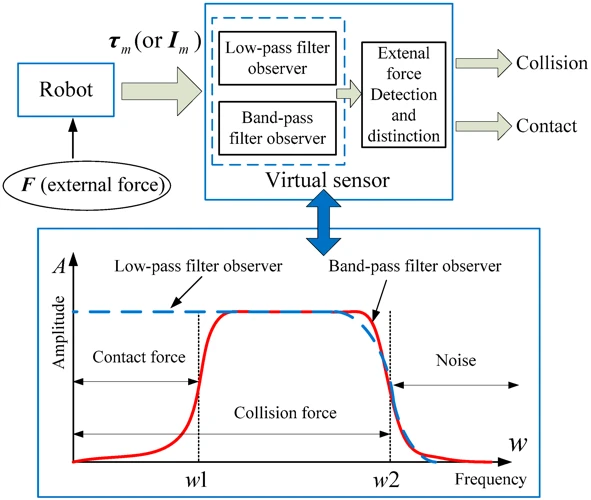
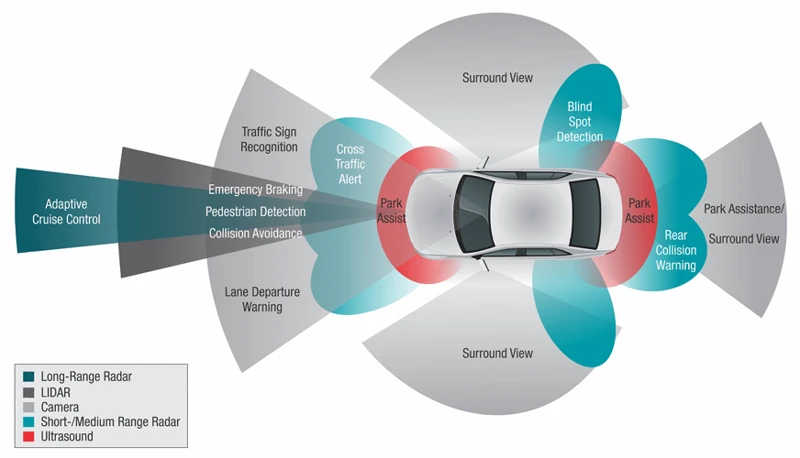
The anti-collision sensors are one of the most important features in a smart vacuum cleaner to avoid damage to your furniture and other household items. However, these sensors can encounter issues that might impede the optimal functioning of your device. In this section, we’ll discuss some common issues with the anti-collision sensors that you may face while using your smart vacuum cleaner. Understanding these problems can help you troubleshoot and fix them quickly. To learn more about anti-collision sensors and their application in the smart vacuum cleaner market, check out this comprehensive guide to anti-collision sensors.
Sensor Not Responding
When your smart vacuum cleaner’s anti-collision sensor is not responding, it can lead to frustration and even damage to the device. This can happen due to a variety of reasons, ranging from simple dirt accumulation to a malfunction. Here are the steps to troubleshoot this issue:
- Step 1: Check the sensor’s position. If the sensor is not in its proper position, it might not respond. Refer to the manual to find out the correct placement of the sensor.
- Step 2: Make sure that the vacuum cleaner’s power is on. The sensor will not respond if the device is not turned on.
- Step 3: Clean the sensor. Accumulated dust or debris might be preventing the sensor from responding. Use a soft cloth or cotton swab to clean the sensor, and refer to the cleaning guide for detailed instructions on how to do this properly.
- Step 4: Test the sensor. After cleaning, test the sensor to see if it responds. If it still does not work, try resetting the vacuum cleaner.
- Step 5: Check the wiring. If the wiring is loose or disconnected, the sensor may not respond. Inspect the wiring to ensure it’s properly connected, and refer to the manual for guidance on repairing the wiring.
If none of the above steps work, it’s possible that the sensor itself is damaged, and you may need to replace it. Additionally, it’s also important to note that some types of flooring or surfaces may interfere with the sensors’ ability to function properly. Refer to the article on anti-collision sensors and flooring to learn more about this.
Taking preventative measures can ultimately save you time and money. Regularly cleaning the sensors and keeping the vacuum cleaner in good condition can help prevent sensor malfunctions. Keeping an extra battery can also come in handy if the current battery is low. For more tips and tricks on smart vacuum cleaner maintenance, refer to the market innovations of anti-collision sensors in smart vacuums.
Sensor Triggered for No Obstacle
A common issue that people encounter with their smart vacuum cleaner’s anti-collision sensors is when the sensor gets triggered for no obstacle. This can be frustrating, as it can cause the vacuum cleaner to stop working properly or move erratically.
What Causes the Sensor to Trigger?
There are several reasons why a sensor may be triggered for no obstacle. One possibility is that there is dirt or debris on the sensor, which can make it malfunction. Another possibility is that the sensor is not aligned properly, which can cause it to trigger when there is no obstacle. Finally, it could be due to a software glitch or a hardware issue with the vacuum cleaner.
How to Troubleshoot a Sensor Triggered for No Obstacle
If your vacuum cleaner’s sensor is triggering for no obstacle, there are several steps you can take to troubleshoot the issue:
| Step | Description |
|---|---|
| Step 1 | Start by cleaning the sensor with a soft cloth or cotton swab. Make sure to remove any dirt or debris that may be present. |
| Step 2 | Next, check the sensor for proper alignment. Make sure that it is installed correctly and that there is no obstruction in front of it. |
| Step 3 | If the issue persists, try resetting the vacuum cleaner. This can sometimes fix software glitches that may be causing the problem. |
| Step 4 | If none of these steps work, it is possible that there is a hardware issue with the vacuum cleaner. Check the drop sensors and other sensors to ensure they are functioning properly. |
| Step 5 | If you are still having problems with your anti-collision sensors, it may be time to contact customer support. They can provide further assistance and help you determine if there is a hardware issue that needs to be addressed. |
Conclusion
If your smart vacuum cleaner’s anti-collision sensor is triggering for no obstacle, it can be a frustrating experience. However, by following the troubleshooting steps outlined above, you can often resolve the issue and get your vacuum cleaner back to working properly. The key is to start by cleaning the sensor and checking for proper alignment, and then escalate to more advanced troubleshooting steps if the issue persists. As always, regular maintenance is key to keeping your smart vacuum cleaner working properly in the long run.
Sensor Constantly Triggered
If your smart vacuum cleaner’s anti-collision sensors are constantly triggered, it can be a frustrating experience, as it may prevent your robot vacuum from navigating your home properly. Here are some troubleshooting steps to resolve this issue:
1. Check the Sensitivity Settings: If the sensitivity level of the sensors is too high, it may constantly detect obstacles that are not there. Check the sensitivity settings of your vacuum cleaner’s anti-collision sensors and adjust them accordingly.
2. Inspect the Sensors: Inspect the anti-collision sensors for any physical damage or obstructions. Sometimes, the sensors may have accumulated dirt, dust or other debris that may be obstructing them from functioning properly. Clean the sensors with a soft, dry cloth to remove any obstructions.
3. Test Different Floor Types: Sometimes, the anti-collision sensors may not work well on certain types of floors, such as dark or shiny surfaces. Test the vacuum cleaner’s anti-collision sensors on different surfaces to see if the sensors work better on certain types of floors.
4. Check for Interference: Other electronic devices such as Wi-Fi routers or Bluetooth devices may cause interference with the sensors, leading to false positives. Move these devices away from your robot vacuum cleaner to eliminate any interference that may cause the sensors to constantly trigger.
Troubleshooting Steps for Constantly Triggered Anti-Collision Sensors
| No. | Troubleshooting Steps |
|---|---|
| 1 | Adjust the sensitivity settings of the sensors. |
| 2 | Clean the sensors thoroughly to remove any obstructions caused by dirt, dust, or debris. |
| 3 | Test the sensors on different floor types to see if they work better on certain surfaces. |
| 4 | Ensure that other electronic devices in your home are not causing interference that triggers the sensors. |
By following these troubleshooting steps, you may be able to resolve the issue of constantly triggered anti-collision sensors on your smart vacuum cleaner, which will help to improve its performance and make your household cleaning tasks easier.
Troubleshooting Steps

It’s frustrating when your trusty smart vacuum cleaner isn’t able to navigate your home efficiently due to faulty anti-collision sensors. Luckily, there are some troubleshooting steps you can take to fix these issues. By following these methods to diagnose and solve the problem, you can get your vacuum cleaner up and running again in no time.
Step 1: Clean the Sensors
One of the easiest and most common troubleshooting steps for anti-collision sensors on your smart vacuum cleaner is to clean the sensors. Dirt and debris on the sensors can cause false readings, leading to either the sensors not responding or constantly triggering when there is no obstacle in the way. Here are some steps to follow:
- Step 1: Turn off the vacuum
- Step 2: Locate the sensors
- Step 3: Gently wipe the sensors with a soft, dry cloth to remove any dust, dirt or debris buildup.
- Step 4: If there is any stubborn dirt, use a damp cloth or a cotton swab with some rubbing alcohol to clean the sensors thoroughly.
- Step 5: Ensure the sensors are completely dry before turning the vacuum back on.
Remember to be gentle while cleaning, as the sensors can be delicate and easily damaged. Additionally, avoid using any harsh chemicals as they can damage the sensors.
If cleaning the sensors doesn’t solve the problem, move on to the next troubleshooting step.
Step 2: Check for Obstructions
One common problem with anti-collision sensors on smart vacuum cleaners is the detection of false obstacles. This can be caused by a buildup of dust or dirt on the sensors or by a physical obstruction in the vacuum cleaner’s path. In this case, you should take the following steps to troubleshoot the issue:
| Step | Description |
|---|---|
| Step 2.1: | First, turn off the vacuum cleaner and unplug it from the power source. |
| Step 2.2: | Inspect the area around the vacuum cleaner for any objects that might be blocking its path. This could include toys, furniture, or other obstacles. |
| Step 2.3: | Remove any obstructions that you find and make sure that the vacuum cleaner has a clear path to operate. |
| Step 2.4: | If there are no physical obstructions, check to see if there is any dust or debris on the anti-collision sensors. These sensors are usually located on the front and sides of the vacuum cleaner. |
| Step 2.5: | Use a dry cloth or a soft-bristled brush to gently clean the sensors. Do not use water or any cleaning fluids, as this can damage the sensors or cause electrical issues. |
Once you’ve completed these steps, turn the vacuum cleaner back on and see if the anti-collision sensors are working properly. If the problem persists, you may need to move on to the next step in the troubleshooting process. Remember to always unplug the vacuum cleaner before performing any maintenance or repairs to ensure your safety.
Step 3: Reset the Vacuum Cleaner
When troubleshooting anti-collision sensors on your smart vacuum cleaner, resetting the vacuum cleaner can be a useful step in resolving the issue. Resetting the vacuum cleaner will clear any error codes that may be interfering with the proper functioning of the anti-collision sensors.
To reset the vacuum cleaner, follow these steps:
- Step 1: Turn off the vacuum cleaner using the power button.
- Step 2: Unplug the vacuum cleaner from the power source.
- Step 3: Wait for at least 30 seconds before plugging the vacuum cleaner back in.
- Step 4: Turn on the vacuum cleaner using the power button.
After resetting the vacuum cleaner, test the anti-collision sensors to see if the issue has been resolved. If the sensors are still not functioning properly, move on to the next troubleshooting step.
It’s worth noting that resetting the vacuum cleaner should only be done after checking for obstructions and cleaning the sensors, as these are the most common causes of issues with anti-collision sensors. Additionally, it’s important to keep the vacuum cleaner in good condition and replace the battery when needed to prevent issues with the sensors from occurring in the first place.
Step 4: Check the Battery
When experiencing issues with your smart vacuum cleaner’s anti-collision sensors, checking the battery is an important troubleshooting step. Here are the steps to follow:
- Step 1: Turn off the vacuum cleaner and unplug it from the power source. This step is essential for safety purposes.
- Step 2: Open the battery compartment and remove the batteries. Check if there is any corrosion or damage to the batteries or the compartment.
- Step 3: Test the voltage of the batteries using a digital multimeter. A fully charged battery should read around 1.5 volts. If the battery has a low voltage, you may need to replace it.
- Step 4: If the batteries are okay, reinstall them properly in the battery compartment. Make sure to follow the correct polarity marked in the compartment.
- Step 5: Close the battery compartment and power on the vacuum cleaner. Check if the anti-collision sensors are working properly.
Checking the battery is crucial as low battery levels may affect the performance of your vacuum cleaner’s sensors. If necessary, replace the batteries with a new set. Make sure to use the same voltage and type of battery recommended by the manufacturer to avoid further issues.
By following these steps, in addition to the previously mentioned steps, you can troubleshoot issues with your smart vacuum cleaner’s anti-collision sensors without any hassle.
Step 5: Contact Customer Support
When it comes to troubleshooting anti-collision sensors on your smart vacuum cleaner, sometimes the issues may be too complex or technical to fix on your own. In these cases, it’s best to seek help from the experts by contacting customer support.
Contacting Customer Support
First, check the user manual that came with your smart vacuum cleaner for customer support information. This will usually include a phone number, email address, or website where you can reach out for assistance. If you can’t find this information, try looking it up online using the brand and model of your vacuum cleaner.
Before contacting customer support, make sure you have the following information readily available:
| Information Needed | Explanation |
| Brand and Model of Vacuum Cleaner | This will help customer support identify your specific device and its features |
| Serial Number | This unique identifier will further assist in identifying your device |
| Description of Issue | Be specific and detailed about the problem you’re experiencing with the anti-collision sensors |
When you reach out to customer support, be sure to describe the specific troubleshooting steps you’ve already taken. This will prevent them from offering redundant advice and help them more quickly diagnose the issue.
Benefits of Contacting Customer Support
While it may be tempting to try to troubleshoot the issue on your own, contacting customer support has several benefits:
- Expert advice tailored to your specific device
- Access to additional resources and troubleshooting tools not available to consumers
- Assistance with warranty claims or repairs
In many cases, customer support may be able to resolve the issue without the need for a professional repair or replacement. However, if the issue is severe or a component within the anti-collision sensor is faulty, they may recommend sending the device in for repair or replacement.
By following these steps, you’ll be able to troubleshoot and resolve any issues with your smart vacuum cleaner’s anti-collision sensors. And if you can’t fix the problem on your own, contacting customer support can help you get your device back to full functionality.
Preventative Maintenance
One way to ensure your smart vacuum cleaner with anti-collision sensors performs at its best is to prioritize preventative maintenance. By taking steps to keep your vacuum in good condition, you can avoid potential issues with the sensors and prolong the life of the machine. Let’s explore some simple but effective methods for maintaining your vacuum cleaner.
Regularly Clean the Sensors
Keeping the anti-collision sensors clean is essential for the proper functioning of your smart vacuum cleaner. Not cleaning the sensors can lead to inaccurate sensor readings, which can cause the device to navigate in the wrong direction or collide with obstacles. To prevent this from happening, it’s crucial to regularly clean the sensors.
Cleaning the sensors is a simple process that can be done quickly and efficiently. To clean the sensors, follow these steps:
| Step | Action |
|---|---|
| 1 | Power off the vacuum cleaner and unplug it from the power source. |
| 2 | Locate the sensors. They are usually located on the front of the device. |
| 3 | Use a soft, damp cloth to wipe the sensors gently. You can also use a soft-bristled brush to remove any dirt or debris from the sensors. |
| 4 | Dry the sensors with a clean and dry cloth. |
It’s important to avoid using harsh chemicals or abrasive materials when cleaning the sensors. These can damage the sensors and lead to permanent damage.
Regular cleaning of the sensors will help ensure that your smart vacuum cleaner operates at its best. Additionally, it’s a good idea to check the sensors for any signs of wear and tear. If you notice any cracks or visible damage to the sensors, it’s best to contact customer support for further assistance.
By following these simple steps and regularly cleaning the sensors, you’ll help maintain the performance of your smart vacuum cleaner and prevent any potential issues from occurring.
Keep the Vacuum Cleaner in Good Condition
To ensure that your smart vacuum cleaner’s anti-collision sensors function properly, it’s crucial to keep your machine in good condition. Here are a few tips to help you maintain your vacuum cleaner:
- Regularly Empty the Dustbin: It’s important to frequently empty the dustbin to prevent it from getting overstuffed, which could cause the vacuum to malfunction. Check the dustbin after every use and dispose of the contents properly.
- Clean the Brushroll: If the brushroll collects hair, debris, or other foreign objects, it can affect the vacuum cleaner’s performance. Make sure to clean the brushroll regularly by removing any tangled hair or debris.
- Replace the Filters: The filters in your smart vacuum cleaner play an important role in trapping dust and other airborne particles. Over time, filters can become clogged, which can compromise the vacuum cleaner’s suction power. It’s recommended to replace filters every 3-6 months or as needed.
- Store the Vacuum Cleaner Properly: When storing your vacuum cleaner, make sure to keep it in a cool, dry place to prevent any damage or deterioration. Avoid placing it near any heat sources or in direct sunlight.
By following these simple steps, you can help prolong the life of your smart vacuum cleaner and ensure that the anti-collision sensors continue to perform at their best. A well-maintained vacuum cleaner will not only improve the functionality of your home cleaning routine but also prevent the need for frequent repairs or replacements.
Replace the Battery When Needed
Replacing the battery of your smart vacuum cleaner is an important part of its maintenance, and it’s often overlooked by most users. If your vacuum cleaner’s battery is old and not holding a charge, then your vacuum cleaner might not function properly. To ensure that your device is always operating at optimal levels, it’s crucial that you replace the battery when needed.
Why is it important to replace the battery?
A battery that isn’t holding a charge can result in your vacuum cleaner not working, which can be frustrating when you need to clean your home. A weak or dying battery can also cause your vacuum cleaner to malfunction or stop working altogether. It is essential to replace the battery when it is no longer performing as it should.
How often should you replace the battery?
The frequency at which you should replace a battery depends on a few factors, such as the frequency of use and the number of charging cycles. Most batteries can last up to 2-3 years, but it is important to keep a check on the battery’s efficacy regularly. If your vacuum cleaner’s battery is showing signs of deterioration or no longer holding a charge, you need to replace it immediately to avoid further complications.
How can you replace the battery?
Replacing the battery of your smart vacuum cleaner is usually an easy task. Most modern vacuum cleaners come with user-replaceable batteries. All you need to do is remove the battery compartment’s cover, remove the old battery, and replace it with a new one. Always ensure that you only buy a suitable replacement battery that is compatible with your device.
Conclusion
Your smart vacuum cleaner’s battery is a critical component that is essential to its operation. Replacing the battery regularly ensures that your device is always functioning correctly and that you can rely on it to clean your house effectively. Make sure you follow the manufacturer’s guidelines for battery replacement and dispose of the old battery in a responsible manner.
Conclusion
In conclusion, troubleshooting anti-collision sensors on your smart vacuum cleaner is a process that may require some patience and attention to detail, but it is not something that cannot be overcome. By following the steps outlined in this article, you can fix most common issues that may arise with these sensors.
It’s important to keep in mind that regular cleaning and maintenance of your vacuum cleaner can help prevent sensor issues from occurring in the first place. This includes cleaning the sensors regularly, keeping the vacuum cleaner in good condition, and replacing the battery as needed.
If you encounter an issue with your anti-collision sensors that you cannot fix on your own, don’t be afraid to contact customer support for further assistance. They may be able to offer additional troubleshooting advice or even replace the vacuum cleaner if necessary.
Remember, anti-collision sensors are an important part of your smart vacuum cleaner’s functionality and can greatly improve its performance. By taking the time to troubleshoot and maintain them, you can ensure that your vacuum cleaner continues to work properly and efficiently, providing you with a cleaner home and more free time to enjoy your day.
Frequently Asked Questions
What are anti-collision sensors?
Anti-collision sensors are sensors that detect obstacles and prevent the vacuum cleaner from colliding into them.
Why aren’t my anti-collision sensors working?
There could be a variety of reasons why your anti-collision sensors aren’t responding, including dirt or obstructions on the sensors, low battery, or a malfunctioning sensor.
Can I clean the sensors myself?
Yes! You can clean the sensors using a soft cloth, rubbing alcohol, or compressed air.
What kind of obstructions can trigger the sensor?
Obstructions can range from the obvious, like furniture, to the less obvious, like stray wires or small objects on the ground.
What should I do if the sensor is triggered even when there is no obstacle?
This could be a sign of a malfunctioning sensor. Try resetting the vacuum or contacting customer support for help.
How do I reset my smart vacuum cleaner?
Refer to the user manual, as the steps may vary depending on the model. In general, it usually involves holding down a combination of buttons on the vacuum or using a reset button on the base.
How long should the battery last?
It depends on the specific model and usage, but most batteries should last between 1-2 hours of continuous use.
Can I replace the battery myself?
Again, it depends on the specific model. Some models have easily replaceable batteries, while others require professional help. Refer to the user manual or customer support for guidance.
How often should I clean the sensors?
It’s recommended to clean the sensors after each use to ensure optimal performance. However, if you use your vacuum cleaner frequently, you may want to clean the sensors more often.
What else can I do to prolong the life of my smart vacuum cleaner?
Regularly maintaining and cleaning the vacuum, replacing parts and batteries when needed, and using the vacuum as directed are all ways to extend the life of your smart vacuum cleaner.
