Program Your Smart Vacuum to Work on Your Schedule
Warning: A non-numeric value encountered in /var/www/html/wp-content/themes/generatepress/inc/structure/post-meta.php on line 165
by Dwight Gibson
Have you ever wished your vacuum cleaner could work according to your schedule? With the advent of smart technology, that wish has become a reality. Smart vacuum cleaners not only clean your home but also allow you to program them to work when it suits you best. No more worrying about forgetting to schedule a cleaning session or having to cancel plans to clean the house. In this article, we will guide you through the process of programming your smart vacuum cleaner to work according to your schedule step-by-step. By the end of this article, you’ll be able to sit back and relax while your smart vacuum cleaner does the job for you. Let’s get started!
Table of Contents
Step 1: Familiarize Yourself with the App
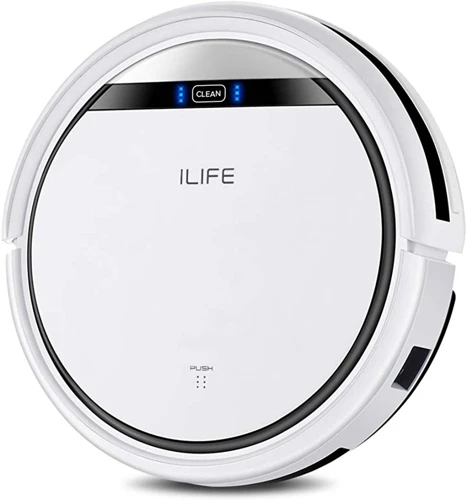
Are you tired of spending hours each week vacuuming your home? With a smart vacuum cleaner, you can easily program your vacuum to clean your floors with just a few clicks on your smartphone. However, before you can start cleaning, you need to familiarize yourself with the app that controls your device. In this section, we’ll explain how to download, connect, and explore the app for your smart vacuum cleaner, so you can start cleaning your floors according to your schedule. For those who want to learn more about the benefits of a smart vacuum cleaner, check out our article on how a smart vacuum cleaner can improve your indoor air quality.
Download the App
As a first step in programming your smart vacuum cleaner, you need to download the app. You can find the app either in the App Store for iOS devices or in the Google Play Store for Android devices. Once you have downloaded the app, you can open it and begin the process of connecting your smart vacuum cleaner to it.
To download the app, simply follow these steps:
Step 1:
Open the App Store or Google Play Store on your device.
Step 2:
Search for the brand of your smart vacuum cleaner in the search bar.
Step 3:
Click “Download” or “Get” to download and install the app onto your device.
It’s important to note that the app may vary for different brands of smart vacuum cleaners, so make sure you download the correct app for your specific model. Once you have downloaded the app, you can start exploring its features and functions.
Now that you have downloaded the app, it’s time to explore its features. The app is the command center for your smart vacuum cleaner and allows you to control various settings and functions. Here are some of the most notable features to explore:
Feature
Function
Cleaning Modes
The app will allow you to choose between different cleaning modes based on your needs. For example, you can select a mode for deep cleaning or a lighter mode for daily cleaning.
Cleaning Time
This feature will let you specify how long you want the vacuum cleaner to clean for. It can be anywhere from 15 minutes to several hours, depending on the cleaning mode you have selected.
Cleaning Area
You can choose the specific areas that you want the vacuum cleaner to clean. This feature is particularly useful if you want the cleaner to focus on high-traffic areas or avoid certain spots in your house.
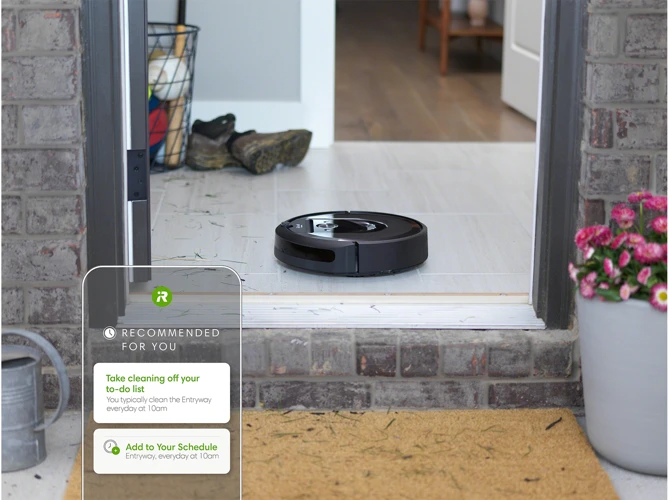
Scheduling
The app will allow you to set a cleaning schedule for the vacuum cleaner. You can specify different schedules for different days of the week or specific dates. This feature is particularly useful if you want the cleaner to run when you’re not home.
By exploring these features, you can customize your smart vacuum cleaner to work according to your specific needs. Additionally, you can improve your indoor air quality by adding HEPA filters to it. If you have pets, you can learn about the benefits of a smart vacuum cleaner for pet owners. Or, if you’re considering switching from a traditional vacuum to a smart vacuum, you can compare the benefits of each. If you’re interested in the technology behind smart vacuums, you can explore how sensors and mapping tech enhance their functionality.
Connect Your Smart Vacuum Cleaner to the App
Connecting your smart vacuum cleaner to the app is a relatively simple process. Before beginning the process, ensure that your smart vacuum cleaner is plugged in and turned on. Here are the detailed steps to connect your smart vacuum cleaner to the app:
Step
Description
Step 1
Download and open the app on your smartphone or tablet. You can use the app provided by the manufacturer of your vacuum cleaner. Alternatively, you can use a universal app like Amazon Alexa or Google Home, depending on your smart vacuum brand.
Step 2
Ensure that your smartphone or tablet is connected to the Wi-Fi network.
Step 3
Enable Bluetooth on your smartphone or tablet.
Step 4
Press and hold the Wi-Fi button on your vacuum cleaner until the light blinks rapidly.
Step 5
Go to your Wi-Fi settings on your smartphone or tablet and select the vacuum cleaner’s network.
Step 6
Enter the password for the vacuum cleaner’s network. You can find this password on the back of the vacuum cleaner or in the user manual.
Step 7
Return to the app and follow the instructions to register your vacuum cleaner. This may involve creating an account or entering your vacuum cleaner’s serial number.
Step 8
Your smart vacuum cleaner is now connected to the app. You can now use the app to control your vacuum cleaner and enjoy its advanced features.
Now that your smart vacuum cleaner is connected to the app, you have access to a range of features that can make cleaning your home more convenient and efficient. You can learn more about these features by clicking on the links below:
So you’ve successfully connected your smart vacuum cleaner to the app and you’re ready to customize your cleaning preferences. But where do you start? Don’t worry, it’s easier than you think. By using the Set Your Cleaning Preferences feature, you have the ability to tailor the cleaning process to your specific needs. Whether you require a quick clean or a deep clean, the app offers a range of options to maximize the efficiency of your smart vacuum cleaner. Let’s take a closer look at how you can make the most out of this feature.
Select Cleaning Mode
When setting up your smart vacuum cleaner to work according to your schedule, the first step is to select the cleaning mode that best fits your needs. The mode you select will determine how the vacuum cleaner navigates your home and the intensity of the cleaning.
Table 1: Cleaning Modes
Cleaning Mode
Description
Auto
This mode allows the vacuum cleaner to navigate your entire home in a random pattern, cleaning as it goes.
Spot
If you have a specific area that needs extra attention, this mode will clean in a tight spiral pattern, focusing on the designated spot.
Edge
If you have debris and dust build up along walls, this mode will follow edges and corners with a set pattern to ensure a thorough cleaning of those tough to reach spaces.
Single Room
For more precise cleaning of specific rooms or areas, this mode allows the vacuum cleaner to target a single room at a time.
Before selecting your cleaning mode, consider the layout of your home and your cleaning preferences. For example, if you have pets that shed heavily, selecting the “Auto” mode may be the best option to cover all areas. However, if you have a room with clutter or cords on the floor, “Single Room” mode may be more efficient to avoid tangling.
Once you have selected the cleaning mode, you can move on to specifying the cleaning time and choosing the cleaning area. Together, these settings will ensure your smart vacuum cleaner cleans your home exactly the way you want it and at the time that suits you best.
Specify Cleaning Time
When programming your smart vacuum cleaner, specifying the cleaning time is an essential step to ensure that your home is clean and tidy when you need it. You can set the time to coincide with your schedule to avoid any disturbance while the cleaning is taking place.
To specify the cleaning time, follow these simple steps:
Step
Action
Description
Step 1:
Select Cleaning Time from the app menu
The Cleaning Time option allows you to set the time for your vacuum cleaning to start.
Step 2:
Select the time
You can select the time that suits your schedule based on the activities you do during the day.
Step 3:
Select the duration
Select the duration you want your vacuum cleaner to clean your home. This will depend on the size of your house or the areas you want it to clean.
Keep in mind that you can always adjust the cleaning time and duration, depending on your specific needs. If you have a busy schedule, you may want to set the cleaning time to coincide with the times when you are away from home. This way, you can return to a clean and fresh-smelling house.
By specifying the cleaning time, you can save time and effort, and ensure that your home is always looking its best. With the use of the app, you can easily make changes to the cleaning schedule whenever necessary.
Choose Cleaning Area
When it comes to programming your smart vacuum cleaner to work according to your schedule, it is crucial to choose the right cleaning area. Here are some steps to follow:
Assess the Location: Begin by assessing the area you want your vacuum to clean. Is there a specific room or area that requires more attention? Do you have any obstacles or furniture that could potentially pose a problem for your vacuum? Knowing your space well is the key to ensuring that your robot vacuum operates efficiently and effectively.
Select the Appropriate Cleaning Setting: Depending on the type and model of your vacuum, you may have the option to choose different cleaning settings. For example, some vacuums come equipped with a spot cleaning setting, which is designed to focus on a specific area for a deeper clean. Other vacuums may offer a more general setting that cleans the entire space. Consider the type of cleaning your space requires and choose the appropriate cleaning mode.
Select Specific Areas to Clean: Some smart vacuums come with the option to customize specific areas, allowing you to select and highlight them on the app or device. This can be especially useful for homes with multiple levels or for apartments with separate rooms, allowing you to choose where your vacuum goes and avoid cleaning areas that aren’t necessary.
Set Up Cleaning Barriers: You may want to set up electronic barriers or tape to ensure that your vacuum stays within the designated cleaning areas. This is especially useful if you have children, pets or delicate objects that you want to protect from the vacuum.
Repeat the Process: Finally, once you have set up your cleaning area and preferences, it’s important to repeat the process each time you use your vacuum to achieve consistent results. This will help your vacuum effectively clean the entire area without accidentally missing specific areas.
By ensuring that you choose the right cleaning area, you can program your smart vacuum cleaner to work according to your schedule and clean your home thoroughly and effectively.
Step 3: Create a Cleaning Schedule
Are you tired of manually starting your smart vacuum cleaner every time you want to clean your floors? Creating a cleaning schedule is the solution to this problem. With a custom cleaning schedule, you can program your smart vacuum cleaner to clean your floors when it’s most convenient for you. In this section, we’ll walk you through the process of creating a custom cleaning schedule using step-by-step instructions. So, grab your smart vacuum cleaner and let’s get started!
Set Specific Time and Date
When setting a cleaning schedule for your smart vacuum cleaner, it’s important to choose a specific time and date for it to run. This ensures that it will clean your floors when it’s most convenient for you. Here are the steps to take when setting the specific time and date:
Open the app: Launch the app on your smartphone or tablet that is connected to your smart vacuum cleaner.
Select the scheduling feature: Look for the scheduling feature within the app, and click on it to bring up the scheduling options.
Choose the specific time: Select the exact time that you want the smart vacuum cleaner to start cleaning your floors. This can be done by manually inputting the time or by selecting a time from a drop-down menu.
Pick the date: Choose the specific date that you want the vacuum cleaner to start cleaning. You can select a one-time cleaning for a specific date or set up a cleaning schedule to run on multiple dates.
It’s important to note that the smart vacuum cleaner will stick to the exact time and date that you set, so be sure to choose a time and date that works for your schedule. Additionally, if there are any changes to your schedule, you can easily modify the settings through the app. With this feature, you can have peace of mind knowing that your floors will always be clean when you need them to be.
Recurrence
One of the most useful features of smart vacuum cleaners is the ability to set a cleaning schedule that suits your needs. And one of the key components of scheduling is recurrence. With recurrence, you can set your vacuum cleaner to clean your floors automatically on a daily, weekly, or monthly basis, depending on your preference. This means that you won’t have to remember to start your vacuum cleaner every time you want your floors cleaned.
Here are some ways to customize the recurrence of your cleaning schedule:
Daily Cleaning: If you have pets or children at home, daily cleaning may be necessary. You can set your smart vacuum cleaner to clean every day at a specific time, so you don’t have to worry about manually starting the cleaning process.
Weekly Cleaning: If your home is relatively clean and you don’t have a lot of foot traffic, you may find that weekly cleaning is sufficient. You can set your vacuum cleaner to clean the floors at the same time every week.
Monthly Cleaning: For those who don’t need to clean their floors as often, monthly cleaning may be enough. You can choose a specific day each month to schedule the cleaning.
You can also customize the recurrence of your cleaning schedule by setting the start date and end date. For example, if you’re going on vacation and won’t be home for a week, you can set your smart vacuum cleaner to start cleaning when you leave and stop when you return.
Remember that recurrence is just one aspect of scheduling your smart vacuum cleaner. Be sure to take advantage of all the features available to you to find the cleaning schedule that works best for your needs.
Customize Each Schedule
When it comes to creating a cleaning schedule for your smart vacuum cleaner, one of the most useful features you can utilize is the ability to customize each schedule according to your unique needs and preferences. Here’s how you can take full advantage of this feature:
1. Set different cleaning modes for each schedule: Depending on your cleaning needs for any given day, you may want your smart vacuum cleaner to operate under different cleaning modes. For example, you may want to use a deeper cleaning mode for days when you have more guests over or when it’s been a while since your last cleaning. On other days, a lighter cleaning mode might suffice. You can specify different modes for each cleaning schedule, ensuring that your vacuum is operating at the level you need it to.
2. Select a specific area for cleaning: If there are areas of your home that require more attention than others, or if there are certain rooms that you want your smart vacuum cleaner to focus on during a particular cleaning schedule, you can easily customize the area that it will clean. This feature allows you to ensure that your vacuum is working where you need it to work and that no areas are missed.
3. Adjust cleaning time and frequency: While you can set a general cleaning time and frequency for your smart vacuum cleaner, customizing each schedule allows you to adjust these details as needed. Whether you need your vacuum to run for longer on certain days or if you only want it to run on specific days of the week, you can customize each schedule according to your needs.
4. Utilize room mapping features: Some smart vacuum cleaners come equipped with advanced room mapping features that allow them to detect and navigate around different areas of your home. By customizing each schedule, you can take full advantage of these features and ensure that your vacuum is cleaning specific rooms or areas that require extra attention.
5. Consider your household’s schedule: One of the most important factors to consider when customizing your smart vacuum cleaner’s schedule is your household’s daily routine. If you know that certain days or times of the week are busier than others or if you have specific areas of your home that tend to get dirtier more quickly, you can adjust your cleaning schedule accordingly.
By customizing each cleaning schedule for your smart vacuum cleaner, you can ensure that it is operating according to your specific needs and preferences, and ultimately achieve a cleaner home with less effort on your part.
Step 4: Maximize Efficiency with Additional Features
As you become more familiar with your smart vacuum cleaner, you may discover a variety of additional features that can help you maximize its efficiency and performance. These features can range from virtual walls and barriers to room mapping and selective cleaning. By utilizing these tools, you can create a customized cleaning experience that fits your unique needs and preferences – all while saving time and effort. Let’s explore some of these exciting features in more detail below.
Virtual Wall and Barrier Tape
One of the best ways to maximize the efficiency of your smart vacuum cleaner is by using its advanced features such as virtual wall and barrier tape. These features allow you to set boundaries for your vacuum cleaner so that it can only clean specific areas.
Virtual walls use infrared technology to create an invisible barrier that your vacuum cleaner cannot cross. This is especially useful for areas where you do not want your vacuum cleaner to accidentally damage objects or knock over fragile items. With virtual walls, you can easily block off areas such as corners, fireplaces, or pet bowls.
On the other hand, barrier tape is a physical strip that you can place on the floor to create a boundary for your smart vacuum cleaner. This feature is particularly useful if you need to create a more permanent barrier that your vacuum cleaner cannot cross, such as a doorway or a specific section of the room.
By utilizing these advanced features, you can customize your vacuuming experience, and achieve a more detailed and precise cleaning. Here’s a comparison of the two features:
Virtual Walls
Barrier Tape
Uses infrared technology to create an invisible barrier
Physical strip that is placed on the floor
Blocks off areas where you do not want your vacuum cleaner to go
Creates a more permanent boundary that your vacuum cleaner cannot cross
Useful for corners, fireplaces, or pet bowls
Great for doorways or specific sections of the room
Keep in mind that not all smart vacuum cleaners come with virtual wall or barrier tape features. So before making your purchase, check the product description or consult with a sales representative to ensure that you are getting the options that you need.
Room Mapping and Selective Room Cleaning
One of the great features of a smart vacuum cleaner is the ability to map the rooms and clean specific areas. This feature is particularly useful if you want to clean just a certain part of your house or if you want to avoid certain rooms.
Room mapping requires the vacuum to first navigate through your house and create a map of your home. This may take some time, but it is worth it in the long run. Once the room mapping is complete, you can see the map through the app and identify the different rooms in your house.
The next step is selective room cleaning. With this feature, you can choose which rooms to clean and which to avoid. Simply tap on the rooms you want to clean, and the vacuum cleaner will only clean those areas. This can save you time and energy as you won’t have to worry about the vacuum going into rooms that don’t need to be cleaned.
To give you an idea of how the room mapping and selective room cleaning feature works, here’s an example scenario: Let’s say you have a guest room that hasn’t been used in a while and you want the vacuum to clean that room. With this feature, you can select the guest room on the app, and the vacuum will navigate to that room and clean it thoroughly.
On the other hand, let’s say you have a home gym with equipment and want to avoid the vacuum bumping into your gear. By selecting this room on the app, the vacuum will stay clear of that space and clean only the surrounding areas.
It’s important to note that the room mapping feature may not be available on all models, so make sure to check the specifications before making a purchase. If you do have this functionality, don’t hesitate to explore and take advantage of it to make cleaning your home as efficient as possible.
Here’s a table summarizing the benefits of room mapping and selective room cleaning:
Benefits
Description
Time-saving
Choose which rooms to clean and avoid unnecessary areas.
Ease of use
Select rooms through the app and let the vacuum do the rest.
Efficient cleaning
Thoroughly clean the rooms you want without worrying about missed spots.
Room mapping and selective room cleaning can greatly improve the efficiency and ease of using a smart vacuum cleaner. Be sure to check your model’s specifications and explore the app for this useful feature.
Auto Recharge and Resume
One of the most convenient features of smart vacuum cleaners is their ability to recharge and resume cleaning automatically. With this feature, you don’t have to worry about your smart vacuum cleaner running out of battery power while cleaning your home. Instead, it will return to its charger on its own when its battery is running low, and then continue cleaning once it’s fully charged.
How does auto recharge and resume work?
When you set up your smart vacuum cleaner, you’ll need to place its charger in a location where the vacuum cleaner can easily find it. Once the vacuum cleaner is running low on battery power, it will automatically return to its charger and connect to it. It will then charge back up to full power.
Once the vacuum cleaner is fully charged, it will resume cleaning exactly where it left off. This feature ensures that every inch of your home is cleaned thoroughly and efficiently.
What are the benefits of auto recharge and resume?
The benefits of this feature are numerous. For one, you don’t have to worry about your smart vacuum cleaner running out of battery power halfway through cleaning a room. It also saves you time, as you don’t have to manually recharge your vacuum cleaner or pick up where it left off in the cleaning process.
How to troubleshoot auto recharge and resume issues?
If your smart vacuum cleaner isn’t automatically recharging and resuming cleaning as it should, there are a few troubleshooting tips you can try:
Issue
Possible Solution
The vacuum cleaner isn’t returning to its charger.
Make sure the charger is plugged in and turned on, and that there are no obstacles blocking the vacuum cleaner’s path to the charger.
The vacuum cleaner isn’t connecting to the charger.
Make sure the vacuum cleaner is correctly aligned with the charging contacts on the charger, and that the contacts are clean.
The vacuum cleaner isn’t resuming cleaning after charging.
Make sure the cleaning schedule or settings haven’t been changed, and that the vacuum cleaner is still in the correct cleaning mode.
By following these troubleshooting tips, you should be able to get your smart vacuum cleaner’s auto recharge and resume feature working properly again.
Conclusion
Auto recharge and resume is a highly useful feature that can make keeping your home clean much easier. With this feature, you can trust that your smart vacuum cleaner will clean your entire home without interruption, saving you time and hassle.
Troubleshooting Tips
As much as we love our smart vacuum cleaners, they are still subject to hiccups every now and then. Here are some troubleshooting tips to help you get your vacuum cleaner back on track and working according to your schedule.
Connection Issues: If you are having trouble connecting your vacuum cleaner to the app, make sure you have followed the instructions carefully. Check that your Wi-Fi network is working properly and that you have entered the correct login information. If these steps do not work, try resetting both the vacuum cleaner and the app and try again.
Navigation Problems: If your vacuum cleaner is having difficulty navigating your home or avoiding obstacles, check that the sensors are not obstructed or dirty. Clean the sensors and the brushes regularly to prevent buildup of debris. You may also need to adjust the virtual wall or barrier tape to create a clear path for the vacuum cleaner.
Performance Issues: If you feel like your smart vacuum cleaner is not cleaning as well as it should, check that the brushes and filters are clean and in good condition. You may need to replace these parts regularly to maintain optimal performance. Additionally, check that you have selected the correct cleaning mode for the area you want to clean.
Error Messages: Sometimes, error messages may appear on the app or on the vacuum cleaner itself. Check the user manual for help interpreting these messages and follow the recommended steps to resolve the issue.
Recurring Issues: If you are experiencing the same issues repeatedly, it may be a sign of a more significant problem. Contact the manufacturer or customer support for assistance in resolving the issue and getting your smart vacuum cleaner to work according to your schedule.
By following these troubleshooting tips, you can ensure that your smart vacuum cleaner is working at peak performance and is programmed to work according to your schedule. Don’t let minor issues get in the way of a clean home.
Conclusion
In conclusion, programming your smart vacuum cleaner to work according to your schedule is a simple process that can save you time and effort in cleaning your home. By using the accompanying app and following the aforementioned steps, you can set your preferences and create a cleaning schedule that fits your lifestyle. The added features such as virtual walls, room mapping, and auto recharge, make it even more efficient.
It’s important to note that, like any technology, there may be occasional troubleshooting issues. However, by referring to the user manual or contacting customer service, you can quickly resolve any problems.
Overall, a smart vacuum cleaner is a worthwhile investment for any individual or family looking to simplify their cleaning routine. It allows you to prioritize other tasks in your day-to-day life without sacrificing the cleanliness of your home. So get started today and experience the convenience and efficiency of a smart vacuum cleaner for yourself!
Frequently Asked Questions
What kind of smart vacuum cleaners can you program?
You can program various brands and models of smart vacuum cleaners, as long as they have an accompanying mobile app that allows for scheduling and remote control.
Do I need a Wi-Fi connection to program my smart vacuum cleaner?
Yes, you need a stable Wi-Fi connection to connect your smart vacuum cleaner to the mobile app and to schedule cleaning sessions remotely.
How often should I schedule a cleaning session?
It depends on your household’s level of foot traffic, pet shedding, and other factors that contribute to the accumulation of dust and debris. Generally, once a day or every other day is sufficient for most households.
Can I schedule different cleaning modes for different days?
Yes, most smart vacuum cleaners allow you to customize cleaning modes and apply them to specific schedules. For example, you can set the vacuum to do a deep cleaning on weekends and a spot cleaning on weekdays.
Can I exclude certain areas from the cleaning schedule?
Yes, you can use the virtual wall or barrier tape feature to block off areas that you don’t want the vacuum to clean. Alternatively, some models allow you to manually steer the vacuum away from certain areas using the mobile app.
What happens if the vacuum gets stuck during a cleaning session?
Most smart vacuum cleaners have an obstacle detection sensor that prevents them from getting stuck or falling off ledges. However, if the vacuum does encounter an obstacle, it will usually emit a warning sound and try to navigate around it.
Do I need to clean or replace the vacuum’s filters and brushes?
Yes, regular maintenance of the vacuum’s filters and brushes is necessary for optimal performance and longevity. Refer to the manufacturer’s instructions for specific cleaning and replacement guidelines.
Can I track the cleaning progress and status of my smart vacuum cleaner?
Yes, most mobile apps allow you to monitor the vacuum’s cleaning progress in real-time and receive notifications when it’s done or when there’s an issue.
Do I need to empty the vacuum’s dustbin after every cleaning session?
It depends on the size of the dustbin and the amount of debris in your household. As a general rule of thumb, it’s recommended to empty the dustbin after every cleaning session to prevent clogging and ensure optimal suction power.
What should I do if the mobile app doesn’t connect to the vacuum?
First, check if your Wi-Fi connection is stable and if the vacuum is properly connected to it. If the problem persists, try resetting the vacuum to factory settings and reinstall the mobile app. If you still can’t connect, contact customer support for assistance.