Cleaning our homes is an essential chore that we cannot escape. With the emergence of smart home technology, we now have the luxury of automated cleaning through smart vacuum cleaners. Smart vacuum cleaners are a great way to save time and energy while still ensuring that your home is sparkling clean. One feature of smart vacuum cleaners that has been gaining popularity is the multi-surface brushroll. But what exactly is a multi-surface brushroll, and how can we maximize its cleaning efficiency? In this article, we’ll dive deep into the world of smart vacuum cleaning and explore the tips and tricks to get the most out of your multi-surface brushroll.
What is a multi-surface brushroll?
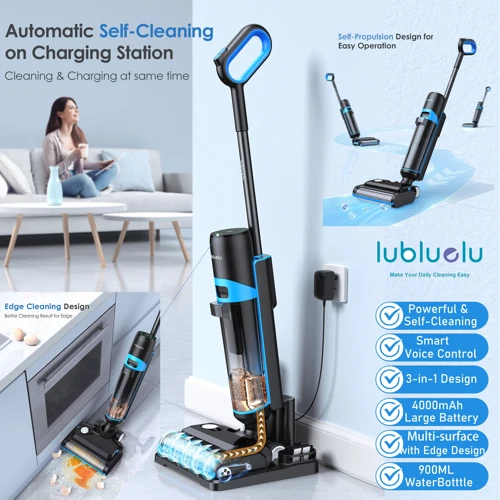
When it comes to cleaning your home with a smart vacuum cleaner, having the right tools is essential. One component that can make a significant impact on the efficiency of your robot vacuum is a multi-surface brushroll. This sophisticated feature is designed with specialized bristles that enable it to lift dirt and debris from a range of surfaces, including carpets, hardwood floors, and even tiles. To discover more about how a multi-surface brushroll can help keep your floors spotless, keep reading. Or you can check out our top picks for the best multi-surface brushroll smart vacuums.
Understanding the Function of a Multi-Surface Brushroll
A multi-surface brushroll is an essential component of a smart vacuum cleaner, particularly for households with different floor surfaces. It’s a motorized brush that sweeps and agitates carpets and rugs to dislodge dirt and dust for efficient suction. It also boasts a unique design that enables use on a variety of surfaces from carpets to hard floors.
The brushroll usually has bristles and rotating beater bars that penetrate deep into the carpet fibers and loosen dirt, dust, and hair that might be hard to lift otherwise. Some models have adjustable height settings to match the carpet’s pile depth, ensuring maximum cleaning with minimal effort.
The brush’s design is such that it adjusts itself to different surfaces to sweep the dirt and debris away. These brushes work differently on hard floors, often disengaging from the surface to avoid damage and allowing powerful suction to do the cleaning.
One of the most significant advantages of a multi-surface brushroll is that it’s versatile, and a single brushroll can clean different surfaces effectively. The length of the bristles often varies to help the brushroll work on distinct surfaces to perfection, from fluffy carpets to plain floors.
It is not surprising that the smart vacuum cleaner’s multi-surface brushroll has become a game-changer in the world of automated vacuums. It is more efficient compared to the previous models that could only clean one kind of floor surface.
All in all, a multi-surface brushroll is an essential feature that every smart vacuum cleaner should possess. It’s an effective and reliable way to keep your floors cleaner by providing the right combination of features that can handle common household messes with ease.
Benefits of a Multi-Surface Brushroll
A multi-surface brushroll is an indispensable component of any smart vacuum cleaner designed for versatile cleaning. Here are some of the benefits of using a multi-surface brushroll:
- Versatility: A multi-surface brushroll is capable of cleaning a variety of surfaces, from carpets and rugs to hard floors such as tile, hardwood, linoleum, and more. This means that you don’t have to buy separate brushes for different flooring types, saving you money and effort.
- Efficiency: With a multi-surface brushroll, you can clean multiple surfaces in a single pass without the need for manual adjustments. This ensures that all types of debris and dirt, including pet hair, dust, and other allergens, are effectively removed, leaving your floors sparkling clean.
- Time-Saving: Smart vacuums with multi-surface brushrolls are designed to work autonomously, which means you can free up your time while the robot does the cleaning for you. The multi-surface brushroll ensures that the cleaning process is done quickly and effectively.
- Increased Lifespan: A multi-surface brushroll is built to last, with durable materials capable of withstanding the pressure of repeated cycles of cleaning. As a result, you don’t have to worry about replacing or repairing the brushroll frequently.
Investing in a smart vacuum cleaner with a multi-surface brushroll is a wise choice for any household. Its benefits are undeniable and make cleaning a breeze. Whether you’re seeking efficient cleaning or want to get the most out of your smart vacuum, the benefits of a multi-surface brushroll are worth considering.
Tips to Maximize Your Smart Vacuum Cleaner’s Multi-Surface Brushroll
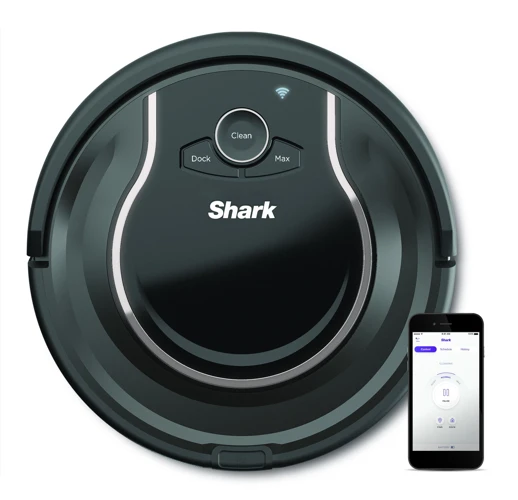
The multi-surface brushroll is a powerful tool in your smart vacuum cleaner’s cleaning arsenal. It’s designed to pick up dirt, debris, and pet hair from different surfaces in your home, from hardwood floors to carpets. However, to ensure your multi-surface brushroll is working at its best, proper care and maintenance are essential. In this section, we’ll dive into some helpful tips to help you maximize the cleaning efficiency of your smart vacuum cleaner’s multi-surface brushroll. From optimizing the setting to clearing out tangled hair and debris, let’s explore how to get the most out of your smart vacuum cleaner’s multi-surface brushroll.
1. Optimize the Setting for Carpet or Hard Floors
When optimizing the setting for carpet or hard floors, it’s important to use the correct type of brushroll. Not all brushrolls are created equally, and using the wrong one can lead to lower cleaning efficiency and even damage to the floor or the brushroll itself.
To optimize the setting for carpet or hard floors, first, check the manufacturer’s instructions. These instructions will often provide guidance on which type of brushroll to use for different surfaces. If you’re unsure, look for a brushroll that specifically states it’s designed for both carpet and hard floors.
Next, make sure the brushroll is securely attached and properly installed. A loose or improperly installed brushroll can lead to poor cleaning performance. Consult the manufacturer’s instructions if you’re unsure how to install it correctly.
Once the brushroll is installed, adjust the height setting on your smart vacuum cleaner if possible. Different types of floors may require different heights to optimize cleaning efficiency. A too-low or too-high brushroll can cause damage to the floor or the brushroll itself.
Lastly, test the smart vacuum cleaner on a small area before cleaning the entire room. This will allow you to check whether the brushroll is properly set up and adjusted, and make any necessary changes before starting the full cleaning cycle.
Remember, using the right brushroll and optimizing the setting for carpet or hard floors is essential to maximize cleaning efficiency and avoid damage. If you’re having trouble finding the right brushroll, consider checking out our multi-surface brushroll smart vacuum cleaners.
2. Keep the Brushroll Clean
To maximize the cleaning efficiency of your smart vacuum cleaner with multi-surface brushroll, it’s crucial to keep the brushroll clean. Dirt, tangled hair, and debris can accumulate on the brushroll over time, leading to poor performance and potential damage to the brushroll. Here are some tips for cleaning the brushroll of your smart vacuum cleaner:
| Tip | Description |
|---|---|
| 1. Turn off the vacuum cleaner | Before cleaning the brushroll, make sure that the vacuum cleaner is turned off and unplugged. |
| 2. Remove the brushroll | Remove the brushroll from the smart vacuum cleaner according to the manufacturer’s instructions. Some brushrolls can be easily removed by flipping a latch or pressing a button. Others may require a screwdriver or other tools to remove. |
| 3. Use a brush or comb | Use a soft-bristled brush or comb to gently remove any dirt, hair, or debris from the brushroll. Be careful not to tangle or damage the bristles. |
| 4. Wash the brushroll | If the brushroll is particularly dirty, it may be washed with water and mild soap. However, make sure to thoroughly dry the brushroll before reattaching it to the smart vacuum cleaner. |
| 5. Check the bearings and belts | While the brushroll is removed, it’s a good idea to check the bearings and belts for signs of wear or damage. If any parts appear to be damaged or worn, they should be replaced before using the smart vacuum cleaner again. |
| 6. Reattach the brushroll | After cleaning and checking the brushroll, reattach it to the smart vacuum cleaner according to the manufacturer’s instructions. |
By keeping the brushroll of your smart vacuum cleaner clean, you can ensure that it operates at peak efficiency and maintains a longer lifespan. In addition to cleaning the brushroll, it’s essential to follow the other tips and best practices discussed in this article to maximize the performance of your smart vacuum cleaner with multi-surface brushroll. To learn more about smart vacuums and multi-surface brushrolls, check out our other articles on multi-surface brushroll smart vacuums and smart vacuum multi-brushroll cleaning.
3. Replace the Brushroll When Needed
Your smart vacuum cleaner’s multi-surface brushroll is a vital component of the machine’s cleaning capabilities. When the brushroll becomes worn, it can negatively affect the efficiency of the vacuum cleaner’s cleaning abilities on different surfaces. It’s essential to replace the brushroll at the right time to ensure the vacuum cleaner continues to clean effectively.
How Often Should You Replace the Brushroll?
The lifespan of a brushroll can vary depending on how frequently you use your vacuum cleaner, the surface being cleaned, and the quality of the brushroll. Most manufacturers suggest replacing the brushroll at least once a year to maintain optimal cleaning performance. However, if you use your vacuum cleaner frequently or have pets with long hair, you may need to replace the brushroll more often.
To know when it’s time to replace the brushroll, here are some signs to look out for:
| Signs It’s Time to Replace the Brushroll: |
|---|
| Worn or frayed bristles |
| Bent or broken brushroll |
| Reduced cleaning performance on surfaces |
| Noisy or squeaky brushroll during operation |
If you notice any of these signs, it’s essential to replace the brushroll to ensure the vacuum cleaner maximizes its cleaning efficiency and prolongs its lifespan.
Choosing the Right Brushroll Replacement
When replacing the brushroll, it’s crucial to choose the right replacement for your smart vacuum cleaner model. Different models come with varying brushroll types and sizes, so make sure to check with the manufacturer before purchasing a replacement. Most smart vacuum cleaner manufacturers sell replacement brushrolls designed for their specific models, making it easy to select the right one.
Replacing the brushroll when needed is crucial in maximizing your smart vacuum cleaner’s cleaning efficiency. Make sure to monitor the brushroll’s condition regularly and replace it when necessary. Additionally, choose the right replacement that matches your smart vacuum cleaner’s model to achieve optimal cleaning performance on different surfaces.
4. Clear the Brushroll of Tangled Hair and Debris
One of the primary reasons why smart vacuum cleaners with multi-surface brushrolls fail to clean effectively is tangled hair and debris on the brushrolls. It’s essential to clear the brushroll of any tangles and debris to ensure maximum cleaning efficiency.
How to Clear the Brushroll of Tangled Hair and Debris
It’s a simple process, yet many people neglect it, leading to reduced performance of their vacuum cleaners.
| Step | Description |
|---|---|
| Step 1 | Turn off the vacuum cleaner and unplug it from the socket. |
| Step 2 | Remove the multi-surface brushroll from the vacuum cleaner. |
| Step 3 | Using a pair of scissors or a knife, cut through any hair or thread tangled around the brush roll. Be careful not to damage the bristles. |
| Step 4 | Clean the brushroll with a soft-bristled brush or a damp cloth. This helps to remove any remaining debris or dust that may have adhered to the bristles. |
| Step 5 | Reinsert the brushroll back into the vacuum cleaner and ensure it is correctly aligned with the belt and suction port. |
| Step 6 | Plug the vacuum cleaner back into the socket and turn it on. |
Why Clearing the Brushroll Matters
When the brushroll is covered with hair and debris, it can reduce the suction power of the vacuum cleaner, causing it to work less efficiently. The tangles can clog the brushroll and eventually lead to damage to the bristles, resulting in expensive repairs. By regularly cleaning and clearing the brushroll, you’ll ensure that your smart vacuum cleaner performs at its best capacity, and you’ll also extend its lifespan.
Make it a habit to inspect and clear the brushroll after each use of the vacuum cleaner. In doing so, you’ll maximize its cleaning efficiency, save time, and eliminate the need for costly repair bills.
5. Use the Right Attachments for Different Surfaces
Using the right attachments for different surfaces can help to maximize the cleaning efficiency of your smart vacuum cleaner’s multi-surface brushroll. Different surfaces require different types of brushroll for optimal results.
Here are some tips when it comes to using the right attachments for different surfaces:
- For carpets: Use a brushroll with stiff bristles or beater bars. This will help to agitate the fibers of the carpet and remove dirt and debris that is embedded deep within the fibers.
- For hardwood floors: Use a brushroll with soft bristles or a suction-only attachment. Hardwood floors are prone to scratches, so you want to avoid using anything that has stiff bristles or rotating brushes that can damage the surface.
- For tiled floors: Use a brushroll with soft bristles to avoid scratching the surface. It’s best to use a brushroll that doesn’t have too much agitation, so as not to scatter the dirt and debris around.
- For pet hair: Use a brushroll with rubber or silicone bristles. These types of bristles are great at picking up pet hair without tangling or clogging the brushroll.
- For stubborn dirt and debris: Use a brushroll with stronger agitation, such as a turbo brushroll or motorized tool. These attachments are great at tackling tough messes that regular brushrolls may not be able to handle.
Keep in mind that not all smart vacuum cleaners come with multiple attachments. If you don’t have the right attachments, you can still optimize your multi-surface brushroll by adjusting the suction power based on the surface you’re cleaning. For example, you can turn up the suction power for carpets and turn it down for hardwood floors.
By using the right attachments and adjusting the suction power, you can get the most out of your smart vacuum cleaner’s multi-surface brushroll and ensure that your floors are thoroughly cleaned.
6. Schedule Regular Cleanings
Keeping your smart vacuum cleaner’s multi-surface brushroll clean is crucial to maximize its efficiency. Schedule regular cleanings to ensure your vacuum maintains its high-quality cleaning performance.
But how often should you clean the brushroll?
The frequency of cleaning depends on the amount of use and the type of debris the vacuum is picking up. For instance, if you have pets that shed a lot, you might need to clean the brushroll frequently.
Here are some tips on how to schedule regular cleanings for your smart vacuum cleaner:
| Frequency | What to Do |
| Every time you use the vacuum | Inspect the brushroll for tangled hair and debris. Remove any debris or hair that has accumulated on the brushroll. |
| Every week | Clean the brushroll thoroughly, including the bearings and end caps. Use a pair of scissors or a comb to cut or remove any entangled hairs or debris that could harm your vacuum cleaner. |
| Every month | Take the brushroll out of the vacuum cleaner and clean it more thoroughly. Wash it with soap, water, and a soft bristle brush. Rinse with water and let it dry completely before re-attaching it. |
By following these simple cleaning steps, you can improve the longevity of your smart vacuum cleaner’s multi-surface brushroll, prevent damage, promote energy efficiency, and enhance cleaning performance. Plus, you’ll enjoy a cleaner and healthier home with minimal effort.
7. Allow the Robot Vacuum to Work Uninterrupted
When you set your smart vacuum cleaner to work, one of the best things you can do is to allow it to do its job uninterrupted. This means keeping any curious pets or small children away from the device while it works. It also means ensuring that the vacuum’s sensors are not impeded by any objects on the floor.
Why is it important to allow the robot vacuum to work uninterrupted?
Firstly, a robot vacuum cleaner works based on sensors and algorithms that enable it to navigate through your home while cleaning. When you interrupt the device, you risk disrupting its navigation, making it less effective in cleaning your floors. Additionally, having to stop and start the vacuum frequently can cause it to drain its battery faster, requiring more frequent charging and leading to less efficient cleaning overall.
How can you allow the robot vacuum cleaner to work uninterrupted?
Here are some tips to keep your robot vacuum running smoothly, without interruption:
- Ensure that the floors are free of clutter and obstacles, such as cords or toys, that could impede the device’s sensors.
- Warn family members or housemates to stay out of the room where the vacuum is operating.
- Program the device to work during times when you know the area will be empty, such as when everyone is at work or school.
- Make sure that doors to the rooms the robot vacuum is cleaning are open to allow the device to navigate through effortlessly.
By taking these simple steps, you can help ensure that your robot vacuum cleaner operates effectively and efficiently while maximizing the cleaning efficiency of your floors.
8. Use the Smart Vacuum Cleaner’s Mapping and Navigation Features
When it comes to maximizing the cleaning efficiency of your smart vacuum cleaner with a multi-surface brushroll, one important feature that you should not overlook is the device’s mapping and navigation capabilities. These features allow the robot vacuum to clean your home more efficiently, accurately and with less effort on your part. Here are some tips on how to use these functions effectively.
Map Out Your Home
The first step in using the mapping and navigation features of your smart vacuum cleaner is to map out your home. This will help the device understand the layout of your living space, identify any obstacles or hazards and plan the most efficient cleaning path. Some models have built-in mapping features, while others require you to manually map your home using a mobile app or remote control.
To map out your home properly, you should move any furniture or items that may obstruct the device’s movement. You may also want to block off certain areas that you do not want the vacuum to clean, such as a home office or a child’s playroom. Once the device has completed its scan, verify the map in the mobile app, and make any necessary adjustments.
Define Cleaning Zones
Most smart vacuums have the ability to create cleaning zones, which allow you to specify certain areas of your home that require extra attention. For example, you can create a cleaning zone around your pet’s food and water bowls to ensure that any dropped kibble or water spills are cleaned up promptly. Likewise, you can create a cleaning zone around high-traffic areas, like entryways or hallways.
Set a Cleaning Schedule
Another way to take advantage of your smart vacuum cleaner’s mapping and navigation features is to set a cleaning schedule. You can program the device to clean your home on specific days and times, or you can activate the cleaning function remotely using your smartphone or a voice assistant.
By setting a cleaning schedule, you can ensure that your home stays clean and tidy with minimal effort on your part. You can also avoid having to manually start the device every time you want it to clean.
Final Thoughts
Maximizing the cleaning efficiency of your smart vacuum cleaner with a multi-surface brushroll requires you to leverage its mapping and navigation features to your advantage. By mapping out your home, defining cleaning zones, setting a cleaning schedule, and allowing the device to work uninterrupted, you can ensure that your home is always clean and healthy for you and your family. So, don’t hesitate to take advantage of these features and enjoy a cleaner, more efficient home cleaning experience.
| Pros | Cons |
|---|---|
| Enhances the cleaning efficiency of your smart vacuum cleaner | Requires some initial setup |
| Reduces the amount of time and effort required to maintain a clean home | May not be available on all smart vacuum models |
| Allows you to customize cleaning zones and schedules | Maintenance and upkeep of smart vacuum cleaner required |
| Improves the navigation and accuracy of the device | Can be expensive compared to traditional vacuum cleaners |
Additional Tips and Best Practices
As you aim to achieve optimal cleaning efficiency with your smart vacuum cleaner’s multi-surface brushroll, there are additional tips and best practices that can help. By implementing these techniques, you can make the most out of your investment and reduce the need for manual cleanups. These methods require some planning and diligence but are well worth the effort in the long run. Let’s explore some of the best practices you can adopt to maximize your smart vacuum cleaner’s cleaning efficiency!
1. Adjust the Power Modes According to the Task
One of the best ways to maximize the efficiency of your smart vacuum cleaner’s multi-surface brushroll is to adjust the power modes according to the task at hand. Most smart vacuums have different power modes, ranging from eco to max power.
Here are some tips to optimize your vacuum’s power modes:
- Use Eco Mode for Light Cleaning Tasks: If your home is relatively clean and you just want to do a quick sweep, then eco mode will work just fine. This saves you some energy and extends battery life.
- Use Regular Mode for Daily Cleaning: For general cleaning on hardwood floors, carpets, or rugs, choose the regular power mode. This setting provides a good balance between power and battery life.
- Use Boost Mode for Tough Stains and Heavy Debris: If you’re dealing with tough stains or debris, such as pet hair or crumbs, then you might want to switch to the boost mode. This setting offers maximum suction power but at the expense of battery life.
Keep in mind that running your vacuum at max power for too long might shorten its lifespan. So, it’s best to use that mode sparingly and only when necessary.
Here are some additional tips:
- Use Quiet Mode During Sleeping Hours: Some models have a quiet mode that reduces noise levels while cleaning. This is ideal if you use your vacuum at night or early in the morning when others are sleeping.
- Refer to the User Manual: Always read the user manual to learn about your vacuum’s power modes and their limitations. This will help you use your machine effectively and extend its lifespan.
By adjusting the power modes according to the task, you can maximize the efficiency of your multi-surface brushroll and extend the lifespan of your smart vacuum cleaner.
2. Map Out Obstacles and Blocked Areas
Maximizing the efficiency of your smart vacuum cleaner’s multi-surface brushroll requires more than just proper maintenance and cleaning. In order to truly optimize its performance, you need to take into consideration the layout of your home and the potential obstacles that may impede its cleaning path. To help you with this, we recommend mapping out any obstacles and blocked areas. Here are some tips for doing so:
- Familiarize Yourself with the Layout: Before you can start mapping out obstacles, you need to become familiar with the layout of your home. Take note of any furniture, walls, stairs, or other obstructions that may impact the cleaning path of your smart vacuum cleaner.
- Mark Obstacles: Once you’ve familiarized yourself with your home’s layout, it’s time to start marking any obstacles that your smart vacuum cleaner may encounter. Use tape, stickers, or any other type of marker to identify areas where the robot vacuum may get stuck or encounter difficulty in maneuvering around.
- Block Off Areas: In addition to marking obstacles, you may also want to block off areas that you don’t want your robot vacuum to go near. For example, if you have small children, you may want to block off areas where there are toys or other potential choking hazards. You can use baby gates or other types of barriers to block off these areas.
- Adjust the Cleaning Schedule: Once you’ve mapped out any obstacles or blocked areas, you can adjust your smart vacuum cleaner’s cleaning schedule accordingly. By doing so, you can ensure that your robot vacuum is able to clean your home more efficiently and effectively, without getting stuck or encountering any other issues.
Keep in mind that mapping out obstacles and blocked areas is an ongoing process. As your home’s layout changes or new obstacles arise, you may need to remap certain areas or adjust your smart vacuum cleaner’s cleaning schedule accordingly. By taking the time to do so, however, you can ensure that your multi-surface brushroll is always working at its best, and that your home remains clean and tidy with minimal effort on your part.
3. Keep a Close Eye on the Cleaning Progress
It’s important to keep a close eye on your smart vacuum cleaner’s cleaning progress to ensure that it’s effectively completing the job. Here are some tips on how to do so:
- Regularly check the dustbin: The dustbin collects all the debris that the vacuum picks up. Make sure to check it frequently to see how much dirt has been collected. Emptying the dustbin will also allow the vacuum to continue working efficiently.
- Monitor the battery life: The battery life of your vacuum indicates how much longer it can continue cleaning before it needs to be charged. If you notice that the battery is running low, it’s a good idea to recharge it before continuing cleaning.
- Observe the cleaning pattern: Smart vacuums have a cleaning pattern that they follow to ensure efficient cleaning. Watch to see if the vacuum is covering all necessary areas and if it’s cleaning thoroughly. If you notice any areas that the vacuum isn’t cleaning or is missing, you may need to adjust its settings or move any obstructions.
- Check for any error messages: Smart vacuums typically have an LED display that will provide error messages if the vacuum is experiencing any issues. Be sure to check for any messages and address them promptly to ensure that the vacuum is running at peak performance.
By keeping a close eye on your smart vacuum cleaner’s cleaning progress, you can make sure that it’s functioning properly and efficiently. This will help to prolong the lifespan of the vacuum and keep your floors looking clean and tidy.
Conclusion
In conclusion, maximizing the cleaning efficiency of your smart vacuum cleaner with a multi-surface brushroll is not difficult, but it requires some effort and attention to detail. By understanding the function and benefits of a multi-surface brushroll and following the tips outlined in this article, you can ensure that your smart vacuum cleaner is performing at its best and keeping your home clean and tidy.
Remember to optimize your settings for different floor types, keep the brushroll clean and replace it when needed, clear any tangles or debris from the brushroll, use the correct attachments for various surfaces, schedule regular cleanings, let the robot vacuum work uninterrupted, and take advantage of the mapping and navigation features of your smart vacuum cleaner.
Additionally, adjust the power modes according to the task at hand, map out obstacles and blocked areas, and keep a close eye on the cleaning progress to make sure your smart vacuum cleaner is doing its job effectively.
All of these tips and best practices will help you get the most out of your smart vacuum cleaner with a multi-surface brushroll, and keep your floors looking clean and well-maintained. So, take the time to implement these strategies and see the difference they can make in your cleaning routine.
Frequently Asked Questions
What is the difference between a single-surface brushroll and a multi-surface brushroll?
A single-surface brushroll is designed to work on only one type of flooring, while a multi-surface brushroll is able to work on multiple types of flooring.
What happens if I use the wrong setting on my multi-surface brushroll?
If you use the wrong setting on your multi-surface brushroll, it may not clean as effectively or could cause damage to the brushroll or flooring.
How often should I replace my multi-surface brushroll?
You should replace your multi-surface brushroll when the bristles are worn or frayed, or if it’s not cleaning as effectively as it used to.
Can I use my multi-surface brushroll on all types of flooring?
Yes, you can use a multi-surface brushroll on carpets, rugs, hardwood floors, and other types of flooring, but you may need to adjust the settings accordingly.
What is the best way to clean my multi-surface brushroll?
The best way to clean your multi-surface brushroll is to remove it from your vacuum cleaner and use a brush or tool to remove any tangled hair or debris, and then rinse with water and let it dry completely.
How do I know if my multi-surface brushroll needs cleaning?
If you notice that your smart vacuum cleaner is not cleaning as effectively as it used to, or if you hear a rattling noise, it’s likely that your multi-surface brushroll needs cleaning.
Can I use aftermarket multi-surface brushrolls on my smart vacuum cleaner?
It’s not recommended to use aftermarket brushrolls on your smart vacuum cleaner as it may void the warranty, and they may not be compatible with your vacuum cleaner’s settings and features.
How do I adjust the power modes on my smart vacuum cleaner?
You can adjust the power modes on your smart vacuum cleaner by using the settings menu in the mobile app, or by using the controls on the vacuum cleaner itself.
What should I do if my smart vacuum cleaner gets stuck on an obstacle?
If your smart vacuum cleaner gets stuck on an obstacle, you should turn it off and manually move it away from the obstacle, and then adjust the mapping settings to avoid the obstacle in the future.
Is it safe to leave my smart vacuum cleaner unattended for long periods of time?
Yes, it is safe to leave your smart vacuum cleaner unattended for long periods of time, but you should regularly check on its cleaning progress and ensure that it’s functioning properly.
