Have you ever experienced frustration with your smart vacuum’s multi-room cleaning feature? You’ve set up the map and scheduled a cleaning, only to find out that not all the rooms were properly cleaned or the robot got stuck in between them. Don’t worry, you’re not alone in this perplexing situation. Multi-room cleaning can be a challenge, but with the right troubleshooting and efficient cleaning strategies, you can make the most out of your smart vacuum’s capabilities. In this article, we’ll explore common problems and solutions for multi-room cleaning, as well as tips to improve the efficiency of the process. So, let’s dive in and make your home cleaner with less hassle!
Common Problems and Solutions
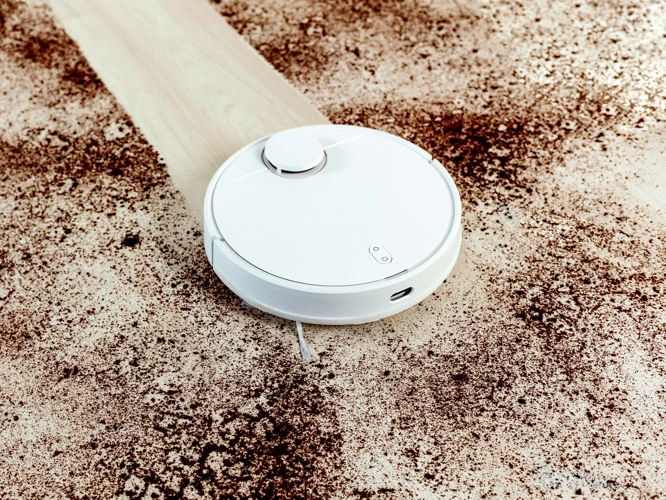
Are you experiencing issues with multi-room cleaning using your smart vacuum? Worry not, as there are common problems that can occur and solutions that can help you get back on track. Whether you’re struggling with incomplete cleaning, difficulty navigating between rooms, or low battery life, there are steps you can take to troubleshoot these problems and ensure your smart vacuum is working efficiently. In this section, we’ll explore some of these common problems and offer solutions to help you achieve a cleaner home with less effort. For more information on multi-room mapping and the advantages of multi-room cleaning with smart vacuums, check out our related articles.
1. Incomplete Cleaning of Rooms
When your smart vacuum doesn’t clean rooms completely, it can be frustrating. Here are some common problems and solutions that can help you troubleshoot this issue.
1. Check if the vacuum’s filter and brushes are clean and in working order. If these components are clogged or damaged, the vacuum may not suction dirt and debris properly. Clean or replace them as needed to ensure optimal performance.
2. Ensure that you’ve set up the cleaning map correctly and that the robot has access to all rooms. If the smart vacuum doesn’t have access to certain rooms, it won’t be able to clean them. Double-check the map to make sure it includes all areas that you want to be cleaned. Also, make sure that there are no physical barriers preventing the robot from accessing certain rooms.
3. Adjust the suction power on the vacuum. If the vacuum’s suction power is too low, it may not be able to pick up all the dirt and debris in the room. On the other hand, if the suction power is too high, it may cause the vacuum to get stuck under furniture. Adjust the suction power to find the optimal setting for your home.
4. Calibrate the robot’s sensors and map. If the vacuum is not accurately sensing the room, it may leave parts of the room unclean. Calibrate the sensors and map to improve the robot’s navigation.
5. Clear any obstacles from the floor. If there are cords or other obstacles on the floor, the smart vacuum may avoid those areas and not properly clean your room. Before cleaning, make sure to remove any obstacles from the floor that may get in the way of the vacuum.
By following these solutions, you can ensure that your smart vacuum will clean all the areas of your home properly. Multi-room cleaning with a smart vacuum has many advantages, and by troubleshooting any issues you encounter, you can make the most of your device. For information on the advantages of multi-room cleaning, check out our article on the topic. For recommendations on the best smart vacuums on the market, see our list of top picks. Additionally, for tips on creating multi-room cleaning schedules and integrating your smart vacuum into your smart home, read our article on this topic and our guide to smart home integration.
- Check if the vacuum’s filter and brushes are clean and in working order.
- Ensure that you’ve set up the cleaning map correctly and that the robot has access to all rooms.
Common Problem: Incomplete Cleaning of Rooms
One of the most common problems that arise when using a smart vacuum for multi-room cleaning is incomplete cleaning of rooms. This can be frustrating as it defeats the purpose of having an automated cleaning device. There can be different reasons why this may happen, but two of the most common reasons are:
| Possible Cause | Solution |
|---|---|
| The vacuum’s filter and brushes are dirty or not working properly | Check if the vacuum’s filter and brushes are clean and in working order. Over time, vacuum filters and brushes can get clogged with dirt and hair, which can interfere with their efficiency. It is essential to clean them regularly to ensure optimal performance. |
| The cleaning map is not set up correctly, or the robot does not have access to all rooms. | Ensure that you’ve set up the cleaning map correctly and that the robot has access to all the rooms that need to be cleaned. The cleaning map is the blueprint that the robot follows during cleaning. If it is not set up correctly, the robot may not know what areas to clean or may miss some rooms altogether. Make sure that the robot can access all the areas by removing obstacles like furniture and cords. |
When addressing this problem, it is essential to try these two solutions to ensure they are not the reason why the robot is missing some areas. A dirty filter or clogged brushes can drastically affect the performance of the vacuum, while a wrong map setup can cause the robot to miss some rooms.
If you are experiencing incomplete cleaning of rooms with your smart vacuum, try checking the vacuum’s filter and brushes, as well as the cleaning map’s configuration. By doing so, you can ensure that your smart vacuum is working efficiently, and you’re getting the most out of your investment.
2. Difficulty Navigating between Rooms
One common issue that people face when using a smart vacuum for multi-room cleaning is difficulty navigating between rooms. This can be frustrating and can lead to incomplete cleaning of certain areas. However, there are several solutions that you can try.
Firstly, calibrate the robot’s sensors and map. Make sure that the robot is using accurate up-to-date maps and sensors on every floor that it cleans. Some robots also benefit from frequent free space calibration, particularly when used on different floors.
Secondly, ensure that the robot has access to all rooms. Move any obstacles that may block the robot’s path and ensure that furniture and cords are properly cleared. You can also experiment with removing or adding different types of obstacles such as chairs, tables, or other objects that the robot might have difficulty navigating around.
Another solution is to create a cleaning map with zones and tailor cleaning settings to particular areas. This can be particularly useful for large rooms or areas with different surfaces. Here’s an example:
| Room/Area | Surface | Cleaning Setting |
|---|---|---|
| Living Room | Carpet | High suction mode |
| Kitchen | Linoleum | Normal suction mode |
| Bathroom | Tiled | Spot cleaning mode |
Lastly, you can also use physical or virtual barriers to guide the robot’s movements. Physical barriers such as magnetic strips or boundary markers can be used to define the robot’s cleaning area. Virtual barriers, which are set up on the app or through the robot’s software, can be used to prevent it from entering certain areas, like no-go zones.
By using these solutions, you can troubleshoot difficulty navigating between rooms and get the most efficient cleaning out of your smart vacuum.
- Calibrate the robot’s sensors and map to improve navigation between rooms.
- Make sure that the robot can access all rooms and that obstacles such as furniture and cords are properly cleared.
If you’re experiencing difficulty with your smart vacuum navigating between rooms, there are a few things you can do to improve its performance. First, calibrate the robot’s sensors and map to ensure that it is accurately detecting and responding to its environment. This may involve adjusting the way in which the robot maps your home or ensuring that its sensors are properly aligned.
In addition to calibrating the robot, it is important to make sure that the robot can access all rooms that you want it to clean. This may involve moving furniture or other items that are blocking the robot’s path. Also, be sure to properly clear cords or other items from the floor that might trip the robot.
By taking these steps, you can help to ensure that your smart vacuum is able to navigate your home effectively and efficiently. And, by optimizing your vacuum’s performance, you’ll be able to enjoy a cleaner home with less effort. So don’t hesitate to take the time to calibrate your robot and ensure that it has access to all the areas of your home that you want to be cleaned.
3. Low Battery Life During Multi-Room Cleaning
One of the most frustrating problems that can arise when using a smart vacuum for multi-room cleaning is running out of battery in the middle of a cleaning cycle. Fortunately, there are a few simple solutions to this issue.
Charge the Robot Before Cleaning
Make sure to fully charge the robot before starting a cleaning cycle, especially if you know that it will be covering multiple rooms. This will help to ensure that the vacuum has enough battery life to complete the task at hand.
Consider Using Turbo Mode Sparingly
If you have heavily soiled areas that require the use of turbo mode, consider using this feature only in those specific areas. Using turbo mode throughout the entire cleaning cycle can drain the vacuum’s battery faster than normal.
Configure the Robot to Return to the Docking Station
Many smart vacuums can be configured to return to the docking station and recharge if their battery falls below a certain level. This feature can help to ensure that the vacuum always has enough battery to complete a cleaning cycle.
To give you an idea of how long different smart vacuums can clean for, here is a table that shows the battery life for some popular models:
| Brand/Model | Battery Life |
|---|---|
| iRobot Roomba i7+ | 75 minutes |
| Eufy RoboVac G30 | 100 minutes |
| Shark IQ Robot Vacuum | 90 minutes |
As you can see, battery life varies greatly between different models, so it’s important to choose a vacuum that will meet your needs for multi-room cleaning. By following these tips and choosing a vacuum with a sufficient battery life, you can avoid the frustration of running out of battery mid-cleaning cycle.
- Charge the robot before cleaning and consider using the turbo mode only for heavily soiled areas.
- Configure the robot to automatically return to the docking station and recharge if the battery becomes low.
Maximizing Battery Life:
The battery life of your smart vacuum is crucial to ensure that it can complete multi-room cleanings efficiently. One of the most common issues when cleaning multiple rooms is low battery life. Here are some tips to help you maximize battery life during multi-room cleaning:
| Tips | Explanation |
|---|---|
| Charge the Robot Before Cleaning | Before starting any cleaning cycle, ensure that your smart vacuum is fully charged. This will ensure that it doesn’t run out of battery quickly or mid-cycle. Make it a habit to dock the robot on its charging station after every cleaning cycle to make sure it remains fully charged. |
| Consider Using the Turbo Mode Only for Heavily Soiled Areas | The Turbo mode consumes more battery life than the standard mode. Consider using it only in specific areas that need more attention, such as carpeted zones or areas with more foot traffic. Use it sparingly to maximize battery life. |
| Configure the Robot to Automatically Return to The Dock When Battery Is Low | Most smart vacuums come equipped with the automatic docking feature. This enables the robot to recharge and resume the cleaning cycle at a later time. Configure this feature in the settings to help extend the battery life of your vacuum. |
By implementing these tips, you can protect the battery life of your smart vacuum and enable it to complete multi-room cleanings without any setbacks. Maintaining a fully charged and efficient robot will give you peace of mind knowing it can tackle any mess in your home.
Tips for Efficient Multi-Room Cleaning
Looking for ways to optimize the cleaning process with your smart vacuum? Here are some helpful tips and strategies for efficient multi-room cleaning. Whether you have a large home or just want to get the most out of your robot vacuum, these tips can help you save time and effort while keeping your floors clean and tidy. From dividing large rooms into smaller zones to prioritizing certain areas, read on for some practical advice on how to improve your smart vacuum’s cleaning performance.
1. Divide Large Rooms into Smaller Zones
Dividing large rooms into smaller zones can improve the efficiency of your smart vacuum and help ensure that every corner of your home is thoroughly cleaned. Here are some tips on how to create smaller cleaning zones:
| Step | Description |
|---|---|
| 1 | Start by identifying the larger rooms in your home that may benefit from zone cleaning. This may include living rooms, dining rooms, or open-concept spaces. |
| 2 | Once you’ve identified the larger rooms, consider breaking them down into smaller zones based on specific cleaning needs. For example, you may divide a living room into a seating area, coffee table zone, and entertainment zone. |
| 3 | Use the app or remote control to program the smart vacuum to clean each zone individually. This will ensure that each zone is cleaned thoroughly and efficiently, without wasting time or battery power. |
| 4 | To further customize each zone, adjust the cleaning settings on the vacuum. For example, you may want to use a higher suction power in heavily trafficked areas or near pet beds. |
| 5 | Keep in mind that you may need to move furniture or other objects around to create clear paths for your smart vacuum. This can take some extra time and effort initially, but it will ultimately lead to a more efficient cleaning process. |
By dividing larger rooms into smaller zones, you can ensure that your smart vacuum is cleaning every corner of your home efficiently and effectively. Take the time to set up zones and adjust cleaning settings to get the most out of your smart vacuum.
- Divide large rooms into smaller zones for more efficient cleaning. This also allows you to tailor cleaning settings to specific areas.
If you have a large room, you may find that your smart vacuum struggles to clean it properly. To make multi-room cleaning more efficient, you can divide large rooms into smaller zones. This allows your vacuum to clean more thoroughly and effectively.
By dividing a large room into zones, you can create a more targeted cleaning approach. This means that you can set specific cleaning settings for each zone. For example, if you have a heavily trafficked area, you may want to set the vacuum to work with a stronger suction or to clean that area several times to ensure all debris is picked up.
You can create zones easily with most smart vacuums on the market, either through an app or through the vacuum itself. You can typically create zones by drawing them on the map of your home. Once you have created zones, you can customize the settings for each zone.
Creating zones can improve the efficiency and effectiveness of your cleaning process. Instead of the vacuum cleaning the room randomly, you can direct it to clean specific areas. This ensures that your entire home is cleaned thoroughly and effectively.
Using zones can save you time and energy. Instead of having the vacuum clean the entire room, it can focus on high-traffic areas or areas that are typically dirtier. This can also help prolong the life of your vacuum, as it won’t have to work as hard to clean your home.
Dividing large rooms into zones can offer a more thorough, efficient, and targeted cleaning. You can easily set up zones through your vacuum’s app or controls, and customize the settings for each zone. This approach to cleaning can save you time and energy, while ensuring your home is clean and welcoming.
2. Schedule Cleaning Times and Prioritize Zones
Creating a cleaning schedule and prioritizing zones can significantly improve the efficiency of multi-room cleaning with a smart vacuum. By setting up a schedule, you can ensure that the robot cleans at a convenient time for you and prioritize certain zones based on importance.
Schedule cleaning times: When setting up a cleaning schedule, consider the times when you’re typically out of the house or least likely to be disturbed by the vacuum’s noise. Most smart vacuums allow you to set up a daily or weekly schedule and some even offer the option to start cleaning remotely using a smart app.
Prioritize zones: Prioritizing certain zones can ensure that high-traffic areas and heavily soiled zones are cleaned first. This can be especially helpful if you’re short on time or only need to clean specific areas of your home. Create a list of the zones you want to be cleaned, and use the vacuum’s app to set the cleaning order.
To help with prioritizing, consider using a table to organize which zones need to be cleaned first.
| Zone | Cleaning Priority | Cleaning Time |
|---|---|---|
| Living Room | High | Morning |
| Kitchen | High | Afternoon |
| Bedrooms | Medium | Evening |
| Bathrooms | Low | Before Bed |
By prioritizing zones and scheduling cleaning times, you can make the most of your smart vacuum’s capabilities and keep your home clean with minimal effort. Don’t forget to consider using the highest suction mode for heavily soiled areas and carpeted zones, as well as virtual boundaries or no-go zones to prevent the robot from accessing certain areas or rooms.
- Set up a cleaning schedule and prioritize certain zones to ensure that the robot cleans the most important areas first.
- Consider using the high suction mode for high-traffic areas and carpeted zones.
Creating a cleaning schedule is a great way to efficiently clean multiple rooms with your smart vacuum. By setting a schedule, your robot vacuum can clean when you’re not home, making the process much more convenient for you.
When setting up your cleaning schedule, it’s important to prioritize certain zones, such as high-traffic areas or rooms where pets spend the most time. By doing this, you can ensure that the most important areas are always cleaned first, even if the battery runs low before the entire house is cleaned.
For areas that tend to accumulate dirt and debris more quickly, consider using the high suction mode. This is especially true for carpeted areas, as they tend to trap dirt and dust.
In addition to prioritizing certain zones and using high suction mode, it’s important to follow a consistent cleaning routine. By doing so, you can help prolong the life of your robot vacuum and maintain its efficiency over time.
Remember to always empty the vacuum’s dustbin after each cleaning and clean the brushes and filter on a regular basis to keep them in optimal working condition. With these tips and strategies, you can ensure that your smart vacuum will always do a thorough job cleaning your home.
3. Create Virtual Boundaries and No-Go Zones
When it comes to multi-room cleaning with your smart vacuum, there may be certain areas or rooms that you want to restrict your robot from entering. This is where creating virtual boundaries and no-go zones come in handy.
Virtual Boundaries can be set up through the robot’s accompanying app, where you can create a digital map of your home and draw areas where the robot should not clean. Alternatively, no-go zones can be established using physical barriers such as magnetic strips. These strips can be placed across doorways or around specific areas, effectively creating a boundary that the robot is not allowed to cross.
It is important to note that not all smart vacuums have the ability to set up virtual boundaries or no-go zones, so make sure to check before purchasing. If this feature is available, take advantage of it to prevent your robot from cleaning in areas where it may get stuck or cause damage to fragile objects.
Setting up virtual boundaries or no-go zones also allows you to create a more customized cleaning experience. For example, if there is a cluttered room that you don’t want to clean, you can set up a virtual boundary or no-go zone around it while still allowing the robot to clean everywhere else.
In addition to creating boundaries, you can also use the accompanying app to control and monitor the robot’s cleaning progress. This feature makes it easy to schedule cleaning times, check battery life, and adjust cleaning settings as needed.
Creating virtual boundaries and no-go zones is a simple and effective way to improve your multi-room cleaning experience with your smart vacuum. Take advantage of this feature to enjoy a more customized and efficient cleaning experience.
| Pros | Cons |
|---|---|
| Prevent robot from accessing certain areas or rooms | Not all smart vacuums have this feature |
| Customize cleaning experience | May require physical barriers for no-go zones |
| Control and monitor cleaning progress through app |
- Use virtual boundaries or no-go zones to prevent the robot from accessing certain areas or rooms. This can be done through the app or using physical barriers like magnetic strips.
When it comes to cleaning your home with a smart vacuum, it’s important to ensure that the robot only goes where you want it to go. One way to do this is by using virtual boundaries or no-go zones. Both options help prevent the robot from accessing certain areas or rooms that you want to keep off-limits.
Virtual boundaries are digital boundaries that you set up using your smart vacuum’s app. The app will typically have a mapping feature that allows you to draw a line or shape around the area or room that you want to restrict the robot from cleaning. This is especially useful if you want to keep the robot away from delicate furniture or cords that could get tangled.
No-go zones, on the other hand, are physical barriers that you place around the areas or rooms that you want to restrict the robot from accessing. Many smart vacuums come with magnetic strips that you can use to block off certain areas. Simply cut the magnetic strip to the desired length and place it in a position that prevents the robot from passing into the restricted area. This method is ideal if you have a room with a lot of furniture or other obstacles that could be difficult for the robot to navigate around.
In order to ensure that your virtual boundaries or no-go zones are working properly, it’s important to test them before you start a cleaning cycle. Check to see that the robot is not going beyond the defined boundary or passing through the physical barrier. Once you’ve confirmed that the robot is not going where it’s not supposed to, you can sit back and let it do its thing.
Virtual boundaries and no-go zones are effective tools for creating a customized cleaning experience that meets your specific needs. By utilizing these features, you can rest assured that your smart vacuum is only cleaning the areas that you want it to, and avoiding areas that you want to keep off-limits.
Conclusion
As we reach the end of our guide to troubleshooting multi-room cleaning with your smart vacuum, it’s important to remember that keeping your home clean doesn’t have to be a tedious chore. With the right strategies and tools, you can achieve a spotless home with minimal effort. By following the tips and solutions outlined in this article, you’ll be able to maximize the efficiency and effectiveness of your smart vacuum, ensuring that every room in your home is thoroughly cleaned. So why wait? Try out these strategies today and enjoy a happier, cleaner home!
- By troubleshooting common multi-room cleaning issues and implementing efficient cleaning strategies, you can get the most out of your smart vacuum and enjoy a cleaner home with less effort.
Efficient multi-room cleaning with your smart vacuum is more than just pressing the start button and letting the robot do the work. Identifying and troubleshooting common problems that prevent your robot from cleaning effectively is key, along with implementing efficient cleaning strategies that fit your needs.
By troubleshooting common multi-room cleaning issues, such as incomplete cleaning of rooms or difficulty navigating between rooms, you can ensure that your smart vacuum is operating at its full potential. Cleaning the filter and brushes and checking the set up of the cleaning map are just two ways that you can resolve incomplete cleaning issues. On the other hand, calibrating the robot’s sensors and clearing obstacles like furniture and cords can address navigation issues.
In addition to troubleshooting, implementing efficient cleaning strategies can help you maximize your smart vacuum’s cleaning abilities. Dividing large rooms into smaller zones and prioritizing certain areas for cleaning ensures that the most important areas are cleaned thoroughly. Using the high suction mode for high-traffic areas and scheduling cleaning times are also effective strategies to consider.
Ultimately, by troubleshooting issues and implementing efficient cleaning strategies, you can get the most out of your smart vacuum and enjoy a cleaner home with less effort. So take the time to identify and resolve common issues, and tailor your cleaning strategies to fit your needs. Your smart vacuum will thank you.
Frequently Asked Questions
1. Why is my smart vacuum getting stuck under furniture?
This could be due to your robot’s height or the furniture design. Try rearranging your furniture or setting up virtual boundaries to prevent the robot from accessing those areas.
2. How do I know if my robot’s sensors need calibration?
If you notice your robot is having difficulty navigating rooms, it may need calibration. Refer to your user manual or contact customer support for assistance.
3. Can I use my smart vacuum on multiple floors?
Yes, most smart vacuums can be used on multiple floors. However, you may need to manually carry the robot to the desired floor and set up the cleaning map again.
4. Should I clean my robot’s filter and brushes regularly?
Yes, regular cleaning of your robot’s filter and brushes ensures optimal performance and prevents clogging or damage.
5. Can I schedule specific cleaning times for each room?
Most smart vacuums have the option to schedule specific cleaning times for each room or zone. Refer to your user manual or app settings to set this up.
6. How can I improve my robot’s battery life?
You can improve battery life by charging the robot fully before cleaning, using low power modes, and setting up automatic recharging when the battery gets low.
7. What is the difference between turbo mode and standard mode?
Turbo mode provides increased suction power for heavy dirt and debris, while standard mode is ideal for daily cleaning or less soiled areas.
8. How often should I replace my robot’s brushes and filter?
Refer to your user manual for specific guidelines on when to replace your robot’s brushes and filter. In general, these parts should be replaced every 6-12 months depending on usage.
9. Can I customize my robot’s cleaning map?
Yes, most smart vacuums allow users to customize their cleaning map and set virtual boundaries or no-go zones through the app.
10. How do I handle errors or technical issues with my smart vacuum?
Refer to your user manual for troubleshooting tips. If the issue persists, contact customer support for further assistance.
