Customizing Your Smart Vacuum Cleaner’s Suction Settings for Different Flooring Types
Warning: A non-numeric value encountered in /var/www/html/wp-content/themes/generatepress/inc/structure/post-meta.php on line 165
by Dwight Gibson
Table of Contents
Introduction
When it comes to keeping our homes clean, technology has given us an efficient helping hand in the form of smart vacuum cleaners. These advanced cleaning devices are designed to help make our lives easier by taking care of tedious and repetitive cleaning tasks, allowing us more time to focus on other activities. However, many people are not aware that to get the best results from your smart vacuum cleaner, you need to customize the suction settings for different flooring types. In this article, we will explore the process of adjusting suction settings for various types of flooring, as well as the factors you need to consider before making any adjustments. So, let’s get started!
What is a Smart Vacuum Cleaner?
Smart vacuum cleaners are the latest innovation in home cleaning technology. These types of vacuums have the ability to adapt to different flooring types and suction requirements. They are equipped with smart sensors that can detect the type of flooring and adjust their suction settings accordingly. The use of smart vacuum cleaners is on the rise due to their convenience and efficiency.
Traditionally, vacuum cleaners had only one suction setting, which was not ideal for all flooring types. This often led to inadequate cleaning, especially on carpets and other high-pile surfaces. With the advent of smart vacuum cleaners, cleaning the house has become simpler and more efficient. They are equipped with advanced software that enables them to customize suction settings for different flooring types. In this way, they can clean more effectively and efficiently.
One of the most significant benefits of smart vacuum cleaners with customizable suction settings is that they adjust the suction power based on the type of flooring they are cleaning. This feature is particularly useful for carpets, laminate and tile flooring, and hardwood floors. It ensures that the vacuum cleaner is not using too much suction on a delicate surface and not enough suction on a thicker surface.
Smart vacuum cleaners offer several additional features that are worth noting. They not only detect the type of flooring, but can also detect air quality and dust levels. They are equipped with HEPA filters that capture allergens and dust particles to improve air quality. They are equipped with maneuverability sensors that help them navigate the space around the room without hitting any obstacles.
Customizable suction settings make smart vacuum cleaners efficient and effective cleaning machines. By adjusting the suction power according to the surface they are cleaning, they can effectively clean every nook and cranny of your home without damaging your floors. With so many options on the market, it can be challenging to choose the right one. To help, we have compiled a list of the top smart vacuums with customized suction settings. Check out our article on /smart-vacuums-customizable-suction/ for more information.
Why Customize Suction Settings for Different Flooring Types?
One of the most significant features of smart vacuum cleaners is their ability to customize suction settings for different flooring types. It is important to adjust the suction settings to ensure that your cleaning experience is both efficient and effective. This feature is particularly important for people who live in homes with a variety of flooring types, such as hardwood, tile, laminate, and carpets with different pile heights.
Different flooring types require different levels of suction power to ensure that dirt, pet hair, and other debris are lifted off the floor effectively. Using the wrong suction setting can be ineffective and can even damage your flooring in the long run. For example, too much suction power can damage delicate hardwood floors or snag the fibers of a low-pile carpet. Conversely, too little suction power can leave dirt and pet hair behind on carpets, making it more challenging to maintain a clean living space.
Customized suction settings for smart vacuums allow for a more efficient and effective cleaning experience. Not only does it improve your cleaning experience, but it also saves you time and energy. By customizing the suction settings, smart vacuums can adjust their cleaning power based on the flooring type, ensuring that they use the right suction power to clean effectively without causing damage to your floors.
Having a smart vacuum with customizable suction is particularly important for households with pets and people who suffer from allergies. Pet hair and allergens can be lifted off your floors more effectively with proper suction settings, improving your indoor air quality. Smart vacuums with customizable suction are also useful for high-traffic areas, which are more prone to accumulate dirt and other debris, requiring higher suction power for effective cleaning.
In the next sections, we will dive deeper into how to adjust the suction settings for various flooring types and troubleshooting issues that may arise. But before we get into those details, let’s explore the importance of customized suction settings in more detail.
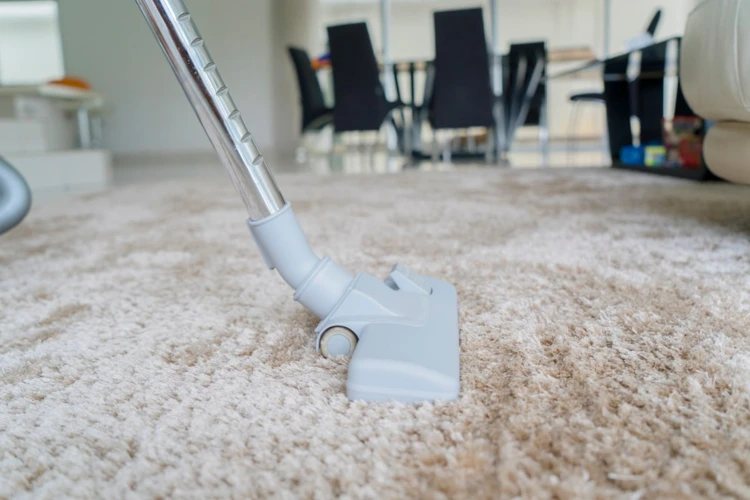
Carpet
When it comes to maintaining carpet flooring, a one-size-fits-all approach simply doesn’t work. From low-pile to high-pile carpets, each requires a different level of care to keep it looking and feeling its best. Fortunately, with the advent of customizable suction settings on smart vacuums, it’s easier than ever to keep your carpets clean without damaging them. In this section, we’ll explore some tips and tricks for customizing your vacuum’s suction settings to match the needs of your carpet. For more information on customized suction settings on smart vacuums, check out our article on /smart-vacuums-customizable-suction/ [internal link].
Low-Pile Carpet
When it comes to cleaning low-pile carpets with a smart vacuum cleaner, you’ll want to make sure that the suction settings are properly adjusted. Low-pile carpets are less than 1/2 inch high and have a tight, flat weave. Due to their short fibers, these carpets tend to collect a lot of dirt and debris in a short amount of time. To effectively clean these carpets, you should set the suction power to a medium or high level. However, if you have a delicate low-pile carpet, you might need to reduce the suction power to prevent damaging the fibers.
Here’s a table summarizing the recommended suction settings for low-pile carpets:
Smart Vacuum Model
Suction Setting
Notes
Model 1
Medium
Effective for most low-pile carpets
Model 2
High
For very dirty or high-traffic areas
Model 3
Low
For delicate low-pile carpets
Adjusting the suction settings for low-pile carpets can help you ensure that dust, dirt, and pet hair are effectively removed. By setting the suction power to the right level, you can avoid damaging your carpets and prolong their lifespan. For more information on customized suction settings for smart vacuums, check out our article on smart vacuums with customizable suction.
Medium-Pile Carpet
When it comes to medium-pile carpets, smart vacuum cleaners that offer customizable suction settings are especially useful. These carpets have a pile height of around 0.5-0.75 inches, which can make it challenging for vacuums to cleanly pick up dirt and debris.
Using a vacuum with too much suction power may damage the delicate fibers of the medium-pile carpet. On the other hand, using a vacuum with too little suction power may not effectively clean the carpet. This is where the option to customize the suction settings comes in handy.
Here are some recommended suction settings for medium-pile carpets:
Vacuum Model
Recommended Suction Setting
Brand A
Medium or Auto Mode
Brand B
Normal or Medium Setting
Brand C
Power 2 or Lower Power Setting
Remember that the best suction setting may vary depending on the model and brand of your vacuum, so be sure to refer to your manufacturer’s instructions when setting your suction power.
For medium-pile carpets with heavy traffic or pet hair, a higher suction power might be necessary. However, keep in mind that excessive suction power for prolonged periods can cause long-term damage to your carpet. To avoid this, consider using a vacuum that automatically adjusts suction based on the amount of dirt and debris detected as it cleans.
When it comes to high-pile carpets, it’s important to use the right suction setting to prevent your smart vacuum cleaner from getting stuck and to ensure it picks up all the dirt and debris. High-pile carpets have long, fluffy fibers that can trap dirt, dust, and debris deep down in the carpet, making it hard to clean.
To clean high-pile carpets effectively, you should use a vacuum with adjustable suction settings and choose the right setting based on the thickness of the carpet. Here are some tips to help you customize suction settings for high-pile carpets:
Start with the lowest suction setting first to avoid damaging the fibers of the carpet.
If the vacuum gets stuck or is not picking up enough dirt and debris, gradually increase the suction setting until you find the right balance between suction power and ease of use.
Make sure to adjust the suction setting more frequently if you are vacuuming an area with thicker, denser patches of carpet.
Some smart vacuum cleaners have specialized suction settings for high-pile carpets, so be sure to check your owner’s manual to see if your vacuum has this feature.
Remember, high-pile carpets require more suction power than low-pile or medium-pile carpets, but too much suction could damage the fibers. By gradually adjusting the suction setting until you find the right balance, you can effectively clean your high-pile carpets without causing any damage.
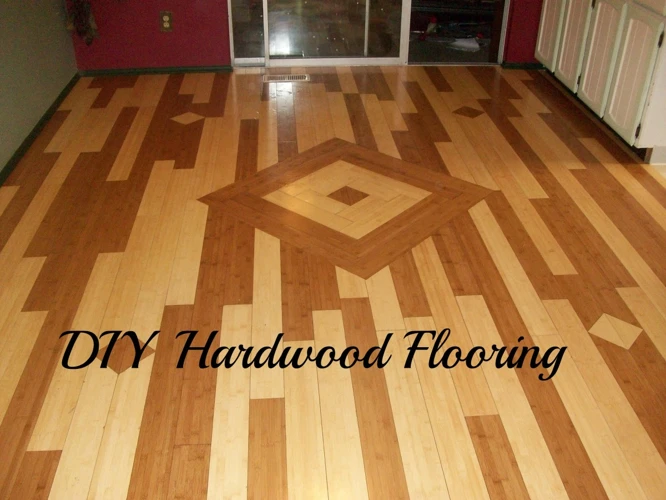
When it comes to keeping your hardwood floors clean, using a smart vacuum cleaner with customizable suction settings can be a game-changer. But with different types of hardwood floors out there, how do you ensure you’re using the right suction setting? Here, we’ll take a closer look at the unique cleaning needs of sealed and unsealed hardwood floors, and how to customize your vacuum’s suction settings accordingly for optimal cleaning results. So let’s dive in!
Sealed Hardwood
When it comes to cleaning sealed hardwood flooring, you need to be very careful. Sealed hardwood flooring is a popular flooring option in many homes due to its durability and aesthetic appeal. However, it needs to be cleaned carefully, especially to maintain its sealant. Here are some steps on how to customize suction settings for sealed hardwood:
Start with a low suction setting: When cleaning sealed hardwood flooring, it is important to start with a low suction setting. This will help prevent any scratches or damage to the flooring. Use the lowest suction setting possible and gradually increase it as needed.
Use a soft brush or floor tool: When cleaning sealed hardwood flooring, use a soft brush or floor tool. This will help prevent any scratches or damage to the flooring. Hard or stiff brushes can do more harm than good.
Be cautious with water: Sealed hardwood flooring is still susceptible to water damage. Be cautious when using any water or liquid on the floor, especially if it is not a part of your regular cleaning routine. Excessive water can seep through the sealant and damage the flooring.
Regular vacuuming: Regular vacuuming can help keep sealed hardwood flooring looking its best. Use a vacuum with a soft brush attachment at a low suction setting. Vacuum in the direction of the grain to prevent any damage or scratches to the flooring. It is recommended to vacuum at least once a week or as needed depending on the foot traffic in your home.
By following these steps, you can ensure that your sealed hardwood flooring remains clean and looking its best. Remember to take extra care when cleaning this type of flooring, as any damage to the sealant can lead to potential water damage or even irreversible damage.
Unsealed Hardwood
Unsealed hardwood floors are more delicate than their sealed counterparts, and so require some extra care and attention when being vacuumed. Here are some tips for customizing your suction settings for unsealed hardwood floors:
Adjust the Suction Power: Unsealed hardwood floors are more susceptible to damage from suction, so it is important to reduce the suction power of your vacuum cleaner. You can adjust the suction power to a low level by using the manual adjustment or choosing the appropriate setting in the automatic mode of your vacuum cleaner.
Use the Right Brush Roll: Unsealed hardwood floors require a special type of brush roll that will not scratch or damage the surface. Choose a brush roll that has soft bristles or one that is specifically designed for hardwood floors.
Avoid Using Water: Unsealed hardwood floors are easily damaged by water, so it is important to avoid getting them wet. Instead of using a damp mop, use a dry microfiber cloth to clean up any spills or debris.
Clean Regularly: Unsealed hardwood floors collect dust and debris easily, so it is important to clean them regularly. Doing so will prevent scratches and damage caused by abrasive particles on the surface.
Avoid the Beater Bar: The beater bar may seem like a helpful tool for cleaning hardwood floors, but it can actually cause damage to the surface. Avoid using the beater bar or turning it off if your vacuum cleaner has that option.
By following these tips, you can customize your suction settings for unsealed hardwood floors to ensure their longevity and beauty. Remember to clean your vacuum cleaner regularly as well, in order to prevent the buildup of debris that can cause damage to flooring over time.
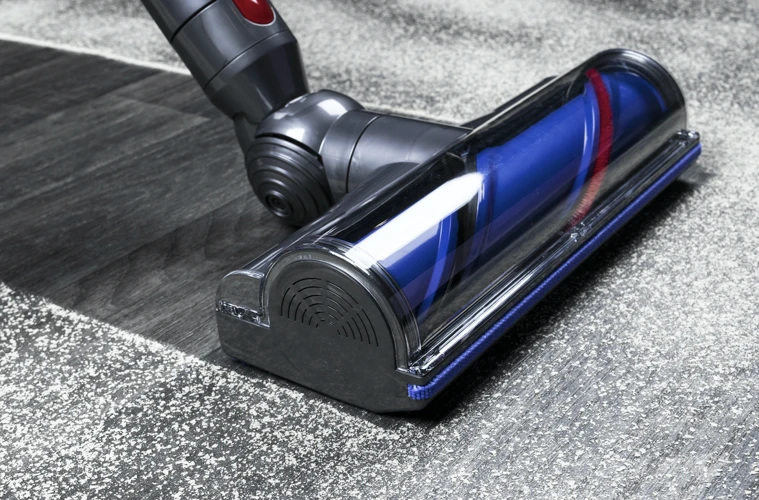
Laminate and Tile Flooring
If you have a laminate or tile flooring in your home, you may think that adjusting the suction settings on your vacuum isn’t necessary, but that’s not true. While these types of flooring are more durable and resistant to scratches, they require specific suction settings to clean properly without causing any damage.
Suction Settings for Laminate Flooring
Laminate flooring is a synthetic flooring option that resembles wood or stone but is much more affordable. The key to cleaning laminate floors is to avoid using brushes or beater bars, as they can cause scratches or dents in the surface. Instead, opt for a vacuum cleaner with adjustable suction settings that can be set to a low or medium level.
Suction Settings for Tile Flooring
Tile flooring, whether it’s ceramic or porcelain, is much more durable than other flooring types but still requires the right suction settings to avoid any scratches or damages. Similar to laminate flooring, it’s best to avoid using a vacuum with a brush or beater bar on tile flooring. Instead, choose a vacuum with adjustable suction settings and use it on a low or medium level.
The Importance of Proper Suction Settings
Using the wrong suction settings on your vacuum can cause damage to your flooring, and in some cases, the vacuum itself. Additionally, not using the right suction settings can result in poor cleaning results, leaving behind debris and dirt.
Conclusion
Regardless of flooring type, it’s important to adjust your vacuum’s suction settings to match the flooring’s needs. Laminate and tile flooring are no exception. By using the right suction settings, you can ensure that your floors are getting cleaned properly without any damage being done.
Other Factors to Consider
When it comes to choosing the right suction setting for your vacuum cleaner, there are several factors to consider beyond just the type of flooring. These additional considerations can greatly impact the effectiveness of your cleaning strategy and ensure that your living space remains healthy and tidy. By paying attention to these key factors, you can optimize your cleaning routine and boost the performance of your vacuum to the max.
Pet Hair and Allergens
When it comes to dealing with pet hair and allergens, there are a few extra factors to consider when customizing your vacuum’s suction settings. Pets can shed quite a bit of hair and dander, which can cling to carpets and upholstery, making it difficult to remove with a standard vacuum.
Allergens can also be a concern for those with sensitivities or asthma. Dust, pollen, and other particles can get kicked up during vacuuming, making it important to choose a machine with a good filtration system.
To address these issues, look for vacuums designed specifically for pet owners or those with allergies. These models often feature specialized filters or attachments specifically designed to pick up pet hair and other allergens.
HEPA filters are a must-have for those with allergies, as they are designed to trap even the smallest particles, such as pet dander and pollen. Some vacuums even come with UV-C lights that can help kill bacteria and other microorganisms.
In the table below, we outline some additional tips for dealing with pet hair and allergens:
Tip
Description
Use a brush roll
Many vacuum cleaners come with a brush roll attachment, which is designed specifically for picking up pet hair. Be sure to choose a vacuum with a high-quality brush roll that won’t get tangled or bogged down.
Vacuum regularly
The more frequently you vacuum, the less chance there is for pet hair and dander to build up. Aim to vacuum at least once a week, or more often if you have multiple pets.
Choose the right suction setting
For pet hair and allergens, you’ll want to use a higher suction setting. This will help remove more hair and dander from carpets and upholstery. Just be sure not to use too high of a setting on delicate surfaces, such as hardwood floors or area rugs.
Clean or replace filters regularly
Filters can become clogged with pet hair and other debris, making it harder for the vacuum to pick up dirt and dust. Be sure to clean or replace your filters regularly to keep your vacuum running at its best.
By following these tips and customizing your vacuum’s suction settings, you can help keep your home clean and free from pet hair and allergens.
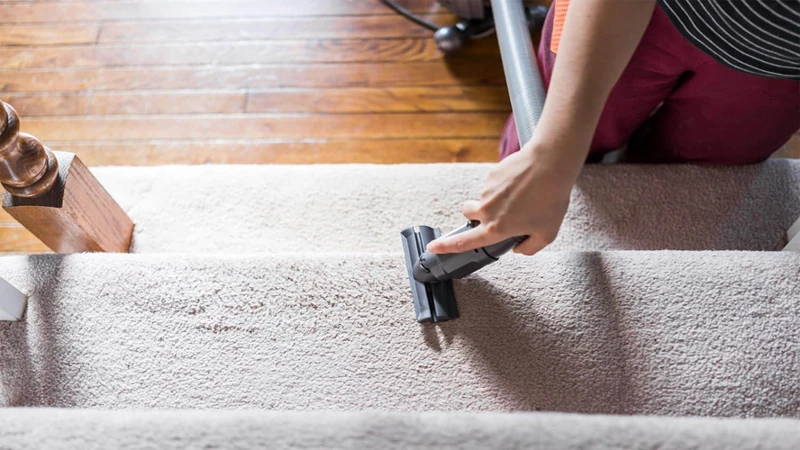
High-Traffic Areas
High-traffic areas in a home require more frequent cleaning, and the suction settings of the vacuum cleaner play an important role in keeping these areas clean. In these areas, dirt and debris tend to accumulate more often, causing discoloration and even damage to the flooring over time.
One of the best ways to keep high-traffic areas clean is by using high suction settings. When it comes to carpeted high-traffic areas, a powerful vacuum cleaner with a strong motor and high suction setting can help remove dirt and debris that are embedded deep in the carpet fibers.
On the other hand, hardwood or tile flooring in high-traffic areas might require lower suction settings to avoid scratching the surface of the flooring. However, it is important to note that using a vacuum cleaner with too low suction settings may not effectively remove dirt and debris.
The following table provides an overview of the recommended suction settings for high-traffic areas on different flooring types:
Flooring Type
Recommended Suction Settings for High-Traffic Areas
Low-Pile Carpet
High
Medium-Pile Carpet
High
High-Pile Carpet
High
Sealed Hardwood
Low to Medium
Unsealed Hardwood
Low to Medium
Laminate and Tile Flooring
Low to Medium
Keep in mind that these are just general recommendations and the suction settings may vary depending on the specific vacuum cleaner model and manufacturer’s instructions.
How to Adjust Your Vacuum’s Suction Settings
Now that you understand the importance of customizing your vacuum’s suction settings based on the flooring type, it’s time to learn how to make those adjustments. The process may seem daunting at first, but with a bit of practice, you’ll be able to optimize your vacuum’s performance on any surface in no time. In this section, we’ll explore both manual and automatic suction adjustments, and provide tips for troubleshooting any issues that may arise. So, grab your vacuum and let’s get started!
Manual Adjustment
When it comes to adjusting your vacuum’s suction settings, there are two main methods to choose from – manual adjustment and automatic adjustment. Let’s take a look at how to do manual adjustment.
Step 1: Identify the type of flooring you need to clean.
Step 2: Check your vacuum’s user manual to see the recommended suction settings for that type of flooring.
Step 3: Locate the suction control on your vacuum. This could be a knob or a slider.
Step 4: Adjust the suction control to the recommended setting for your type of flooring.
Step 5: Vacuum the flooring, starting from the farthest corner of the room and moving towards the door.
Step 6: Observe how your vacuum is performing. If you notice that it’s not picking up dirt or debris effectively, you may need to increase the suction setting. If you hear excessive noise or the vacuum is difficult to move, you may need to decrease the suction setting.
Step 7: Repeat this process for each type of flooring in your home.
It’s important to note that manual adjustment requires some trial and error to find the right suction setting for each type of flooring. But once you find the right setting, you’ll be able to effectively clean your floors and prolong the life of your vacuum.
Automatic Adjustment
There are some smart vacuums that come with automatic suction adjustment feature, meaning that they will detect the type of flooring they are on and adjust suction power accordingly. This feature can save you a lot of time and effort as you won’t have to manually adjust suction settings every time you move from one type of flooring to another.
Here’s a table summarizing the smart vacuums that come with automatic suction adjustment feature:
Brand
Model
Technology
Dyson
Dyson Cyclone V10 Absolute
Dynamic Load Sensor technology
iRobot
iRobot Roomba i7+
Imprint Smart Mapping technology
Shark
Shark IQ Robot Vacuum
Self-cleaning brushroll and multi-surface detection
While automatic suction adjustment can be convenient, it’s important to note that it may not always be accurate. For example, if you have a carpet with a mix of low and high pile areas, the vacuum may not be able to detect the difference and may not adjust suction power accordingly.
Additionally, if you have pets that shed a lot, you may need to manually adjust the suction power even if your vacuum has automatic adjustment feature. This is because pet hair can clog the vacuum’s filter and reduce suction power over time.
Automatic suction adjustment can be a useful feature to have, but it’s important to use it in conjunction with manual adjustment when necessary.
Precautions to Take
When it comes to adjusting your vacuum cleaner’s suction settings, it’s important to take safety precautions to prevent any damage to your home or injury to yourself. Here are a few measures you can take:
Unplug your vacuum cleaner: Always make sure your vacuum cleaner is unplugged from the power outlet before attempting to adjust the suction settings. This will prevent any electrocution or other electrical hazards.
Wear protective gear: When adjusting the suction settings, it is recommended that you wear protective gloves to avoid any cuts or other injuries to your hands. Additionally, you should wear goggles to protect your eyes from dust and debris that may be released during the adjustment.
Read the manual: Don’t just assume that you know how to change the suction settings on your specific vacuum cleaner. Always read the manual first to ensure that you understand the process fully and are not missing any important steps.
Don’t use the highest setting: While it may be tempting to set your vacuum to the highest suction setting to get the deepest clean possible, doing so can actually cause damage to your floors and carpets. Instead, start at the lowest setting and gradually work your way up until you find the right level of suction for your specific flooring type.
Keep children and pets away: When adjusting your vacuum cleaner’s suction settings, be sure to keep children and pets out of the room. This will prevent any accidental injury or interference while you work.
By taking these precautions, you can ensure that the process of adjusting your vacuum cleaner’s suction settings is safe and effective. Remember to always prioritize your personal safety and the condition of your home over any desire for a deep clean.
Troubleshooting Common Issues
Sometimes, even the best smart vacuum cleaner can experience issues that can disrupt its cleaning performance. This can leave you frustrated and wondering what could have gone wrong. Fortunately, there are ways to troubleshoot common issues that can be easily resolved at home without calling for a technician’s help. Let’s delve into some of these issues and how you can solve them using simple techniques.
Excessive Noise
Excessive noise can be a nuisance when using your smart vacuum cleaner. If your vacuum cleaner is producing more noise than usual, it might be a sign of a problem. Here are some possible causes of excessive noise and what you can do to fix them:
Clogged filter: A clogged filter could be the reason why your vacuum is making too much noise. When the filter is dirty, it makes the vacuum work harder, which can cause excessive noise. To fix this, clean or replace the filter regularly.
Damaged brushroll: If the brushroll is damaged or broken, it can cause excessive noise. You can remove the brushroll and inspect it for any damage. If it’s damaged, replace it with a new one.
Lack of lubrication: A lack of lubrication can cause parts of the vacuum, such as the motor, to grind against each other and produce excessive noise. To remedy this, add lubricant to the affected areas according to the manufacturer’s instructions.
Incorrect height settings: If the height setting of the vacuum is incorrect, it can cause excessive noise. The vacuum will have to work harder to clean the flooring, leading to increased noise levels. Adjust the height settings of the vacuum to match the flooring type to reduce noise.
There are also some preventative measures you can take to avoid excessive noise. First, make sure your vacuum cleaner is in good condition before using it. Regular maintenance will help ensure that all parts are functioning properly. Additionally, try to avoid running the vacuum cleaner for extended periods of time, especially in quiet environments. If the noise is still excessive despite your best efforts, it might be time to contact a professional to take a closer look.
Loss of Suction Power
Experiencing a loss of suction power can be frustrating when trying to clean your floors effectively. Here are some potential reasons why your vacuum may be losing suction power:
Clogged Filter: A common reason for a loss of suction power is a clogged filter. Over time, dust and debris can accumulate in the filter, causing it to become restricted. To prevent this, make sure to clean or replace the filter regularly, as recommended by the manufacturer.
Clogged Hose: Another possible reason for a loss of suction power is a clogged hose. Check to see if there are any blockages in the hose or wand, and clear them out if necessary.
Full Dustbin: If your vacuum’s dustbin is full, it can cause a loss of suction power. Make sure to empty the dustbin regularly, especially if you have pets or are dealing with a lot of debris.
Worn-out Parts: Over time, certain parts of your vacuum, such as the brushroll, may become worn out and need to be replaced. If you notice a decrease in suction power, it may be time to check if any parts need to be replaced.
Leaky Hose or Connections: If there are any leaks in your vacuum’s hose or connections, it can lead to a loss of suction power. Check to see if there are any visible leaks, and replace any damaged parts if necessary.
Keep in mind that some vacuums may naturally have lower suction power due to their design or age. If you have tried the above solutions and are still experiencing a loss of suction power, it may be time to consider purchasing a new vacuum.
Conclusion
After reading this article, you should have a good understanding of the importance of customizing suction settings for different flooring types with a smart vacuum cleaner. By adjusting the suction power, you can improve the performance and efficiency of your vacuum, as well as extend the lifespan of your flooring.
Whether you have low-pile or high-pile carpet, sealed or unsealed hardwood, or laminate and tile flooring, there are specific suction settings that will work best for each type. Additionally, considering factors like pet hair and allergens, as well as high-traffic areas, will help you achieve the most effective cleaning results.
Luckily, adjusting your vacuum’s suction settings is a straightforward process that can be done manually or automatically. Taking proper precautions, like following manufacturer guidelines and regularly maintaining your vacuum, can also prevent common issues like excessive noise and loss of suction power.
In conclusion, by taking the time to customize your vacuum’s suction settings for different flooring types and considering other factors, you can achieve optimal cleaning results and prolong the lifespan of your flooring. Happy cleaning!
Frequently Asked Questions
How do I know which suction setting to use?
The best suction setting for your type of flooring will depend on the type of flooring, level of dirt/debris, and whether you have pets or allergies. Always start with the lowest setting and gradually increase as needed.
Can I use the same suction setting on all types of flooring?
No, using the same suction setting on all types of flooring may not be effective. For example, high-pile carpet will require a higher suction setting than laminate or tile flooring.
What is the difference between manual and automatic suction adjustment?
Manual suction adjustment requires you to manually adjust the suction strength on your vacuum cleaner while automatic suction adjustment allows your vacuum cleaner to automatically adjust the suction strength based on the flooring type and level of dirt/debris.
What are the benefits of customizing suction settings?
Customizing suction settings can improve the cleaning performance of your vacuum cleaner, reduce wear and tear on your flooring, and may even help with pet hair and allergy concerns.
Do I need to adjust the suction setting for high-traffic areas?
Yes, high-traffic areas may require a higher suction setting to effectively remove dirt and debris that has been ground into the flooring.
How often should I adjust the suction setting?
You should adjust the suction setting as needed based on the type of flooring and level of dirt/debris. For example, if you switch from carpet to hardwood flooring, you will need to adjust the suction setting accordingly.
Can I damage my flooring by using the wrong suction setting?
Yes, using too high of a suction setting on delicate flooring types such as unsealed hardwood can cause damage or scratches.
What should I do if my vacuum cleaner is making excessive noise?
If your vacuum cleaner is making excessive noise, try adjusting the suction setting to a lower level. If the noise persists, there may be a blockage in the vacuum cleaner that needs to be cleared.
Why is my vacuum cleaner losing suction power?
There are several reasons why a vacuum cleaner may lose suction power, such as a clogged filter, full dustbin, or blockage in the hose. Make sure to check these areas and clean or replace parts as needed.
Is it okay to use a high suction setting for pet hair?
While using a higher suction setting can help with pet hair removal, it is important to use caution on delicate flooring types and to always start with the lowest setting and gradually increase as needed.