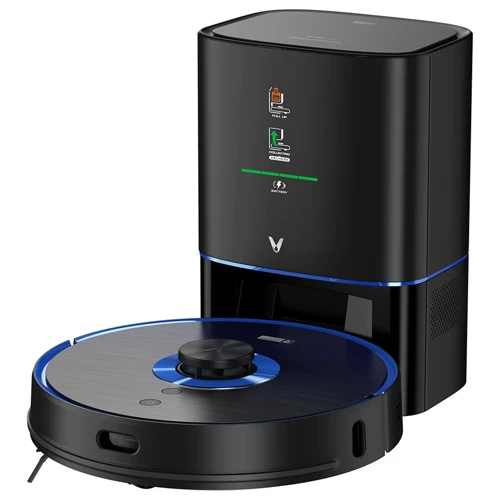
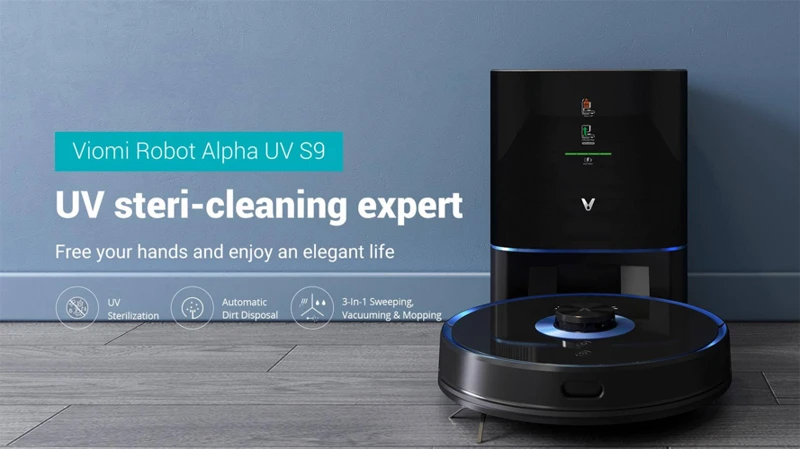
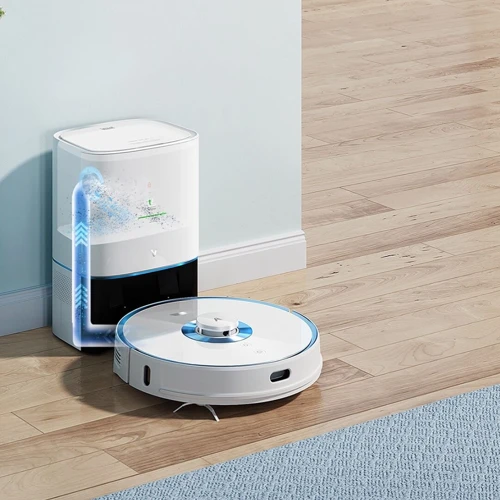
Smart Vacuum Cleaner’s UV Sterilization Technology: Cleaning and Maintenance
Warning: A non-numeric value encountered in /var/www/html/wp-content/themes/generatepress/inc/structure/post-meta.php on line 165
by Dwight Gibson
Table of Contents
Introduction
Welcome to the world of smart vacuum cleaners with UV sterilization technology. These high-tech devices offer an efficient and effective way to keep your home clean and healthy. However, like any other device, they require proper maintenance and cleaning to function at their best. In this article, we will guide you through the step-by-step process of cleaning and maintaining your smart vacuum cleaner’s UV sterilization technology, so you can enjoy a clean, germ-free home. So, let’s get started!
What is UV Sterilization Technology?
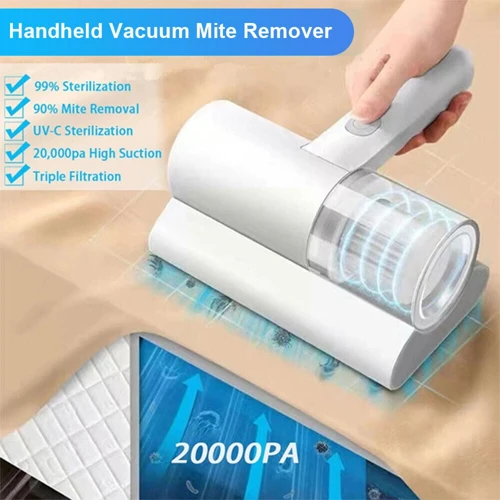
UV Sterilization Technology is a unique feature found in many smart vacuums that uses ultraviolet light to kill bacteria, germs, and other microscopic organisms. This technology is especially helpful for people who suffer from allergies or have weakened immune systems.
How does it work?
The UV light is emitted from a bulb inside the vacuum and shines on the surface being cleaned. The light damages the DNA of any bacteria or viruses, rendering them unable to reproduce and effectively killing them. This process is similar to how the sun’s UV rays can kill bacteria and germs.
Benefits of UV Sterilization Technology in Smart Vacuums
1. Kills germs and bacteria: This technology is an effective way to sanitize and clean surfaces, eliminating bacteria and viruses that can cause illness.
2. Allergy relief: UV sterilization technology can help reduce allergens, dust, and pollen in the air, making it easier for people with allergies to breathe.
3. Easy to use: This feature is integrated into the smart vacuum, so there is no need for additional setup or maintenance.
4. Cost-effective: This feature is generally affordable and available on many smart vacuums across a range of price points.
5. Safer and chemical-free: UV sterilization eliminates the need for harsh cleaning chemicals and is a safe, environmentally friendly cleaning option.
UV Sterilization Technology in smart vacuums is an effective and convenient way to clean and sanitize surfaces, all while reducing the risk of infection and making it easier for allergy sufferers to breathe. If you want to learn more about smart vacuums with UV technology, check out our list of the top 5 smart vacuums with UV technology or explore the benefits of UV sterilization in smart vacuums.
Why Clean and Maintain UV Sterilization Technology?
Maintaining the UV sterilization technology in your smart vacuum cleaner is crucial to ensure its optimum performance. The vacuum cleaner with UV sterilization technology uses ultraviolet rays that can kill up to 99.9% of the bacteria and viruses present in the surrounding air and on the surface, which is a significant advantage over traditional cleaning methods.
Regular cleaning and maintenance of your smart vacuum cleaner’s UV sterilization technology can prevent the accumulation of dust and dirt particles. It ensures the maximum coverage of ultraviolet rays, and ultimately, eliminating the bacteria and viruses more effectively. The accumulation of dust and dirt particles on the UV bulb weakens its performance, which in turn can lead to poor air quality in your home, especially if you’re using the vacuum cleaner to clean regularly. It is essential to clean and maintain UV sterilization technology for the best results.
Another reason to maintain the UV sterilization technology is that the buildup of dust and dirt particles inside the dustbin can lower the suction power of the vacuum cleaner. This, in turn, can increase the chance of microorganisms growing inside the dustbin, which can harm your health. It can also infect your entire home after the vacuum cleaner releases these harmful particles into the air during cleaning.
Regular cleaning of the dustbin, filter, and UV bulb can also prolong the lifespan of the smart vacuum cleaner. It is because the dusty and dirty environment inside the vacuum cleaner can cause the machine to malfunction and break down easily. As a result, you will have to spend more money to replace or repair the damaged parts.
In summary, cleaning and maintaining the UV sterilization technology of your smart vacuum cleaner is essential to ensure optimal performance, improve air quality in your home, and prolong the lifespan of the device. Make sure to follow the cleaning and maintenance procedure outlined in this article regularly. If you want to learn more about the benefits of UV sterilization technology in smart vacuums, check out our article on “The Benefits of UV Sterilization in Smart Vacuum Cleaners“.
Precautions Before Cleaning
Before we jump into the actual cleaning process, it’s crucial to take some precautions to ensure our safety and protect the smart vacuum cleaner’s UV sterilization technology. Understanding the importance of these initial steps will make the cleaning process much easier and effective. By following these simple steps, we can optimize our cleaning experience while avoiding any unfortunate accidents. So let’s dive in and learn about these precautions before we begin! And if you’re interested in learning more about the benefits of UV sterilization technology in smart vacuums, check out our article on UV sterilization in smart vacuums.
Switch Off the Device
Switch off the device before beginning the cleaning process. It is important to ensure that the device is not connected to any power source before proceeding with the cleaning procedure. This will prevent any electrical accidents or malfunctions. Keeping the device switched on during the cleaning process can also lead to damage to the UV sterilization technology.
To switch off the device, unplug it from the power outlet. If it is cordless, remove the battery. Do not attempt to clean the device while it is still connected to a power source in any way. This precautionary step is important for the safety of the user and the longevity of the device.
Before cleaning the smart vacuum cleaner, it is important to read the user manual carefully to understand the specific instructions for your device. Different models may have different cleaning procedures or requirements, so it is crucial to have a clear understanding of the guidelines specific to your device.
Cleaning and maintaining the UV sterilization technology is crucial to ensuring its maximum effectiveness in removing germs and bacteria from your home. To learn more about the benefits of using UV sterilization technology in smart vacuum cleaners, check out our article on smart vacuum cleaners and UV sterilization for allergies. If you’re curious about the differences between UV sterilization and traditional cleaning methods, check out our comprehensive guide on UV sterilization versus traditional cleaning methods.
Remove the Dustbin and UV Bulb
Removing the dustbin and UV bulb is the first step to clean and maintain your smart vacuum cleaner’s UV sterilization technology. It is important to remove these components before cleaning to avoid damaging the device. Here’s how you can do it:
Steps
Instructions
Step 1
Make sure that the device is turned off and unplugged.
Step 2
Locate the dustbin on the device and press the release button to remove it.
Step 3
Similarly, locate the UV bulb on the device and carefully remove it from its slot. Avoid touching the bulb with your bare hands.
Note that removing the dustbin and UV bulb might differ slightly depending on the model and brand of your smart vacuum cleaner. Refer to the product manual for specific instructions.
It is essential to take care when handling the UV bulb as it is delicate and can break easily. UV bulbs emit harmful UV-C radiation, which can cause skin and eye damage. We recommended wearing gloves and protective eyewear, and avoid pointing the bulb in your direction.
It’s important to note that the UV sterilization technology in smart vacuum cleaners uses UV-C radiation, which is a shorter wavelength than UV-A or UV-B. Read more about the difference between UV-C and UV-A in smart vacs here.
Once you have completed this step, you can move on to the next stage of cleaning your smart vacuum cleaner’s UV sterilization technology.
Wear Gloves
It is essential to wear gloves before cleaning your smart vacuum cleaner’s UV sterilization technology. This is because the dustbin and UV bulb may contain bacteria and germs that could be harmful to your skin. By wearing gloves, you not only protect your hands but also prevent the transfer of these harmful organisms to other surfaces.
Here is a step-by-step guide on how to wear gloves before cleaning your smart vacuum cleaner’s UV sterilization technology:
Step 1: Choose a pair of gloves that fit your hands well. They should not be too tight or too loose.
Step 2: Check the gloves for any tears or holes that could expose your skin to the dustbin or UV bulb.
Step 3: Put on the gloves one at a time, making sure they cover your whole hand and wrist.
Step 4: Adjust the gloves to ensure they fit snugly around your fingers and palm.
Step 5: Avoid touching your face or any other surfaces while wearing the gloves as this could transfer the bacteria and germs.
Step 6: After cleaning, remove the gloves carefully, avoiding touching the outside of the glove.
Step 7: Discard the gloves in a trash can and wash your hands thoroughly with soap and water.
By following these steps, you can ensure that you protect yourself from any potential hazards while cleaning your smart vacuum cleaner’s UV sterilization technology. It is important to take these precautions to minimize the risk of infection and ensure a hygienic environment in your home.
Cleaning the Dustbin and Filter
As we use our smart vacuum cleaners, the dustbin and filter can quickly accumulate dirt and debris. Over time, this can impede the efficiency of your device, preventing it from working optimally. It is essential to clean the dustbin and filter regularly. In this section, we will delve into the step-by-step process of how to clean and maintain them. So let’s get started with emptying and cleaning the dustbin.
Empty and Clean the Dustbin
When it comes to maintaining your smart vacuum cleaner’s UV sterilization technology, cleaning the dustbin is an important step. Not only will it ensure that your vacuum cleaner is working optimally, but it will also help to get rid of any germs that may have accumulated in the bin. Here are the steps you should follow to empty and clean the dustbin:
Step 1: Turn off the smart vacuum cleaner and unplug it.
Step 2: Remove the dustbin from the vacuum cleaner. This is usually located at the back of the device.
Step 3: Empty the contents of the dustbin into a trash can. Make sure to dispose of any large debris separately.
Step 4: Use a soft-bristled brush or a toothbrush to clean any remaining debris or dust from the dustbin.
Step 5: Lastly, wipe the dustbin with a damp cloth or sponge to get rid of any remaining dirt or germs.
Make sure to dry the dustbin completely before placing it back into the vacuum cleaner. By following these steps, you can be sure that your smart vacuum cleaner’s dustbin is clean and ready to be used again.
Wash the Dustbin and Filter with Water
After emptying the dustbin, it’s time to clean it along with the filter. It’s important to remember that the dustbin and filter should be washed with water to remove any remaining debris.
Step 1: Fill a sink or basin with warm water.
Step 2: Remove the filter from the dustbin and place both in the water.
Step 3: Using gentle pressure, rub the dustbin and filter with your hands to remove any hidden dirt or dust.
Step 4: Once you’re done cleaning, empty the dirty water and refill the sink or basin with clean water.
Step 5: Rinse the dustbin and filter thoroughly with clean water to ensure that all the soap and dirt are removed.
Step 6: Finally, tap the dustbin and filter gently to remove excess water, and let them air dry completely before replacing them in the vacuum cleaner.
It’s important to note that dish soap or other harsh cleaning chemicals should not be used when cleaning the dustbin and filter. This can cause damage to the device and could render the UV sterilization technology ineffective. Keep in mind that cleaning the dustbin and filter after every use is crucial to ensure maximum efficiency and longevity of the device.
Let Them Dry Thoroughly
Once you have washed the dustbin and filter with water, it is essential to let them dry thoroughly before placing them back in the smart vacuum cleaner. Drying can be done naturally or with the help of a dryer. Here are some guidelines you can follow to ensure that everything is dry and ready to use:
Step
Description
Step 1
After washing, use a soft and absorbent towel to dry the dustbin and filter as much as possible. Make sure the towel is clean and dry to avoid any further contamination.
Step 2
Once you have towel-dried the dustbin and filter, leave them in a well-ventilated area to air dry.
Step 3
Avoid drying the dustbin and filter under direct sunlight or very high temperatures, as this could damage the material.
Step 4
Ensure that the dustbin and filter are completely dry before replacing them in the smart vacuum cleaner.
Note: Avoid using the smart vacuum cleaner when the dustbin and filter are still wet or damp, as this could damage the device and affect its performance.
Cleaning the UV Bulb
As we dive deeper into maintaining your smart vacuum cleaner’s UV Sterilization Technology, it’s important not to overlook the UV bulb. This integral part of the system is responsible for eliminating harmful bacteria and making your home a healthier place. However, over time, dust and debris can accumulate on the bulb, hampering its effectiveness. That’s why it’s crucial to clean the UV bulb regularly to ensure optimal performance. Let’s explore the essential steps to clean the UV bulb and keep it in pristine condition.
Remove the UV Bulb Carefully
When it comes to cleaning and maintaining the UV Sterilization Technology of your smart vacuum cleaner, removing the UV bulb carefully is crucial to ensure that no damage is caused to the device. Here are the steps that you need to follow when removing the UV bulb from your smart vacuum cleaner:
Step 1: First, make sure that the device is switched off and unplugged from the power source to avoid any electric shocks.
Step 2: Locate the UV bulb in your device. Refer to the user manual to understand the exact position and method for removing it.
Step 3: Gently hold the UV bulb and twist it anti-clockwise to loosen it from its position in the device.
Step 4: Once the bulb is loose, pull it out slowly and carefully from the device using both hands. Be cautious not to exert too much force or pull it out too quickly as this may damage the bulb or the device itself.
It’s important to note that the UV bulb is a sensitive part of the device and should be handled with utmost care. Any damage caused to the bulb can result in the device not functioning properly, defeating the purpose of cleaning and sterilizing your home. Once you have successfully removed the UV bulb, it’s time to move onto the next step of the cleaning and maintenance process.
Clean the Bulb with a Soft Cloth
When it comes to cleaning the UV bulb of your smart vacuum cleaner, it is essential to handle it with care to avoid any damages. To clean the bulb, you will need a soft cloth and some cleaning solution. Here are the steps you should follow:
Step 1: First things first, make sure the device is unplugged and the bulb is cool to touch. This will prevent you from getting burnt or electrocuted.
Step 2: Take the soft cloth and dampen it slightly with the cleaning solution. Make sure not to over-saturate the cloth as this can cause liquid to seep into the device.
Step 3: Gently wipe the bulb with the damp cloth, making sure to remove any dirt, dust, or grime that may have accumulated on the surface. Be careful not to apply too much pressure, as this can cause the bulb to crack or break.
Step 4: Once you have wiped the bulb clean, use a dry cloth to remove any excess moisture. Make sure the bulb is completely dry before re-attaching it to the device.
Remember, the UV bulb is a critical component of your smart vacuum cleaner, and any damage or malfunction can hinder the device’s performance. By cleaning it regularly with a soft cloth, you can ensure that the UV sterilization technology remains in top condition and efficiently eliminates even the tiniest of particles, including bacteria and viruses.
Change the Bulb if Damaged
UV sterilization bulbs are a crucial component of a smart vacuum cleaner with UV sterilization technology. Over time, the bulb may become damaged due to regular usage. If the bulb is damaged, it’ll be unable to function effectively, and it can also be harmful to health if not replaced immediately.
How to identify if the UV bulb is damaged?
A damaged UV bulb can show signs such as:
Signs
Meaning
Visible cracks or scratches
It can allow UV radiation to leak and harm humans or pets
The bulb is not emitting UV light
It signifies that the bulb is not functioning, resulting in ineffective cleaning
Strange noises or flickering
It suggests that the bulb is not functioning correctly
How to change the UV bulb?
Before changing the UV bulb, it’s essential to wear gloves to prevent contact with the bulb, which can be harmful to human skin. Ensure the device is switched off and unplugged from the power source.
1. Access the UV bulb compartment by removing the cover or panel.
2. Locate the bulb and remove it carefully from its socket.
3. Check the bulb’s specifications such as the model number, voltage, and wattage to determine the type of bulb your device requires.
4. Purchase a replacement UV sterilization bulb from a reputable provider to ensure it’s of high quality and meets the device’s requirements.
5. Place the replacement bulb into the socket and gently twist until it’s firmly in place.
6. Finally, put the cover or panel back onto the device, switch it on and test the new UV bulb by running the device.
Changing a UV bulb is a simple process, and it’s imperative that this is done regularly, at least once a year, to ensure the device is working correctly and to avoid any harmful effects on the user’s health.
The Importance of Regular Maintenance
As technology continues to evolve and become integrated into our daily lives, it’s important to remember that regular maintenance is essential for keeping these devices functioning at their best. Your smart vacuum cleaner’s UV sterilization technology is no exception. Without proper care, this technology can become less effective and even potentially pose a health risk. But don’t worry, there are simple steps you can take to enhance your device’s efficiency and prolong its lifespan. Let’s explore the benefits of regular maintenance and why it’s crucial for ensuring your smart vacuum cleaner’s UV sterilization technology delivers optimal performance.
Enhances Device Efficiency
Regular maintenance of your smart vacuum cleaner’s UV sterilization technology can significantly enhance the efficiency of the device. A clean and well-maintained UV bulb kills germs and bacteria more effectively. A clean dustbin and filter ensure that the suction power of the device remains optimal.
To understand how maintenance enhances device efficiency, let’s take a closer look at the different components of your smart vacuum cleaner’s UV sterilization technology using the table below:
Component
How Maintenance Enhances Efficiency
UV Bulb
If the UV bulb is dirty or damaged, it will not be able to emit the right amount and type of UV light, thereby reducing its ability to kill germs and bacteria. Regular cleaning of the UV bulb ensures that it remains as efficient as possible in destroying harmful microorganisms, keeping your home cleaner and healthier.
Dustbin
Over time, dust and debris can accumulate in the dustbin and filter, reducing the airflow and suction power of the device. This hinders its ability to pick up dirt and other particles from the floor, resulting in a suboptimal cleaning performance. Regular cleaning of the dustbin and filter ensures that the suction power of the vacuum remains optimal, allowing it to work efficiently and effectively.
Regular maintenance can prevent the buildup of contaminants and dirt that can hinder the performance of your smart vacuum cleaner’s UV sterilization technology. By keeping all the components clean and well-maintained, the device can function at optimal levels, which enhances its efficiency in keeping your home as clean and healthy as possible.
Prolongs Device Lifespan
Regular maintenance of your smart vacuum cleaner’s UV sterilization technology is essential not only for improving its efficiency but also for prolonging its lifespan. By taking good care of your device, you can ensure that it lasts longer and performs to the best of its ability. Here are some of the reasons why regular maintenance is so important.
Better Performance: When your smart vacuum cleaner’s UV sterilization technology is clean and functioning properly, it can perform better. The UV light can effectively kill dust mites, bacteria, and other harmful particles in your home. This means your device can work more efficiently, leaving your home free of allergens and other irritants.
Prevention of damage: Regular cleaning and maintenance can help prevent damage to your device. Dust and debris can accumulate inside the dustbin and filter, clogging the system and reducing its efficiency. Over time, this can lead to permanent damage to the device. By regularly emptying the dustbin and cleaning the filter, you can prevent this from happening.
Cost-effective: Maintaining your smart vacuum cleaner’s UV sterilization technology can save you money in the long run. Regular cleaning prevents damage, which means you won’t need to spend money on costly repairs or replacements. By keeping your device in good condition, you can use it for years without having to replace it.
Improves air quality: Regular maintenance of your device can lead to improved air quality in your home. By removing harmful particles such as dust mites and bacteria, you can breathe easier and enjoy a healthier living environment.
Taking the time to clean and maintain your smart vacuum cleaner’s UV sterilization technology can go a long way in prolonging its lifespan. Not only will it improve the device’s efficiency and performance, but it will also save you money in the long term. So, make sure to follow the steps outlined in this article and keep your smart vacuum cleaner in top shape for years to come.
Conclusion
After taking the time to understand what UV Sterilization Technology is, as well as how to properly clean and maintain it, you should feel confident in your ability to keep your smart vacuum cleaner functioning at its best. By following the necessary precautions before cleaning, you can ensure your safety and prevent any damage to your device.
When it comes to cleaning the dustbin and filter, it’s important to empty them before washing them with water and letting them air dry completely. The UV bulb should be handled carefully and cleaned with a soft cloth if needed. Remember to replace the bulb if it’s damaged to ensure that the device continues to function effectively.
It’s worth noting that regular maintenance of your vacuum cleaner’s UV Sterilization Technology can not only increase the efficiency of the device, but also extend its lifespan. This means that your investment will remain in tip-top shape for longer and you’ll reap the benefits of a cleaner home.
Overall, by properly cleaning and maintaining your smart vacuum cleaner’s UV Sterilization Technology on a regular basis, you can enjoy the full benefits of this innovative technology while ensuring that your device continues to serve you for years to come. So, invest a little time in upkeep and enjoy a cleaner, healthier home environment with peace of mind that your device is functioning at its best.
Frequently Asked Questions
1. Can I use cleaning chemicals to clean my smart vacuum cleaner’s UV sterilization technology?
No, it is not recommended to use any cleaning chemicals as they may damage the UV sterilization technology.
2. How often should I clean the dustbin and filter?
It is recommended to clean the dustbin and filter after every use, or at least once a week.
3. Is it necessary to wear gloves while cleaning the device?
Yes, wearing gloves is important to avoid getting in contact with dust and allergens while cleaning the device.
4. Can I wash the dustbin and filter with hot water?
No, it is recommended to wash them with cold or lukewarm water to avoid any damage to the device.
5. Do I need to replace the UV bulb regularly?
Yes, it is recommended to replace the UV bulb once a year to ensure the efficiency of the device.
6. Can I clean the UV bulb with any cloth?
No, it is recommended to use a soft cloth to clean the UV bulb to avoid any scratches or damage.
7. Can I use the vacuum cleaner without the UV sterilization technology?
Yes, you can use the vacuum cleaner without the UV sterilization technology, but it is recommended to use it for enhanced cleaning.
8. How long does it take for the dustbin and filter to dry?
It may take around 1-2 hours for the dustbin and filter to dry completely, depending on the humidity and temperature.
9. How can I enhance the efficiency of my smart vacuum cleaner?
You can enhance the efficiency of your smart vacuum cleaner by cleaning it regularly, and also by keeping the device’s sensors and brushes clean.
10. Is it safe to use the UV sterilization technology on all surfaces?
No, it is not recommended to use the UV sterilization technology on certain surfaces such as silk, velvet, and leather, as it might damage them.