Imagine being able to clean your home without lifting a finger or even getting off the couch. With the advancements in technology, this is no longer a pipe dream – it’s a reality. A smart vacuum cleaner with Wi-Fi connectivity and voice control has become the new standard in household cleaning. Not only does it offer hands-free convenience, but it also saves time and effort. But that’s not all, voice control has many other benefits that you may not have even considered. So, let’s take a closer look at how using voice control can improve your cleaning routine and make your life easier.
The Benefits of Voice Control
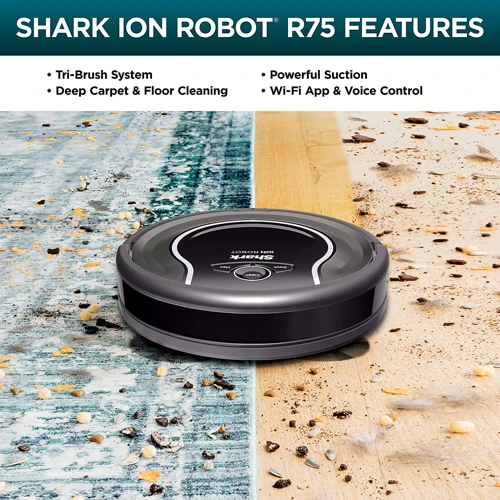
Many people are turning to smart devices with Wi-Fi connectivity to make their lives easier. One of the most popular devices is the smart vacuum cleaner. While these vacuums are already convenient, using voice control takes their functionality to the next level. Using voice control with your smart vacuum cleaner offers several advantages that can significantly benefit your cleaning routine. From hands-free convenience to time-saving features, voice control can make cleaning a breeze. In this article, we’ll explore these benefits in detail and provide tips for using voice control with your smart vacuum effectively. Whether you have already invested in a smart vacuum with Wi-Fi connectivity or are considering it, this guide will show you the advantages of making that investment for your cleaning needs.
1. Hands-Free Convenience
Hands-free convenience is one of the most significant benefits of using voice control for your smart vacuum cleaner with Wi-Fi connectivity. With voice commands, homeowners can easily operate their smart vacuum without the need for any physical input.
One of the major advantages of hands-free convenience is that it allows busy homeowners to multitask while their smart vacuum gets the job done. For instance, if you’re in the middle of cooking and notice some crumbs on the floor, you can simply tell your smart vacuum to clean up the mess for you. You won’t have to put down your cooking tools or interrupt your meal preparation. This feature is especially helpful for parents who need to keep an eye on their children while still maintaining a clean home.
Another advantage of hands-free convenience is that it can help prevent physical strain and discomfort. Vacuuming can be a physically demanding task, especially if you have to carry the vacuum cleaner around the house. With hands-free voice commands, you won’t have to bend over or lift heavy machinery. This can alleviate strain on your back, neck, and shoulders.
With hands-free convenience, you won’t have to waste time and energy trying to locate the vacuum cleaner every time you need to use it. Instead, you can simply use your voice to activate it, and let it do the work for you. This feature is especially valuable for individuals with mobility issues who find it difficult to move around the home.
The hands-free convenience offered by voice control for your smart vacuum cleaner with Wi-Fi connectivity is a game-changer for those looking to save time, effort, and physical strain. By freeing up your hands and allowing you to multitask, this feature enables you to maintain a clean home without interfering with your daily routine.
2. Improves Accessibility
Voice control can be an incredibly useful feature for smart vacuums, as it can improve accessibility and make cleaning more convenient for a wide range of people. With voice control, individuals with mobility or vision impairments can easily control their vacuum without needing to physically interact with it.
Here are some ways in which voice control improves accessibility:
- Allows for Hands-Free Cleaning: Voice control eliminates the need for individuals with mobility impairments to physically operate the vacuum. This can be especially helpful for individuals who may struggle with reaching, bending, or standing for extended periods of time. With voice control, users can simply give commands and let the vacuum do the work for them.
- Easy to Use for Vision Impaired Individuals: Voice control can be a convenient option for individuals with visual impairments, as it eliminates the need for them to rely on buttons or touchscreens. Instead, users can rely on voice commands to turn the vacuum on and off, start or stop cleaning cycles, and more.
- Increases Independence: By enabling users to clean their homes without assistance, voice control for smart vacuums can increase independence for individuals who may need additional support with household chores. With a voice-controlled vacuum, users can go about their day with fewer interruptions and less reliance on others.
The accessibility benefits of voice control can greatly improve the cleaning experience for individuals with mobility or vision impairments. Incorporating this feature into a smart vacuum can create a more inclusive and convenient cleaning solution for all users.
To learn more about the benefits of Wi-Fi connectivity for smart vacuums, check out our article on the advantages of Wi-Fi connectivity for cleaning appliances. Additionally, for information on the navigation capabilities of smart vacuums, read our article on Wi-Fi enabled smart vacuum navigation.
3. Saves Time and Effort
Using a smart vacuum cleaner with voice control can save you a lot of time and effort. With traditional vacuum cleaners, you have to manually push and drag them around the house, which can be physically demanding, especially if you have a large living space. Constantly bending down to adjust the vacuum settings, change the cleaning mode, or check the battery status can be quite a hassle.
However, with a smart vacuum cleaner with voice control, you can simply use your voice to control its functions and settings. This feature is particularly useful when you have your hands full or when you’re busy with other activities. For example, you can use voice commands to start, pause, or stop the vacuuming process, change the cleaning mode, or adjust the suction power.
Here are some additional benefits of using voice control for your smart vacuum cleaner:
- You don’t have to interrupt your work or leisure activities to manually adjust the vacuum settings.
- You can focus on other tasks while the vacuum cleaner does the cleaning for you.
- You can cover more areas and clean more frequently without straining your muscles.
- You can customize the cleaning schedule and frequency based on your preferences and lifestyle.
- You can use voice control to navigate and access hard-to-reach areas, such as under the bed or the sofa.
All in all, using voice control for your smart vacuum cleaner can significantly reduce the time and effort required for cleaning your living space. Plus, it can also improve the overall cleaning quality and consistency, as well as enhance your overall cleaning experience.
Voice Control Features and Compatibility
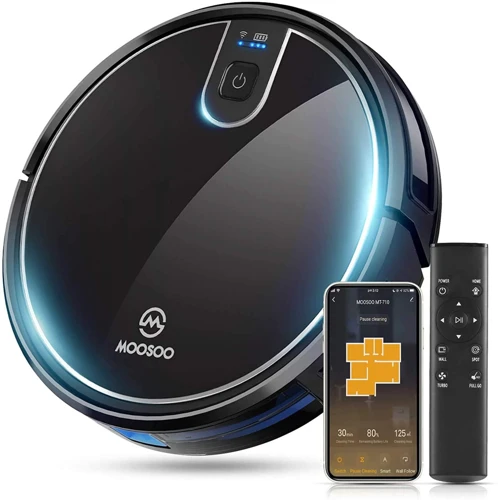
When it comes to smart vacuum cleaners with Wi-Fi connectivity, voice control is a game-changing feature. With the ability to control your vacuum cleaner using simple voice commands, you can experience a whole new level of convenience and accessibility. But how exactly does voice control work, and which virtual assistants are compatible with your smart vacuum? In this section, we’ll explore the voice control features and compatibility of smart vacuums, so you can choose the best option for your needs.
1. Amazon Alexa Integration
Amazon Alexa is a popular virtual assistant that is compatible with many smart home devices, including smart vacuum cleaners with Wi-Fi connectivity. Integration with Amazon Alexa provides a range of benefits for users, such as hands-free convenience, improved accessibility, and streamlined controls.
To use voice control with an Amazon Alexa device, you will need to ensure that your smart vacuum cleaner is compatible with Alexa specifically. You can check this by looking on the manufacturer’s website or in the user manual. Once you have confirmed compatibility, follow these steps to set up voice control:
- 1. Enable the skill: To begin using your smart vacuum with Alexa, you will need to enable the appropriate Alexa skill. This can typically be done through the Alexa app or website. Simply search for the skill that corresponds to your specific smart vacuum model and select “Enable Skill.”
- 2. Link your account: After enabling the skill, you will need to link your smart vacuum account with Alexa. This involves entering your account login details and granting Alexa permission to access your vacuum’s features.
- 3. Discover devices: Once your account is linked, you should use the “discover devices” feature in the Alexa app to connect your vacuum cleaner to Alexa. This should allow your vacuum to be automatically detected and added to your Alexa device list.
Once you have set up Alexa integration for your smart vacuum cleaner, you can begin using voice commands to control its functions. For example, you can tell Alexa to start or stop cleaning, go to a specific room, or return to the charging dock. You can also schedule cleaning tasks and set up custom routines using Alexa’s voice control features. With Alexa integration, you can enjoy greater flexibility and ease of use for your smart vacuum cleaner.
2. Google Assistant Integration
One of the most popular smart home assistants is Google Assistant, and the good news is that it is compatible with many smart vacuum cleaners. By integrating your vacuum with Google Assistant, you can enjoy the convenience of controlling it with just your voice.
Here are some advantages of using Google Assistant integration with your smart vacuum cleaner:
| Advantages of Google Assistant Integration |
|---|
| 1. Enables hands-free operation of your smart vacuum cleaner. |
| 2. Allows you to control your smart vacuum cleaner from anywhere in the room. |
| 3. Provides a faster and more efficient way of cleaning your home. |
| 4. Gives you the ability to schedule cleaning sessions using just your voice. |
| 5. Lets you receive cleaning status updates from your smart vacuum cleaner in real-time. |
To integrate your smart vacuum with Google Assistant, follow these steps:
1. Check Compatibility and Follow Manufacturer’s Instructions: Before attempting to connect your smart vacuum cleaner to Google Assistant, make sure it is compatible with the assistant. You can check this by visiting the manufacturer’s website or checking the product manual. Follow the instructions provided by the manufacturer carefully to ensure a successful setup.
2. Download Smart Vacuum App and Connect to Wi-Fi: Download the app for your smart vacuum from the app store on your smartphone or tablet. Once downloaded, connect your smart vacuum to your Wi-Fi network. This will enable it to communicate with your Google Assistant.
3. Enable Voice Control and Connect to Google Assistant: Open the Google Assistant app on your smartphone and enable voice control for your smart vacuum. You may need to enable permissions and grant access to your smart vacuum. Once enabled, connect your smart vacuum to your Google Assistant.
To use your smart vacuum cleaner with Google Assistant effectively, keep these tips in mind:
1. Keep Your Voice Commands Simple and Clear: Be precise and use simple language when giving command to Google Assistant to ensure it understands you correctly.
2. Create Custom Routines and Schedules: Take advantage of the ability to customize your routines and create schedules using your voice.
3. Familiarize Yourself with Compatible Apps and Features: Make sure you understand the different features and capabilities of your smart vacuum and compatible apps, such as Google Assistant. This will help you optimize and streamline your experience.
Integrating your smart vacuum cleaner with Google Assistant provides an efficient and streamlined way to keep your home clean. With just your voice, you can schedule cleaning sessions, control your vacuum, and receive cleaning status updates in real-time.
3. Apple HomeKit Compatibility
One of the most significant advantages of using voice control for your smart vacuum cleaner is the compatibility with Apple HomeKit. With this feature, you can control your device using the Home app, which is available on any iOS device.
But what exactly is Apple HomeKit compatibility?
Essentially, HomeKit is a system that allows you to control various smart home devices, including your smart vacuum cleaner, from your iOS device. Apple HomeKit compatibility means that your smart vacuum cleaner can communicate with your HomeKit network, making it easy to include your device in your smart home setup.
What are the benefits of Apple HomeKit compatibility?
There are several benefits to having Apple HomeKit compatibility for your smart vacuum cleaner. Firstly, it allows you to use Siri to control your device using voice commands. This means you can ask Siri to start or stop cleaning, to return to its charging dock, or to even tell you where the vacuum cleaner is in your home.
Secondly, Apple HomeKit compatibility enables you to create personalized scenes and automations. You can program your device to start cleaning automatically when you arrive home, or to run at certain times of the day. This makes it easy to ensure your floors are always clean, without having to do it manually.
How do you set up Apple HomeKit compatibility?
Setting up Apple HomeKit compatibility for your smart vacuum cleaner is relatively simple. First, you need to ensure that your device is compatible with HomeKit. Check the manufacturer’s website for a list of compatible devices.
Once you’ve confirmed compatibility, enable HomeKit mode on your device following the manufacturer’s instructions. Then, download the Home app on your iOS device, and add your smart vacuum cleaner to your HomeKit network.
Final thoughts
Apple HomeKit compatibility is a fantastic feature for smart vacuum cleaners, enabling you to control your device using Siri voice commands and to create personalized scenes and automations. If you’re considering a smart vacuum cleaner purchase, be sure to check for compatibility with Apple HomeKit.
How to Set Up Voice Control for Your Smart Vacuum
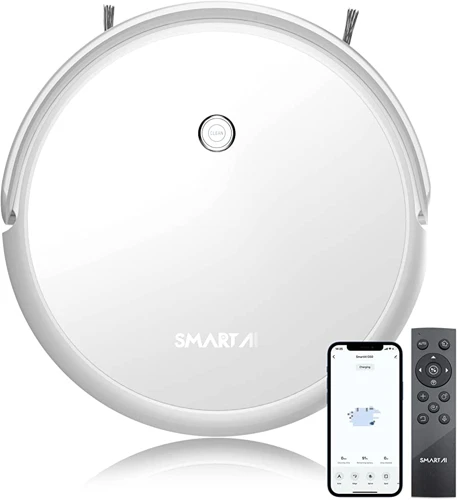
One of the most exciting aspects of owning a smart vacuum cleaner with Wi-Fi connectivity is the ability to control it using voice commands. However, setting up voice control may seem daunting for some. The good news is that with the right information and guidance, it can be a simple and straightforward process. In this section, we will provide step-by-step instructions on how to set up voice control for your smart vacuum cleaner. So, grab your device and let’s dive in!
1. Check Compatibility and Follow Manufacturer’s Instructions
Before setting up voice control for your smart vacuum cleaner, it is important to check for compatibility and follow the manufacturer’s instructions. Not all smart vacuums have voice control capabilities, and even if they do, not all virtual assistants are compatible.
Table of Smart Vacuums and Voice Control Compatibility:
| Smart Vacuum Brand | Voice Control Compatibility |
|---|---|
| iRobot Roomba | Amazon Alexa, Google Assistant |
| Ecovacs Deebot | Amazon Alexa, Google Assistant |
| Shark IQ Robot | Amazon Alexa, Google Assistant |
| Neato Botvac D7 | Amazon Alexa, Google Assistant, Apple HomeKit |
Once you have confirmed that your smart vacuum is compatible with voice control, follow the manufacturer’s instructions for set up. This may include downloading a specific app and connecting your vacuum to your Wi-Fi network.
It is important to carefully read through the instructions and follow each step precisely. Skipping a step or misunderstanding a direction can result in a failed set up or potential damage to the vacuum.
If you are unsure about any part of the set up process, don’t hesitate to reach out to the manufacturer’s customer support for assistance.
Remember to always prioritize safety and follow manufacturer’s instructions when setting up any smart home devices, including your voice-controlled smart vacuum cleaner.
2. Download Smart Vacuum App and Connect to Wi-Fi
Once you have determined that your smart vacuum cleaner is compatible with voice control, the next step is to download its accompanying app and connect it to Wi-Fi. This step is crucial in preparing your device for voice commands.
Downloading the Smart Vacuum App
To get started, head to the App Store or Google Play Store on your smartphone and search for the app required for your specific vacuum cleaner model. Once found, click ‘Download’ and wait for the app to be installed on your phone.
Connecting to Wi-Fi
Once the app has been downloaded, open it and access the ‘Settings’ menu. You should see an option to connect your vacuum cleaner to Wi-Fi. To do so, select the network you want to connect to and enter the necessary password when prompted.
If you encounter any issues when trying to connect to Wi-Fi, double-check that you have entered the correct password and that your Wi-Fi signal is strong enough. A weak signal may cause connectivity issues.
Why is Wi-Fi Connection Important?
The Wi-Fi connection is essential to utilizing voice control for your smart vacuum. Without a stable connection, your virtual assistant will not be able to communicate with your vacuum cleaner to execute your commands.
Table
| Step | Action |
|---|---|
| 1 | Find and download the app for your vacuum cleaner model on the App Store or Google Play Store |
| 2 | Open the app and access the ‘Settings’ menu |
| 3 | Select the option to connect your vacuum cleaner to Wi-Fi |
| 4 | Choose the network you want to connect to and enter the necessary password |
Download the app and connect to Wi-Fi is an easy but essential step in setting up voice control for your smart vacuum. Once connected, you will be able to control your smart vacuum cleaner through your virtual assistant with ease.
3. Enable Voice Control and Connect to Virtual Assistant
Now that you’ve checked your smart vacuum’s compatibility and downloaded the appropriate app, it’s time to enable voice control and connect to a virtual assistant. This is an important step that will allow you to control your vacuum using voice commands, making cleaning much more convenient and hands-free.
Step 1: Open the smart vacuum app on your device and go to the “Settings” menu. Look for an option that says “Voice Control” or “Virtual Assistant” and select it.
Step 2: Choose which virtual assistant you want to use – Amazon Alexa, Google Assistant, or Apple HomeKit – and follow the on-screen instructions to link your smart vacuum with your chosen assistant.
To help you decide which virtual assistant to choose, here’s a table summarizing the features and compatibility of each option:
| Virtual Assistant | Features | Compatibility |
|---|---|---|
| Amazon Alexa | – Hands-free control through voice commands – Ability to create custom routines – Integration with other smart home devices |
– Compatible with Amazon Echo and Echo Dot devices – Requires Alexa app on smartphone or tablet |
| Google Assistant | – Hands-free control through voice commands – Ability to create custom routines and schedules – Integration with other smart home devices |
– Compatible with Google Home and Nest devices – Requires Google Assistant app on smartphone or tablet |
| Apple HomeKit | – Hands-free control through voice commands – Ability to create custom scenes and automations |
– Compatible with Apple devices running iOS 10 or later – Requires Home app on iOS device |
Step 3: After linking your smart vacuum with your virtual assistant, test out some basic voice commands to make sure everything is working properly. Remember to use your virtual assistant’s wake word or button to activate it before giving a command (e.g. “Alexa, start the vacuum”).
With voice control enabled, you can now sit back, relax and control your smart vacuum from the comfort of your couch. This feature will make using your smart vacuum so much easier and more efficient!
Tips for Using Voice Control Effectively
Looking to get the most out of your smart vacuum cleaner with voice control? While the convenience of hands-free cleaning is undeniable, knowing how to use voice control effectively is key to optimizing your experience. However, with so many features and functions at your fingertips, it can be easy to get overwhelmed. In this section, we’ll provide you with some helpful tips on how to use voice control in order to get the most out of your smart vacuum cleaner, without any unnecessary hassle. So sit back, relax, and get ready to transform the way you clean your home.
1. Keep Your Voice Commands Simple and Clear
When it comes to using voice control for your smart vacuum cleaner with Wi-Fi connectivity, it’s important to keep your voice commands simple and clear. After all, your vacuum won’t understand you if your instructions are convoluted or unclear. To help you make the most of this technology, consider the following tips:
- Use concise language: Stick to simple, straightforward commands that get straight to the point. Use phrases like “start cleaning” or “stop vacuuming,” as opposed to wordy or complex phrasing.
- Avoid jargon or slang: Your vacuum might not be hip to the latest lingo, so it’s best to avoid using informal language, abbreviations, or colloquialisms. Instead, use proper nouns or common language that everyone can understand.
- Be specific: Make sure you specify exactly what you want your vacuum to do. For example, instead of saying “clean the house,” be more specific and say “vacuum the living room.”
- Speak clearly and loudly: Your virtual assistant needs to hear your voice loud and clear to take action. Speak slowly and enunciate your words to ensure that the device picks up on every command you give.
By keeping your voice commands simple, you can enjoy the convenience of hands-free vacuuming. Plus, you’ll avoid frustration and confusion, which can save you time and energy in the long run. Take these tips to heart and enjoy the benefits of using voice control for your smart vacuum cleaner with Wi-Fi connectivity!
2. Create Custom Routines and Schedules
Creating custom routines and schedules can make the most out of your smart vacuum cleaner’s voice control feature. With different customization options available, you can easily customize your device’s settings to suit your unique cleaning requirements. Here are some tips to help you effectively create custom routines and schedules for your smart vacuum cleaner.
1. Assess Your Cleaning Needs: The first step in creating custom routines and schedules is to assess your cleaning needs. Do you need your vacuum to clean your floors every day or only on specific days? Do you want the device to clean at a certain time or when you’re away from home? Once you’ve assessed your requirements, you can program your device accordingly.
2. Use the Smart Vacuuming App: Most smart vacuum cleaners come with a companion app that allows you to schedule cleaning routines and customize settings. Use the app to set specific cleaning schedules that are tailored to your preferences. Ensure that the vacuum cleaner is connected to Wi-Fi to enable programming and scheduling.
3. Incorporate Voice Commands: You can integrate voice commands into your custom routines and schedules to make things more convenient. For instance, you can set up a cleaning routine that starts at 7 PM every day and is initiated when you say a specific command like “Hey Siri, start cleaning.” This way, you don’t have to use the app or the physical controls to get your vacuum to start cleaning.
4. Adjust Cleaning Intervals: Your cleaning requirements may change over time, so it’s important to reassess and adjust your vacuum’s cleaning intervals if necessary. For example, if you’re hosting guests for a week, you can increase the frequency of cleaning to keep your floors clean and tidy.
5. Experiment and Fine-Tune: Creating custom routines and schedules is a trial-and-error process. Be willing to experiment with different settings and intervals until you find the perfect one that suits your needs. Once you’ve found the ideal settings, ensure that you save them for future use.
By creating custom routines and schedules for your smart vacuum cleaner, you can enjoy a more efficient and convenient cleaning experience. With voice control, you can also initiate cleaning routines without having to physically interact with your device. So take advantage of the available customization options to optimize your cleaning needs.
3. Familiarize Yourself with Compatible Apps and Features
One of the most important things to consider when using voice control for your smart vacuum cleaner with Wi-Fi connectivity is to familiarize yourself with the compatible apps and features. This will allow you to fully utilize the capabilities of your device and streamline your cleaning experience.
The following table showcases some of the compatible apps and features you can use with popular voice assistants:
| Virtual Assistant | Compatible Apps and Features |
|---|---|
| Amazon Alexa |
|
| Google Assistant |
|
| Apple HomeKit |
|
By exploring the compatible apps and features, you can customize your device to meet your specific cleaning needs. For example, you can create custom routines and schedules that best fit your home’s cleaning needs. By simply asking your virtual assistant to initiate a cleaning session, you can sit back and relax while the device does the work for you.
It’s crucial to familiarize yourself with these compatible apps and features to optimize your experience using voice control for your smart vacuum cleaner with Wi-Fi connectivity. This knowledge and management will save your time, energy, and ensure that your smart vacuum cleaner operates effectively.
Conclusion
In conclusion, incorporating voice control into your smart vacuum cleaning routine can provide numerous benefits. The convenience of hands-free operation, improved accessibility, and time-saving capabilities make it a valuable addition to any household.
With Amazon Alexa, Google Assistant, and Apple HomeKit compatibility, users have the ability to choose their preferred virtual assistant and integrate it seamlessly into their home. Setting up voice control is a straightforward process, and with the help of the manufacturer’s instructions and the smart vacuum app, users can easily connect their device to Wi-Fi and enable voice control.
To use voice control effectively, it’s important to keep commands simple and clear, create custom routines and schedules, and become familiar with compatible apps and features. With these tips in mind, users can maximize the potential of their smart vacuum and enjoy a more efficient and streamlined cleaning experience.
Overall, using voice control for your smart vacuum cleaner with Wi-Fi connectivity is a great way to take advantage of the latest technology and make life easier. Whether you’re looking to save time, minimize physical effort, or simply enjoy the convenience of hands-free operation, voice control is a valuable tool that can benefit any household. With so many advantages to using this technology, there’s no reason not to give it a try and see for yourself the difference it can make in your daily routine.
Frequently Asked Questions
What are the benefits of using a smart vacuum with Wi-Fi connectivity?
Using a smart vacuum with Wi-Fi connectivity allows for more control and convenience, as well as the ability to use voice control for hands-free operation.
What is voice control and how does it work with smart vacuums?
Voice control is a feature that allows you to control your smart vacuum using voice commands. This requires integration with a virtual assistant like Amazon Alexa, Google Assistant, or Apple HomeKit.
Which virtual assistants are compatible with smart vacuums?
Smart vacuums are commonly integrated with Amazon Alexa, Google Assistant, and Apple HomeKit.
Can I set up voice control on my existing smart vacuum?
It depends on the specific model and manufacturer of your smart vacuum. Check the compatibility and follow the manufacturer’s instructions for enabling voice control.
How do I connect my smart vacuum to a virtual assistant?
You will need to download the compatible app for your smart vacuum and connect it to your Wi-Fi network. Then, enable voice control through the app and connect to your virtual assistant account.
What are some tips for using voice control effectively with my smart vacuum?
Keep your voice commands simple and clear, create custom routines and schedules, and familiarize yourself with compatible apps and features.
What if my virtual assistant doesn’t recognize my voice commands for my smart vacuum?
Make sure that your voice commands are clear and concise. It may also help to check your virtual assistant’s settings for specific smart home device permissions.
Can I control my smart vacuum with my phone instead of using voice control?
Yes, smart vacuums typically have a companion app that you can use to control and schedule cleaning sessions.
What are some of the most popular smart vacuum brands that offer voice control?
Some of the most popular brands that offer voice control for smart vacuums include iRobot, Ecovacs, and SharkNinja.
Are there any privacy concerns with using a smart vacuum with Wi-Fi connectivity?
As with any smart device, there is a risk of data privacy concerns. Make sure to read the manufacturer’s privacy policy and take steps to secure your Wi-Fi network and virtual assistant account.
