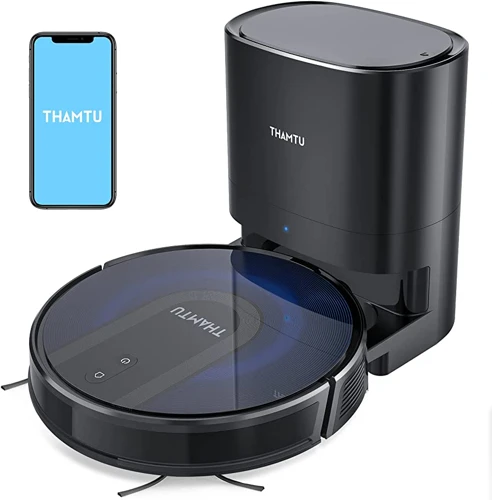
Imagine coming home to a clean house, with no visible traces of dust or crumbs lying around. This is made possible by the innovative technology of smart vacuum cleaners with automatic dirt disposal. These advanced cleaning gadgets are designed to take the stress of cleaning off your hands, leaving you with more time to spend on other essential tasks. However, owning a smart vacuum cleaner comes with some responsibility. Regular maintenance and troubleshooting are necessary to ensure that your device functions optimally. In this article, we’ll provide you with some useful tips on maintaining and troubleshooting your smart vacuum cleaner with automatic dirt disposal. You’ll learn how to keep your device running smoothly and overcome some common challenges that come with the territory. So, sit back, grab a cup of coffee and let’s delve into the world of smart vacuum cleaners.
Maintenance Tips
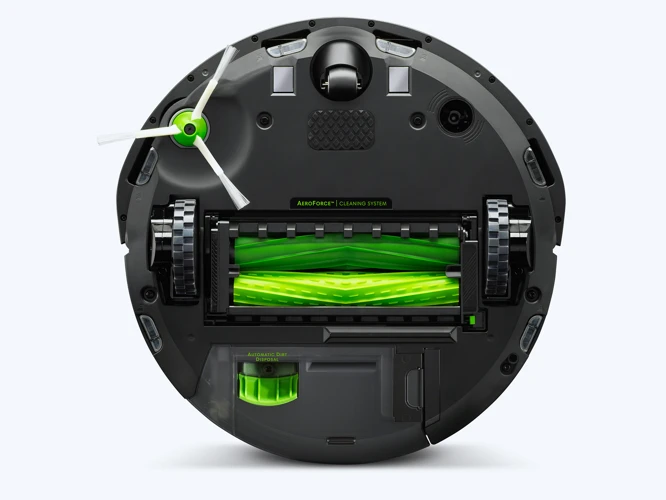
Keeping your smart vacuum cleaner with automatic dirt disposal in good working condition is important for ensuring its efficient performance. While these units are designed to make your cleaning experience effortless and convenient, it’s essential to provide regular maintenance to keep them working correctly. In this section, we’ll provide you with some essential maintenance tips to help you get the most out of your smart vacuum cleaner. Regular maintenance is also a significant factor in extending the life of your device.
Clean the dustbin regularly
Regularly cleaning the dustbin is one of the most important maintenance tasks to keep your smart vacuum cleaner with automatic dirt disposal in top condition. A dustbin that is full can cause suction power to be reduced, which defeats the purpose of having an automatic dirt disposal feature in the first place. To clean the dustbin, follow these steps:
Step 1: Remove the dustbin from the vacuum.
Step 2: Empty the contents of the dustbin into a trash can or disposal system.
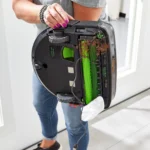
Step 3: Use a clean, dry cloth or soft-bristled brush to remove any remaining dirt or debris from the dustbin. Pay close attention to the crevices and corners of the dustbin, as dirt can easily get trapped in these areas.
Step 4: If the dustbin is particularly dirty, you can wash it with soap and water. Make sure to dry it completely before reinserting it into the vacuum.
Step 5: Before putting the dustbin back into the vacuum, check that the dustbin door and all the sensors are clean and free of debris.
It is important to clean the dustbin after every use to prevent the accumulation of dirt and debris. This will ensure that your smart vacuum cleaner runs effectively and maintains its suction power. Additionally, cleaning it regularly can extend the lifespan of the dustbin and the overall vacuum system.
To sum up, regular cleaning of the dustbin will improve the performance of your smart vacuum cleaner with automatic dirt disposal. Make sure to clean the dustbin thoroughly after every use and check that all the sensors are free from dust and debris before reinserting it into the vacuum to ensure a long-lasting and efficient cleaning experience.
Replace worn-out parts
To keep your smart vacuum cleaner with automatic dirt disposal working efficiently, it’s important to replace worn-out parts when necessary. Over time, parts such as brushes and filters can wear down or become damaged, which can affect the overall performance of your vacuum. By replacing these parts, you can help ensure that your vacuum continues to clean effectively.
Here are some common parts that may need replacing and how often to replace them:
| Part | How often to replace |
|---|---|
| Brush roll | Every 6-12 months, depending on usage |
| Side brush | Every 3-6 months, depending on usage |
| Filter | Every 2-3 months, or as needed |
| Battery | Every 1-2 years, depending on usage |
When replacing parts, be sure to use the manufacturer’s recommended parts for your specific vacuum model. Using the wrong parts can negatively impact the performance of your vacuum and may even cause damage.
Note: If you’re not sure how to replace specific parts of your smart vacuum cleaner, consult the user manual or contact the manufacturer for guidance.
By keeping up with regular maintenance and replacing worn-out parts as needed, you can help ensure that your smart vacuum cleaner with automatic dirt disposal is working at its best. This means a cleaner home and less time spent troubleshooting issues.
If you’re interested in learning more about smart vacuums with automatic dirt disposal, check out our article on the best smart vacuum cleaners with automatic dirt disposal.
Clean the filters
Keeping the filters clean is crucial for the proper functioning of your smart vacuum cleaner with automatic dirt disposal. Dirty filters can cause the suction power to decrease and can even damage the motor. To make sure your smart vacuum cleaner is running optimally, you need to clean the filters on a regular basis.
How often to clean filters: The frequency of cleaning will depend on how often you use your smart vacuum cleaner. If you use it daily, then we recommend cleaning the filters at least once every two weeks. If you use it less frequently, then once a month should suffice.
The types of filters your smart vacuum cleaner may have: There are different types of filters that your smart vacuum cleaner may use. The most common types are:
| Filter type | Description |
|---|---|
| Hepa Filter | This type of filter is great for people with allergies. It can capture particles as small as 0.3 microns. |
| Foam Filter | This is the most common type of filter. It captures small particles like dust and pollen. |
| HEPA and Foam Filter Combination | This type of filter captures both large and small particles while being washable and reusable. |
Steps to Clean Filters:
1. Turn off the smart vacuum cleaner and unplug it.
2. Locate the filter compartment. (Refer to the user manual if you’re not sure where the filter compartment is.)
3. Remove the filter from the compartment.
4. Tap the filter gently to remove any loose dirt and debris.
5. Rinse foam filters with cool water until the water is clear. Do not use soap. Allow it to air dry completely before inserting it back in the vacuum cleaner.
6. If you have a washable HEPA filter, rinse it gently with cool water without using soap. Let it air dry completely before inserting it back in the vacuum cleaner.
7. If you have a non-washable HEPA filter, replace it with a new one.
8. Insert the filter back in the compartment.
9. Make sure the filter is secured properly.
10. Plug in the smart vacuum cleaner and turn it back on.
Now your smart vacuum cleaner with automatic dirt disposal is ready to go! Remember to clean the filters regularly for optimal performance.
If you’d like to learn more about smart vacuum cleaners with automatic dirt disposal, check out our article on the increasing popularity of automatic dirt disposal. Or, if you’re in the market for a new smart vacuum cleaner, take a look at our article on the top smart vacuum cleaner brands with automatic dirt disposal to see which one might be right for you.
Inspect the brushes
Maintaining the brushes is extremely important to ensure that your smart vacuum cleaner with automatic dirt disposal functions effectively. It is recommended to inspect the brushes regularly to see if they are damaged or clogged with hair or debris. Dirty brushes can cause the vacuum cleaner to lose its suction power and eventually damage the motor.
Thus, here are some steps you can follow to properly inspect the brushes:
- Step 1: Turn off the vacuum cleaner and remove the dustbin.
- Step 2: Locate the brushes underneath the vacuum cleaner and take them out.
- Step 3: Check the brushes for any tangles, hair or dirt. If you find any tangled hair or debris, remove them right away.
- Step 4: Look closely at the brushes for any signs of wear and tear, such as frayed or broken bristles. If such damage is found, it’s time to replace the brushes.
- Step 5: If the brushes look clean and undamaged, reattach them correctly and restart the vacuum cleaner. Test it for a few minutes to make sure everything is working correctly.
By following these simple steps, you can make sure that your vacuum cleaner’s brushes are in top-notch condition. It is always better to maintain and take care of your smart vacuum cleaner regularly instead of waiting until it’s too late.
If you want to learn more about the pros and cons of smart vacuum cleaners, you can check our article on smart vacuum cleaners. In case you’re trying to decide between brands, we have a comparison of two popular smart vacuum cleaner brands in our article iRobot vs Shark Smart Vacuum Cleaners. Lastly, don’t forget the importance of maintaining your automatic dirt disposal system, which you can learn more about in our article on smart vacuum cleaners with automatic dirt disposal.
Keep the sensors clean
When it comes to keeping your smart vacuum cleaner with automatic dirt disposal in top condition, it’s important to clean the sensors regularly. These sensors are an integral part of its navigation system, allowing the vacuum to sense obstacles, navigate around furniture, and avoid falling down stairs. If the sensors become dirty or obstructed, they may not function properly, leading to decreased performance or even a complete malfunction.
To keep the sensors clean, follow these steps:
| Step | Action |
|---|---|
| 1 | Turn off the vacuum cleaner and unplug it from the power source. |
| 2 | Locate the sensors on the bottom of the vacuum cleaner. |
| 3 | Use a soft, dry cloth or a clean, dry brush to gently wipe away any dust or debris that may have accumulated on the sensors. |
| 4 | If the sensors are particularly dirty, you can use a damp cloth or a small amount of rubbing alcohol to clean them more thoroughly. |
| 5 | Allow the sensors to dry completely before turning the vacuum back on and resuming use. |
Remember to check the sensors regularly, as even a small amount of dirt or debris can affect their performance. By keeping the sensors clean, you’ll help ensure that your smart vacuum cleaner with automatic dirt disposal operates at peak efficiency, keeping your home clean and tidy with minimal effort on your part.
Troubleshooting Common Issues
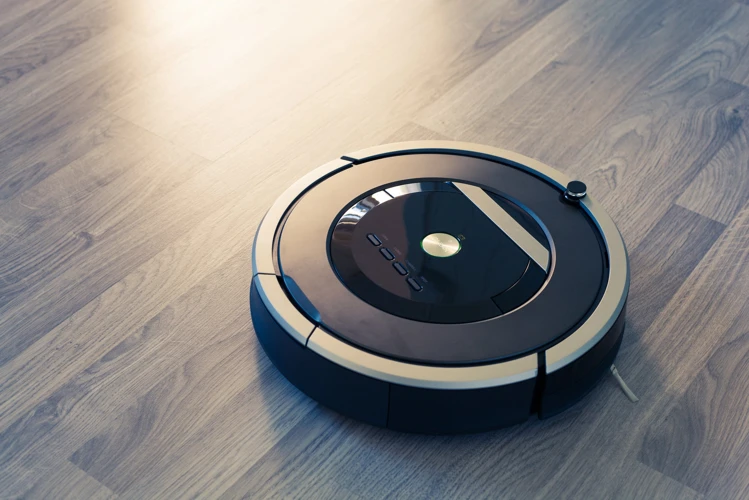
As much as we love our smart vacuum cleaners with automatic dirt disposal, there are times when things don’t go as planned. It can be frustrating when you press the power button, and nothing happens or when the vacuum is not moving in the desired direction. We understand how perplexing troubleshooting can be, and that’s why we’ve provided this section to guide you through some of the most common issues you might encounter. Let’s dive into finding solutions to these problems together.
Vacuum doesn’t turn on
One of the most frustrating issues you can encounter with your smart vacuum cleaner is when it doesn’t turn on. Before panicking and assuming the worst case scenario, follow these steps to troubleshoot the issue:
- Check the power source: Make sure the vacuum is plugged into a working outlet and that the outlet itself is functioning properly. If you’re using a battery-operated model, check that the batteries are charged or replace them with fresh ones.
- Inspect the power switch: Check that the vacuum’s power switch is in the “on” position. Depending on the make and model, this switch may be located on the body of the vacuum or on its handle.
- Reset the machine: If the vacuum still won’t turn on, try resetting it. Unplug it from the power source and wait for a few minutes before plugging it back in.
- Check the circuit breaker: If the vacuum is connected to an outlet in a room with many other devices that are also plugged in, there is a chance the circuit breaker for that room has tripped. Check your circuit breaker box to see if this is the case and reset the breaker if necessary.
- Consult the owner’s manual: If none of the above steps work, consult the owner’s manual that came with your vacuum cleaner. It may have specific instructions for addressing this issue.
Remember, if you are not comfortable with investigating the problem yourself or you suspect the issue may be due to a malfunctioning part or technical error, reach out to customer support or an authorized repair service for further assistance.
Vacuum doesn’t move
One of the common issues that you may face with your smart vacuum cleaner is that it doesn’t move. This can be frustrating, especially if you have a large area to clean. Here are some things you can do to troubleshoot this problem:
- Check the wheels: The wheels are essential for the movement of the vacuum cleaner. Check if there is any debris or hair stuck in them. If so, remove it and try again.
- Inspect the brushes: If the brushes are tangled with hair and other debris, it can hinder the vacuum’s movement. Remove the brushes and clean them thoroughly.
- Move the vacuum to a different location: Sometimes, the vacuum cleaner may not move due to the type of carpet or flooring it’s on. Try moving it to a different location and see if it works.
- Check the sensors: The sensors are responsible for guiding the vacuum cleaner around the room. If they are dirty or obstructed, the vacuum may not move. Clean the sensors and try again.
- Restart the vacuum: Sometimes, restarting the vacuum can solve the problem. Turn off the vacuum, wait for a few seconds, and turn it back on.
If none of these methods work, it’s best to reach out to the manufacturer’s customer service for further assistance.
Remember, regular maintenance can prevent many common issues with your smart vacuum cleaner. Keep it clean and follow the manufacturer’s instructions for optimal performance.
Low suction power
When you notice low suction power on your smart vacuum cleaner, there are a few things you can check to troubleshoot the issue. Here are some steps to take:
- Clean the dustbin: A full or dirty dustbin can restrict airflow and reduce suction power. Empty the bin and clean it thoroughly before using the vacuum again.
- Clean the filters: Filters play an important role in trapping dust and debris. When they become clogged, suction power can decrease. Check the manufacturer’s instructions for information on how often to clean or replace the filters.
- Check the brushes: Debris, hair, and string can get tangled around the brushes, causing them to slow down or stop completely. Make sure the brush roll is free from obstructions.
- Inspect the hoses: A kink or blockage in the hoses can restrict airflow and reduce suction power. Check the hoses for any visible damage or blockages, and clear any obstructions if necessary.
- Replace worn-out parts: Parts like the brush roll and motor can wear out over time, leading to decreased suction power. Check the manufacturer’s instructions for guidance on when to replace these parts.
By following these maintenance steps, you can often restore your vacuum’s suction power to its full potential.
Error messages
Owning a smart vacuum cleaner with automatic dirt disposal is convenient, but just like any other electronic device, it can encounter errors. When an error message appears on your device, don’t worry, this is a common issue that can be fixed quickly. Here are some of the common error messages and the steps you can take to troubleshoot them.
| Error Message | Possible Cause | Troubleshooting |
|---|---|---|
| Bin Full | The dustbin is full and needs to be emptied. | Empty the dustbin and then reset your vacuum by turning it off and then on again. |
| Bin Missing | The dustbin has not been properly installed or is missing from the vacuum. | Check to see if the dustbin has been properly installed. If it has been installed, turn your vacuum off and then on again. If the error persists, contact customer service for help. |
| Brushroll Error | The brushroll is tangled or not working properly. | Inspect the brushroll and remove any tangled hair or debris. If the brushroll is damaged, replace it with a new one. Then reset your vacuum by turning it off and then on again. |
| Navigation Error | The vacuum is having difficulty navigating your home. | Inspect the sensors and ensure they are clean. Move any objects that may be blocking the vacuum’s path. Check if the software is up-to-date, and recalibrate the vacuum. If the error persists, contact customer service for help. |
If you encounter an error message that is not listed here, refer to your vacuum’s user manual for troubleshooting steps or contact customer service for help. By following these steps, you can ensure that your smart vacuum with automatic dirt disposal is always in top working condition.
Strange noises
If you hear strange noises coming from your smart vacuum cleaner with automatic dirt disposal, it’s likely that something isn’t working properly. Here are a few potential causes and solutions:
- Clogged Brushes: If the brushes become clogged with hair or other debris, they can make a loud, grinding noise. To fix this, make sure to clean the brushes regularly and remove any tangled debris.
- Worn-Out Bearings: The bearings in the vacuum’s motor can wear out over time and cause a grinding or high-pitched noise. Unfortunately, this is a more serious issue that will require replacing the motor entirely.
- Loose Parts: Loose parts, such as a stray screw or broken wheel, can also cause strange noises. Be sure to inspect your vacuum thoroughly to identify any loose parts and tighten or replace them as necessary.
- Obstructions: Sometimes, obstructions in the vacuum’s air path can cause unusual noises. Check to make sure that the air path is clear of any debris or obstructions that could be causing the sound.
- Faulty Sensors: If the vacuum’s sensors are malfunctioning, it may make strange noises as it tries to navigate a room. Check the sensors and recalibrate them if necessary.
By identifying the cause of the strange noise and taking appropriate action, you can ensure that your smart vacuum cleaner with automatic dirt disposal continues to function properly and efficiently.
Troubleshooting Automatic Dirt Disposal
When it comes to maintaining your smart vacuum cleaner, another aspect that requires attention is the automatic dirt disposal system. This feature is designed to enhance the convenience and efficiency of cleaning, but like any other mechanical system, it can also encounter problems. If you are experiencing issues with your vacuum’s automatic dirt disposal, don’t fret! In this section, we will delve into the most common problems and provide useful tips for troubleshooting them. Let’s dive in and explore the perplexing world of automatic dirt disposal troubleshooting!
Dirt not fully emptied
One of the most common issues with automatic dirt disposal is when the dirt is not fully emptied from the bin. This can happen due to a variety of reasons, such as a clogged hose, an issue with the dirtbin door, or a malfunctioning motor.
To troubleshoot this problem, try the following steps:
| Step | Description |
|---|---|
| Step 1 | Check the dirtbin door. |
| Step 2 | Inspect the hose for any clogs or blockages. |
| Step 3 | Check the motor to ensure it is functioning properly. |
| Step 4 | Empty the dirtbin manually and try using the vacuum again. |
| Step 5 | Contact the manufacturer or a professional technician for further assistance. |
Make sure to unplug the vacuum before attempting any of these steps. If the problem persists, it may be a sign of a more serious issue that requires professional attention.
Regular maintenance of your automatic dirt disposal system can help prevent this problem from occurring. Be sure to clean the dirtbin, filters, and sensors regularly and replace worn-out parts as needed. By taking care of your smart vacuum cleaner with automatic dirt disposal, you can enjoy a cleaner home with less hassle.
Error messages
One of the most frustrating situations that a smart vacuum cleaner owner can encounter is receiving an error message. These messages can be cryptic and leave many users perplexed as to what the issue actually is. However, it’s important to remember that these error messages are the vacuum cleaner’s way of communicating that something is wrong and needs to be addressed.
Here are some of the common error messages that you may encounter when using a smart vacuum cleaner with automatic dirt disposal:
| Error Message | Possible Cause | Solution |
|---|---|---|
| Bin full | The dustbin is full and needs to be emptied. | Empty the dustbin and resume cleaning. |
| Brush error | The brush has become stuck or tangled with debris. | Turn off the vacuum and inspect the brush. Remove any debris or hair and resume cleaning. |
| Navigation error | The vacuum is having difficulty navigating due to obstacles or low light conditions. | Remove any obstacles or switch on the lights. If the issue persists, move the vacuum to a different location or reset the map. |
| Filter error | The filter is dirty or clogged. | Remove the filter and clean or replace it as needed. Resume cleaning once the filter has been reinstalled. |
| Motor error | The motor has malfunctioned or stopped working. | Contact the manufacturer or a qualified repair technician to diagnose and fix the issue. |
It’s important to note that the above solutions are general guidelines and may not solve every issue. Always consult the owner’s manual or contact the manufacturer for specific troubleshooting instructions. Remember to also perform regular maintenance to prevent error messages from appearing in the first place.
Malfunctioning motorized dirtbin door
One common issue that can occur with a smart vacuum cleaner with automatic dirt disposal is a malfunctioning motorized dirtbin door. This can be an annoying problem, as it prevents the dirtbin from emptying properly and can result in reduced suction power.
Causes
There are several possible causes of a malfunctioning motorized dirtbin door. The most common cause is a blockage in the dirtbin pathway. This can occur if large debris or objects get stuck in the dirtbin, preventing the motorized door from opening and closing properly. Another possible cause is a faulty sensor. If the sensor that signals the motorized door to open and close isn’t functioning correctly, the door may not open at all or may open and close repeatedly for no apparent reason. Finally, it’s possible that the motorized door itself is faulty and needs to be replaced.
Solutions
If you’re experiencing a malfunctioning motorized dirtbin door, there are several steps you can take to troubleshoot the issue. First, try cleaning out the dirtbin and checking for any blockages in the pathway. Make sure to remove any large debris or objects that could be preventing the door from opening and closing properly. If that doesn’t solve the problem, try checking the sensor that activates the motorized door. Make sure the sensor is clean and unobstructed, and consider replacing it if it seems to be faulty.
If neither of those solutions work, you may need to replace the motorized door itself. This can be a somewhat complex process, so it’s important to consult your user manual or contact the manufacturer for assistance.
Preventative Measures
To prevent a malfunctioning motorized dirtbin door from occurring in the first place, it’s important to regularly clean out the dirtbin and remove any large debris or objects that could cause problems. Additionally, make sure to keep the sensors clean and unobstructed, and avoid overfilling the dirtbin. Finally, it’s a good idea to perform regular maintenance on your smart vacuum cleaner, including cleaning the filters and inspecting the brushes, as this can help keep everything running smoothly and prevent issues from occurring.
By following these tips and troubleshooting steps, you can keep your smart vacuum cleaner with automatic dirt disposal working effectively and efficiently.
Conclusion
In conclusion, owning a smart vacuum cleaner with automatic dirt disposal is a convenient and impressive technology. However, it requires regular maintenance to operate efficiently and effectively. By following the maintenance tips outlined in this article, you can ensure your smart vacuum is always ready to tackle your cleaning needs.
Regular cleaning of the dustbin, filters, brushes, and sensors will keep your vacuum running smoothly and avoid any potential issues. Additionally, replacing worn-out parts can prevent bigger problems down the line.
In the event that you encounter any issues with your smart vacuum, the troubleshooting tips discussed in this article can help you diagnose and fix the problem. Whether it’s low suction power or error messages, these tips should help you get back to cleaning in no time.
Automatic dirt disposal is a great feature to have, but it can also present its own set of challenges. If you’re experiencing issues with the motorized dirtbin door or dirt not being fully emptied, the troubleshooting tips will provide some guidance.
Ultimately, with proper maintenance and troubleshooting, your smart vacuum cleaner with automatic dirt disposal will be a valuable addition to your cleaning routine. Don’t let small issues turn into big problems – stay on top of maintenance and troubleshooting to keep your cleaning efficient and stress-free.
Frequently Asked Questions
Can I wash the dustbin of my smart vacuum cleaner?
Yes, most smart vacuum cleaners have washable dustbins. Make sure to read the manual to see if your specific model is washable and how to properly clean it.
How often should I clean the filters on my smart vacuum cleaner?
It is recommended to clean the filters once a month or as needed depending on usage. Refer to the manual for specific instructions on how to clean the filters for your model.
Why is my smart vacuum cleaner not picking up dirt as well as it used to?
The most common reasons for low suction power are a clogged dustbin, dirty filters, or worn-out brushes. Clean or replace these parts as needed to restore suction power.
How often should I replace the brushes on my smart vacuum cleaner?
Brushes should be replaced every 6-12 months depending on usage. If you notice that the bristles are worn or damaged, it’s time to replace them.
How do I troubleshoot error messages on my smart vacuum cleaner?
Refer to the manual for a list of common error messages and their solutions. If the issue persists, try resetting the vacuum cleaner or contacting customer support.
Why is my smart vacuum cleaner making strange noises?
Strange noises can be caused by a variety of factors, such as a clogged dustbin, loose parts, or worn-out brushes. Inspect the vacuum cleaner to identify the source of the noise and address it accordingly.
How do I troubleshoot if my smart vacuum cleaner won’t turn on?
Make sure the vacuum cleaner is fully charged and that it’s securely plugged in. If that doesn’t work, try resetting the vacuum cleaner. If the issue persists, contact customer support.
How do I troubleshoot if my smart vacuum cleaner won’t move?
Check to see if the wheels are stuck or if there are any obstacles causing a blockage. Make sure that the sensors and brushes are clean and functioning properly. If the issue persists, contact customer support.
Why is my smart vacuum cleaner still leaving dirt behind even with automatic dirt disposal?
Make sure that the dirtbin is properly installed and that there are no blockages in the motorized dirtbin door. If the issue persists, try cleaning the sensors and contacting customer support.
What do I do if the motorized dirtbin door on my smart vacuum cleaner is malfunctioning?
Refer to the manual for instructions on how to troubleshoot the motorized dirtbin door. If the issue persists, contact customer support for further assistance.
